
Jump to Recipe
I remember how the rich aroma of coffee and cocoa would fill the air when this dessert arrived at the table. That first spoonful, with its perfect balance of creamy filling and delicate cake, created moments worth savoring.
For those who’ve had to avoid gluten, enjoying authentic versions of beloved treats can feel like a distant memory. This particular Italian creation holds a special place for many of us. The layers of coffee-soaked ladyfingers and mascarpone cream create something truly magical.
Creating a version that works for gluten-sensitive diets required careful attention to tradition. The key adaptation focuses on the ladyfingers while preserving everything else that makes this dessert authentic. I researched traditional methods thoroughly to ensure this approach respects Italian techniques.
You might be surprised how straightforward this preparation can be. Whether you make your own gluten-free ladyfingers or find quality purchased ones, the method remains beautifully simple. The result tastes like the real thing you remember.
This recipe uses raw eggs as traditional versions do, with clear safety guidance provided. I believe in honoring authentic methods rather than taking shortcuts that compromise texture and flavor. The outcome is worth the careful approach.
Key Takeaways
- This dessert recreates the authentic Italian experience for gluten-sensitive diets
- Traditional methods are preserved with one key adaptation
- The preparation is more accessible than its sophisticated reputation suggests
- Raw eggs are used with proper safety guidance as in classic versions
- Both homemade and purchased gluten-free ladyfingers work beautifully
- The recipe focuses on flavor and texture authenticity above all
- Clear, reliable instructions make this achievable for home cooks
Rediscovering Authentic Italian Tiramisu with a Gluten Free Twist
What makes authentic tiramisu so light and creamy might surprise those accustomed to modern adaptations. The name itself, translating to “pick me up,” perfectly captures the dessert’s energizing combination of coffee and rich flavors.
| Method | Texture Source | Egg Treatment | Cream Usage |
|---|---|---|---|
| Traditional Italian | Whipped eggs | Separated yolks & whites | None |
| Common American | Heavy cream | Often omitted | Primary ingredient |
| Authentic Adaptation | Whipped eggs | Traditional separation | Optional garnish |
Traditional preparation separates egg yolks from whites. Each component gets whipped separately to build the signature airy texture.
The yolks combine with mascarpone for richness. Whipped whites provide the light, cloud-like consistency.
This adaptation changes only the ladyfingers. All other traditional elements remain intact. The method respects Italian kitchen practices.
Using raw eggs follows authentic preparation. Italian restaurants commonly include disclaimers about this technique. Understanding this approach creates truly authentic results.
The Inspiring Journey to Gluten Free Adaptations
For many, the journey to creating a dietary-friendly version of a favorite food starts with identifying the one ingredient that needs to change. In the case of this particular Italian treat, that ingredient was clear.
Ladyfingers are the sole component containing gluten. They became the single obstacle to enjoying this beloved dessert for those with Celiac disease. This realization focused the entire adaptation process.
My research involved deconstructing how the dish is truly built. Many people enjoy it for years without knowing the precise technique behind its layers. Understanding this foundation was essential for an authentic result.
Developing a reliable ladyfinger recipe required careful testing. The goal was a version that worked in any home kitchen without special tools. After some time, a consistent and effective way was perfected.
For convenience, quality store-bought options like Schar brand exist. They can be challenging to find locally but are available online. This gives cooks a choice based on their preference and time.
The entire adaptation focused on authenticity. The aim was to recreate the exact experience of the traditional dessert, not just a vague similarity. Every decision respected the original method.
| Component | Adaptation Required | Approach | Result |
|---|---|---|---|
| Ladyfingers | Yes | Recipe development or sourcing certified products | Gluten-free structure that absorbs coffee perfectly |
| Mascarpone Cream & Method | No | Strict adherence to traditional Italian technique | Authentic flavor and airy texture preserved |
Essential Ingredients for an Authentic Gluten Free Tiramisu Recipe
Selecting proper ingredients ensures the final result honors tradition while meeting dietary needs. Each component plays a specific role in building the dessert’s signature layers.
You will need a few core items. These include fresh eggs, granulated sugar, and high-quality mascarpone cheese. Strong coffee, a liqueur like amaretto, and gluten free ladyfingers form the base. Unsweetened cocoa powder provides the classic finish.
Gluten Free Ladyfingers: Homemade vs Store-Bought
The cake layer is the only element that requires adaptation. You have two reliable paths for sourcing these key components.
Homemade ladyfingers offer complete control over flavor and freshness. They use simple ingredients like almond flour. Store-bought options, such as Schar brand, provide excellent convenience.
| Option | Control | Convenience | Flavor | Availability |
|---|---|---|---|---|
| Homemade | High | Low | Fresh, Customizable | Ingredients Widely Available |
| Store-Bought (e.g., Schar) | Low | High | Consistent | Often Online |
Raw Eggs and Dairy Alternatives: Making It Safe and Delicious
Traditional preparation uses raw eggs. For safety, consider pasteurized eggs available at major stores like Walmart. They are gently heated to eliminate risk.
Real mascarpone cheese is essential for authentic taste and texture. While cream cheese can substitute, the difference is significant. For dairy-free needs, vegan cream cheese and dairy-free heavy cream work well.
Liqueur choices add personality. Amaretto is classic, but Grand Marnier, rum, or Kahlua are fine alternatives. Use a quality Dutch-processed cocoa like Hershey’s Special Dark for the best finish.
Step-by-Step Assembly Process for the Perfect Dessert
The assembly begins with preparing the egg components, which form the foundation of the dessert’s signature texture. This method builds structure and airiness through careful whipping and folding.
Preparation and Layering Techniques
Start by whipping the egg whites in a stand mixer bowl. Add sugar slowly once they reach soft peaks. Continue until stiff peaks form that stand straight up.
Transfer the whites to another bowl. Use the same bowl and whisk for the yolks. Beat them with sugar for two to three minutes until thick and pale.
Add the mascarpone, a tablespoon of coffee, and amaretto. Beat the mixture until it is completely smooth. This creates a rich, thick base for the cream.
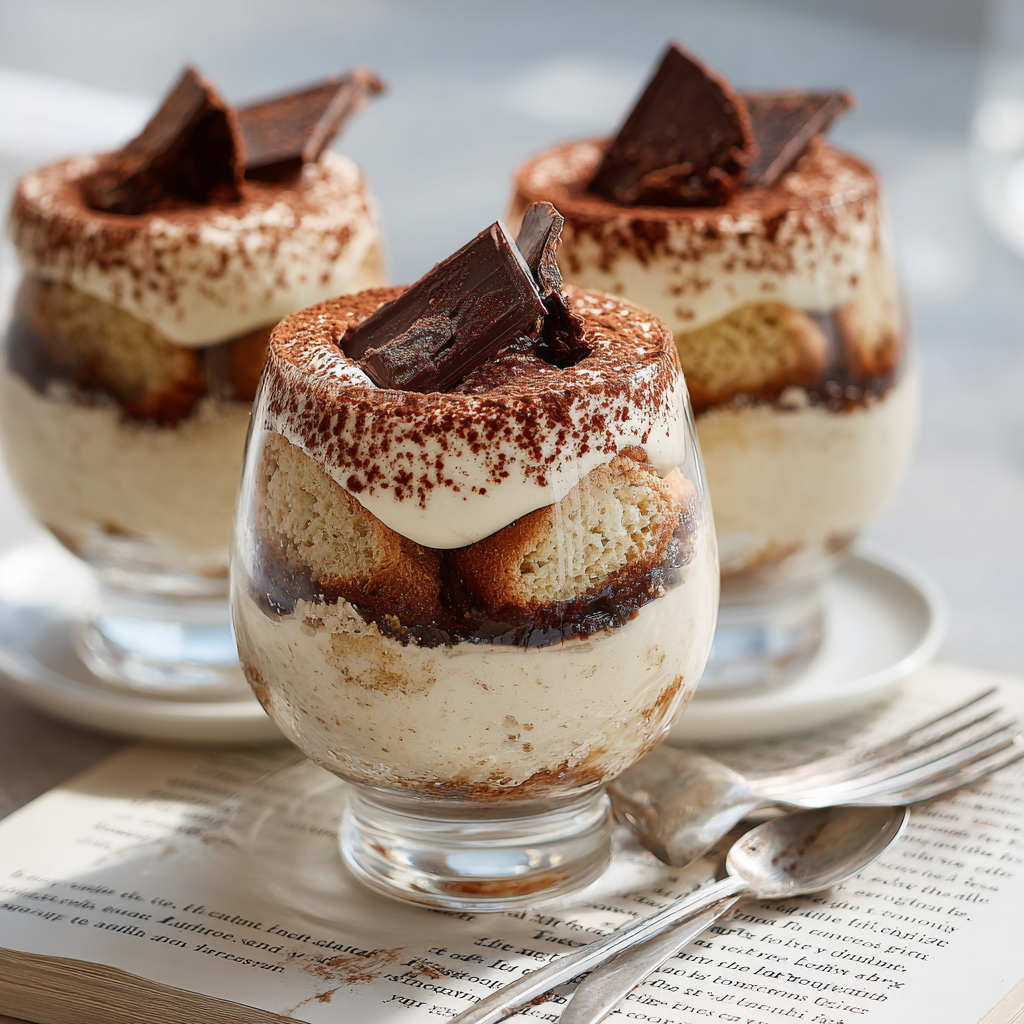
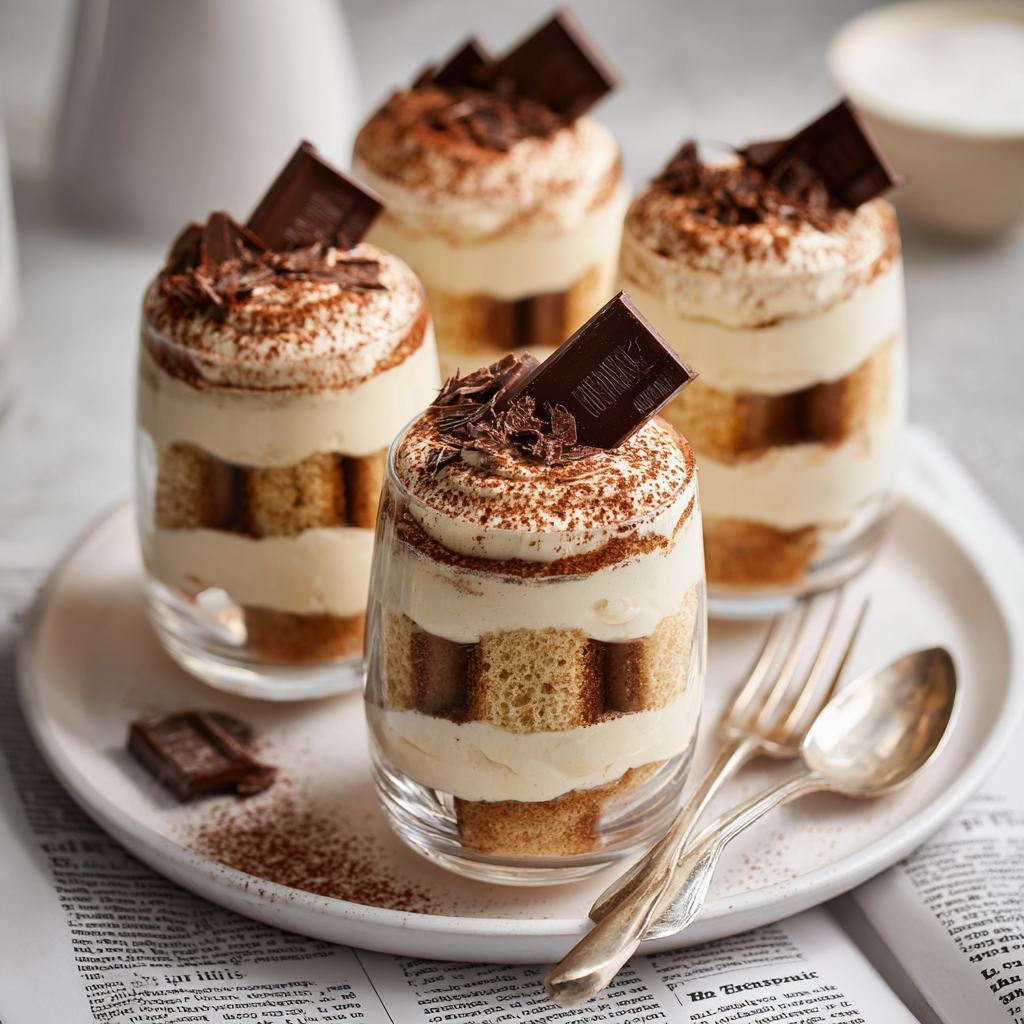
For a fun individual serving option, you can adapt this method for simple individual tiramisu cups. The core technique remains the same.
| Stage | Key Action | Visual Cue | Time Guide |
|---|---|---|---|
| Egg Whites | Whip to stiff peaks | Peak stands upright | 3-5 minutes |
| Egg Yolks | Beat until ribbon stage | Trail holds shape | 2-3 minutes |
Folding and Whipping Secrets for Airy Texture
Gently fold one-third of the egg whites into the yolk mixture. This lightens the heavy base. Then, add the rest of the whites and fold until smooth.
Mix the espresso, remaining amaretto, and sugar in a wide, shallow bowl. Quickly dip each ladyfinger on the top and bottom. Do not soak them.
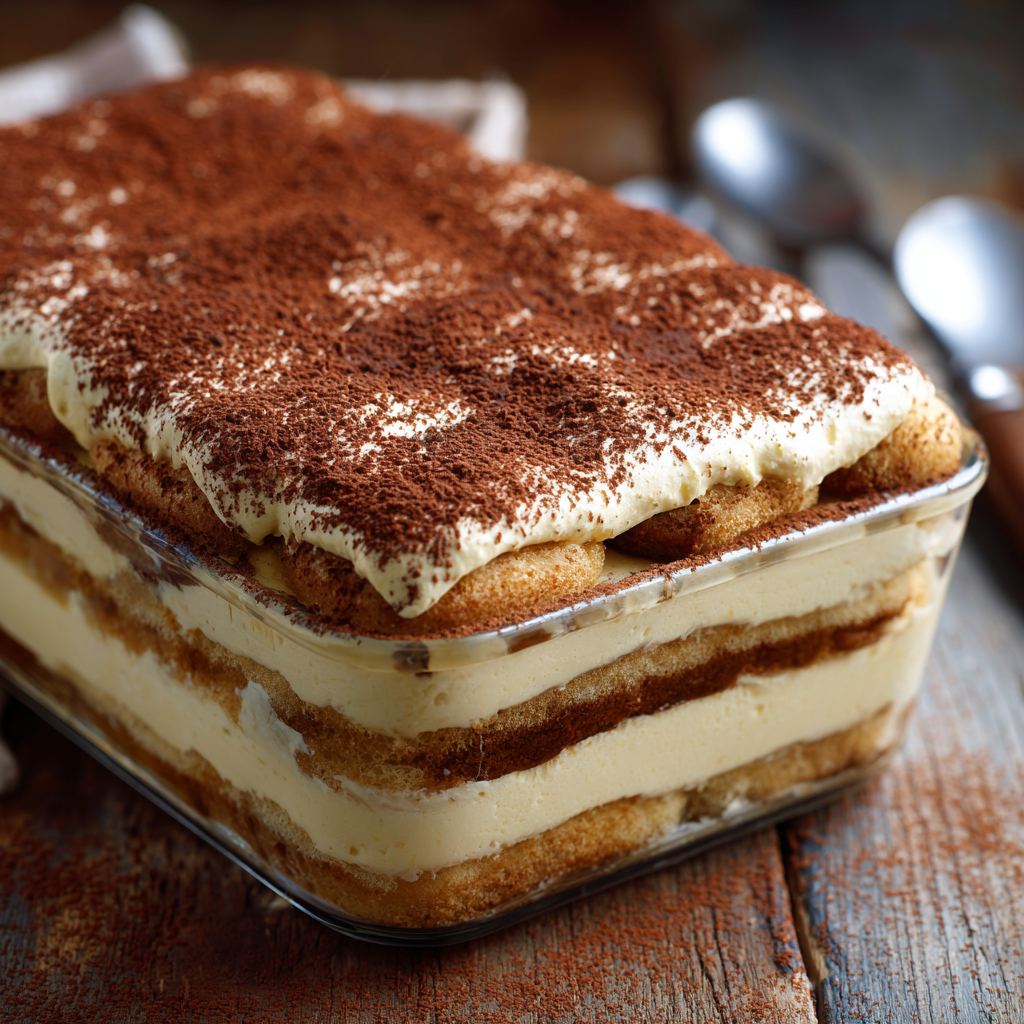
Arrange half the dipped ladyfingers in a single layer on the bottom of your dish. Spread half the cream mixture evenly over them. Repeat the process for the second layer.
Use an offset spatula to smooth the final cream layer. Cover the dish with plastic wrap. Refrigerate it overnight for the flavors to meld perfectly.
Creative Variations and Substitutions for Every Taste
Many home cooks wonder if they can maintain authentic flavors while accommodating dairy-free or vegan preferences. The good news is that thoughtful ingredient swaps can create excellent results without compromising the dessert’s essential character.
Adjusting for Dairy-Free and Vegan Options
For dairy-free adaptations, vegan cream cheese replaces mascarpone effectively. When whipped with dairy-free heavy cream, it maintains the proper consistency and richness. Various non-dairy milks like almond, cashew, or oat milk work well in homemade components.
An alternative sponge cake using almond flour and coconut flour creates a different but delightful texture. This approach works beautifully for those preferring to avoid store-bought options.
| Traditional Ingredient | Dairy-Free Substitute | Vegan Alternative | Best Use Case |
|---|---|---|---|
| Mascarpone Cheese | Vegan Cream Cheese | Vegan Cream Cheese + Dairy-Free Cream | Main cream layer |
| Heavy Cream | Dairy-Free Heavy Cream | Coconut Cream | Whipping and folding |
| Regular Butter | Vegan Butter | Coconut Oil | Homemade cake base |
| Whole Milk | Almond Milk | Oat or Cashew Milk | Sponge preparation |
Individual portions assembled in glasses make elegant presentations. Decaffeinated coffee works perfectly for evening servings. Espresso powder can replace cocoa for intensified coffee flavor.
These variations accommodate different needs while preserving the fundamental experience. The coffee-soaked layers and creamy filling remain balanced and memorable.
Expert Tips for Achieving a Smooth, Creamy Consistency
Temperature control and timing work together to create the smooth, stable cream characteristic of authentic preparation. These techniques ensure your dessert has the proper texture.
Proper handling of ingredients builds the foundation for success. We’ll focus on the key steps that make the difference.
Whipping Egg Whites to Stiff Peaks
Start with room temperature egg whites in a completely clean, dry bowl. Any fat residue prevents proper whipping. Use your mixer at medium speed initially.
Watch for soft peaks first. The whites become foamy and white. When you lift the whisk, the peak curls over rather than standing upright.
Gradually add sugar once soft peaks form. Increase to high speed until stiff peaks develop. They should stand straight up without drooping.
Avoid over-whipping. The whites should look glossy and smooth, not dry or clumpy. Over-mixing causes deflation and graininess.
Mastering Temperature and Timing
For those concerned about raw eggs, use a double-boiler method. Place a heat-proof bowl over simmering water, ensuring it doesn’t touch the water.
Whisk egg yolks and sugar constantly while heating. Use an instant-read thermometer to reach 165°F. This pasteurizes without scrambling.
After heating, whip the mixture until it doubles in volume and turns pale. Then proceed with pasteurized egg whites from a carton.
| Whipping Stage | Visual Cue | Texture | Timing |
|---|---|---|---|
| Soft Peaks | Peak curls over | Foamy, white | 2-3 minutes |
| Stiff Peaks | Peak stands upright | Glossy, firm | 4-5 minutes total |
| Over-whipped | Grainy appearance | Dry, separated | Avoid this stage |
Best Practices for Gluten Free Tiramisu Presentation & Serving
The final presentation transforms your creation from a simple dessert into an elegant centerpiece. A few simple techniques ensure it looks as impressive as it tastes.
We focus on clarity and tradition to honor the authentic Italian experience.
Plating and Garnishing Ideas
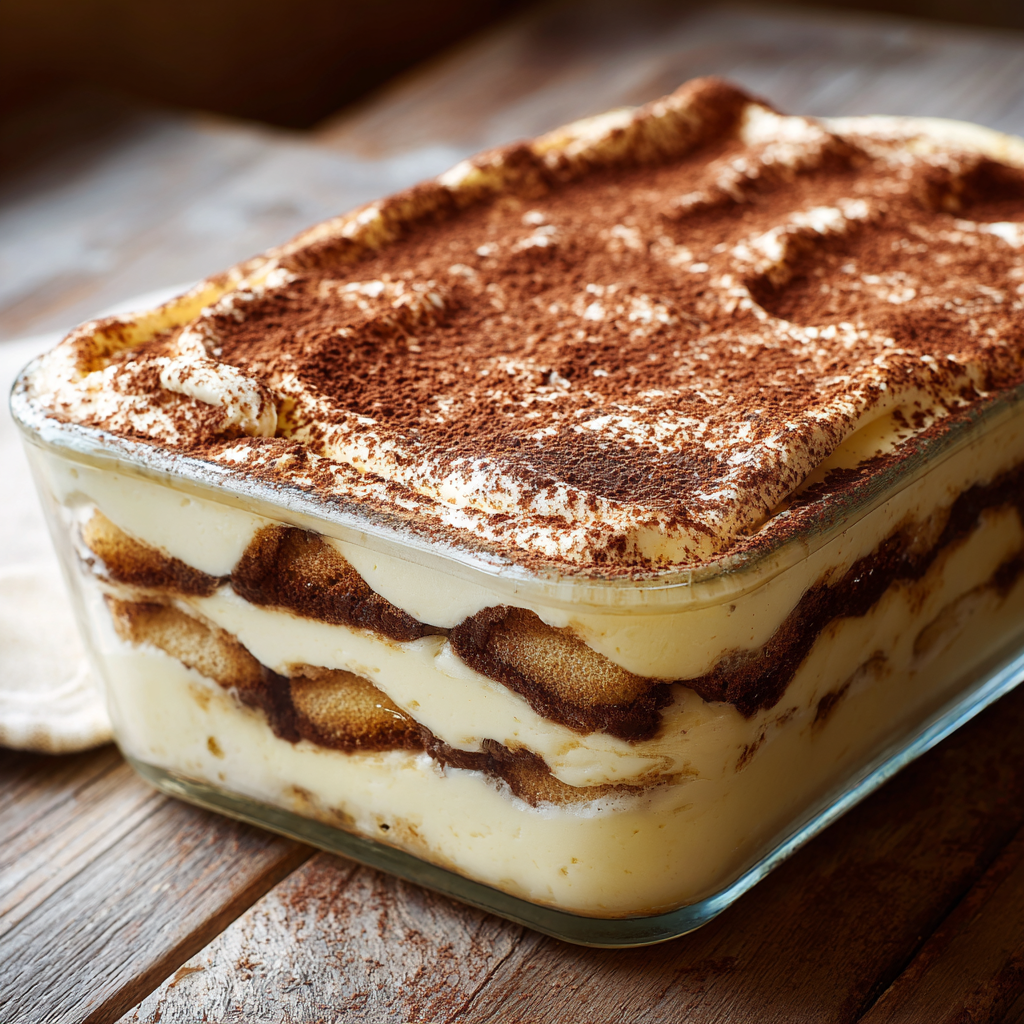
Dust the top with cocoa powder just before serving. Place one to two tablespoons of powder in a fine-mesh sieve.
Tap it gently over the entire surface for an even, professional finish. Timing is key. If applied too early, the powder absorbs moisture and loses its velvety look.
Use a sharp knife, wiped clean between cuts, for neat squares. A thin offset spatula helps lift portions from the dish without smearing.
Serve it cold from the refrigerator. The cool temperature maintains structure and highlights the contrast between creamy filling and coffee-soaked layers.
| Presentation Style | Assembly Method | Garnishing Tip | Best For |
|---|---|---|---|
| Single Dish | Cut squares in the pan | Final dusting of cocoa on the entire top | Family gatherings |
| Individual Glasses | Layer cake, cream, and cocoa repeatedly | Chocolate shavings or cacao nibs on top | Dinner parties |
For individual servings, start with coffee-soaked cake cubes at the bottom of a glass. Add a cream layer, then a light dusting of cocoa.
Repeat the process until you reach the top. Finish with a generous dusting of powder. These can be assembled hours ahead.
Cover the dish tightly with plastic wrap for storage. It keeps well in the refrigerator for two to three days. The flavors meld beautifully, often tasting best on the second day.
For special occasions, garnish with dark chocolate shavings made using a vegetable peeler. Small chunks of quality chocolate or cacao nibs add delightful texture.
Mastering the Gluten Free Tiramisu Recipe: Techniques and Insights
Success with this preparation comes down to a few critical techniques that ensure authentic results every time. Begin by separating eggs carefully, ensuring no yolk mixes with the whites. Whip the whites with half a cup of sugar until stiff peaks form that stand upright.
Next, beat the yolks with another half cup of sugar for two to three minutes. Watch for the ribbon test: when you lift the whisk, the mixture should fall in thick ribbons that hold shape briefly. This indicates proper aeration.
Folding requires a gentle touch. Use a large rubber spatula to cut through the center, sweep the bottom, and lift up the sides. Rotate the bowl slightly with each fold to incorporate evenly without deflating the mixture.
Strong espresso or coffee is essential for flavor penetration. Weak coffee disappears against the sweet cream. For homemade bases, bake at 350°F for about 15 minutes until golden brown.
Overnight refrigeration isn’t optional. It allows full flavor integration and proper setting for clean slicing. When assembling individual servings, the same principles apply.
Dip ladyfingers quickly—just one second per side. Over-soaking makes them fall apart during assembly. These precise techniques create the balanced layers that define authentic Italian desserts.
A Sweet Finale: Bringing Your Italian Gluten Free Dessert to Life
Your finished dessert represents more than just a sweet ending—it’s a testament to careful technique and respect for Italian culinary tradition. The hands-on work takes about 25 minutes, but overnight refrigeration is essential for perfect flavor melding.
Cover your dish tightly with plastic wrap to maintain freshness for two to three days. This recipe yields approximately 12 generous portions, ideal for gatherings. The 11×7-inch baking dish creates impressive layers, though a 9×13-inch pan works well too.
First-time makers need not feel intimidated. Each component is straightforward, and the technique becomes intuitive with practice. Mastering this gluten-free version opens doors to other authentic Italian desserts.
The coffee-soaked bottom, airy cream center, and cocoa-dusted top create distinct experiences in each bite. This adaptation respects tradition while accommodating needs—it delivers the real experience of this classic dessert.
Gluten-Free Tiramisu
Ingredients
Method
- Separate the eggs into yolks and whites.
- In a clean bowl, beat the egg whites with 1/2 cup of sugar until stiff peaks form.
- In another bowl, whisk the egg yolks with the remaining sugar until thick and pale, about 2-3 minutes.
- Add mascarpone cheese, 1 tablespoon of coffee, and amaretto to the yolk mixture. Beat until smooth and thick.
- Gently fold one-third of the egg whites into the mascarpone yolk mixture, then fold in the rest. This creates an airy cream texture.
- Quickly dip each gluten-free ladyfinger into the remaining coffee-amaretto mixture. Ensure they're not soaked too long.
- Arrange half of the dipped ladyfingers in a single layer in your dish.
- Spread half of the mascarpone mixture over the ladyfingers.
- Repeat with another layer of ladyfingers and the remaining mascarpone mixture.
- Smooth the top layer with a spatula, then cover with plastic wrap and refrigerate overnight.
- Just before serving, dust with cocoa powder for a classic finish.
Notes
- For dairy-free versions, swap mascarpone with high-quality vegan cream cheese and use dairy-free heavy cream.
- Ensure the egg whites are whipped properly for a light texture and avoid over-soaking the ladyfingers.
- The tiramisu can be made ahead and stored in the fridge for up to 2-3 days, allowing the flavors to develop even further.