
Jump to Recipe
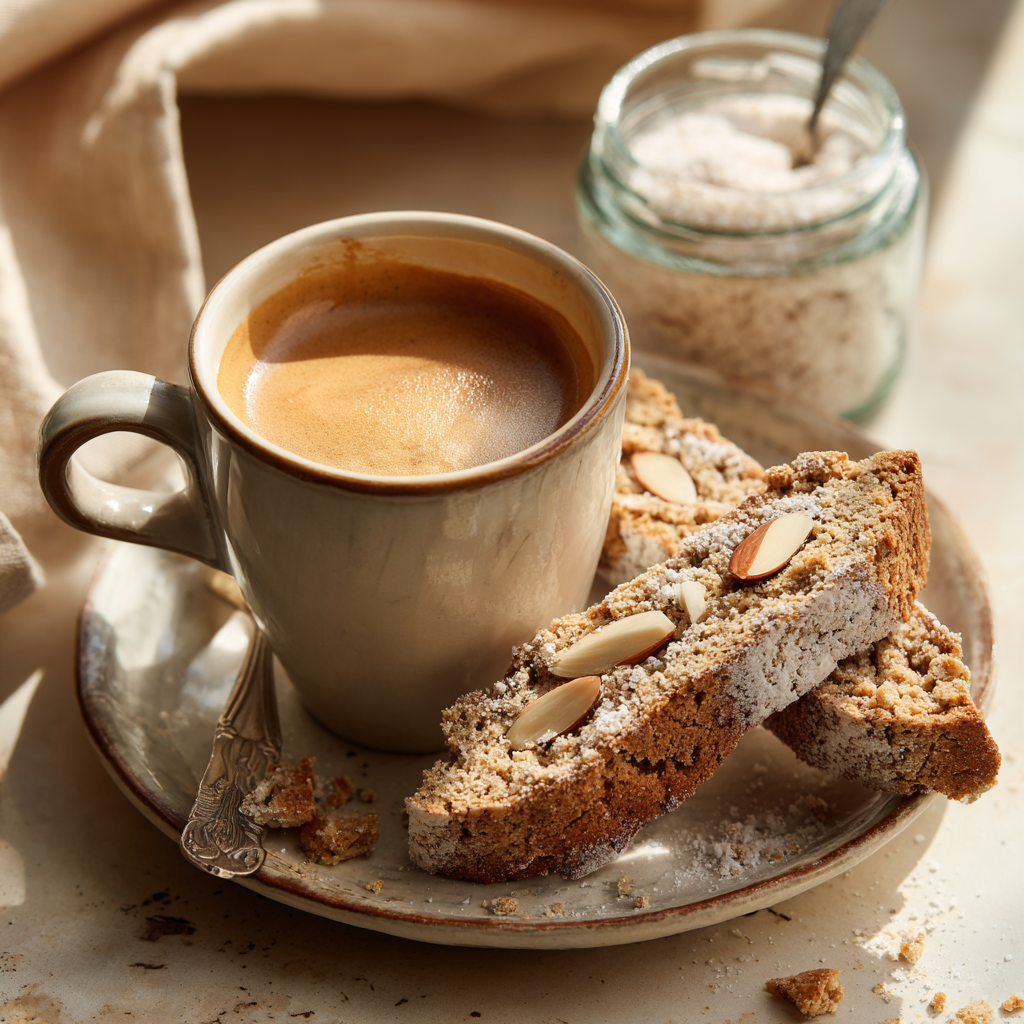
There’s a certain rhythm to Italian baking. It’s in the feel of the dough and the warm, comforting scent that fills the kitchen. It’s a quiet practice of turning simple ingredients into something that feels like a shared moment, perfect for pausing with a cup of coffee.
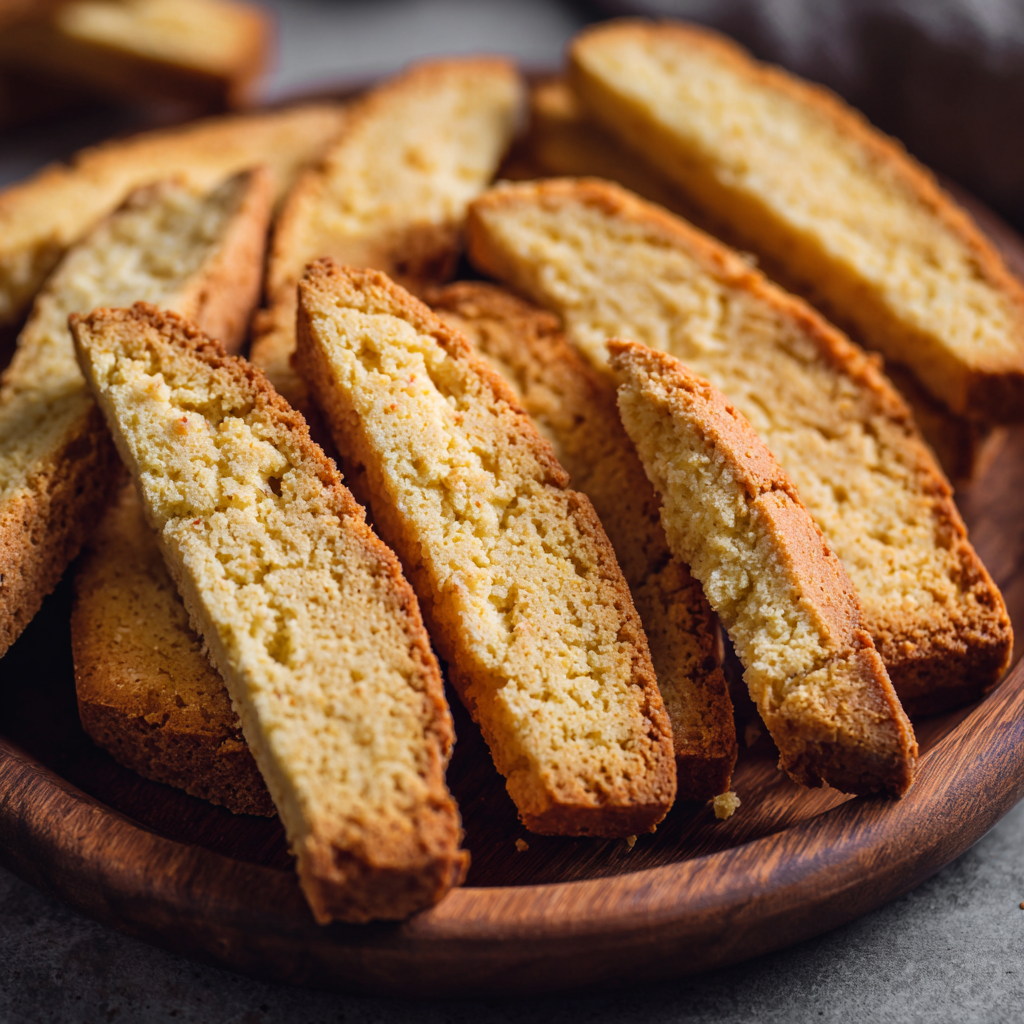
Many people think of these Italian cookies as being too hard. They’ve likely had a dry version that was difficult to enjoy. A proper version should be crisp and satisfying. The texture is key, offering a pleasant crunch without being a challenge to eat.
This approach honors that tradition. It focuses on creating that distinctive, sturdy crunch that holds up beautifully when dunked. The method involves baking twice, which is essential for achieving the right consistency. This technique ensures the treats are delicious alongside tea or espresso.
We’ve adapted this classic for modern kitchens using alternative ingredients. The goal is to deliver the same authentic experience without compromise. The instructions ahead are clear and focused on technique. You’ll understand not just the steps, but why they matter for a perfect result every time.
Key Takeaways
- Authentic Italian cookies should be crisp and enjoyable, not dry and hard.
- The unique texture comes from a specific baking technique.
- This method creates a sturdy treat perfect for dipping in coffee.
- You can achieve traditional quality while using alternative ingredients.
- The instructions focus on clear steps and the reasons behind them.
- This approach works reliably in a standard home kitchen.
Why You’ll Love This Gluten Free Biscotti
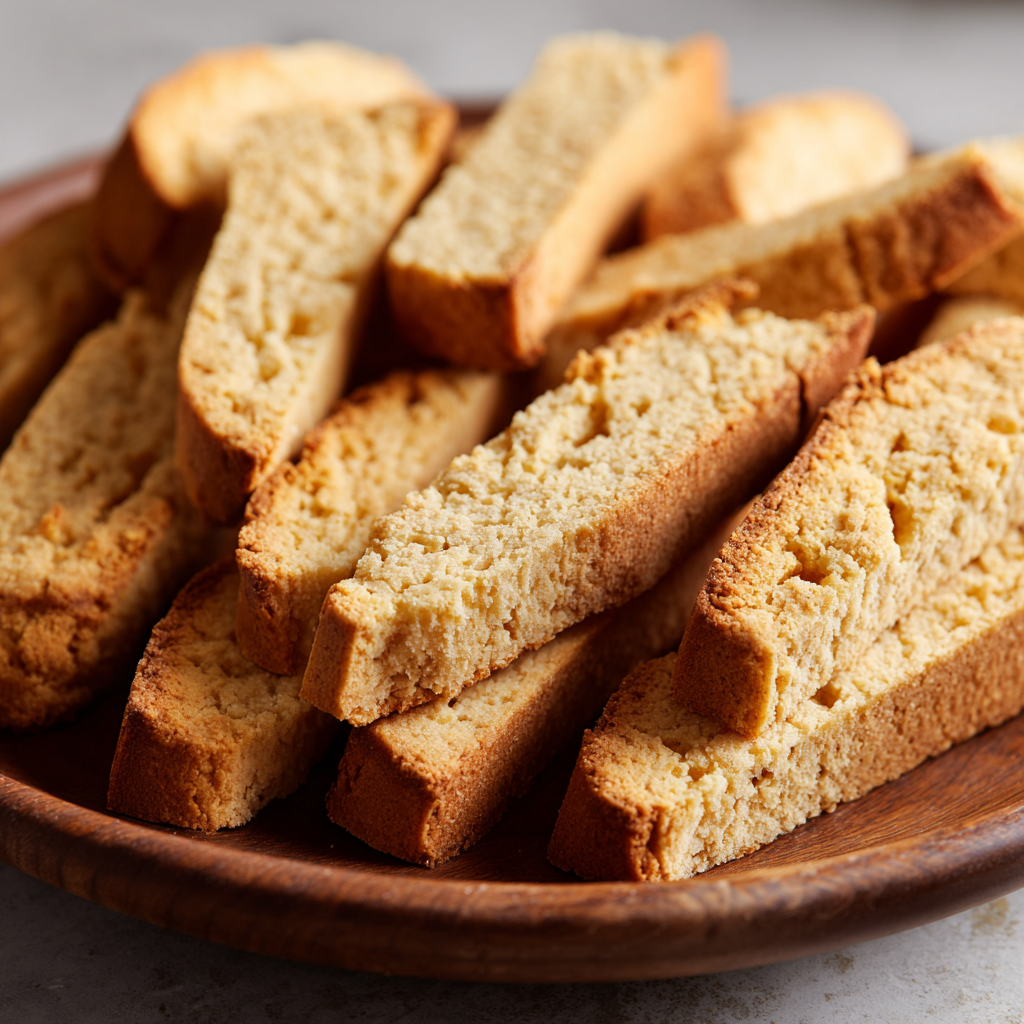
A successful batch of these Italian cookies balances crispness with flavor. The texture is the star. It provides a satisfying snap that holds up to dipping, yet it’s never unpleasantly hard.
The base taste is warm and comforting. It comes from a straightforward combination of vanilla and almond. This honest flavor profile doesn’t rely on being overly sweet.
I find the ingredient list approachable. You will recognize everything. This makes the process welcoming for bakers of any skill level.
The method for this biscotti is also very forgiving. The neutral base serves as a perfect canvas for your own ideas. You can easily add citrus zest, chopped nuts, or a drizzle of chocolate.
This treat stores beautifully in an airtight container. You can make a batch ahead of time. It stays fresh and crisp for weeks, ready for a moment’s notice.
| Feature | Benefit | Example |
|---|---|---|
| Forgiving Dough | Easy to handle and customize | Add chocolate chips or dried fruit |
| Simple Ingredients | Accessible and recognizable | Uses common pantry items |
| Long Shelf Life | Perfect for making ahead | Ideal for gifts or busy weeks |
We focus on the twice-baked technique for a reason. It creates a dry, sturdy cookie that genuinely improves your coffee or tea experience. The texture is intentionally functional and delicious.
Essential Ingredients and Equipment for Delicious Biscotti
Gathering the right tools before you begin makes the baking process smoother and more enjoyable. Proper preparation ensures you can focus on technique rather than searching for items mid-recipe.
We’ll start with a quick look at what you’ll need to create these classic treats.
Key Ingredients Overview
The ingredient list for this approach is straightforward and accessible. You’ll find everything in a well-stocked pantry.
Basic flour alternatives, eggs, sugar, and flavorings like vanilla form the foundation. This simplicity allows the baking method to shine.
Must-Have Baking Tools
A large baking sheet is essential for proper heat circulation. You need enough space for two logs with several inches between them.
Line your baking sheet with parchment paper for easy cleanup. Some traditional methods prefer a greased and floured pan for better browning.
A serrated knife makes slicing partially cooled logs much cleaner. Straight-edge knives tend to compress the dough rather than cut through it neatly.
Mixing bowls in various sizes help with organization. A stand mixer simplifies the initial mixing, but a wooden spoon works perfectly well.
Keep a small bowl of water nearby when shaping the logs. Damp hands prevent sticking without adding extra flour to the dough.
A cooling rack matters for the second bake. Proper air circulation around each piece ensures even drying and that satisfying crunch.
Step-by-Step Gluten Free Biscotti Recipe
This stage of the process focuses on creating the foundation for the distinctive texture we’re aiming for. Proper handling here ensures the characteristic crunch develops correctly during baking.
Mixing the Dough with Care
Begin by dividing your prepared mixture into two equal portions. This ensures both portions bake evenly and finish at the same time. Use a large ice cream scoop to transfer each half onto your parchment-lined baking sheet.
Place the scoops in rows to form two separate logs. Space them about 3-4 inches apart. This allows proper heat circulation and gives you room to work when slicing later.
Forming and Shaping the Logs
Spread each portion into flat loaves measuring approximately 9½ by 2 inches. Keep them about ¾ inch tall rather than rounded. This flat shape bakes more evenly and slices cleaner.
Wet your hands to prevent sticking without adding extra flour. Smooth the tops and sides as evenly as possible. Deep cracks or rough spots will worsen during baking. A wet spatula works well for finishing touches.
Chill the shaped logs for 30 minutes. This step firms the mixture so it holds its shape during baking instead of spreading. For variety, consider our pistachio almond version which follows similar shaping principles.
Sprinkle with coarse sugar if desired, pressing gently to adhere. The logs are now ready for their first bake.
Mastering the First Bake: Preheat and Initial Baking
Many bakers overlook how important the first bake is in creating the signature crunch. The oven temperature matters more than you might expect. Most approaches settle around 325°F as the sweet spot for even baking without over-browning.
This initial baking phase typically takes 25 to 30 minutes. You’re watching for the logs to look set and slightly puffed rather than waiting for deep golden color. The surface should feel firm when gently pressed.
The edges should just be starting to take on a light golden tone. The logs will still feel somewhat soft in the center at this stage. This is correct—they’ll firm up as they cool and during the second bake.
Some bakers spritz the logs with water immediately after removing them from the oven. This softens the crust slightly and makes slicing cleaner. Cover both sides and top lightly but thoroughly.
Let the logs cool for about five minutes before slicing. Cutting them while they’re too hot causes crumbling. Waiting too long makes them difficult to slice cleanly. Reduce the oven temperature now so it adjusts for the next phase.
Chilling and Slicing Techniques for Perfect Texture
Proper handling during the cooling and cutting stage makes all the difference in achieving the ideal crunch. This is where the characteristic shape and texture come together.
Why Chilling the Dough is Crucial
Let the baked logs cool just enough to handle comfortably. They should be warm but not hot to the touch. This temperature makes slicing cleaner.
A brief rest period allows the structure to set properly. The logs become firm enough to hold their shape during cutting. Rushing this step can lead to crumbling.
Tips for Slicing with a Serrated Knife
Use a serrated knife for the cleanest results. The sawing motion cuts through the partially baked dough without compressing it. This preserves the delicate texture.
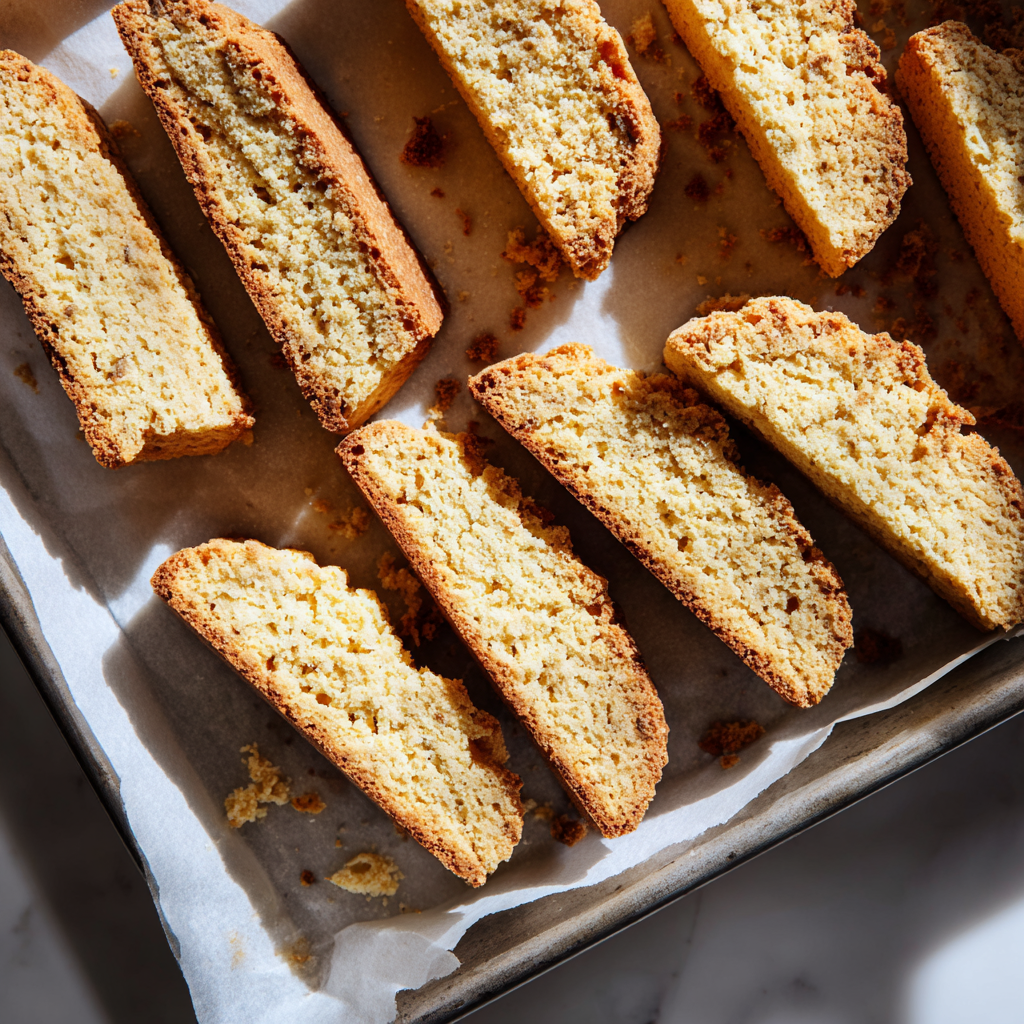
Cut straight down, perpendicular to the pan. Uneven angles create pieces that may tip over during the second bake. Aim for consistent ½-inch to ¾-inch slices.
Wipe the blade clean between cuts if crumbs accumulate. Position the slices cut-side-up on the baking sheet. This ensures both surfaces toast evenly.
Thinner slices become crisper, while thicker ones retain more tenderness. Cutting diagonally creates longer, elegant-looking pieces without changing the flavor.
Second Baking: Achieving That Satisfying Crunch>
While the first bake sets the shape, the second bake is dedicated entirely to developing that perfect crispness. This is when your cookies truly become the classic treat we love.
The lower oven temperature, typically between 275°F and 325°F, works gradually. It dries the slices without burning the edges before the centers are done.
Final Toasting and Flipping Tips
Arrange your slices with space between them on the baking sheet. This allows air to circulate and moisture to escape evenly.
Flipping the cookies halfway through ensures both cut surfaces dry equally. This creates uniform texture throughout each piece.
You’re looking for a light golden color and a firm, dry feel. Gently press the surface with your finger to test doneness.
The cookies might seem slightly underdone when you remove them. They’ll continue to crisp as they cool completely on the rack.
Letting them cool entirely before storing is essential. Any residual warmth means residual moisture, which will soften them in the container.
Flavor Variations and Customization Ideas
Once you’ve mastered the basic technique, a world of flavor possibilities opens up. The neutral base is incredibly forgiving, welcoming both sweet and savory additions. These simple changes can transform the treat for any season or occasion.
I encourage you to view this as a starting point. Feel free to experiment with the combinations that appeal to you most.
Citrus, Chocolate, and Nutty Twists
For a classic upgrade, consider adding zest from an orange or lemon. It provides a bright, aromatic note. Pair it with dried cranberries and white chocolate for a delightful contrast.
Chopped nuts like almonds or pistachios add wonderful texture and richness. A teaspoon of cinnamon or other warming spices makes the treat feel cozy and festive. A gingerbread version, with molasses and spice, is perfect for the holidays.
If you include very sweet ingredients, like chocolate chips, reduce the sugar slightly. This keeps the overall balance in check.
Exploring Sweet and Savory Options
A savory twist might sound unusual, but it follows a true Italian tradition. Finely chopped fresh rosemary, paired with extra vanilla, creates a sophisticated, fragrant cookie.
These herb-infused variations pair beautifully with cheese plates or soup. You can even experiment with a hint of black pepper.
The key is to chop herbs finely for even flavor distribution. Don’t be afraid to combine ideas, like espresso with hazelnuts and dark chocolate. Keeping notes on your favorite variations helps you refine your personal recipe over time.
Smart Ingredient Substitutions for Dietary Needs
The beauty of this baking method lies in its flexibility for various ingredient preferences. You can easily adapt the components to meet different dietary requirements without compromising quality.
If you’re not avoiding specific ingredients, regular all-purpose flour works perfectly using the same measurements. For egg-free versions, a flax egg provides binding but creates a slightly denser texture.
Different oils bring distinct flavor profiles to your creation. Olive oil adds a subtle fruity note, while coconut oil introduces sweetness. Avocado oil remains more neutral in taste.
| Original Ingredient | Substitute Option | Flavor Impact | Texture Change |
|---|---|---|---|
| All-Purpose Flour | Regular Flour Blend | Neutral | Minimal |
| Eggs | Flax Egg Mixture | Neutral | Slightly Denser |
| Granulated Sugar | Coconut Sugar | Caramel Notes | Similar |
| Almond Extract | Hazelnut Extract | Nutty Variation | None |
When using liquid sweeteners like honey or maple syrup, reduce other liquids in the mixture to maintain proper dough consistency. This approach is naturally dairy-free when made with oil instead of butter.
For nut-free versions, simply omit the almonds or replace them with seeds like pepitas. Extract substitutions are straightforward—maintain the total amount even when changing flavors.
Best Storage Practices for Fresh, Long-Lasting Biscotti
The low moisture content that gives these treats their signature crunch also makes them remarkably shelf-stable. Unlike softer cookies that stale quickly, their dry nature works in your favor for storage.
An airtight container is essential for preserving texture. Exposure to air will gradually soften the crispness you worked so hard to achieve. Choose a container that fits your batch snugly without crowding.
Room Temperature vs. Freezing Techniques
For everyday enjoyment, room temperature storage works perfectly. Keep your treats in that airtight container at room temperature, where they’ll stay fresh for up to two weeks. Most batches get eaten well before that timeframe.
Freezing extends storage to three months without affecting quality. Place the cooled pieces in a freezer-safe bag or container. This makes them practical for advance holiday preparation.
When ready to enjoy frozen treats, let them thaw at room temperature for about 30 minutes. If they soften slightly during storage, a few minutes in a 300°F oven will restore the crisp texture.
Completely cooling your baked goods before storing is crucial. Even slight warmth means residual moisture that will condense in the container and create sogginess. Patience here ensures long-lasting enjoyment.
Wrapping Up Your Gluten Free Biscotti Journey
The initial hesitation many feel about making these treats usually melts away after the first successful batch. What appears complex is really about patience and timing.
The twice-baked method creates that distinctive texture you’re after. It’s not difficult, just different from most cookie recipes. Your results will stand proudly beside traditional wheat-based versions.
Once you understand the technique, this recipe becomes almost automatic. These cookies fill a special niche in your baking repertoire. They complement coffee rather than compete with it.
Their sturdy nature and long storage time make them practical for gifting or keeping on hand. Start with the basic version to master the texture. Then feel free to explore variations with confidence.
Gluten-Free Biscotti
Ingredients
Method
- Mix the gluten-free flour, baking powder, and salt in a bowl.
- In another bowl, whisk the eggs, sugar, vanilla, and almond extract until smooth.
- Gradually add the dry ingredients to the wet ingredients and stir until combined.
- Fold in the almonds (optional).
- Divide the dough into two equal portions.
- Place each portion onto a parchment-lined baking sheet.
- Shape each portion into a log about 9½ by 2 inches, making them about ¾ inch tall.
- Wet your hands to prevent sticking and smooth the tops.
- Refrigerate the logs for 30 minutes to firm them up.
- Preheat your oven to 325°F (165°C).
- Bake the logs for 25-30 minutes or until firm with light golden edges.
- Let the logs cool for about 5 minutes before slicing.
- Use a serrated knife to slice the logs into ½-inch to ¾-inch pieces.
- Arrange the slices cut-side up on the baking sheet.
- Lower the oven temperature to 275°F (135°C).
- Bake the slices for 10-15 minutes, flipping halfway through to ensure even crispness.
- Let the biscotti cool completely on a cooling rack.
Notes
- Store biscotti in an airtight container at room temperature for up to 2 weeks.
- Biscotti can be frozen for up to 3 months.
- Customize your biscotti with citrus zest, dried fruit, or chocolate for added flavor.