
Jump to Recipe
There’s a quiet magic in the Italian kitchen, where the simplest ingredients often create the most memorable treats. The scent of toasting nuts and warm sugar can fill a home with a sense of comfort and anticipation.
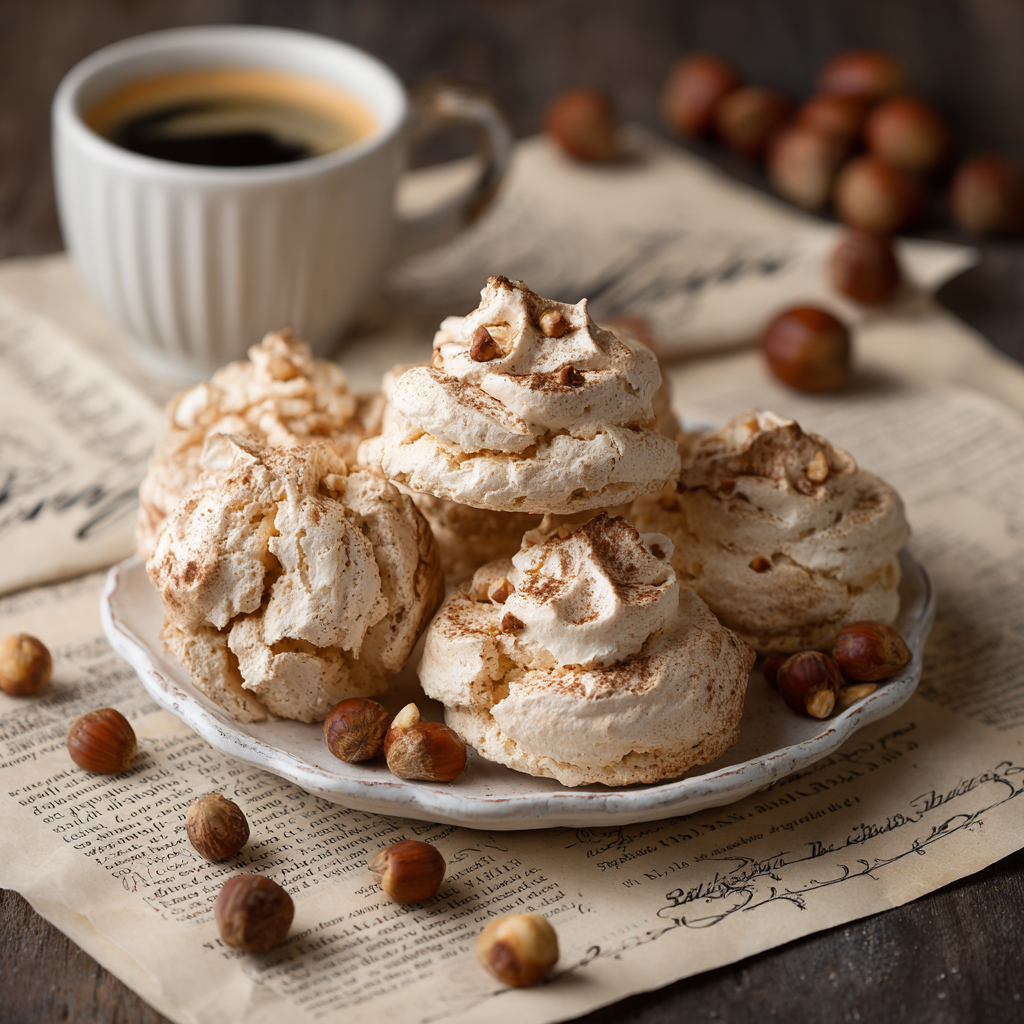
This particular delight comes from Northern Italy, a region celebrated for its superb hazelnuts. It’s a testament to the Italian philosophy that true quality needs no disguise. The name, which translates to “ugly but good,” playfully hints at their rustic, crackled appearance, which belies an incredible taste and texture.
What I love about this preparation is its beautiful honesty. You need just four basic components. The process is traditional and hands-on, focusing on technique over complexity. The result is a wonderful contrast: a crisp, delicate shell that gives way to a softly chewy center.
Because they are naturally gluten-free, these delights are accessible to many. This guide will walk you through the authentic method, including the crucial stovetop step that ensures the perfect consistency. Let’s create something genuinely delicious together.
Key Takeaways
- This is a traditional treat from Northern Italy known for its rustic look and deep, nutty flavor.
- They require only four simple, whole ingredients to make.
- The texture is uniquely crisp on the outside and soft-chewy inside.
- They are naturally gluten-free, making them a great option for many bakers.
- The authentic method involves a key stovetop cooking step to achieve the right consistency.
- This guide focuses on a traditional technique that is approachable for home cooks.
Exploring the Origins and Charm of Brutti ma Buoni

Across Italy’s diverse regions, local ingredients shape traditional preparations in distinctive ways. The history of these treats involves friendly disputes among three areas, each claiming authentic creation rights.
From Italy to Your Kitchen
Lombardy points to a pastry shop in Gavirate from the late 1800s. Piedmont cites towns like Borgomanero and Novara. Tuscany references early 20th-century appearances in Prato and Pistoia.
This regional pride extends to ingredient choices. Piedmont versions highlight local nuts, benefiting from the area’s ideal growing conditions. Tuscan preparations traditionally favor another nut variety.
What Makes Them “Ugly but Delicious”
The playful name perfectly describes their appearance versus taste experience. They boast a rustic, irregular look that contrasts with rich, complex flavor.
Despite origin debates, the fundamental technique remains consistent. These confections have spread throughout Italy, with each region adding subtle variations while maintaining core characteristics.
| Region | Primary Nut | Notable Characteristics | Alternative Names |
|---|---|---|---|
| Piedmont | Local nuts | Connection to famous spread | Traditional name |
| Tuscany | Almonds | Distinct texture profile | Bruttiboni di Prato |
| Lombardy | Mixed nuts | Historical pastry shop origin | Various local terms |
This table shows how regional differences create unique versions while preserving the essential qualities that make these treats so beloved across Italy and beyond.
Gathering Fresh Ingredients and Tools
Before we begin mixing, let’s ensure we have everything organized and ready. Having the proper components and equipment makes the process smoother and more enjoyable.
Quality Hazelnuts, Egg Whites, and Sugar
You’ll need just four essential ingredients for these treats. Whole hazelnuts form the foundation. Raw nuts with skins are economical, though pre-roasted and blanched varieties save time.
For the meringue base, you’ll need egg whites from 2-3 large eggs. Room temperature whites whip to greater volume. Use granulated or caster sugar, which dissolves more easily.
A pinch of salt balances the sweetness perfectly. These simple components create the distinctive texture and flavor.
Essential Kitchen Equipment and Tips
A food processor helps chop the nuts quickly, though a sharp knife works fine. For whisking the egg whites, a standing mixer is convenient. A hand mixer or even a whisk with effort will achieve good results.
Choose a non-stick skillet rather than a saucepan for the stovetop step. The wider surface area promotes better browning. Use a clean stainless steel bowl for whipping the whites.
Line baking sheets with parchment paper to prevent sticking. Having two spoons ready makes shaping the mixture easier. These tools help create the perfect texture.
Step-by-Step Preparation Method
Mastering the texture of these confections relies on two crucial preparation stages. We’ll handle the nut component and meringue foundation separately before combining them.
Roasting and Processing the Hazelnuts
Begin by heating your oven to 350°F. Spread the raw nuts in a single layer on a baking sheet. Roast them for 8-12 minutes until fragrant.
The skins will blister and split when ready. Transfer the hot nuts to a clean kitchen towel. Rub them vigorously to remove most of the skins.
Allow the roasted nuts to cool completely. Place them in your food processor with half the sugar. Pulse carefully to achieve a mix of coarse and fine textures.
Avoid overprocessing to prevent creating nut butter. This varied texture contributes to the final character.
Whisking Egg Whites and Integrating Sugar
Use an impeccably clean, grease-free bowl for the egg whites. Add a pinch of salt and begin whisking at high speed. The whites will become foamy and white, quadrupling in volume.
Whisk only until soft peaks form before adding sugar. Gradually stream in the remaining sugar while continuing to whisk. This technique prevents drying and ensures chewiness.
Continue until stiff peaks form and the mixture becomes glossy. It should form ribbons when lifted. Gently fold in the nut mixture with a spatula, preserving air.
Mastering the brutti ma buoni hazelnut cookies recipe Technique
Two distinct cooking methods work together to create the signature texture. The stovetop develops flavor and chewiness, while the oven provides the final crispness.
Stovetop Simmering for a Perfect Meringue
Transfer your prepared mixture to a non-stick skillet over medium heat. This step caramelizes the sugars and transforms the texture.
Stir constantly for about five minutes as the mixture darkens. Watch carefully to prevent burning at the bottom of the pan.
Reduce the heat if needed. The mixture will thicken into a sticky mass when ready.
Baking for the Ideal Crunch and Chew
Preheat your oven to 300°F. Work quickly while the mixture is still warm and pliable.
Use two spoons to form rustic clumps on a parchment-lined baking sheet. Space them well as they will puff slightly.
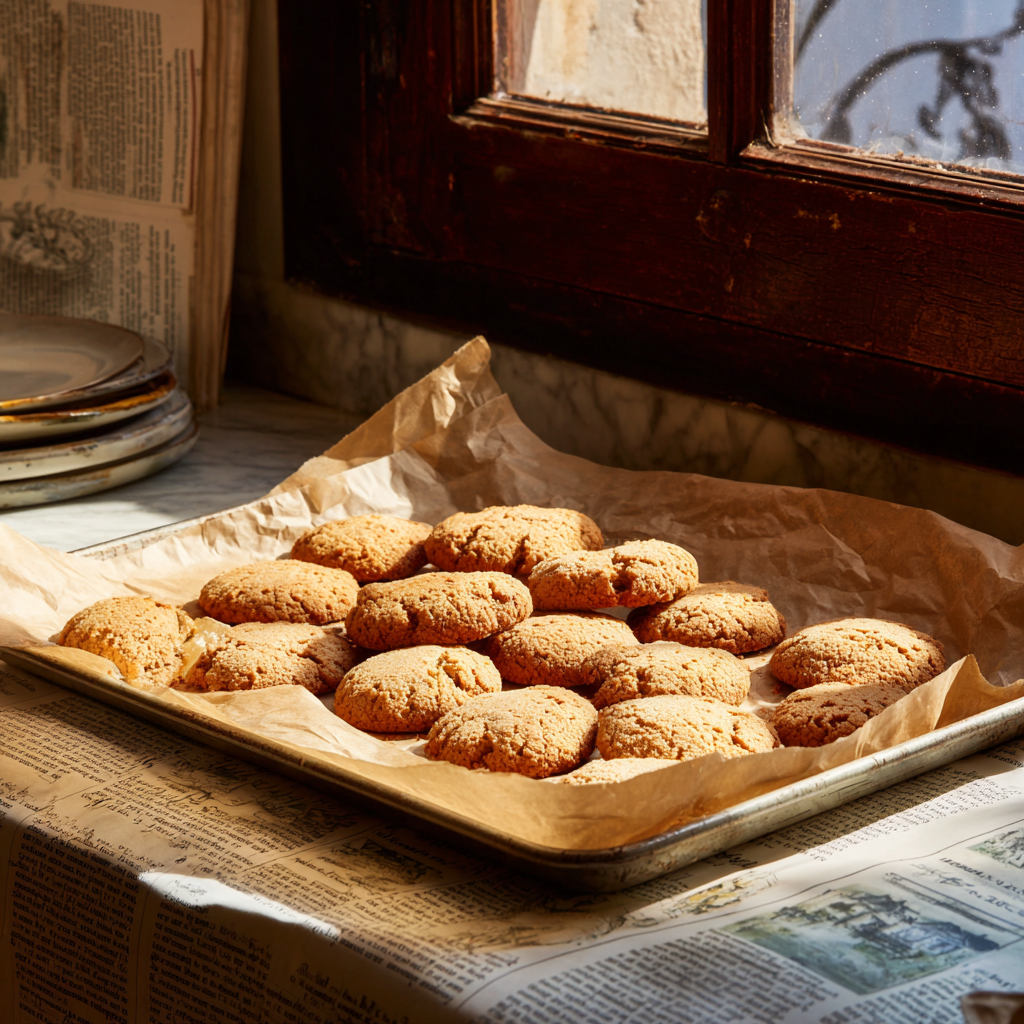
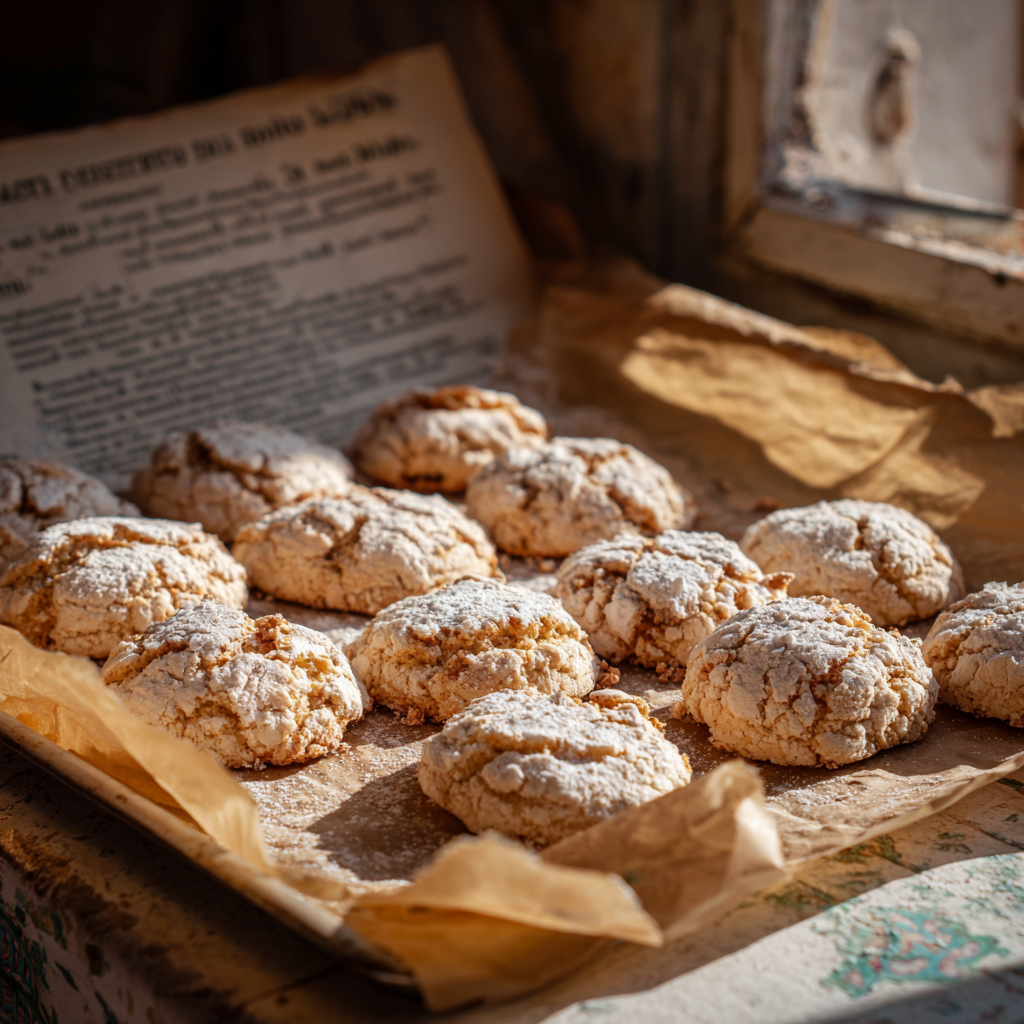
Bake for 25-30 minutes until dry to the touch. Let cool completely before removing from the parchment paper.
The finished treats should be crisp outside with a tender, chewy center.
Innovative Twists and Customization Ideas
While the original version is wonderfully satisfying, there are many ways to add your own signature touch. The basic preparation welcomes thoughtful modifications that can highlight different flavor profiles without compromising texture.
Incorporating Chocolate, Spices, or Vanilla
For a subtle chocolate dimension, fold two tablespoons of sifted cocoa powder into the meringue along with the nuts. This creates a warm cocoa undertone that complements the nutty character beautifully.
Warm spices like cinnamon, nutmeg, or cardamom add complexity. Add ground cinnamon directly with the chopped nuts before the stovetop step for even distribution throughout the mixture.
Vanilla extract provides a classic aromatic enhancement. Stir in one to two teaspoons after the stovetop cooking and before shaping. This timing preserves the extract’s delicate flavor notes.
Consider using almonds instead of the traditional nut for an authentic Tuscan variation. You could also combine half of each for a more complex flavor profile. Different nuts like pistachios or walnuts create entirely new experiences.
For an elegant finish, dip the fully cooled treats in melted dark chocolate. Let them set on parchment paper until firm. This creates a delightful contrast between the crisp exterior and smooth chocolate coating.
Tips for Baking Success and Storage Insights
Success in baking often comes down to understanding the subtle details that transform good results into great ones. These practical insights help ensure your efforts yield the perfect texture every time.
Adjusting Oven Temperatures and Timing
Begin with room temperature egg whites rather than cold ones. They whip to greater volume and create a more stable meringue. Your bowl must be impeccably clean and completely free of any grease.
Even the smallest amount of fat prevents egg whites from reaching proper peaks. A stainless steel bowl is less porous than plastic or glass. Add just a pinch of salt at the beginning to help stabilize the foam.
Whisk only to soft peaks before gradually adding sugar. This crucial tip prevents the final dough from drying out. It ensures a chewier center that contrasts beautifully with the crisp exterior.
Exercise caution during the stovetop simmering step. Maintain medium heat and stir constantly to prevent burning. Never leave the saucepan unattended, as the mixture can quickly go from perfectly caramelized to burnt.
When using a food processor to chop nuts, pulse carefully. Stop before the mixture becomes too fine. You want varied texture with both coarse and fine pieces for the best results.
Baking time varies significantly depending on your oven’s accuracy. Most preparations call for 275-300°F, but you may need to adjust based on your equipment. The size of your portions also affects the required time.
Store completely cooled treats in an airtight container at room temperature. They’ll keep well for at least two weeks. Freshly baked ones offer maximum crispness, while stored versions develop a chewier texture that many find equally appealing.
For longer storage, freeze them in an airtight container with parchment paper between layers. Defrost gradually by first moving to the refrigerator, then to the counter while still sealed. This prevents moisture condensation that would ruin the delicate texture.
Remember that most browning occurs during the stovetop step. Don’t worry if they don’t darken much during baking. The technique shares some principles with other Italian classics like authentic Italian stuffed cookies, where careful temperature control is essential.
Savoring the Moment with Your Homemade Treats
The real pleasure of this preparation comes when you share it. These brutti buoni pair beautifully with a strong espresso for a traditional mid-morning break. Their perfect balance of crisp shell and chewy center makes stopping at just one a real challenge.
This recipe offers wonderful versatility. They are a hit with both adults and children, fitting perfectly on holiday cookie trays or as a finale to an Italian-themed meal. Making them in advance is a practical advantage, as they store well and develop an even more appealing texture over time.
The naturally gluten-free nature of these meringue cookies makes them an inclusive choice for gatherings. I find great satisfaction in mastering this traditional technique. It connects us to a cherished piece of Italian food history.
Embrace the rustic appearance of your homemade treats. That honest, unpretentious character is what makes them so special. The time invested in this baking project pays off with every delicious bite.
Brutti ma Buoni (Italian Hazelnut Meringue Cookies)
Ingredients
Method
- Preheat the oven to 350°F (175°C). Spread raw hazelnuts (or almonds) on a baking sheet in a single layer and roast for 8-12 minutes until the skins split. Rub the roasted nuts in a clean kitchen towel to remove most of the skins, then allow them to cool.
- Place the cooled hazelnuts in a food processor with half of the sugar. Pulse carefully to chop them into a coarse mixture, avoiding nut butter. Set aside.
- In a clean, grease-free bowl, whisk the egg whites and a pinch of salt at high speed until soft peaks form. Gradually add the remaining sugar while continuing to whisk until stiff peaks form and the mixture is glossy.
- Gently fold the processed nut mixture into the whipped egg whites using a spatula, preserving the air in the mixture.
- Transfer the mixture to a non-stick skillet over medium heat. Stir constantly for about 5 minutes as the mixture thickens and darkens slightly. Keep the heat at medium to avoid burning.
- Preheat the oven to 300°F (150°C). Use two spoons to form rustic clumps of the mixture onto a parchment-lined baking sheet, spacing them apart.
- Bake for 25-30 minutes until the cookies are dry to the touch. Allow them to cool completely before removing them from the parchment paper. The finished cookies should have a crispy exterior with a chewy interior.
Notes
- These cookies can be stored in an airtight container for up to 2 weeks.
- You can substitute almonds for hazelnuts for a Tuscan variation.
- To add a twist, try folding in cocoa powder or ground spices like cinnamon for added flavor.
- For longer storage, freeze the cookies by layering them with parchment paper in an airtight container. Allow to thaw slowly.