
Jump to Recipe
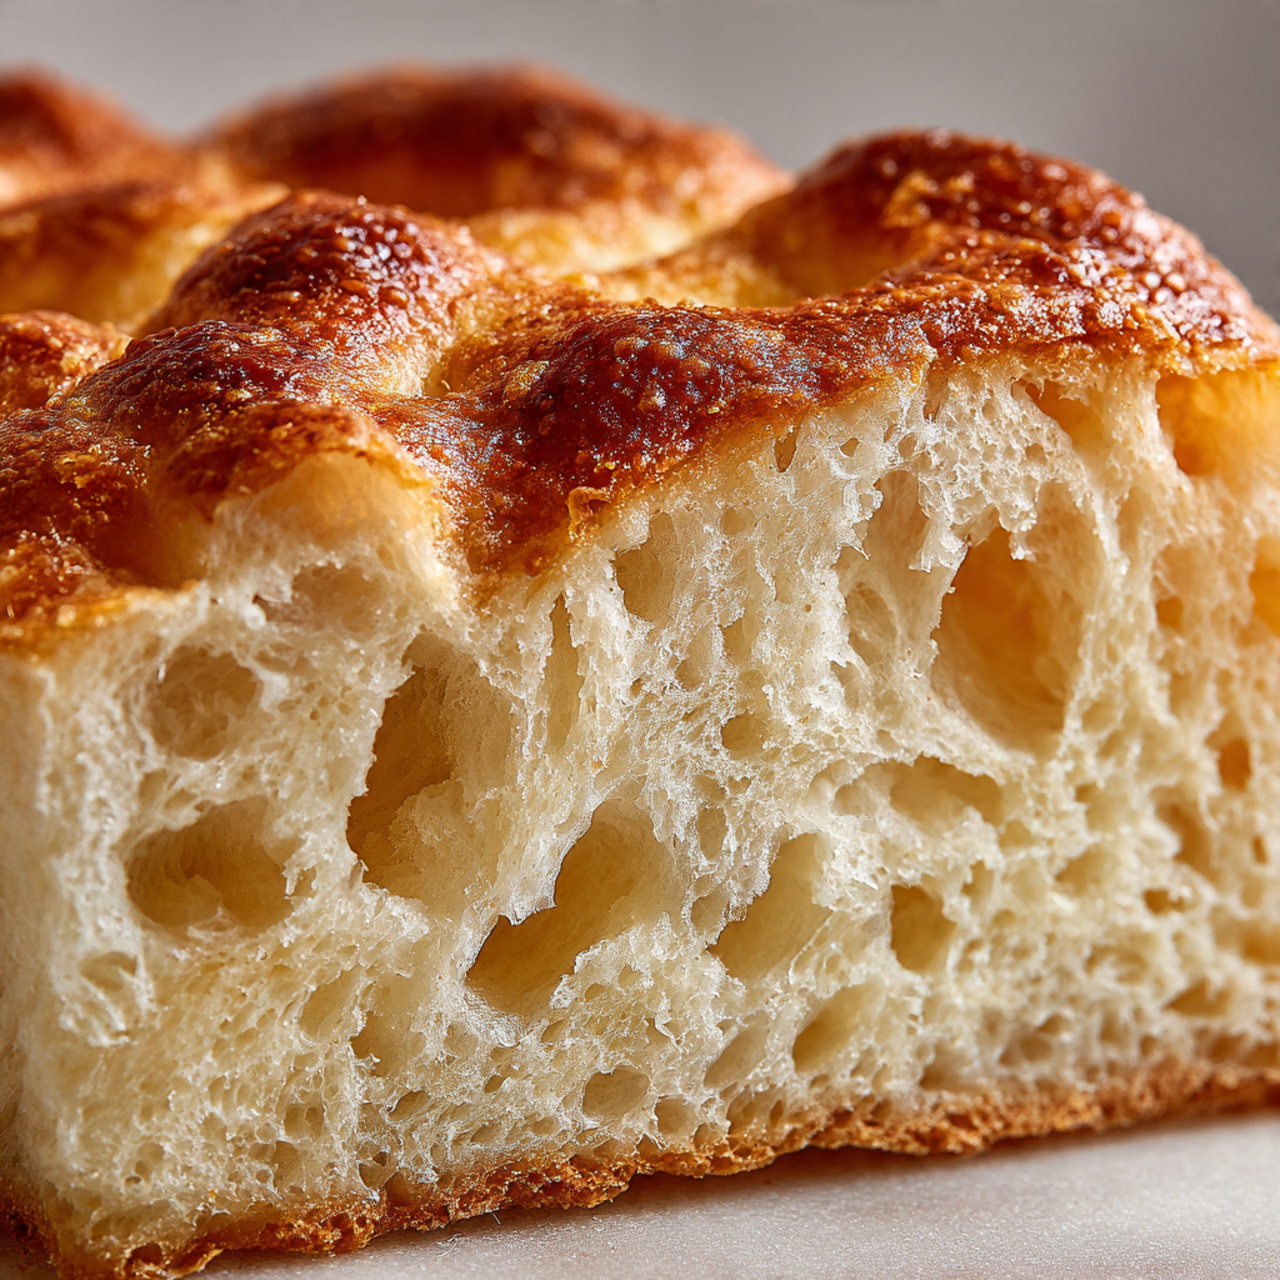
I still remember the smell of warm dough in my mother’s kitchen, and that first bite sealed the memory: this olive focaccia ligurian recipe tastes like home. The crust should be hazelnut-golden, the crumb ivory and just under 2 cm tall, with a crisp edge and pillowy interior.
I learned early that the best bread starts the day before. An overnight sponge—about 1 cup (130 g) flour, a splash of water, and a pinch of yeast—ferments 12–14 hours and builds real depth of flavor.
We finish with a salty brine, deep dimpling at a 45° angle, and a final brush of olive oil before baking at 450°F for 15–18 minutes. These simple steps keep the process approachable and repeatable, whether you dunk it in coffee at breakfast or pull it into sandwiches for dinner.
Key Takeaways
- Start the night before with an overnight sponge for best flavor.
- Aim for about 2 cm thickness and a hazelnut-golden crust.
- Use a salty brine and deep dimples to hold flavor and oil.
- Bake at 450°F for 15–18 minutes, rotating trays for even color.
- Gentle handling and cool water make texture reliable and forgiving.
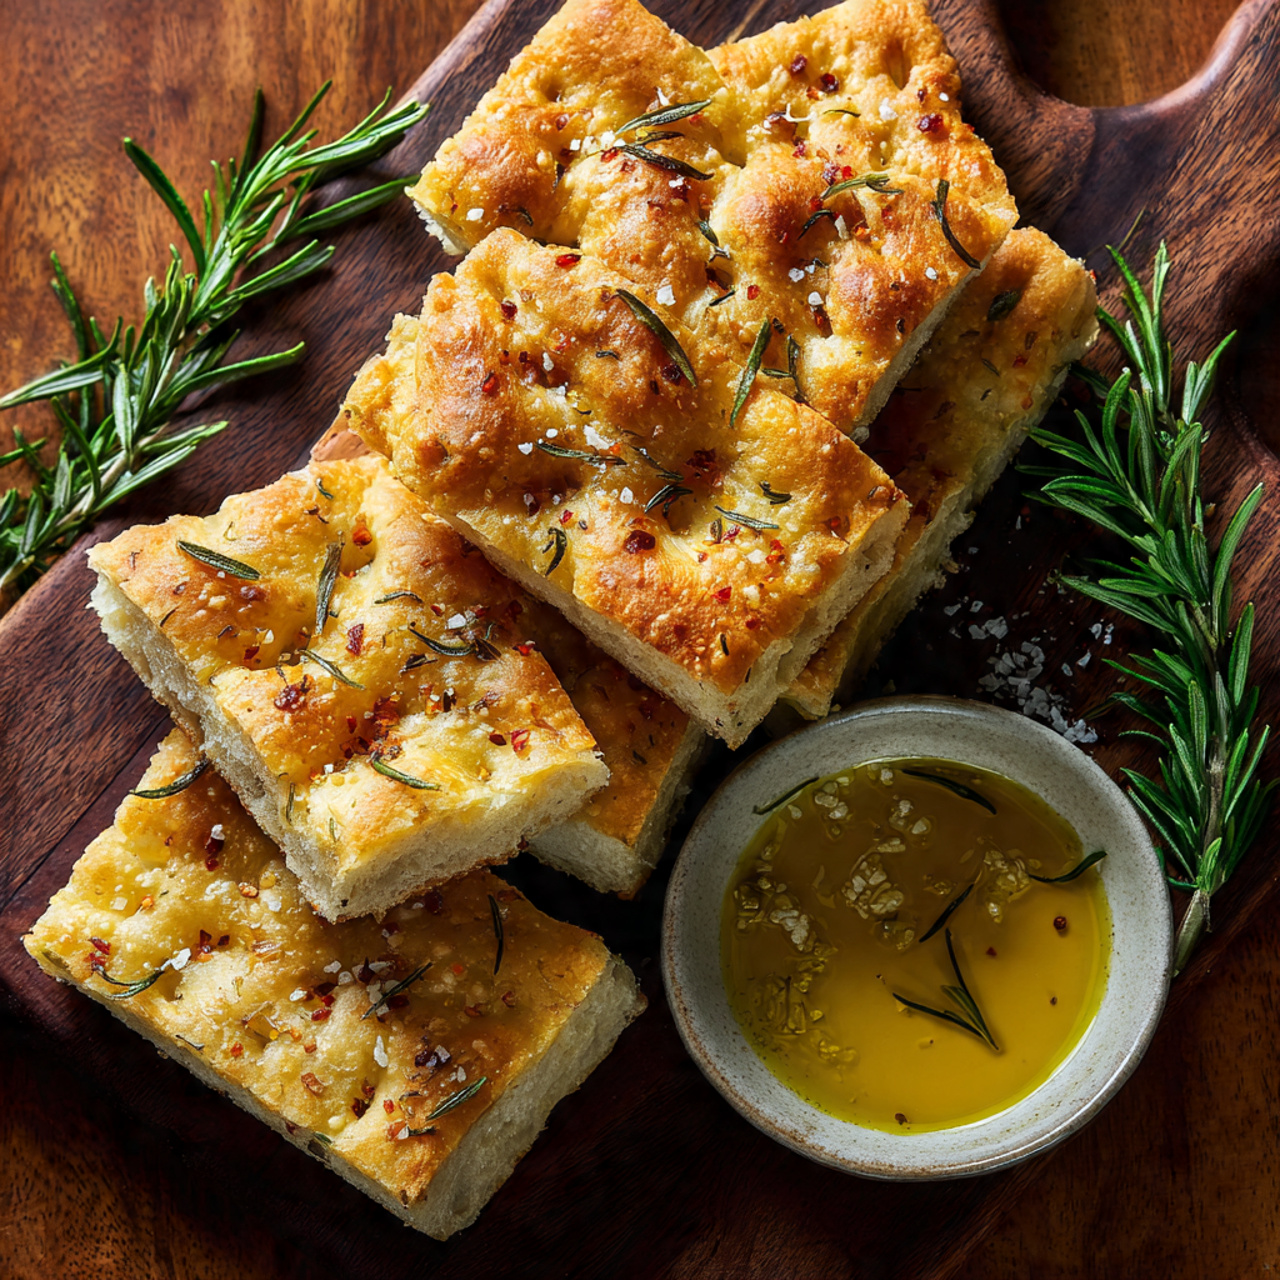
The soul of Ligurian focaccia: crisp top, pillowy crumb, and a briny sheen of olive oil
A true Genoese loaf speaks in contrasts: a crisp top that shatters and a soft, pillowy crumb beneath.
We measure authenticity by size and color. Local bakers aim for roughly 2 cm height so the surface browns to a hazelnut-golden tone while the interior stays ivory and tender.
What makes it “Ligurian”: height, color, and that balanced salt-oil finish
The surface is pocked with deep dimples that hold brine and oil. These tiny pools bake into little salty pockets that pop with each bite.
A light, floral bitterness from quality olive oil balances the glitter of salt. The edge seal is crucial: it keeps liquid from sliding under the dough and steaming the crumb, so the top stays crisp and the edges remain defined.
Experience meets craft: why starting the day before pays off
We start with an overnight sponge because slow fermentation pulls sweetness from flour. The dough relaxes, becomes extensible, and the final loaf shows nuanced flavor and easy digestibility.
- Size: about 2 cm for the classic profile.
- Dimples: reservoirs for brine and oil, not decoration.
- Edges: sealed to protect crispness and structure.
| Trait | Visual/Texture | What it signals |
|---|---|---|
| Crust | Hazelnut-golden, crisp | Proper caramelization and heat |
| Crumb | Ivory, airy, pillowy | Correct hydration and fermentation |
| Surface | Deep dimples with brine sheen | Balanced salt, oil, and texture |
Ingredients and tools that set you up for success
A few precise ingredients and honest tools set the stage for a good bake in any US kitchen. I list what I use at home and why each choice matters, so you get consistent results without fuss.
Flour, water, yeast, salt, sugar, and extra-virgin olive oil
For the sponge use 1 cup (130 g) all-purpose flour, 1/4 cup (60 ml) water, and 1/4 tsp (0.6 g) active dry yeast. It ferments 12–14 hours and gives depth.
Main dough: 500 g AP flour; about 1 cup + 3 tbsp (280–310 ml) cold water; 9 g salt; 12 g sugar; 2.5 tbsp olive oil; 2 1/4 tsp active dry yeast. Keep the water cool for a slower rise and better flavor.
Pan size, sheet thickness, and why a wire rack matters
Use two 13×10 inch pans or one 18×13 inch sheet to hit the classic thickness. Lightly oil the pan — 1/4 cup total — to crisp the bottom and help release the loaf.
Move the hot bread to a wire rack right away. That airflow prevents a soggy bottom and keeps the crust lively.
Measuring cups, tablespoons, and a bowl you can cover
- Use a sturdy bowl you can cover with plastic wrap to hold the sponge overnight.
- Measuring cups and tablespoons work in this tested US-friendly approach, though weighing flour is ideal.
- Keep a bench scraper and a wire rack on hand for tidy handling.
| Item | Why it matters | Suggested measure |
|---|---|---|
| Flour | Tender crumb and enough structure | 500 g + 130 g for sponge |
| Water | Controls fermentation and hydration | 280–310 ml total; 60 ml for sponge |
| Pan / Sheet | Determines final thickness and bake | Two 13×10 in or one 18×13 in |
I keep the setup simple: quality ingredients, a reliable bowl with plastic, and the right pan size. That small kit protects the work we put into the dough and makes the bake repeatable every time.
Build flavor overnight: the sponge that makes the dough sing
The quiet magic of great bread often begins the night before, in a small jar on the counter. A short, slow pre-dough gives real depth without fuss.
Mixing the pre-dough at room temperature for 12–14 hours
Stir together 1 cup (130 g) flour, 1/4 cup (60 ml) water, and 1/4 tsp (0.6 g) active dry yeast until shaggy. No kneading is needed.
Transfer the mix to a small bowl or jar, cover with plastic wrap, and let it rest at room temperature for 12–14 hours. Using a clear container helps you watch the rise.
How the sponge boosts aroma, digestibility, and rise
- You’ll know it’s ready when it is risen, bubbly, and smells lightly sweet and wheaty.
- The tiny pre-dough builds acidity and enzymes that unlock flavor and make the crumb easier to digest.
- It also relaxes gluten so the main dough stretches without tearing and gains a better rise.
- If your kitchen runs warm, check a bit sooner; if cool, give it the full time — patience pays off.
This simple step is the baker’s shortcut. In the morning the sponge slips into your recipe and does most of the flavor work. For a deeper dive on technique, try this concise authentic Italian focaccia method.
Knead, stretch, and fold: developing gluten the right way
Feel the dough change under your hands—that is where texture is born.
Combine the sponge with flour, sugar, salt, and very cold water and mix until shaggy. Cold water slows fermentation and sharpens flavor.
Active dry yeast, water temperature, and when to add oil
Dissolve active dry yeast in a splash of lukewarm water. Add that and the olive oil after the initial mix so gluten forms before the fat softens the structure.
Knead by hand about 5 minutes, then add the yeast-water and oil. Continue 5–10 minutes until the dough is smooth, elastic, and slightly tacky to the touch.
Bench work: folds, “wallet” shaping, and resting the dough
Finish by hand even if you used a mixer. Short rests of 2–3 minutes during kneading let the gluten relax and make the work easier.
- Fold the dough like a wallet: two letter folds at 90° to tighten the crumb.
- Rest 30 minutes so the dough relaxes and stretches without snapping back.
- A rolling pin can give a gentle initial flattening, but don’t press out the gas.
High hydration handling: oil your hands, not your surface with flour
For high-hydration dough resist adding extra flour. Lightly oil your hands and the surface so the dough slides and you keep an open crumb.
| Action | Textural Cue | Minutes |
|---|---|---|
| Initial mix (sponge + flour + water) | Shaggy, cohesive mass | 0–5 |
| Knead then add yeast-water + oil | Smooth, elastic, slightly tacky | 5–10 |
| Wallet folds and rest | Tightened surface; relaxed interior | 30 |
| Final feel check | Supple, pulls without tearing | — |
Set a timer for each rest and trust the minutes. The quiet patience here yields a tender, even crumb for your next loaf of bread.
Pan prep, first stretch, and rise time that respects the dough
Prepare your sheet carefully—this small step saves you from patching leaks later. A good pan setup makes the bake predictable and keeps the brine where it belongs: on the surface, not underneath.
Greasing the sheet pan and keeping edges sealed
Pour about 2 tablespoons of oil into each pan or sheet and spread it evenly. Leave the corners a little cleaner so the dough can grip and form a natural seal.
Gently transfer the dough and stretch it to cover roughly 70–75% of the pan. This first stretch lets gluten relax and protects the gas pockets you want in the crumb.
Covering with plastic wrap, room temperature proofing, and dough cues
Cover the pan with plastic wrap and let the dough rest 20–30 minutes. Short pauses like this make the next stretch effortless and cut tearing.
After the rest, stretch the dough to the edges and press along the perimeter to seal the edge. If it snaps back, give it more time in the room—proofing at room temperature helps it become silky and obedient.
- Keep the surface lightly oiled; avoid flour on the pan to preserve browning.
- Watch the dough, not the clock: when a firm poke leaves a soft indent that springs back slowly, it’s ready.
- Those extra minutes of resting save you from fighting the dough and help build an even thickness across the pan.
| Step | Action | Timing |
|---|---|---|
| Grease | 2 tbsp oil per pan/sheet | Before transfer |
| First stretch | Cover 70–75% of surface | Then rest 20–30 minutes |
| Final stretch | Stretch to edges and press to seal | When indentation test passes |
olive focaccia ligurian recipe: dimples, brine, and that signature texture
The finish line of the prep stage is simple but exact: deep dimples and a salty soak. This is where touch creates the valleys that hold flavor and shine.
Dimpling with three fingers at an angle
Dust the surface lightly with flour. Use your index, middle, and ring fingers at about a 45° angle and press with the pads, not the tips. Work across the dough so broad, elongated valleys form rather than tiny punctures.
The brine ratio and where it should pool
Mix 1 cup water with 1 3/4 teaspoons salt until fully dissolved. Pour the brine over the dough so it settles into the dimples. Add about 2 tablespoons of olive oil per pan; it will look like a lot, but that pooling is intentional.
Final finish: salt flakes, oil, and proof
Scatter flaky salt over the glazed surface. Keep the edges sealed; press any seepage back down. Proof uncovered 40–60 minutes until the dough is puffy and a pressed dimple holds a soft rebound.
- Gentle touch protects pockets of gas in the dough.
- Brine in the valleys creates salty pops at every bite.
- Oil on top crisps the surface and seals aroma.
| Action | Visual Cue | Why it matters |
|---|---|---|
| Dimpling (three fingers) | Wide, elongated valleys | Holds brine and preserves crumb |
| Brine (1 cup + 1 3/4 tsp) | Pools in dimples, glistening | Even seasoning and moist pockets |
| Final proof (40–60 minutes) | Puffy surface, slow rebound | Sets texture before baking |
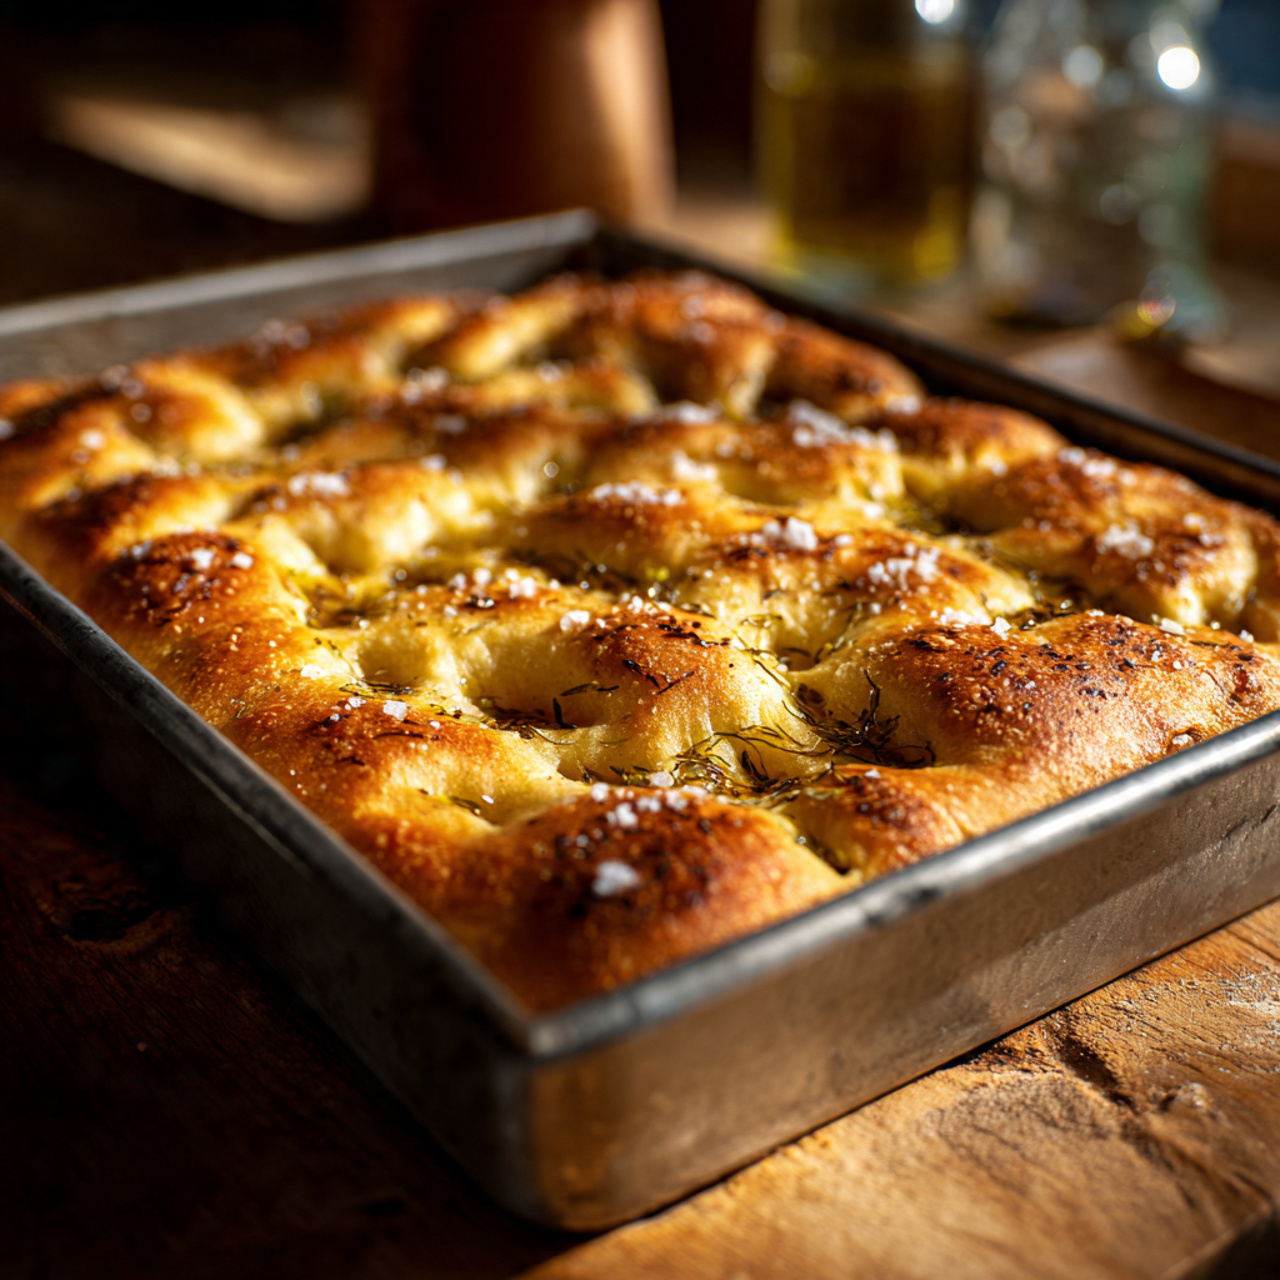
Bake until golden, then oil and cool for the perfect crunch

The last stage is where the oven and timing turn our work into a golden loaf. Preheat oven to 450°F and position two racks in the upper and lower thirds so heat circulates evenly around each sheet.
Preheat oven, rotate trays, and read the color
Slide the pan onto a rack and bake 15–18 minutes. At the halfway point turn top to bottom and rotate front to back for even baking. Watch the time, but trust color: a golden surface with light-beige dimples signals doneness.
Oil, release, and cool on a rack
As soon as it leaves the oven I brush a little olive oil over the hot crust to revive shine and scent. Use a spatula to loosen edges, then lift the loaf from the pan onto a wire rack so steam can escape from the bottom.
- If you spot condensation, flip briefly to release steam, then return upright on the rack.
- The bottom should be crisp, not hard; the oil in the pan helps create that delicate crunch.
- Give the dough a few minutes to set before slicing—rushing tears the crumb.
Serve, store, and reheat the Ligurian way
A warm square straight from the pan invites simple, joyful ways to eat it. I like to cut it into big pieces for the table or into thin fingers for an aperitivo. In our home we also split loaves for sandwiches filled with salumi and cheese.
From breakfast dunking to sandwiches: slices, fingers, and edges
For a true local moment, dunk a piece into your morning cappuccino. The salty and sweet contrast brightens the bite. Serve warm, brush with a little olive oil if you like, and tear rather than slice for a rustic feel.
Same-day best practice, freezing with plastic wrap, and recrunching in the oven
Eat this bread the same day when the crust is at its best. If you must keep it, wrap tightly in plastic wrap and freeze. To restore, place slices on a rack in a hot oven for a few minutes—this recrunches the surface without soggy spots. Avoid the microwave; it softens the crust.
Troubleshooting rise, temperature, and yeast freshness
If the dough stalls, check the yeast and room temperature. Cooler kitchens need more hours or a warmer spot. Create a gentle proof box by placing the covered pan in a turned-off oven with a bowl of hot water to raise temperature and speed proofing.
- Brush a light coat of oil before serving to revive aroma.
- If brine runs under the dough, press the edge firmly to the pan next time.
- Keep notes on minutes, temperature, and rise behavior to refine future bakes.
| Problem | Likely Cause | Fix |
|---|---|---|
| Slow rise | Old yeast or cool room | Warm proof box; give extra hours |
| Soggy bottom | Edge not sealed | Press perimeter to pan; less brine at edge |
| Flat crust after reheating | Microwave used | Recrisp on rack in hot oven for a few minutes |
Bring a slice of Liguria home today
Start tonight with a humble sponge and your dough will do the rest by morning. This simple time investment is the way local bakers get deep flavor with little fuss.
We followed the same bakery steps: overnight sponge, deep dimples, a brine bath, and a hot 450°F bake. Brush the hot top with olive oil and cool on a rack for the best crust.
This recipe is one of the recipes I reach for when I want the table to go quiet at first bite and then light up with smiles. It’s an easy way to learn rhythm and feel.
Keep good oil on the counter and practice will turn technique into habit. Share a warm square and make this focaccia part of your family’s recipes — the Ligurian way.
Olive Focaccia Ligurian Style
Ingredients
Method
- Stir together flour, water, and yeast until just combined.
- Cover with plastic wrap and let rest 12–14 hours at room temperature.
- It’s ready when bubbly and slightly sweet-smelling.
- In a large bowl, combine the sponge, flour, sugar, salt, and most of the cold water.
- Mix until shaggy.
- Dissolve yeast in a splash of warm water (100–110°F) and add it along with the olive oil.
- Knead by hand 8–10 minutes until smooth, elastic, and slightly tacky.
- Let the dough rest 30 minutes.
- Give two “wallet” folds at 90° angles to tighten structure.
- Rest again until relaxed and stretchy.
- Lightly oil two 13×10 inch pans (or one 18×13 inch).
- Pour about 2 tbsp oil per pan and spread evenly.
- Transfer dough to the pan and stretch to cover 70–75 % of it.
- Cover and rest 20–30 minutes.
- Gently stretch to the edges and press along the perimeter to seal.
- Mix 1 cup water with 1 ¾ tsp salt.
- Lightly flour the dough surface.
- Using three fingers at a 45° angle, press deep dimples all over.
- Pour brine evenly so it pools in the valleys.
- Drizzle 2 tbsp olive oil on top and scatter coarse salt flakes.
- Let the dough rest uncovered 40–60 minutes until puffy.
- A gentle press should leave a soft, slow-springing indent.
- Preheat oven to 450°F (230°C).
- Bake 15–18 minutes, rotating trays halfway through.
- The surface should be hazelnut-golden with light-beige dimples.
- Brush hot focaccia with olive oil for shine.
- Loosen edges and lift onto a wire rack.
- Cool 5–10 minutes before cutting.
- Serve warm, tear into rustic pieces, or slice for sandwiches.
- Dunk in coffee or pair with cured meats and cheese.
Notes
- Cool water slows fermentation for a better flavor and lighter crumb.
- Always seal pan edges well so the brine doesn’t slip underneath.
- For a crisp bottom, move baked focaccia to a wire rack immediately.
- Reheat leftovers on a rack in a hot oven for 5 minutes — never microwave.
- A drizzle of good olive oil before serving revives aroma beautifully.