
Jump to Recipe
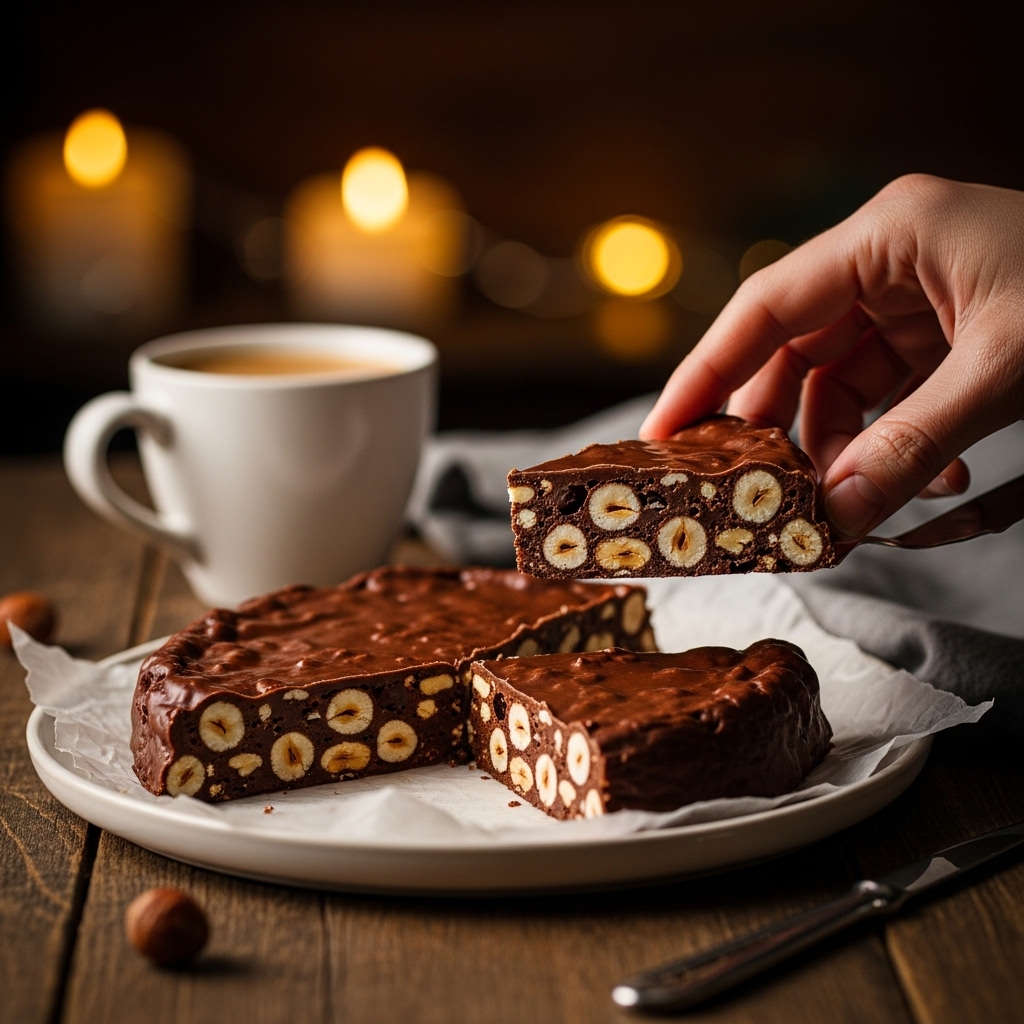
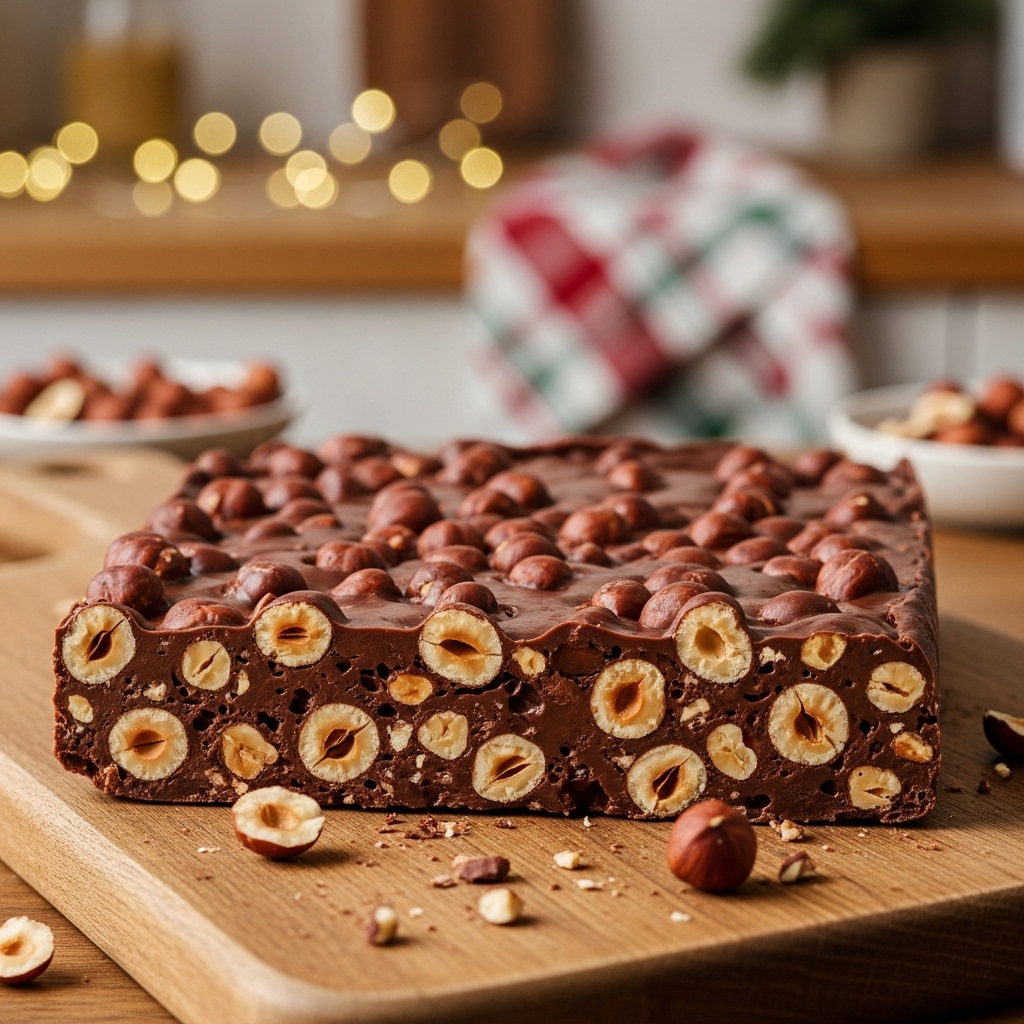
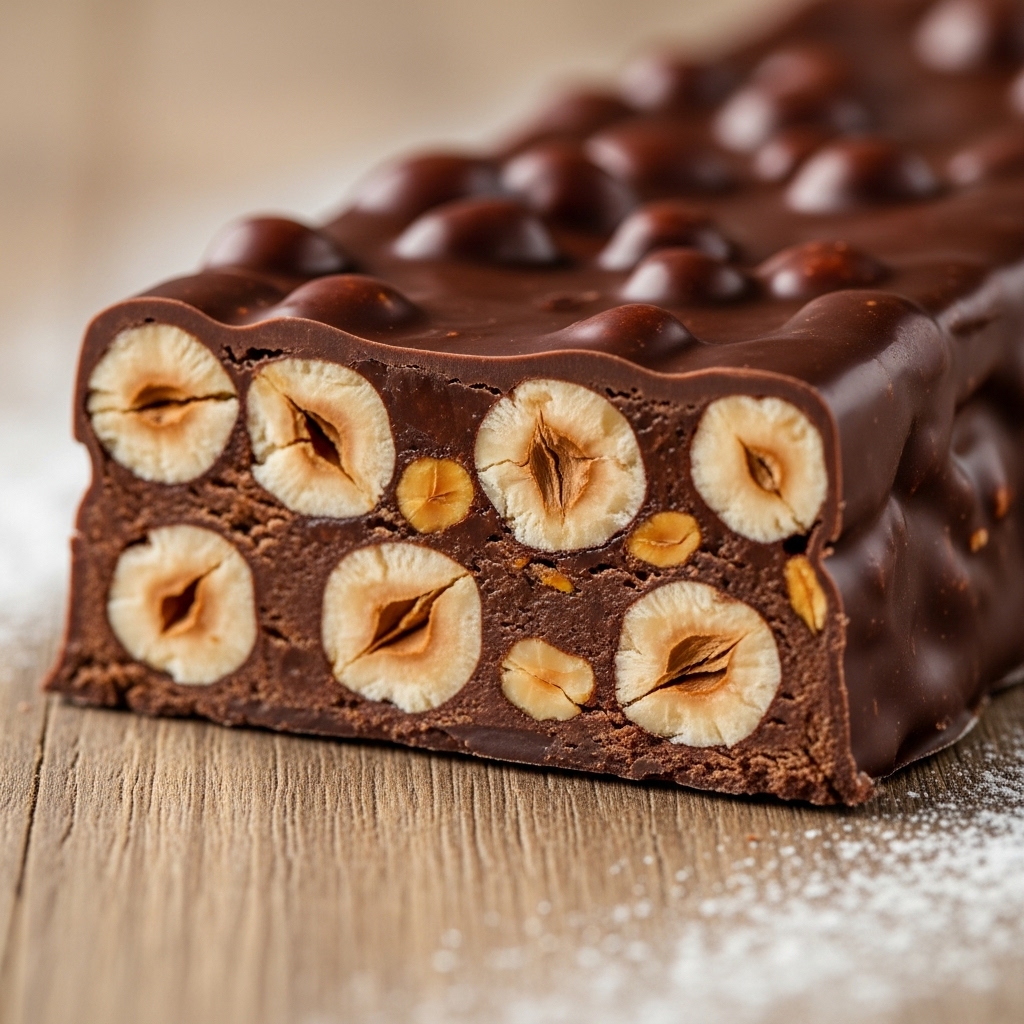
There’s a particular satisfaction in slicing through a glossy, dark slab to reveal a mosaic of toasted hazelnuts. This version of the classic confection is a far cry from the ancient honey-and-egg-white nougat many imagine. It’s a modern, deeply beloved interpretation that has carved out its own essential place on holiday tables.
What makes this formula so special is its beautiful simplicity. With just three core components, you can create a rich, fudgy dessert that feels both impressive and entirely approachable. The texture is wonderfully creamy, a perfect contrast to the nutty crunch within.
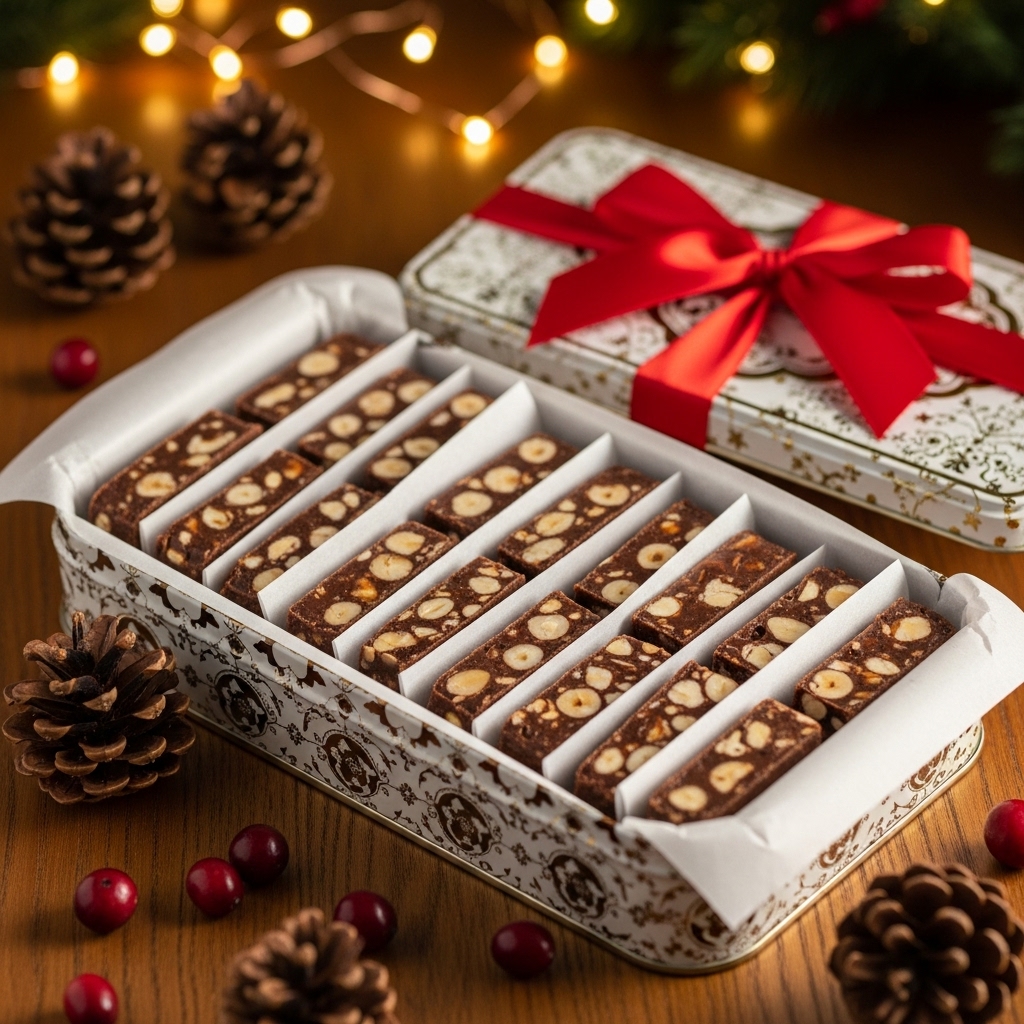
This is the kind of make-ahead delight that simplifies your festivities. It stores beautifully and travels well, making it an ideal homemade gift. It satisfies the desire for a special sweet that isn’t a cookie or a cake.
This guide will walk you through every step, from essential equipment to storage tips. My goal is to ensure your success, honoring the tradition while focusing on clear, reliable results in your own kitchen.
Key Takeaways
- This recipe is a modern, chocolate-based version of traditional torrone.
- It requires only three main ingredients for an authentic, rich result.
- The final texture is creamy and fudge-like, studded with toasted hazelnuts.
- It’s an excellent make-ahead dessert option for the holiday season.
- The confection stores well and is perfect for gifting.
- No advanced candy-making skills are needed for success.
- This guide provides complete instructions for equipment, timing, and variations.
Exploring the Rich Tradition of Torrone
Across generations, this nut-studded confection has held a special place in celebratory traditions. Its story begins in medieval times when honey-based sweets were treasured for special occasions.
The classic version of this candy features a delicate balance of flavors. Cooks combine honey and sugar with whipped egg whites to create a marshmallowy nougat base. Toasted almonds or hazelnuts get folded into this sweet mixture before pressing into slabs.
The Historical Roots of Italian Nougat
Regional variations developed across different areas, each with local pride. Northern regions typically prefer the soft, chewy style called morbido. Southern versions often feature a firmer, crunchier texture known as duro.
This diversity reflects how communities adapted the basic formula using local ingredients. The tradition remained consistent while allowing for creative expression.
Modern Twists on a Timeless Treat
Contemporary interpretations maintain the spirit of the original concept. Instead of the honey-meringue base, modern versions use melted chocolate and hazelnut spread. This creates a fudge-like texture that still showcases the beautiful nut mosaic when sliced.
Both classic and contemporary versions serve the same purpose. They create a special homemade treat meant for sharing and savoring during festive gatherings. The evolution honors the past while embracing new possibilities.
Secrets Behind a Classic Christmas Chocolate Torrone Italian
The true beauty of this chocolate torrone lies in its elegant simplicity. Just three core ingredients carry the entire recipe. This means your choices here define the final result more than any technique.
Your selection of chocolate is the first and most impactful decision. You can use semi-sweet, dark, milk, or even white chocolate. Each type creates a different personality for your confection. The intensity and sweetness level will shape the entire experience.
Consider the quality of your chocolate carefully. Standard grocery store baking bars work perfectly for a reliable, everyday treat. If you are making this for a special gift, investing in a higher-quality chocolate pays dividends. You will notice a smoother texture and a richer, deeper flavor.
Next, the hazelnut spread plays a dual role. It contributes a distinct hazelnut flavor while also creating the signature creamy, fudge-like texture. This is why the recipe specifies a full measure; reducing it compromises the dessert’s essential character.
The third key component is whole, raw hazelnuts. Starting with nuts that still have their skins is important. The process of roasting them and removing the skins, which we will cover next, is crucial. It unlocks their full, toasty flavor and ensures the best texture.
Some variations include an extra chocolate coating for a polished look. The three-ingredient base, however, is what makes this version so approachable and dependable. Success is not about advanced skills. It is about respecting these few, high-quality ingredients and handling them with care.
Step-by-Step Guide to Crafting Your Torrone
Building this dessert begins with developing the deep, toasty flavor of properly prepared hazelnuts. The process unfolds in two clear stages that ensure perfect texture and flavor balance.
Roasting and Preparing Hazelnuts
Start by preheating your oven to 350°F. Spread raw hazelnuts in a single layer on a baking sheet. This allows even heat distribution for consistent roasting.
Roast for about 15 minutes, shaking the pan halfway through. You’ll know they’re ready when the kitchen fills with their rich, nutty aroma. Let them cool slightly before handling.
Transfer warm nuts to a clean kitchen towel. Rub them together gently to remove the papery skins. Don’t worry if some bits remain—this won’t affect your final result.
Melting the Chocolate and Folding in Nutella
Chop your chocolate finely and place it in a large microwave-safe bowl. Heat in short 30-second intervals, stirring after each burst. This prevents scorching and ensures smooth melting.
Add the hazelnut spread to the warm, melted chocolate. Fold gently until the mixture becomes completely uniform. The goal is a creamy, streak-free base.
Finally, fold in your toasted hazelnuts. Distribute them evenly throughout the mixture. This creates the beautiful mosaic pattern that makes each slice special.
Essential Equipment and Practical Kitchen Tips
You’ll be pleased to know that creating this confection requires no specialized kitchen gadgets. Success hinges on a few basic items and a smart setup. This makes the process smooth from start to finish.
Focusing on the right equipment ensures your final slices look as beautiful as they taste. A little preparation goes a long way.
Choosing the Right Pan and Parchment Setup
A standard 9×5-inch loaf pan is the perfect vessel for this recipe. It creates a classic, thick slab. If you own a longer 12-inch loaf pan, you will get more, slightly thinner slices.
This smaller portion size suits the rich nature of the dessert beautifully. A silicone loaf pan is another excellent choice. It allows for easy release without any lining.
For metal or glass pans, a proper parchment paper setup is key. Lightly spray the pan first. This helps the paper adhere to the sides.
Cut a piece of parchment so it overhangs on the two long sides. These create handy “handles.” They let you lift the entire set block out cleanly for slicing.
Using a Sharp Knife for Clean Slices
The final step is achieving clean, elegant slices. A large, sharp chef’s knife is your best tool here. It cuts through the firm texture and nuts without crumbling.
If the dessert is very cold from the fridge, let it sit for a few minutes. A slightly warmer temperature makes slicing even easier. For a coated variation, a pastry brush helps spread melted chocolate evenly.
The goal is a simple equipment list that delivers impressive results. Your careful setup pays off with a stunning presentation.
Mastering Temperature and Timing for Ideal Texture
Once your ingredients are combined, the setting phase determines the final texture and slicing quality. This stage offers flexibility that accommodates different schedules and personal preferences.
Room Temperature vs. Refrigeration: What You Need to Know
After spreading the mixture evenly in your prepared pan, the dessert needs time to firm up completely. You have two reliable options for this setting process.
Leaving it at room temperature overnight allows for slow, gradual hardening. This method typically takes six hours or more. The result is a slightly softer, fudgier texture that slices beautifully.
If you’re short on time, refrigeration speeds up the process significantly. The cooler environment firms the mixture in just three to six hours. This creates a denser texture that some prefer for cleaner slicing.
Make sure to account for one important detail with the refrigeration method. When cold, the dessert becomes quite firm. Let it sit at room temperature for ten to fifteen minutes before cutting. This brief warming period makes slicing much easier.
Using a Candy Thermometer for Accuracy
Traditional honey-based versions require precise temperature monitoring with a candy thermometer. Specific ranges between 290-310°F create either soft or hard textures.
This chocolate version simplifies the process considerably. It sets through cooling rather than reaching specific cooked temperatures. This makes the timing much more forgiving for home cooks.
After the initial setting, storing your creation in the fridge extends its shelf life to two or three weeks. You can slice pieces as needed, allowing them to come to room temperature for optimal texture.
Both approaches work well, so choose based on your schedule and desired consistency. The flexibility in timing ensures success regardless of your available hours.
Creative Variations and Flavor Enhancements
While the classic three-ingredient version is wonderfully complete, exploring variations can make this confection uniquely your own. These thoughtful adjustments honor the traditional spirit while allowing personal expression.
Each change should feel purposeful rather than gimmicky. The goal is enhancement, not transformation of the dessert’s essential character.
Mixing Milk, Dark, or White Chocolate for Unique Profiles
Your choice of chocolate dramatically shapes the final experience. Dark varieties create a sophisticated, less sweet result with deeper cocoa notes.
Milk chocolate produces a sweeter, more approachable version that appeals to younger tastes. White chocolate offers a creamy, mild base that lets the hazelnut flavor shine brightly.
For a striking visual effect, try swirling two types together before adding nuts. This creates a marbled cross-section that looks as beautiful as it tastes.
Adding Citrus Zest or Vanilla for a Fresh Twist
Traditional flavor enhancements borrow from classic preparations. A teaspoon of vanilla extract folded into the melted chocolate adds comforting warmth.
Finely grated citrus zest provides bright contrast to the rich base. Orange or lemon zest cuts through the sweetness beautifully.
Nut substitutions offer another avenue for customization. While hazelnuts are traditional, toasted almonds or pistachios work equally well. Just ensure whatever nuts you choose are properly toasted first.
These variations let you adapt the recipe to different preferences and occasions. The foundation remains solid while the possibilities for personalization are nearly endless.
Nutritional Insights and Serving Suggestions
Knowing what goes into each serving allows for mindful enjoyment of this traditional sweet. Understanding the nutrition helps us appreciate it as a special occasion treat rather than an everyday snack.
Caloric Breakdown and Ingredient Benefits
Each slice provides substantial energy from quality ingredients. The variation depends on your specific chocolate choice and proportions.
| Nutrient | Source 1 (per slice) | Source 2 (per slice) |
|---|---|---|
| Calories (kcal) | 390 | 380 |
| Carbohydrates | 35g | 26g |
| Protein | 5g | 6g |
| Fat | 26g | 30g |
| Sugar | 26g | 17g |
| Fiber | 5g | 5g |
The fat content comes primarily from nuts and cocoa butter. Protein comes from the hazelnuts, while carbohydrates include natural sugars. The 5g fiber comes from both ingredients.
Hazelnuts provide healthy monounsaturated fats, vitamin E, and minerals. Dark varieties offer antioxidants. This rich dessert satisfies in thin slices.
Serve with strong coffee to balance sweetness. The recipe yields 15-20 servings from one pan. Enjoy after dinner or as a gift during festive gatherings.
Storing, Gifting, and Enjoying Your Homemade Torrone
The care you put into making this dessert deserves equal attention when it comes to preservation and presentation. Proper handling ensures your creation stays fresh and beautiful whether you’re enjoying it at home or sharing it with others.
For short-term enjoyment, store sliced pieces in an airtight container at room temperature. Keep it in a cool, dry area below 70°F for up to one week.
Best Practices for Packaging and Freezing
Refrigeration extends freshness to two or three weeks. Use a sealed container to protect against moisture and odors. Let slices sit at room temperature for 10-15 minutes before serving for optimal texture.
Freezing offers long-term storage for up to six months. Wrap the whole loaf or individual slices tightly in plastic wrap. Place them in a freezer-safe container to prevent freezer burn.
| Storage Method | Duration | Special Considerations |
|---|---|---|
| Room Temperature | Up to 7 days | Cool, dry area below 70°F |
| Refrigeration | 2-3 weeks | Let sit before serving |
| Freezing | 6 months | Thaw in fridge overnight |
For gifting, layer uniform slices in decorative tins with parchment paper between each piece. Clear cellophane bags or bakery boxes showcase the beautiful nut mosaic. Prepare your gift a few days ahead and package it fresh for presentation.
Final Thoughts on Crafting a Memorable Holiday Treat
What begins as a few simple ingredients transforms into a gift of genuine care and flavor. This dessert honors a beautiful tradition while being entirely achievable in your kitchen. The process is forgiving, focusing on careful preparation rather than advanced skills.
Remember a few key details for the best results. Always start with a completely dry bowl when melting your ingredients. Keep your toasted nuts warm until you fold them in. Most importantly, allow ample time for the loaf to set properly. These small attentions make a significant difference.
You now have everything needed to create this special homemade treat. For those interested in the classic honey-based version, explore this authentic torrone morbido italiano recipe. May your creation bring warmth and joy to your table.
Chocolate Hazelnut Torrone
Ingredients
Method
- Preheat the oven to 350°F (175°C).
- Spread raw hazelnuts in a single layer on a baking sheet.
- Roast for 15 minutes, shaking the pan halfway through.
- Once done, let them cool slightly and then rub them in a clean towel to remove the skins.
- Chop the chocolate finely and place it in a microwave-safe bowl.
- Heat the chocolate in short bursts of 30 seconds in the microwave, stirring each time until melted and smooth.
- Add the hazelnut spread to the melted chocolate and fold until smooth and uniform.
- Once the chocolate mixture is smooth, fold in the roasted hazelnuts evenly, making sure the nuts are well-distributed.
- Line a 9x5-inch loaf pan with parchment paper, leaving extra paper hanging on the sides.
- Pour the chocolate-hazelnut mixture into the prepared pan and spread it evenly.
- Let the mixture set at room temperature for 6 hours or refrigerate for 3-6 hours for faster firming.
- Once firm, remove from the pan using the parchment paper handles.
- Slice into pieces using a sharp knife and serve. Let it sit at room temperature for 10 minutes if it was refrigerated for optimal texture.
Notes
- You can use milk, dark, or even white chocolate depending on your taste preference.
- If you're short on time, refrigerating the mixture speeds up the setting process.
- Ensure the hazelnuts are properly toasted for maximum flavor.
- If using a metal or glass pan, lining it with parchment paper is essential for easy removal.