
Jump to Recipe
My mini panna cotta cups recipe starts with a whisper of vanilla and a promise of silk — a no-bake Italian cooked cream that melts on the tongue. I love how warm cream and milk meet sugar and gentle gelatin to become a glossy, wobbling treat you can make ahead for guests.
This dessert is about texture as much as flavor. Bloom gelatin in cool liquid, never boil the mixture, and stir before you pour to avoid layers. Use whole milk and a rich cream ratio so the set stays smooth and stable.
I’ll share the quick timing cues: gently warm, fully dissolved gelatin, and a minimum four-hour chill (overnight is best). Serve the cups with bright berries and a squeeze of lemon for contrast, and cover leftovers tightly in the fridge for up to five days.
Key Takeaways
- Bloom gelatin; do not boil the dairy to keep a silky finish.
- Use whole milk and the right cream ratio for even set and richness.
- Chill at least 4 hours; overnight gives the best texture.
- Stir and strain before pouring to avoid layers or bubbles.
- Top with fresh or frozen berries and a touch of lemon for brightness.
Why these mini panna cotta cups belong in your dessert rotation
In about twenty minutes of hands-on time you can have a creamy, elegant dessert that chills into perfect portions. I love that the prep is simple: warm cream, dissolve gelatin, then let the fridge do the rest. This makes it an ideal dish to make ahead for a dinner or party.
Quick to prep, elegant to serve, easy to make ahead
From pan to fridge the hands-on time is short, so you avoid last-minute stress. Serving in small vessels keeps portions tidy and makes every place setting feel thoughtful. Prepare a day or two ahead, then add a fresh topping just before guests arrive.
Silky texture with balanced sweetness and bright berry contrast
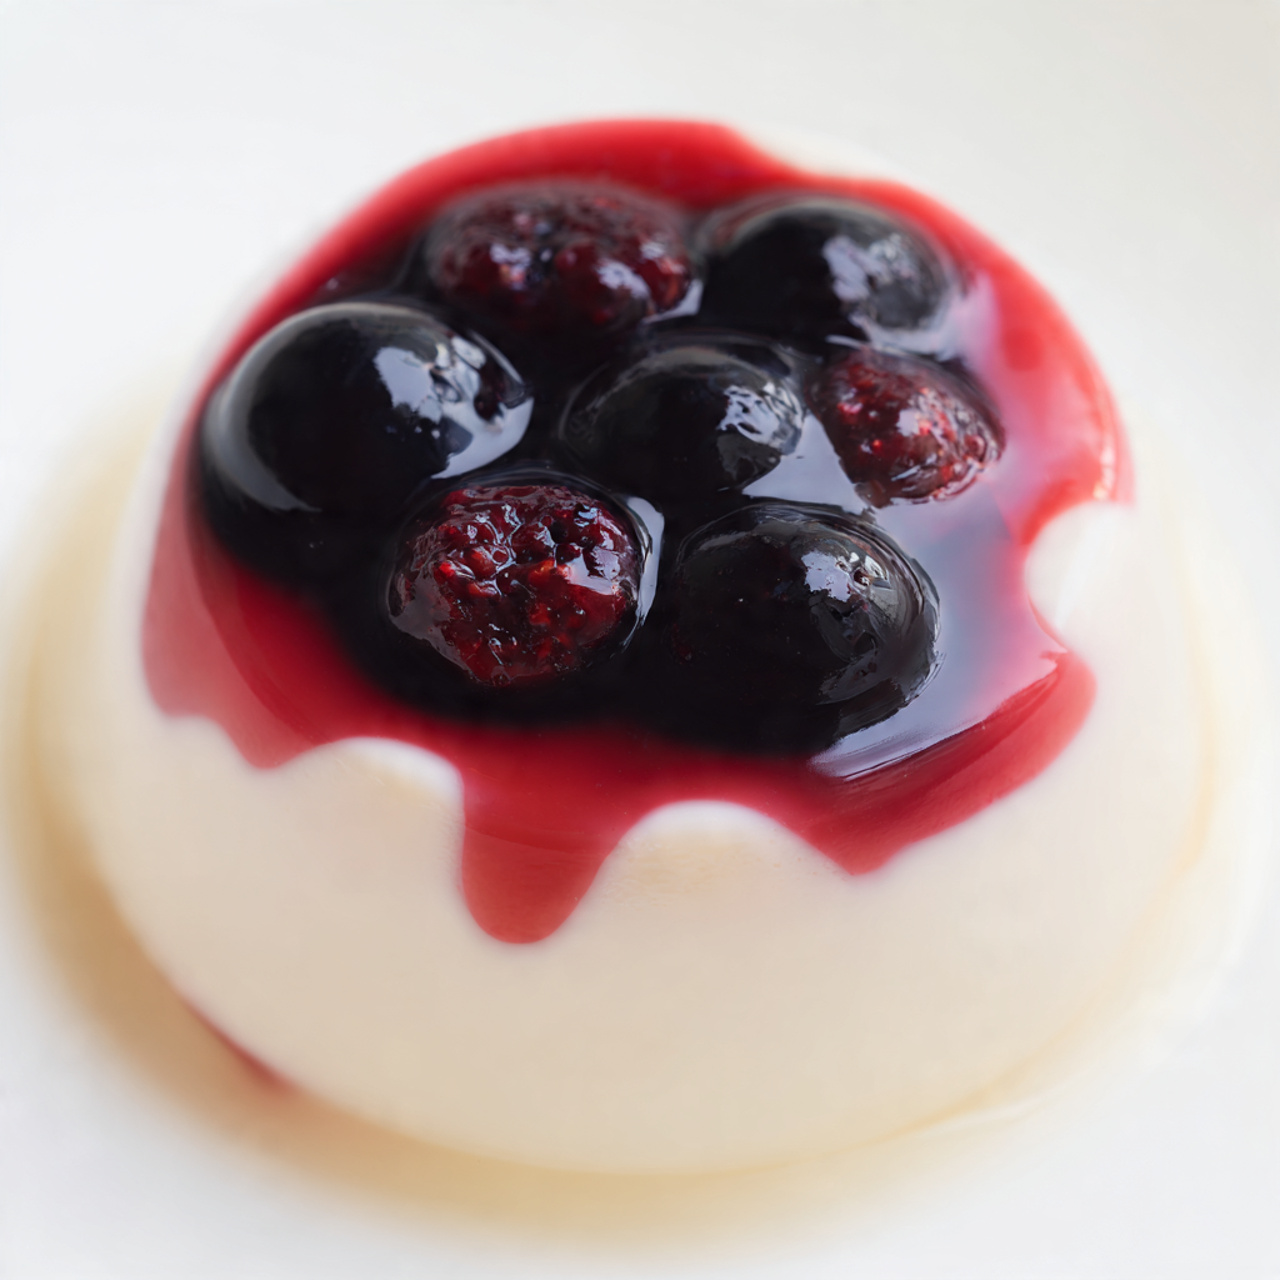
The secret is steaming the cream—never boil—and fully dissolving the gelatin for an ultra-smooth texture. A quick berry sauce of strawberries or mixed berries adds acidity and gloss that balances the lightly sweet cream.
| Step | Time | Serve | Topping |
|---|---|---|---|
| Hands-on prep | ~20 minutes | Small glasses or ramekins | Fresh berry sauce |
| Chill | 4 hours to overnight | Party-ready portions | Mint, nuts, or citrus zest |
| Cleanup | Minimal | Scales well for crowds | Optional compote bar |
What panna cotta is and how the classic “cooked cream” gets its signature texture
This classic Italian cooked cream relies on a few simple ingredients and a gentle touch to become silky and set. I like to explain the why so you trust each step and avoid common pitfalls.
The cream, milk, sugar, and gelatin science
Panna cotta is a no-bake custard made from cream and milk sweetened with sugar and held together by gelatin. There are no eggs here, so curdling is not a worry and the oven stays off.
Start by sprinkling gelatin over cool milk to bloom it. Blooming hydrates each granule so the gel dissolves cleanly later.
Finding the sweet spot between wobble and rubbery
- Warm the cream-milk mixture just to steaming—tiny edge bubbles in the pan—never a rolling boil.
- Remove from heat before adding dissolved gelatin, and stir until the blend is smooth and glassy.
- Use measured gelatin; too much or too much heat makes rubbery texture, while too little yields a floppy set.
- Whole milk helps keep the texture even; low-fat can separate and form layers.
For a practical example and flavor ideas, see my take on coconut panna cotta. Measured gelatin, steady heat, and calm stirring give the tender wobble we love in this dessert.
Ingredients you’ll need, plus pro notes from the test kitchen
Selecting the right cream and milk is the test kitchen secret that makes this dessert reliably silky. Below I give clear shopping choices and explain outcomes so you know what to buy and why.
Cream choices: whipping cream vs heavy cream
Whipping cream (~33% fat) yields a lighter texture. Heavy cream (~36% fat) tastes richer and gives a fuller mouthfeel. Both work; choose by the level of richness you want.
Whole milk matters
Use whole milk to prevent separation. Reduced-fat milk can create a pale top layer and a denser bottom. Cold ingredients heat more evenly when you steam the mixture.
Unflavored gelatin
Pick unflavored gelatin (Knox is reliable). Flavored or acidic gelatins often include additives that can curdle dairy or stop a clean set.
Vanilla, sugar, and salt
Real vanilla extract, a modest amount of sugar, and a pinch of salt keep the flavor bright and simple. Adjust sweetness so fruit toppings can shine.
Optional: sour cream
A spoonful of sour cream adds gentle tang and a satiny body. Use sparingly so the set stays smooth.
| Ingredient | Why it matters | Test-kitchen tip |
|---|---|---|
| Whipping cream | Light richness, airy mouthfeel | Use for a softer finish |
| Heavy cream | Higher fat, richer taste | Best when you want extra decadence |
| Whole milk | Prevents layer separation | Keep cold before heating |
| Unflavored gelatin | Reliable set without off-flavors | Measure amount carefully; bloom first |
- Plan the total amount by vessel size so richness feels balanced.
- Keep a bag of frozen berries for reliable topping options.
Step-by-step: how to make panna cotta without overcomplicating it
The method is simple and sensory: watch for steam, feel for silk, and trust the fridge to finish the job. I keep the work calm and chronological so you can self-correct by eye and touch.
Bloom gelatin and prep the milk
Off the heat, sprinkle gelatin evenly over a little cool milk and let it sit for 3-5 minutes so the grains hydrate and soften. This bloom avoids grit and makes the gel melt cleanly later.
Warm the cream mixture gently
In a pan, warm the rest of the cream, milk, and sugar over medium-low. Watch the pan for steam and tiny edge bubbles—stop before the liquid simmers or boils.
Combine, strain, and portion
- Slide the bloomed gelatin into the warm pan and whisk until it dissolves; add vanilla and taste.
- Pour the mixture through a fine sieve into a bowl to remove bubbles and stray bits.
- Stir briefly before you portion so the fat and milk solids stay suspended, then pour while the liquid feels silky-warm, not hot.
Chill time and finishing cues
Place the filled vessels on a level shelf in the fridge and chill for at least 4-6 hours; overnight gives the best texture. Keep them covered once cool to protect aroma and surface finish.
Mini panna cotta cups recipe
For a crowd or a quiet night, portioning this creamy set into small vessels makes serving effortless and elegant. I suggest choosing your vessel first so portions and presentation match the occasion.
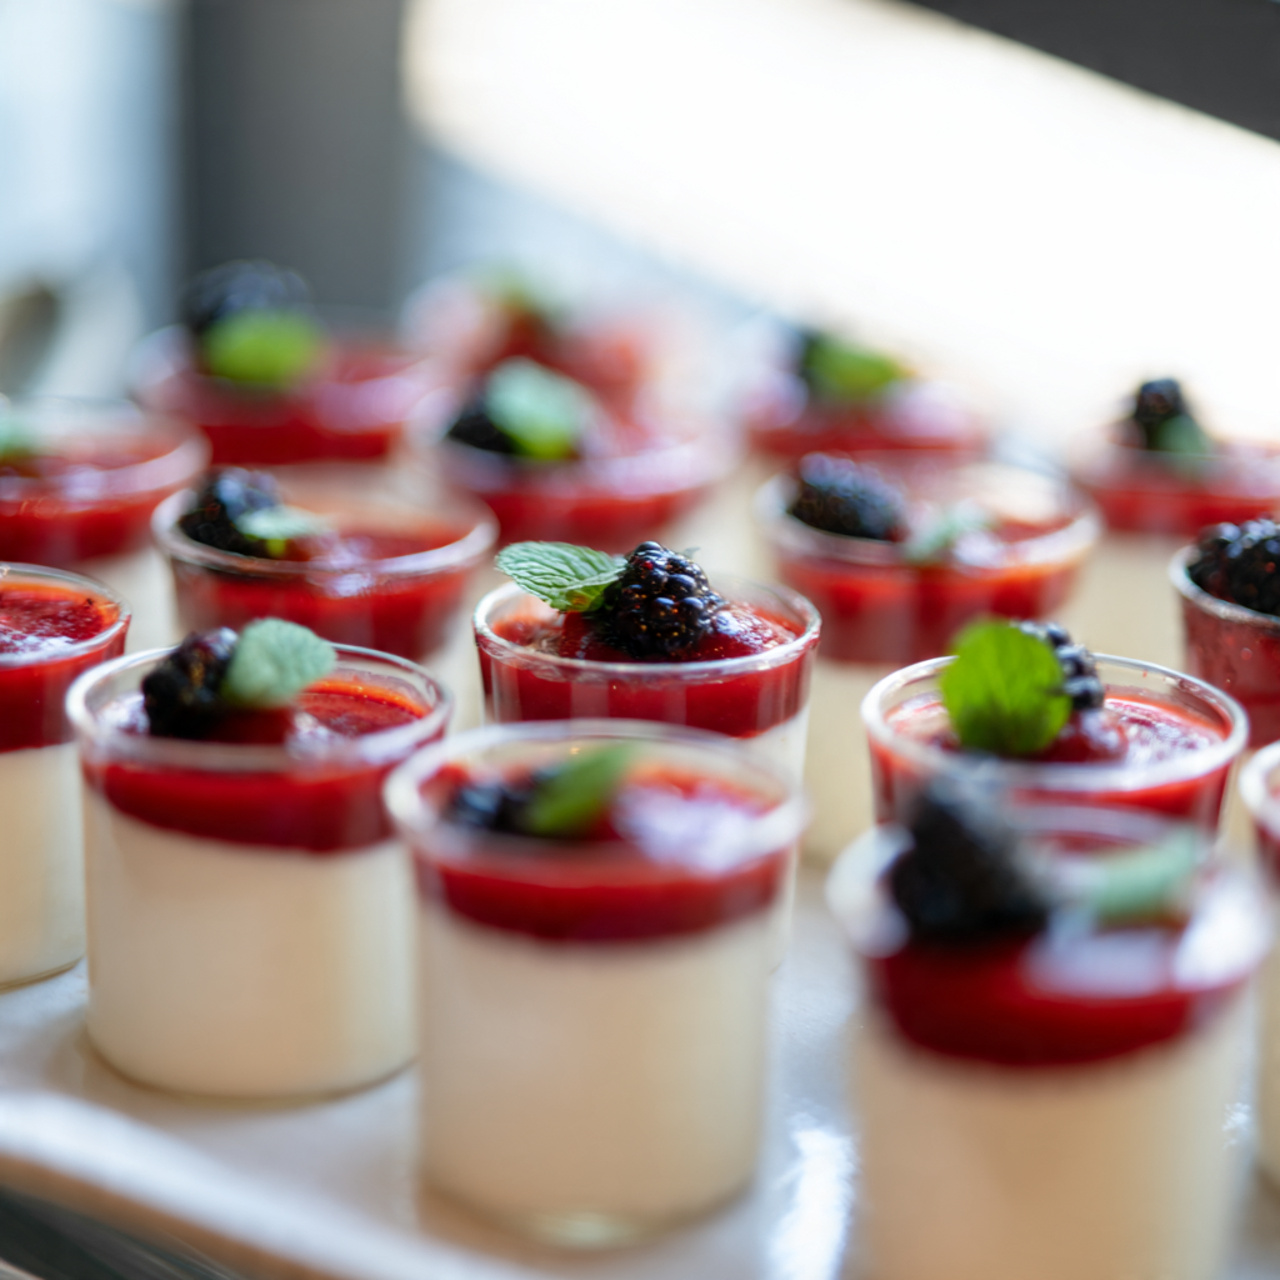
Shot glasses, 3-ounce cups, or ramekins: ideal amounts and fill lines
One tested batch yields about twelve 3-ounce cups or roughly thirty 1-ounce shots. Fill each cup to about 1/4 inch below the rim. That slim headspace keeps a berry sauce from spilling and makes plating tidy.
Stir before pouring to prevent layer separation
Stir the mixture gently just before each pour to keep the fat and milk suspended. If the base thickens while you work, a quick warm rinse of the pan loosens it—never reheat to a boil.
- For parties, 3-ounce cups feel generous; shot glasses let guests taste more flavors without getting full.
- Plan your amount: a standard batch fits twelve 3-ounce servings or about thirty 1-ounce shots.
- Line cups on a tray and move them level into the fridge to avoid slanted sets.
- If using heavy cream expect a richer mouthfeel; milk keeps the texture delicate.
- Chill uncovered 20 minutes to cool, then cover and refrigerate until fully set—about 4–6 hours.
Fresh berry sauce and mixed berry compote options
Bright berry sauces turn a simple chilled cream into something celebratory and effortless. I often keep both a syrupy sauce and a spoonable compote ready so guests can choose.
Frozen vs fresh, sugar to taste, and a splash of lemon
Frozen mixed berries are economical and cook down beautifully; they give consistent color and body when heated in a pan. Fresh raspberries or strawberries added at the end keep texture lively and bright.
Start with a small amount of sugar as the fruit warms and taste as you go. A squeeze of lemon juice off heat sharpens flavor and keeps the sauce vibrant.
Thickening: cornstarch versus quick syrup reduction
For a thicker compote, dissolve cornstarch in cold water and whisk it into the gently simmering pan a little at a time. For a glossy sauce, reduce briefly to a low boil and finish by stirring in a handful of fresh berries off heat.
When to cool and top
Keep the minutes short and the heat modest so berries don’t collapse into jam. Let the sauce cool to room temperature before topping a set dessert — warm sauce can loosen the set and cause condensation.
- Store sauce separately and spoon on just before serving for the best sheen.
- Keep a cup or two extra on hand for those who like more on top.
- A pinch of salt in the pan deepens berry notes without tasting salty.
Expert tips for flawless texture every time
A soft, reliable set starts with careful heat and calm hands at the stove. I share my best, experience-driven tips so you avoid common mistakes and end up with a glassy, even finish every time.
Never let gelatin reach a rolling boil. Bloom it first, then dissolve it over medium-low heat in the pan until the surface steams and faint edge bubbles form. High heat weakens gelatin and ruins the final set.
- Handle berries gently: a quick, low simmer preserves shape and color so toppings sit jewel-like.
- Always strain the mixture through a fine sieve to remove bubbles and undissolved bits for a clear surface.
- Whisk just enough to combine; over-whisking traps air and clouds the texture.
Use sensory cues: when the pan shows steam and tiny edge bubbles, you’re at the right heat. If the base cools and thickens, warm it lightly and stir until fluid again—do not boil.
| Problem | Cause | Quick fix |
|---|---|---|
| Weepy or weak set | Gelatin overheated | Rewarm gently, add a little bloomed gelatin, stir, then chill |
| Mottled surface | Too much air whipped in | Strain and pour slowly; whisk gently next batch |
| Mushy fruit topping | Overcooked berries | Shorten cook time and finish with fresh fruit |
| Flat vanilla flavor | Vanilla extract added too early to high heat | Add vanilla extract off heat to preserve aroma |
Flavor twists and toppings beyond berries
A few smart flavor swaps lift this gentle dessert from familiar to memorable in minutes. I like to keep the base pure and then add texture and contrast on top.
Infuse the base with split vanilla bean for speckled elegance, or stir cocoa into the mix for a chocolate version. A ribbon of ganache adds drama and a toasted nut finish gives crunch and balance.
Seasonal fruit and textured finishes
Swap fruit by season: peaches in late summer, cherries in June, mango when you want sunshine on a plate. Canned pineapple works if you want tropical notes—heat inactivate its enzymes so the gel still sets.
- Salted caramel and toasted nuts add sweet-tart contrast and crunch.
- Cookie crumbs—biscotti or amaretti—give an Italian café crunch.
- Citrus zest brightens the cream; lemon or orange pairs well with vanilla.
| Topping | Effect | When to use |
|---|---|---|
| Vanilla bean or extract | Warm aromatic lift, speckled look | Infuse base before chilling |
| Chocolate ganache or shavings | Richness and visual contrast | Finish just before serving |
| Toasted nuts & caramel | Crunch and salty-sweet balance | Great for parties and holidays |
| Fresh or canned fruit | Bright acidity and color | Use fresh fruit raw; can pineapple if cooked |
Avoid fresh pineapple on the set—its enzymes can break down gelatin and ruin the texture. When in doubt, offer a small fruit bowl so guests can choose how to top their serving.
How to unmold panna cotta cleanly for a plated presentation
The moment of release—from mold to plate—can feel like magic when you know a few reliable steps. I walk you through timing, tactile cues, and the gear I trust so every dish looks intentional on the table.
Hot-water dip, knife release, and the confident invert
Make sure the panna cotta is fully set; an under-set mixture tears as it leaves the mold. Briefly dip the ramekin rim in hot water for 5–10 seconds—do not let water touch the top—then wipe the base dry so the plate stays clean.
Run a thin knife around the edge to break any vacuum seal without gouging the sides. Invert onto a cool plate, give a confident tap, and lift straight up. Patience and a steady hand yield a pristine dome every time.
Silicone molds vs hard ramekins: which releases easier
Silicone molds release most easily. The flexible walls let the set slip out with minimal coaxing. Hard ramekins are classic; the hot-water dip softens the outer layer enough to free the cotta without damage.
- Plate first, then add berries or sauce so the surface stays neat.
- If the room is warm, chill plates in advance to keep the set firm.
- For events, test one unmold early and keep a pan of hot water nearby to refresh temperature between releases.
| Gear | Ease of release | Best use |
|---|---|---|
| Silicone molds | Very easy | Multiple unmolds, delicate shapes |
| Hard ramekins | Requires dip | Classic presentation, smooth sides |
| Shallow dishes | Moderate | Plated desserts for single servings |
Make-ahead, storage, and freezing guidance
A little planning keeps the dessert tasting fresh. I often make the batch a day or two ahead and store portions in the fridge, tightly covered, so the surface stays glossy and the aroma stays clean.
Refrigerate for 3 to 5 days; peak texture and flavor sit in that window. Add berry sauce or compote only at serving so the topping remains vivid and the set beneath stays pristine.
Freezing: what to expect and how to reduce damage
Freezing is not ideal. Thawing can separate fat and liquid and dull the silky texture. If you must freeze, wrap each portion tightly to limit ice crystals and thaw overnight in the fridge.
- Make the batch several days ahead; keep covered in the fridge to avoid surface skin and fridge smells.
- Stage plating by chilling for a few hours, garnish, then return to chill until serving.
- If thawed, refresh the topping with a quick whisk; do not stir the base itself.
- Use consistent whipping cream or heavy cream brands for stable texture across hours of storage.
| Storage method | Best for | Notes |
|---|---|---|
| Fridge, covered | Short-term (3–5 days) | Keeps shine; add sauce at serving; keep level on a pan or tray |
| Chill & stage | Event plating | Garnish just before arrival; cover again to protect surface |
| Frozen, wrapped | Last-resort long hold | Thaw in fridge overnight; expect slight texture change; re-gloss topping |
Serving ideas for parties, holidays, and weeknights
How you serve this classic makes all the difference: casual handheld portions for mingling or a composed plate for romance. I like simple formats that respect the dessert’s texture while matching the occasion.
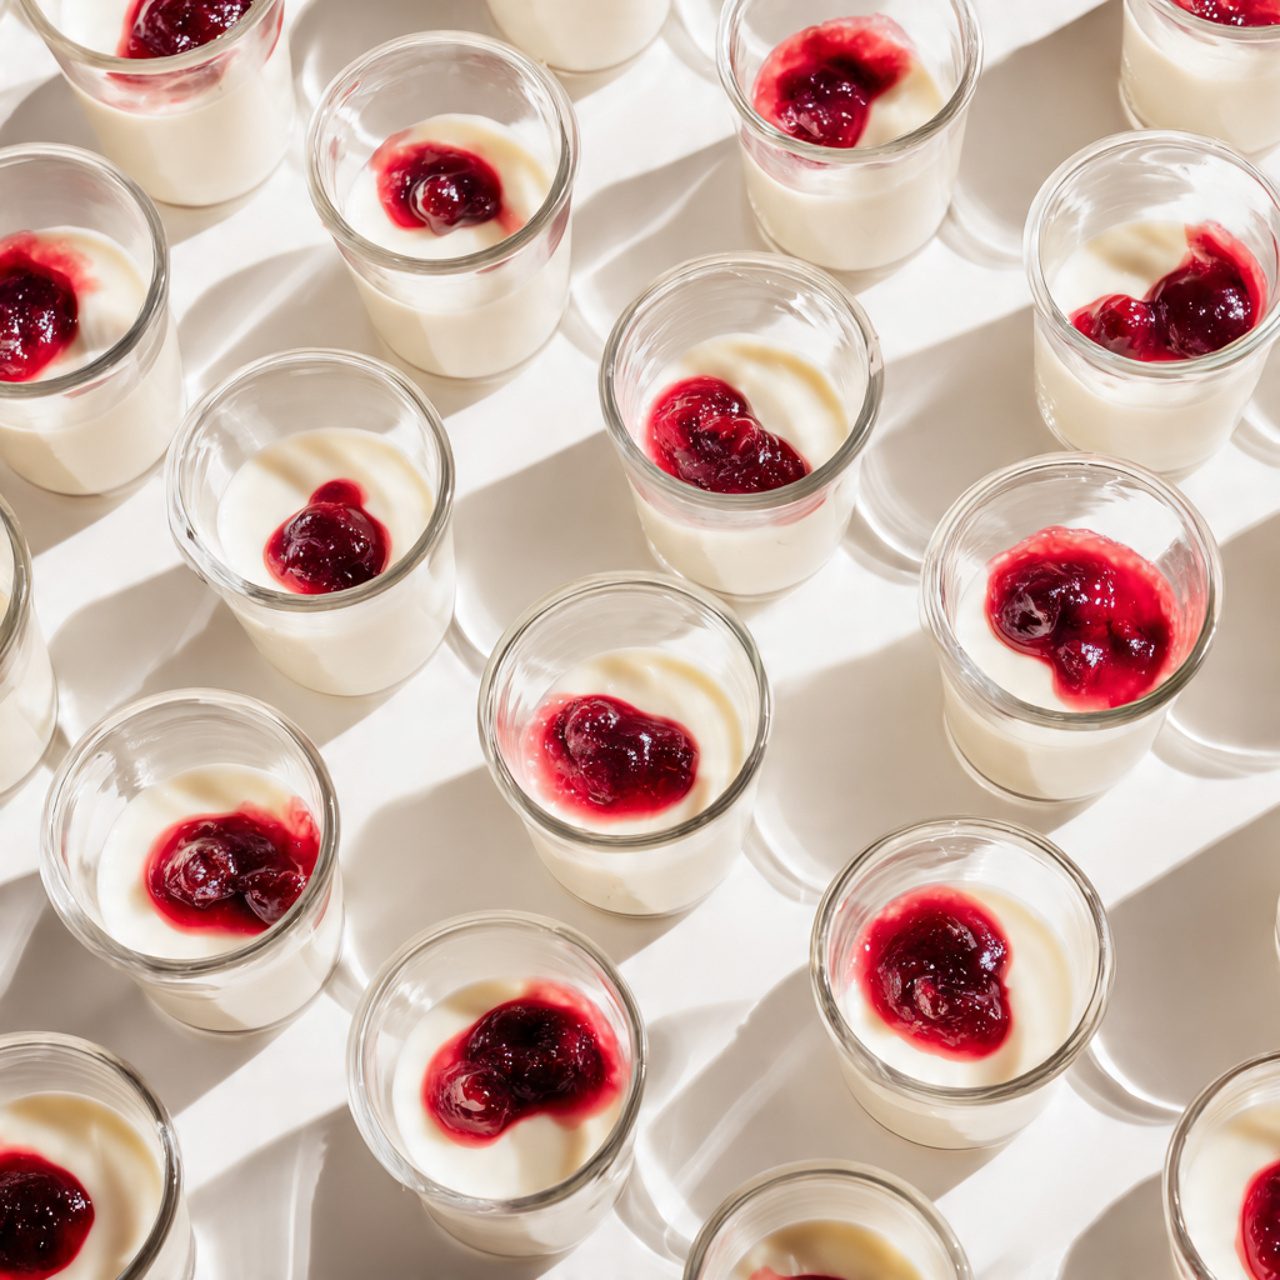
For crowds, pass small serving vessels on a tray so guests can walk and chat. This keeps forks out of the picture and lets people sample several flavors without fuss.
Single-serve cups for crowds; plated for date-night elegance
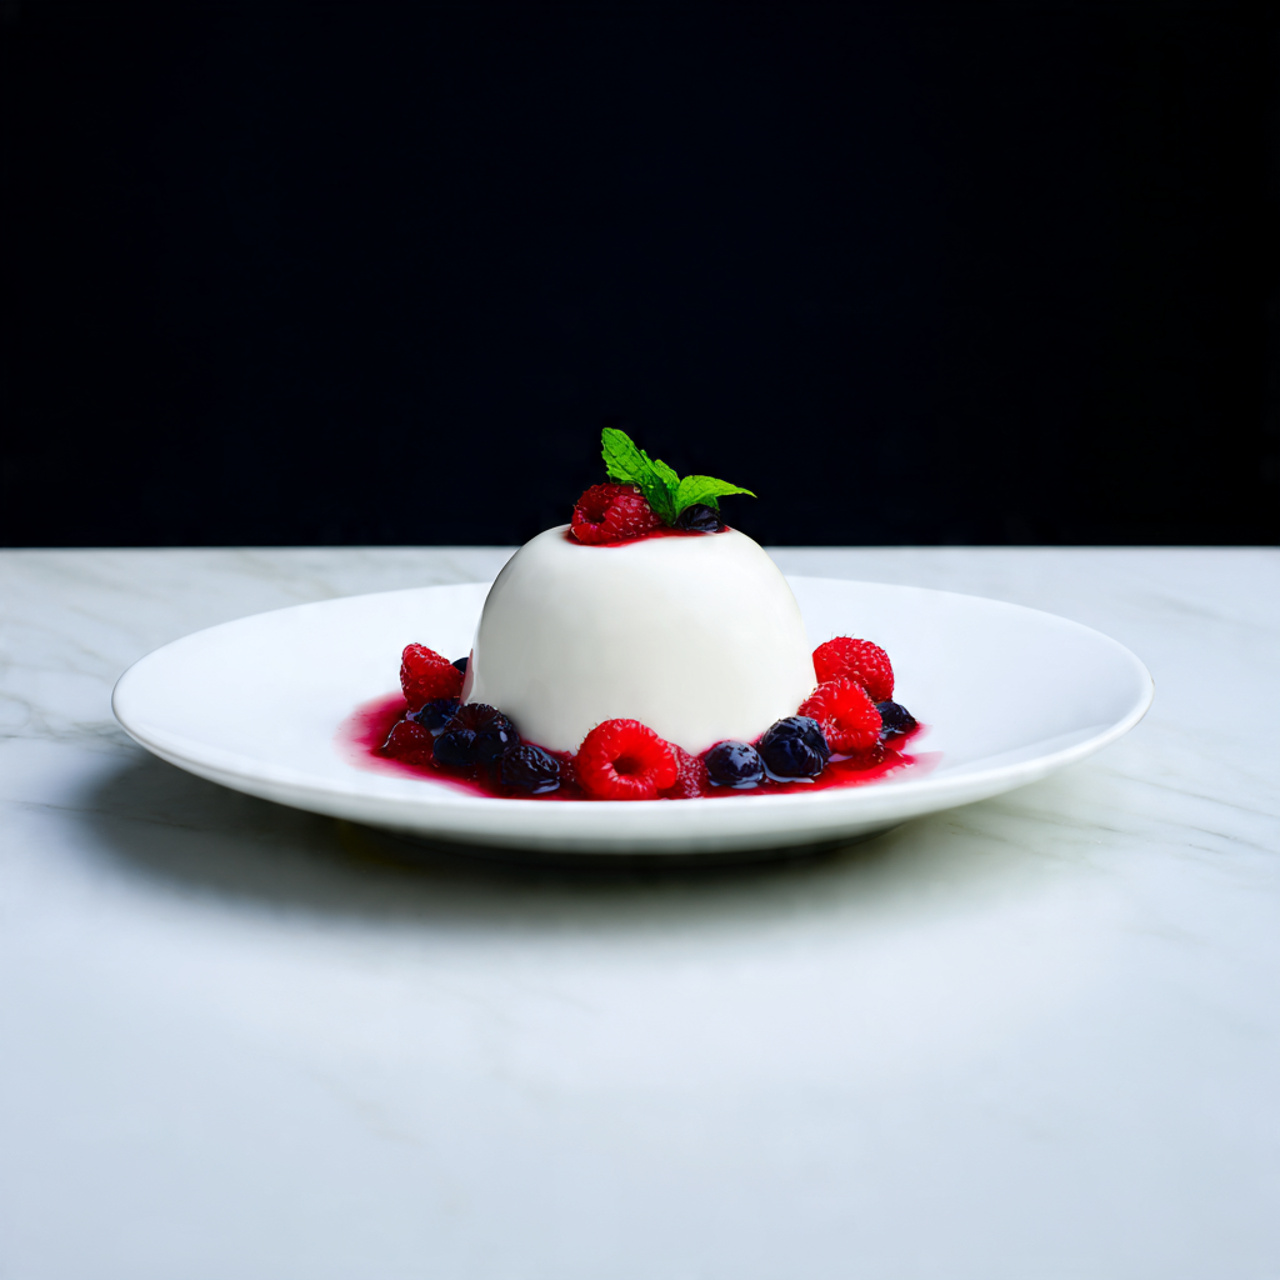
Clear cups show the creamy base and jewel-like berries, which always attracts smiles. For a more intimate moment, unmold onto a chilled plate and spoon a ring of fruit and juice around the base for a trattoria feel at home.
Garnish smart: mint leaves, cookie crumbles, or chocolate shavings
Keep toppings light so the dish stays central. A sprig of mint, a shower of cookie crumbs, or delicate chocolate shavings take seconds and look luxe.
- Pass small servings on trays for parties; add tiny spoons and napkins for ease.
- Set up a finishing station with nuts, caramel, and fresh berries so guests top their own dish.
- Outdoors? Nestle cups on cool packs beneath the platter to keep the texture silky.
- For kids, offer a small portion with raspberries; for adults, dust with espresso or cocoa.
| Occasion | Format | Top suggestions |
|---|---|---|
| Large gathering | Passable cups on tray | Fresh berries, a whisper of juice, napkin + spoon |
| Date night | Unmolded on plate | Ring of fruit, mint, cookie crumbs |
| Seasonal party | Layered clear cups or plated | Summer fruit or chocolate ribbon and candied orange |
Ready to chill and serve: bring this Italian dessert to your table today
Take fifteen to twenty minutes at the stove, then let the fridge finish a tender panna cotta that feels like home. Measure with care, warm the cream gently, and stir in softened gelatin until smooth.
Use heavy cream for richness, vanilla extract for aroma, and just enough sugar so the berries sing. You can make panna in cups or unmold onto a plate; both look inviting.
This recipe is economical and flexible. Halve it for two, double it for a crowd, and swap toppings—raspberries or strawberries work beautifully. Trust the cream mixture, give it time, and share the result as a small, quivering bit of Italian hospitality.
Mini Panna Cotta Cups (Italian Cooked Cream)
Ingredients
Method
- Pour about ¼ cup cold milk into a small bowl.
- Sprinkle the gelatin evenly over the surface.
- Let it sit 3–5 minutes until fully hydrated and soft.
- In a saucepan, add the remaining milk, heavy cream, sugar, and a pinch of salt.
- Heat over medium-low until the mixture is steaming and tiny bubbles appear around the edges.
- Do not let it boil.
- Remove the pan from heat.
- Stir in the bloomed gelatin until it fully dissolves.
- Add vanilla.
- Taste for sweetness and adjust if needed.
- Pour the mixture through a fine-mesh sieve to remove bubbles or bits.
- Stir gently once more so the milk and fat stay blended.
- Pour into small glasses, ramekins, or shot cups, leaving about ¼ inch at the top.
- Place the cups on a level shelf in the fridge.
- Chill for at least 4–6 hours; overnight gives the best texture.
- Leave uncovered for the first 20 minutes, then cover to protect the surface.
- In a small pan, heat berries and sugar over low heat until they release juices.
- Taste and add more sugar if needed.
- Add a squeeze of lemon juice at the end.
- For a thicker compote, stir in the cornstarch slurry and cook 1–2 minutes.
- Let the sauce cool fully before using.
- Spoon the cooled berry sauce on top of each panna cotta.
- Add mint, zest, nuts, or cookie crumbs if you like.
- Keep chilled until serving.
Notes
- Never boil the cream — boiling weakens gelatin and makes the texture rubbery.
- Whole milk gives the best, most even set. Low-fat milk can separate.
- Make the panna cotta a day ahead for the smoothest set.
- Always cool berry sauce before adding it on top. Warm sauce will melt the surface.
- Avoid using raw pineapple, kiwi, or papaya — their enzymes break down gelatin.
- If you want to unmold, dip the ramekins in hot water for a few seconds and loosen edges with a thin knife.
- Heavy cream gives the richest flavor, but whipping cream works if you want something lighter.