
Jump to Recipe
There’s a certain comfort in the rhythm of a weeknight kitchen. The sizzle of a pan, the fresh scent of citrus filling the air—it’s a small ritual that turns ordinary ingredients into something special. This preparation brings that feeling to life, focusing on clean, vibrant tastes that honor a tradition of simplicity.
We achieve a satisfying meal by balancing lean protein with the zesty brightness of fresh fruit. The method is straightforward, requiring just a handful of core components you likely have on hand. In about half an hour, you can create a main course with a golden sear and a light, emulsified sauce that feels indulgent without being heavy.
This approach is wonderfully adaptable. Whether you’re feeding your family or hosting friends, the result is consistently delicious. It’s a testament to how a few quality items can produce a flavorful experience that supports well-being. You get a dish that is both uncomplicated and impressive.
Key Takeaways
- This preparation is an authentic way to enjoy bright, zesty flavors on a busy schedule.
- It uses simple, whole-food ingredients for a result that feels restaurant-quality.
- The balance of lean protein and fresh acidity creates a satisfying yet light meal.
- You can prepare the entire dish in approximately 30 minutes from start to finish.
- It is highly adaptable, with calorie counts that can fit various dietary needs.
- You only need 5 to 10 common kitchen staples to make it.
- The technique creates a delightful texture with a golden crust and a silky sauce.
Embracing a Modern Italian Twist in Your Kitchen

Many beloved dishes find their way into our kitchens through a journey of adaptation and practicality. Pollo al Limone, which translates simply to “lemon chicken,” is a beautiful example of this. It acts as a bridge between traditional Italian methods and the realities of a contemporary home cook’s schedule.
This preparation gained fame in Italian-American restaurants for a good reason. It showcases core principles of the cuisine: superb ingredients, sound technique, and balanced flavor. The goal is not complexity, but clarity and satisfaction on the plate.
True Italian cooking rarely demands exotic items or intricate procedures. It asks for respect for the process and attention to what happens in your pan. Our recipe honors this by focusing on a proper sear and building a simple, emulsified sauce, all within a manageable timeframe.
Italian home cooks have always valued recipes that deliver maximum impact from minimal components. This approach is both authentic and wonderfully practical for today. The modern twist lies in understanding the purpose behind each step, which builds real confidence.
This isn’t a fusion or a radical reimagining. It is good, honest cooking adapted gracefully to the ingredients and equipment found in American kitchens. We are simply applying timeless principles to our modern context.
Choosing the Right Chicken and Prepping It to Perfection
The foundation of any great dish lies in the quality and preparation of its main ingredient. For this preparation, we focus on skinless chicken breasts. They offer a fantastic source of lean protein without excess fat. This choice supports a lighter meal that remains deeply satisfying.
When shopping, look for small to medium breasts with a light pink color. These indicate tender meat. Avoid large, pale pieces with a visible wood-grain texture. They often cook up tough and rubbery.
The Benefits of Skinless Chicken Breasts
Starting with a quality cut makes all the difference. Boneless, skinless chicken breasts are a versatile blank canvas. They allow the bright, zesty flavors of the sauce to shine through without competition.
Before cooking, take a moment to trim each breast. Remove any visible fat, connective tissue, or tough ligaments. This simple prep step ensures even cooking and a superior final texture for every piece.
Mastering Brining and Pounding Techniques
Creating cutlets of even thickness is the next crucial step. You can slice each breast horizontally, like a hamburger bun. Alternatively, place the breast between sheets of plastic wrap. Use a meat mallet or rolling pin to pound it to a consistent ½-inch thickness.
This evenness prevents thin edges from overcooking while the center finishes. For an extra layer of flavor and moisture, consider a quick brine. A simple solution of salt, sugar, and water seasons the meat throughout.
Brining can take as little as 15 minutes while you gather other ingredients. For deeper seasoning, you can brine overnight. Regardless of time, the final step is non-negotiable. Pat the chicken completely dry with paper towels. A dry surface is essential for achieving a proper, golden sear, much like you would want for a boneless chicken cacciatore recipe.
Essential Ingredients for a Zesty and Lemony Flavor
Understanding how each component contributes to the final dish builds cooking confidence. The right selection creates balance between bright acidity and rich depth.
Fresh Lemon, Butter, and Chicken Bone Broth
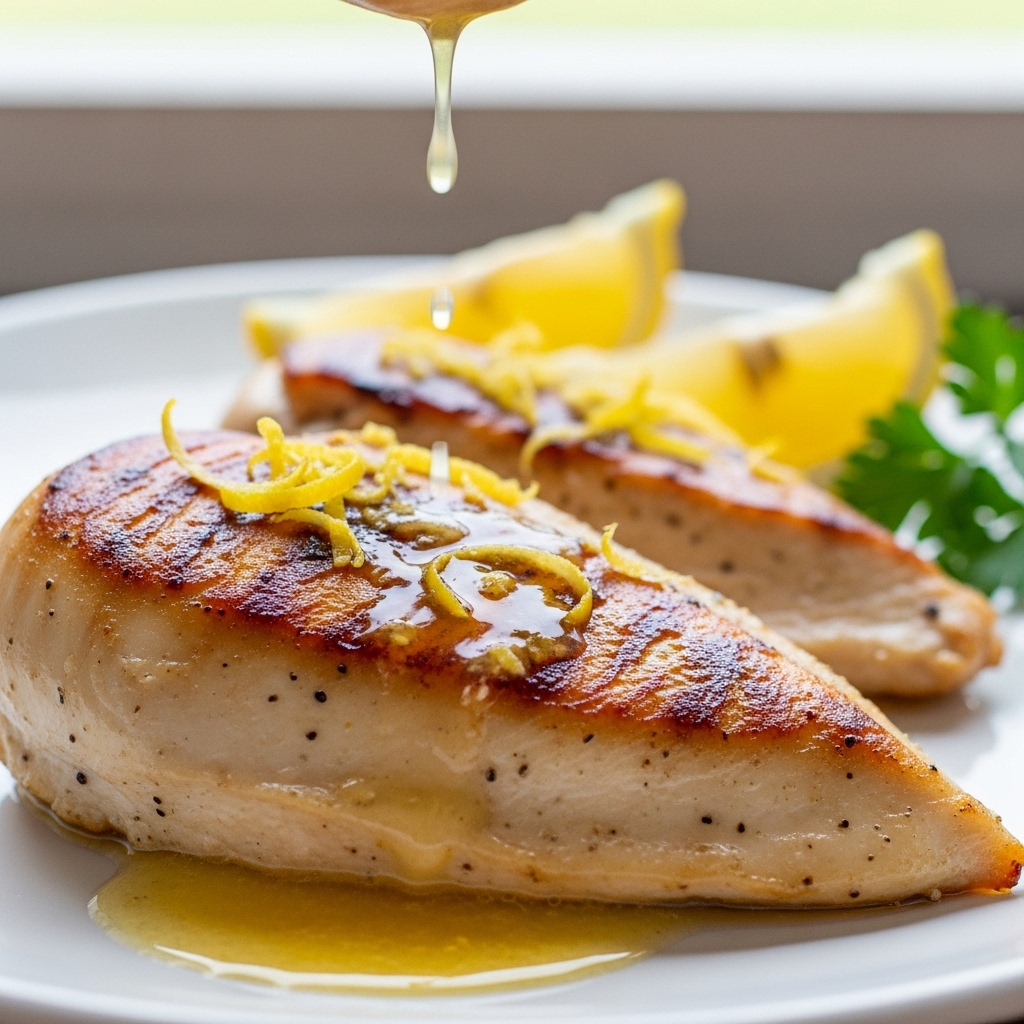
Fresh citrus provides the essential zesty character. Bottled juice lacks the complex flavor that makes this preparation distinctive. The zest adds aromatic oils that enhance the sauce.
Chicken bone broth contains more collagen than regular stock. This creates a more viscous sauce with extra protein. Use ½ to 2 cups depending on your desired sauce quantity.
Butter adds richness and helps emulsify the sauce. Traditional recipes use regular butter, but light versions reduce calories without dramatic flavor changes. Two tablespoons typically suffice.
Understanding the Role of Seasonings and Flour Mix
Kosher salt and freshly cracked black pepper provide foundational flavor. They let the bright notes shine without overwhelming the palate.
A 50/50 blend of all-purpose flour and cornstarch creates a lighter, crispier coating. Cornstarch contributes to a delicate crust that stays crisp during cooking. Use ¼ cup flour with 3 tablespoons cornstarch.
| Ingredient | Function | Measurement |
|---|---|---|
| Fresh Citrus | Provides bright acidity and aroma | 1-2 fruits |
| Chicken Broth | Forms sauce base with body | ½-2 cups |
| Butter | Adds richness and emulsification | 2 tablespoons |
| Flour/Cornstarch | Creates light, crispy coating | ¼ cup + 3 tbsp |
| Olive Oil | Pan-frying with authentic character | 1.5 tablespoons |
Olive oil provides the cooking medium rather than heavier butter amounts. This maintains authentic character while keeping the preparation lighter. Optional additions like capers or garlic can deepen complexity.
Step-by-Step Guide to Pan-Seared Chicken Greatness
Building layers of flavor in the pan creates the foundation for a memorable sauce. This process relies on proper technique rather than complex ingredients.
Dredging, Searing, and Monitoring Temperature
Coat each piece thoroughly in the seasoned flour mixture. Shake firmly to remove excess coating that would burn during cooking.
Place your skillet over medium-high heat. Let it preheat properly before adding oil. The oil should shimmer and move easily when you tilt the pan.
Leave at least an inch between pieces so steam can escape. Each surface browns properly instead of steaming. Most home cooks need to work in batches.
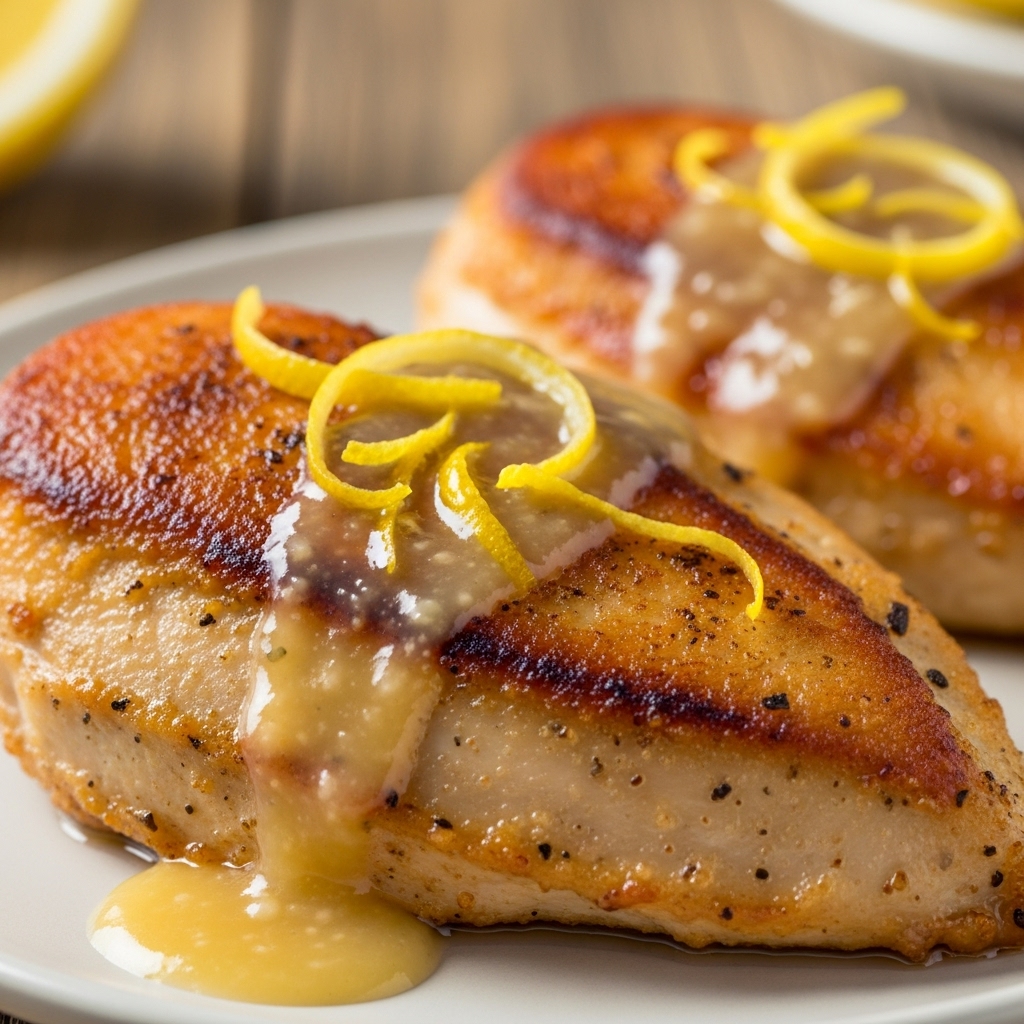
The first side needs about 3 minutes undisturbed. This develops a golden-brown crust before flipping. Remove the protein from heat at 162°F internal temperature.
Creating a Luscious, Emulsified Butter Sauce
After removing the main ingredient, add broth and zest to the hot pan. Use a wooden spoon to scrape up all the flavorful fond stuck to the bottom.
Let the liquid simmer and reduce by roughly half. This concentrates flavor and creates the right consistency. The reduction takes about 15-20 minutes.
Remove the pan from heat before adding citrus juice and butter. Stir vigorously—the residual heat melts the butter while the movement creates a smooth, glossy result.
| Cooking Technique | Purpose | Key Indicator | Time Required |
|---|---|---|---|
| Proper Dredging | Create light crust | Even, thin coating | 1-2 minutes |
| Pan Searing | Develop golden color | Oil shimmers | 3 minutes per side |
| Sauce Reduction | Concentrate flavor | Liquid halves | 15-20 minutes |
| Emulsification | Create glossy sauce | Smooth, cohesive texture | 1-2 minutes |
Proper emulsification prevents the sauce from looking greasy or separated. Taste and adjust seasoning until bright and balanced. The final result should cling beautifully to each piece.
Exploring the low calorie italian lemon chicken Recipe
The beauty of this method lies in its straightforward timeline and adaptable portions. You can have everything ready in about 30 to 45 minutes total. Only 25 minutes require active attention at the stove.
| Preparation Step | Time Required | Purpose |
|---|---|---|
| Prep and Trimming | 5-10 minutes | Even cooking and proper texture |
| Optional Brining | 15 minutes to overnight | Enhanced moisture and seasoning |
| Cooking and Sauce | 25-35 minutes | Golden crust and emulsified sauce |
This preparation naturally serves four to six people. Portion sizes depend on what you serve alongside it. Each serving provides substantial protein while keeping energy content moderate.
The recipe scales beautifully for different occasions. Double it for a dinner party or halve it for two people. You can brine the protein overnight and prep other components ahead.
Final cooking should happen just before serving. This preserves the crispy coating and fresh, vibrant sauce. The result tastes like you spent hours in the kitchen.
Expert Strategies for Enhancing Flavor and Texture
Small refinements in technique often separate a good result from a truly great one. These details matter most when working with simple ingredients.
We focus on methods that build confidence through understanding. Each step has a clear purpose that improves the final dish.
Avoiding Crowded Pans and Ensuring Even Cooking
Proper heat management begins with space in your pan. When pieces touch, they steam rather than sear.
This creates a pale exterior instead of a golden crust. Leave at least one inch between each piece for proper browning.
Working in batches takes only minutes longer. The improvement in texture and flavor makes this effort worthwhile.
Judge your pan’s readiness by watching the oil. It should shimmer and move freely when you tilt the pan.
Insider Tips for a Perfect Crispy Crust
Brining makes a measurable difference in moisture and seasoning. Even a short brine penetrates the meat thoroughly.
Remove your protein at 162°F internal temperature. Carryover cooking brings it to the safe 165°F without dryness.
Use bone broth for your sauce base. Its natural gelatin creates body without additional thickeners.
Deglaze the pan to capture the flavorful fond. These browned bits form the foundation of your sauce.
Emulsify off direct heat by stirring vigorously. This creates a smooth, cohesive texture that clings beautifully.
Always taste before adding extra salt. Your broth and other components may provide enough seasoning already.
Delicious Variations and Dietary Adaptations
Good recipes are like trusted friends—they welcome thoughtful adjustments while staying true to their character. This preparation adapts beautifully to different needs without losing its essential appeal. These variations aren’t compromises but legitimate ways to make the dish work for your kitchen.
Gluten-Free, Dairy-Free, and Corn-Free Options
For a gluten-free version, use a 1:1 gluten-free flour blend. Alternatively, cornstarch alone creates an even crispier coating. Both options work well in this application.
Plant-based butter substitutes provide richness for dairy-free needs. The flavor will differ slightly but remains satisfying. Potato starch works perfectly if you’re avoiding corn products.
Dark meat offers a budget-friendly alternative. Thighs cost less and contain slightly more fat. They stay juicy even if cooked a bit longer.
Using Thighs for a Budget-Friendly Twist
Boneless, skinless thighs change the nutritional profile but increase forgiveness during cooking. They’re particularly good for those who prefer richer meat.
For a piccata-style variation, add dry white wine and capers when building the sauce. Frying the capers first makes them crispy and intensifies their flavor.
Herb flexibility lets you personalize the dish. While parsley is traditional, fresh oregano, thyme, or basil each bring valid Italian flavors. Minced garlic or shallots add savory depth without complication.
For a keto approach, omit the flour dredge entirely. The protein won’t develop a crust, and the sauce will be thinner, but carbohydrates become minimal.
Complementary Sides and Creative Serving Ideas
A thoughtfully chosen side dish elevates a simple main course into a complete and memorable meal. The best accompaniments support the star of the plate without overshadowing its flavors.
They provide contrasting textures and temperatures that make the entire experience more satisfying. Our goal is harmony on the plate.
Pasta, Rice, and Vegetable Pairings
Pasta makes a natural pairing for saucy preparations. Serve it over al dente linguine or orzo tossed with a bit of olive oil.
A sprinkle of Parmesan cheese adds a savory note. For rice, plain white or brown varieties work perfectly.
You can enhance it by stirring a splash of citrus juice into the cooked grains. Cauliflower rice is a great low-carb alternative that still soaks up the sauce.
Roasted vegetables like Brussels sprouts or zucchini complement the bright flavor. Sautéed spinach with a pinch of salt and pepper echoes the main dish’s profile.
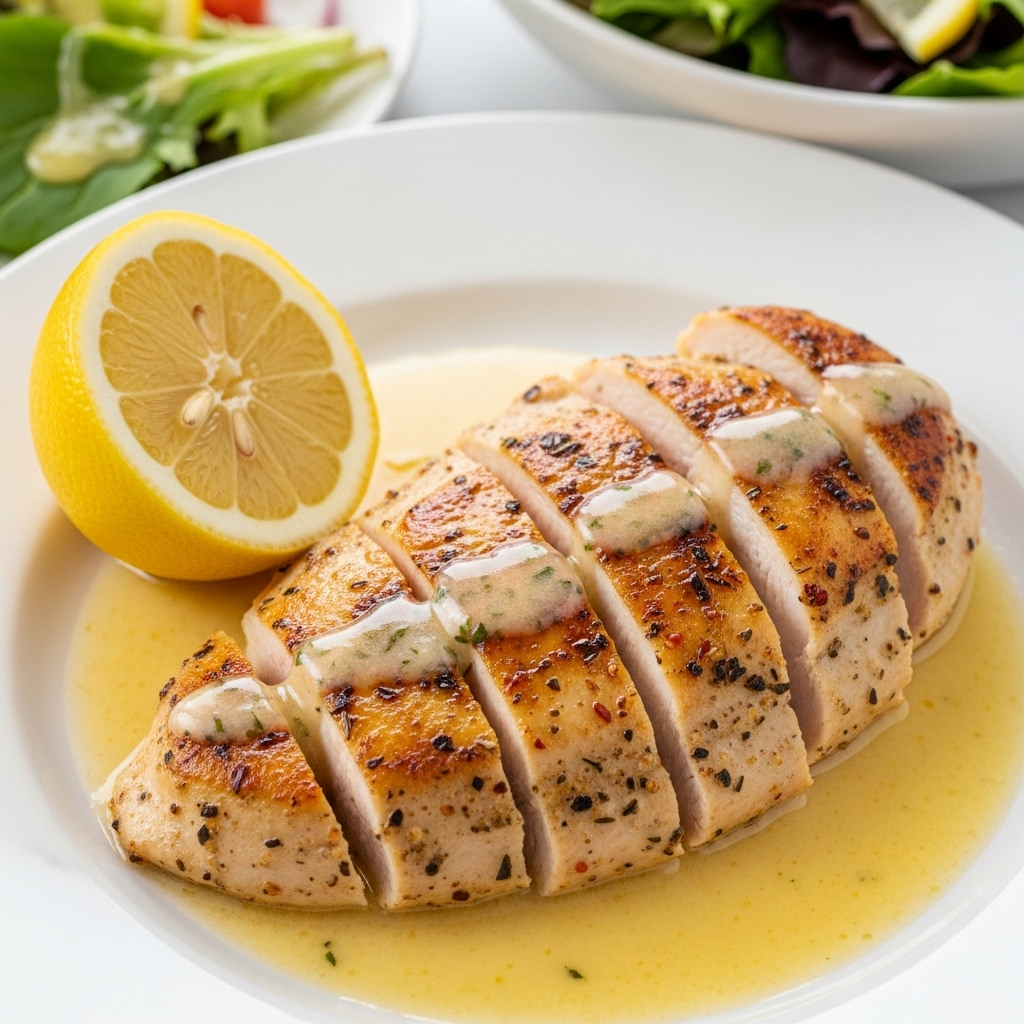
For a fresh contrast, a simple green salad is ideal. A vibrant salad with a lemon vinaigrette keeps the meal light.
Crusty bread is a traditional choice for enjoying every last drop of the pan sauce. Warm focaccia or a baguette completes the experience beautifully.
Quick Prep and Time-Saving Techniques
The key to quick cooking success lies in thoughtful preparation before you even turn on the stove. A calm, organized approach saves precious minutes without compromising flavor.
Efficient Brining and Cooking Methods
Overnight brining develops the deepest flavor, but a quick 15-minute soak still makes a noticeable difference. Use this time to zest and juice your citrus fruits.
Having all ingredients prepped and measured before cooking makes the process smooth. This mise en place approach eliminates stress during active cooking time.
Buying pre-sliced cutlets saves 5-10 minutes of trimming and pounding. The results remain excellent when you start with quality pieces.
| Time-Saving Technique | Time Saved | Impact on Quality |
|---|---|---|
| Quick 15-minute brine | Overnight wait | Good flavor enhancement |
| Pre-sliced chicken breasts | 5-10 minutes | No compromise |
| Mise en place preparation | Reduces cooking stress | Better process flow |
| Pre-mixed flour coating | 2-3 minutes | Consistent results |
Each piece needs only 5-6 minutes in the pan. The sauce comes together in about 20 minutes total. This 30-minute timeline is realistic with proper organization.
Efficiency doesn’t mean rushing. Proper pan temperature and avoiding crowding still matter most for perfect results. Good prep respects both your time and the final dish.
Tips for Storing and Reheating Your Chicken Dish
Knowing how to properly store and reheat leftovers transforms a single meal into convenient future enjoyment. With the right techniques, your carefully prepared dish maintains its quality and appeal.
Maintaining Flavor and Texture Overnight
Place cooled pieces in an airtight container within two hours of cooking. This prevents bacterial growth and preserves freshness. Leftovers keep well for 3-4 days.
Store the sauce separately from the main ingredient when possible. When stored together, the coating absorbs liquid and becomes soggy. Separate storage preserves more of the original texture.
The sauce thickens considerably when cold due to gelatin from bone broth. A splash of broth or water when reheating brings it back to the right consistency.
The Best Methods for Leftover Reheat
The stovetop method produces the best results. Place pieces in a cold skillet with a small amount of oil. Heat gently over medium-low with a lid until warmed through.
Starting with a cold pan matters. Gradual heating prevents the outside from toughening before the inside warms. Heat the sauce separately on the stovetop.
For oven reheating, preheat to 300°F. Place pieces in an oven-safe dish covered with foil. Warm for 15-20 minutes to retain moisture.
The microwave works quickly but produces less ideal texture. Use short bursts and check frequently. Always reheat to an internal temperature of 165°F for safety.
Wrapping Up Your Culinary Adventure with a Delicious Twist
The techniques you’ve practiced here extend far beyond this single preparation, building confidence for countless meals to come. This approach demonstrates how quality ingredients and sound methods create satisfying results.
You now have a reliable option that delivers substantial protein while fitting various eating styles. The same basic preparation adapts easily for different dietary needs and scales beautifully for any occasion.
Mastering this recipe adds a trustworthy choice to your regular rotation. The process becomes almost automatic after making it once or twice.
Trust that proper pan temperature and working in batches make measurable differences. This is authentic cooking adapted gracefully for real life—a practical expression of good technique.
Pollo al Limone (Lemon Chicken)
Ingredients
Method
- Trim any visible fat or connective tissue from the chicken breasts.
- For even cooking, slice the chicken horizontally or use a meat mallet to pound it to about ½-inch thickness.
- Optional: Brine the chicken for 15 minutes to overnight to enhance flavor and moisture.
- In a bowl, mix ¼ cup of flour with 3 tablespoons of cornstarch. Season with salt and pepper.
- Coat each chicken breast in the flour mixture. Shake off any excess.
- Heat a skillet over medium-high heat. Add olive oil and let it shimmer.
- Add the chicken to the skillet, leaving space between each piece. Sear for 3 minutes on each side, until golden brown and the internal temperature reaches 162°F.
- Remove the chicken from the skillet and set it aside.
- Add chicken broth to the pan, scraping up any flavorful bits stuck to the bottom.
- Let the broth simmer and reduce by half, about 15-20 minutes.
- Add lemon zest, lemon juice, and butter to the pan. Stir until the butter emulsifies into a smooth sauce.
- Return the chicken to the pan and spoon the sauce over it.
- Cook for another minute or so, ensuring the chicken is coated with the sauce.
- Adjust seasoning with salt and pepper if needed.
Notes
- You can adjust the amount of broth and lemon juice based on your preference for a more saucy or zesty dish.
- For a gluten-free version, substitute the all-purpose flour with a gluten-free flour blend or use cornstarch alone for dredging.
- To add a twist, consider including capers or a splash of dry white wine to the sauce for more depth of flavor.