
Jump to Recipe
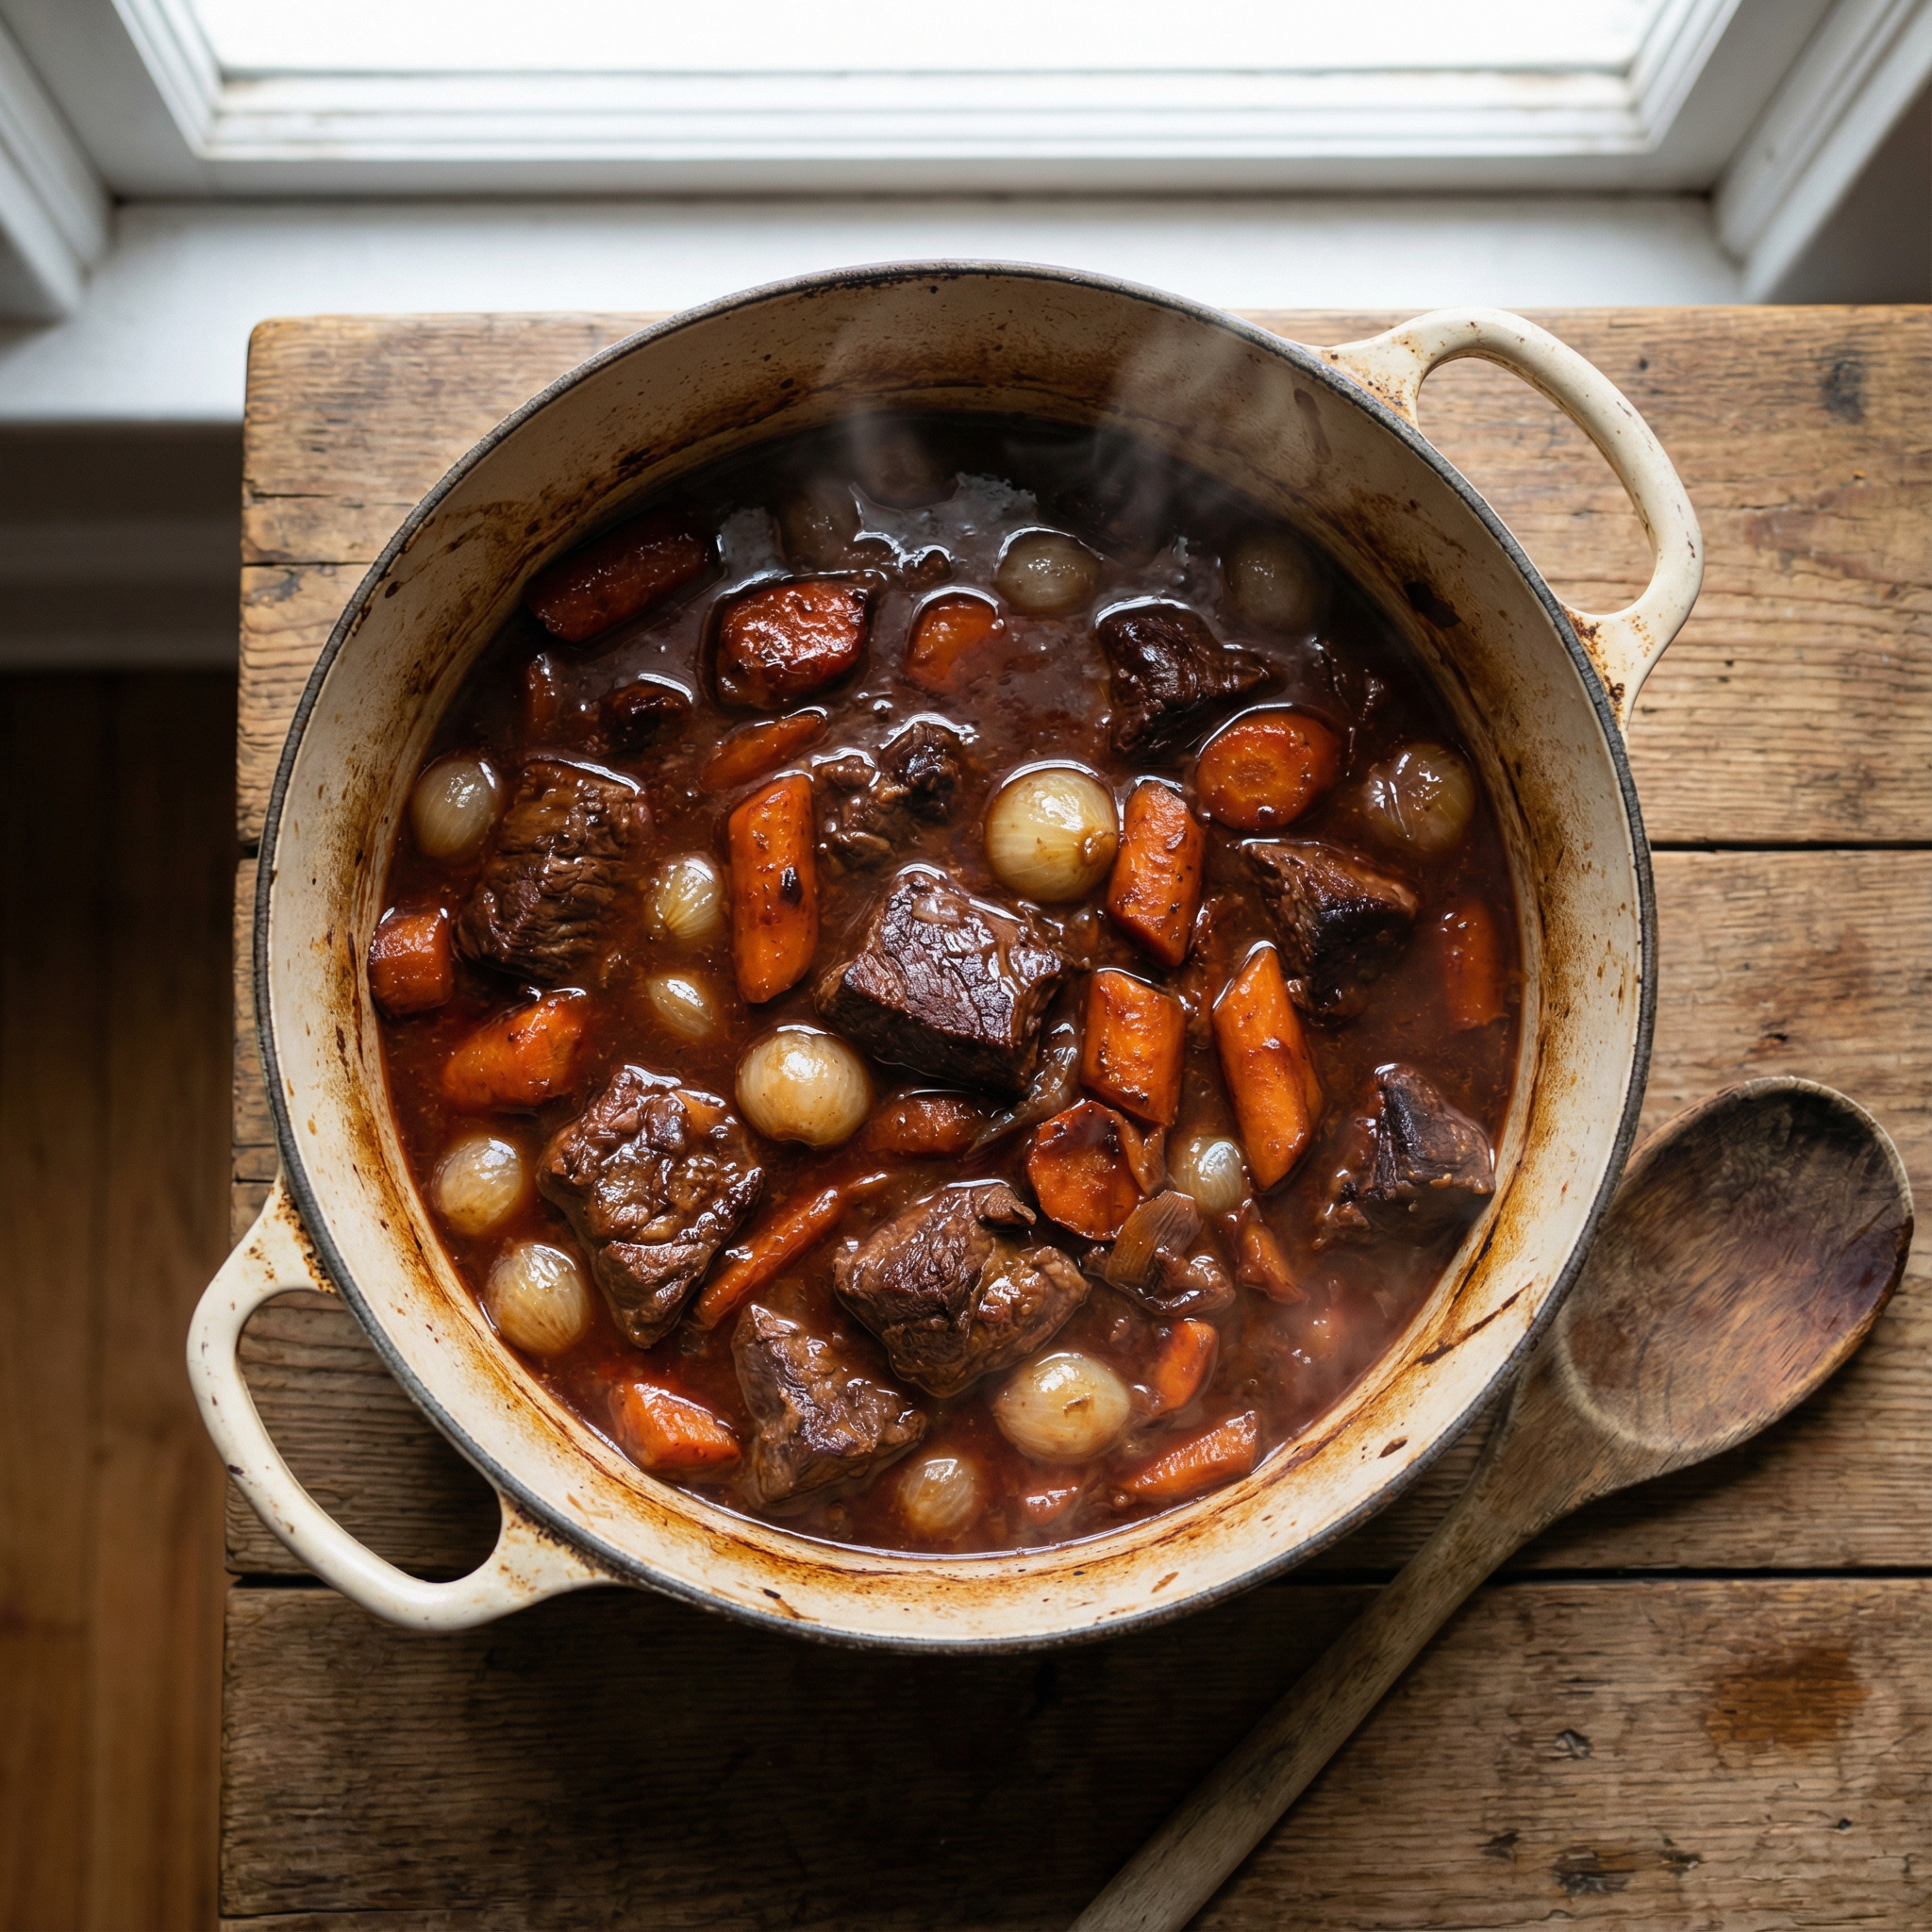
I grew up watching a pot bubble gently on the stove while the house filled with an honest, savory smell that felt like an embrace. The first sear gives that deep color and a promise of comfort, and the slow, patient simmer turns a humble cut into melting, fork-tender pieces you can almost taste before you sit down.
Start by patting the chuck dry and searing it hard until the crust sings; that Maillard color is pure flavor. Then add about 2 cups of red wine and 2 cups of beef stock, tuck in onions, carrots, garlic, fresh thyme and bay leaves, cover, and cook low for roughly 3 to 3.5 hours until the meat yields.
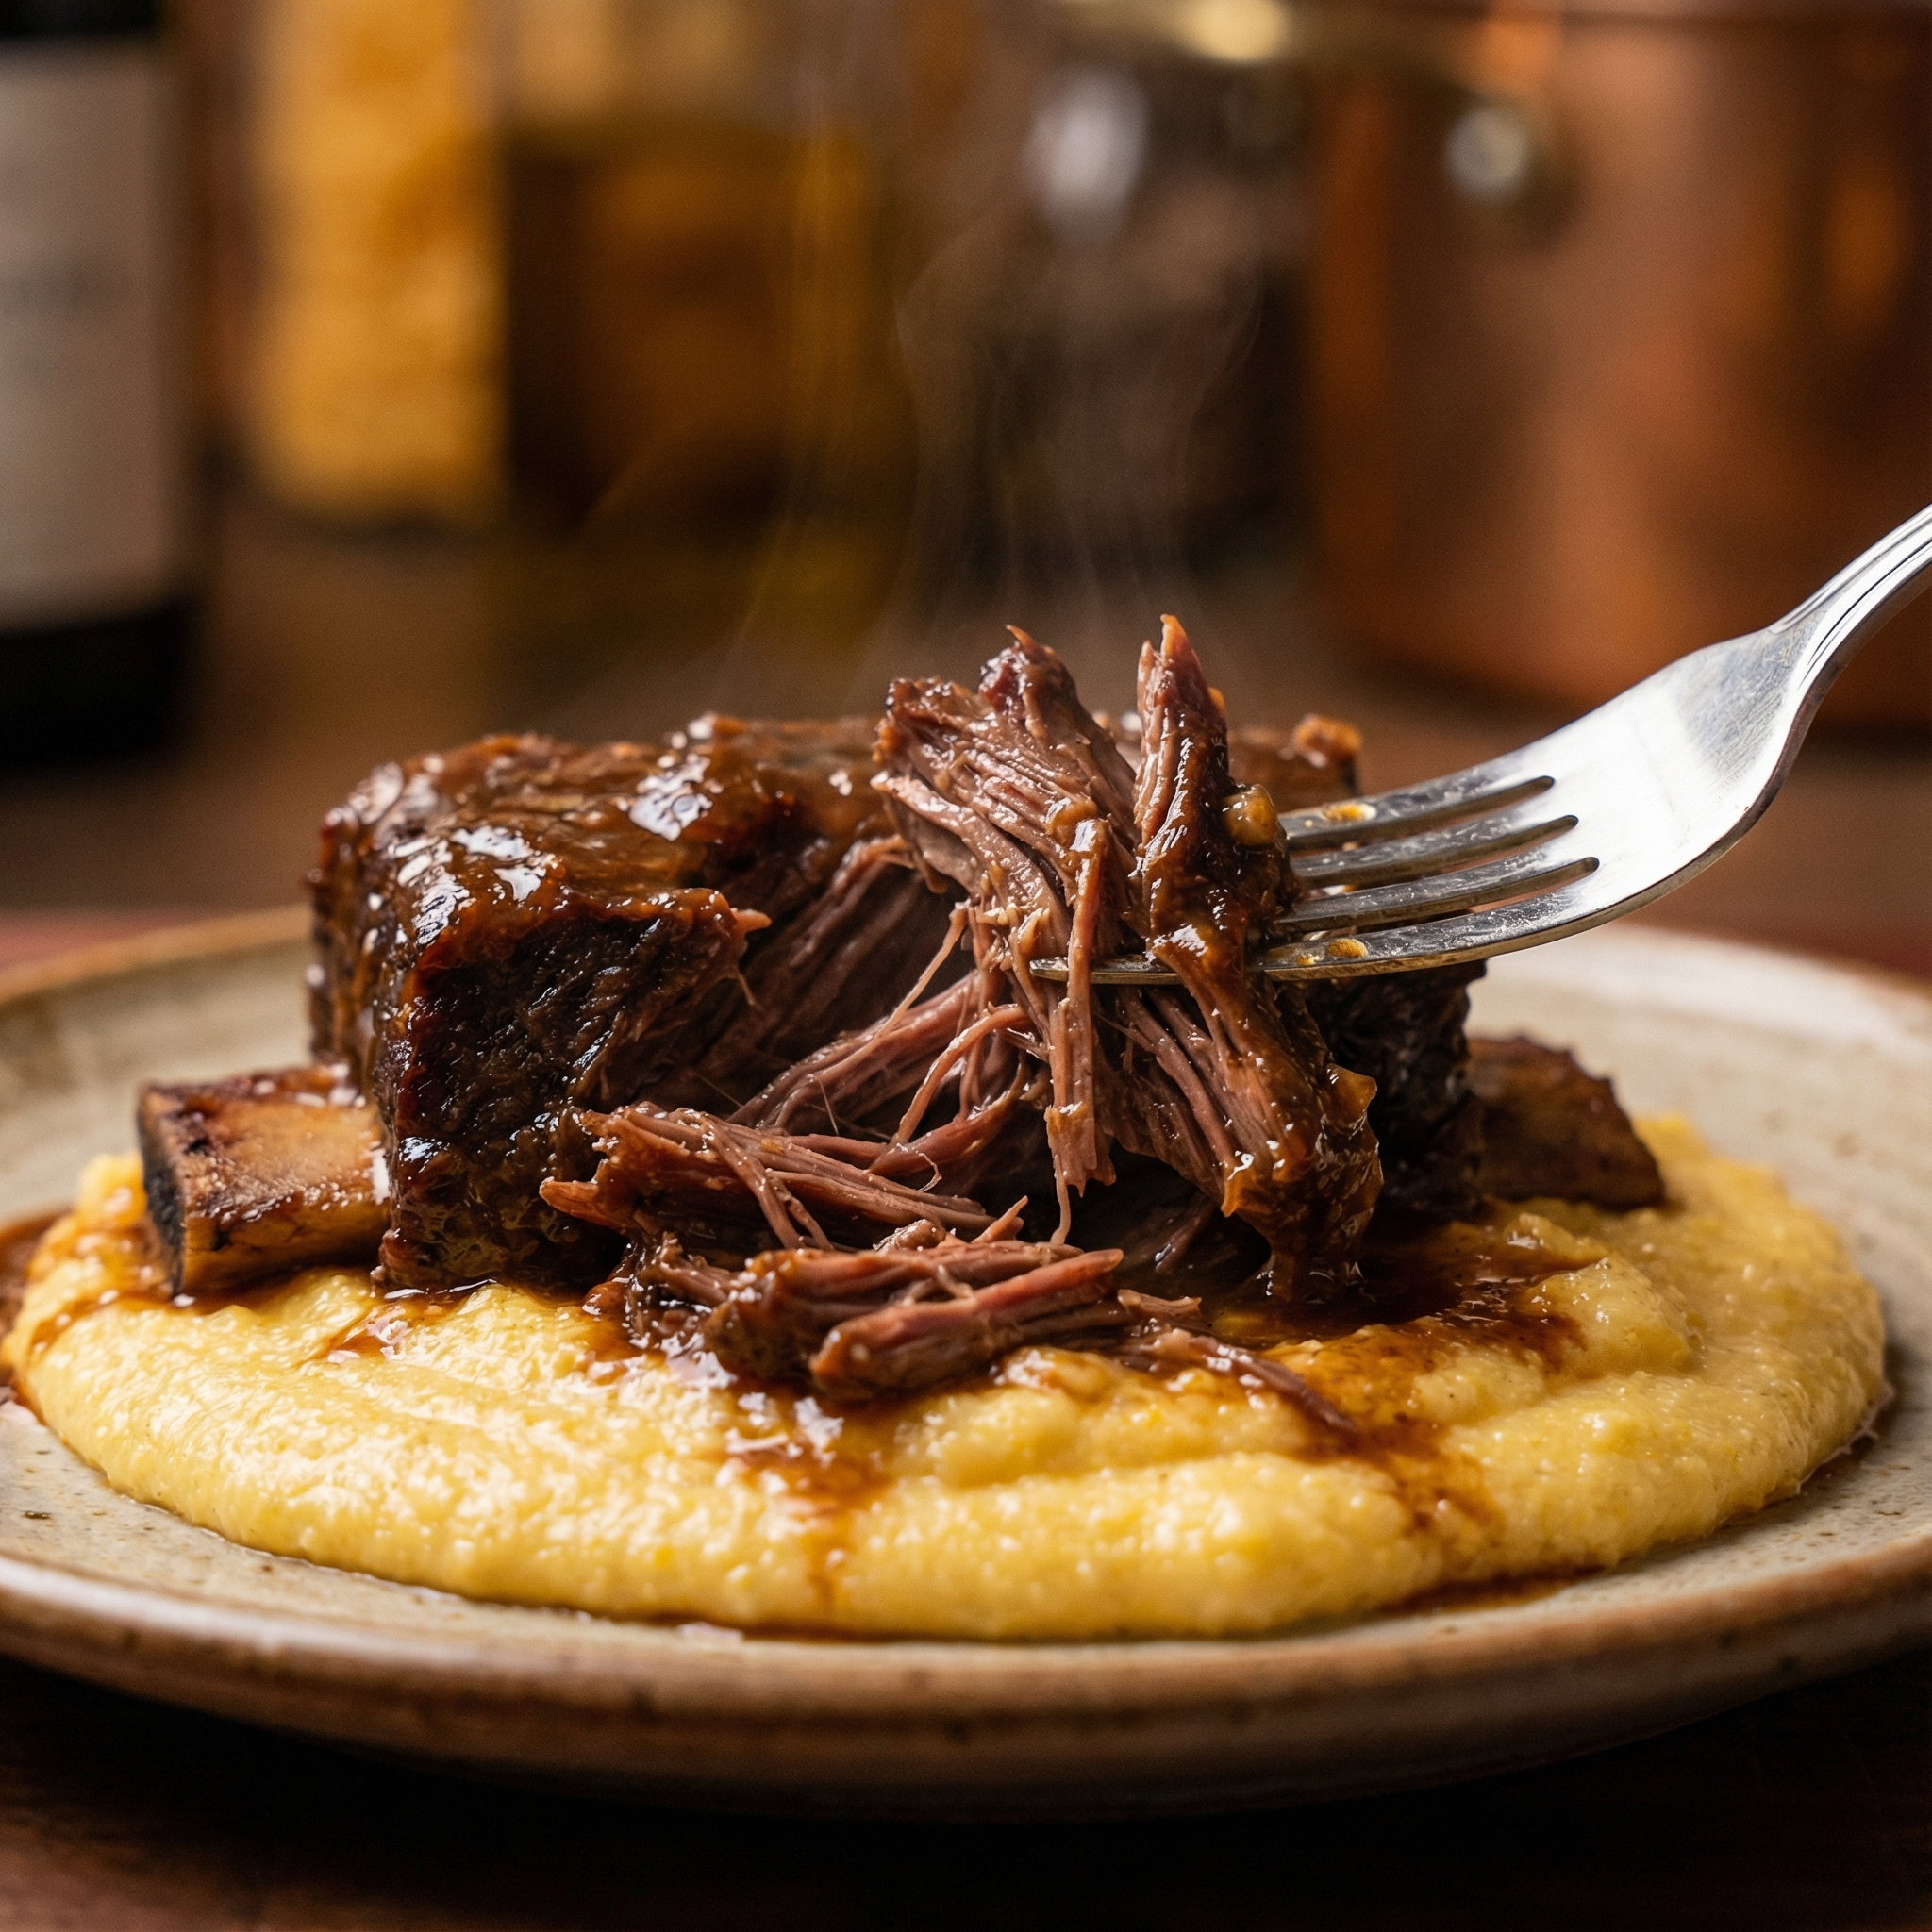
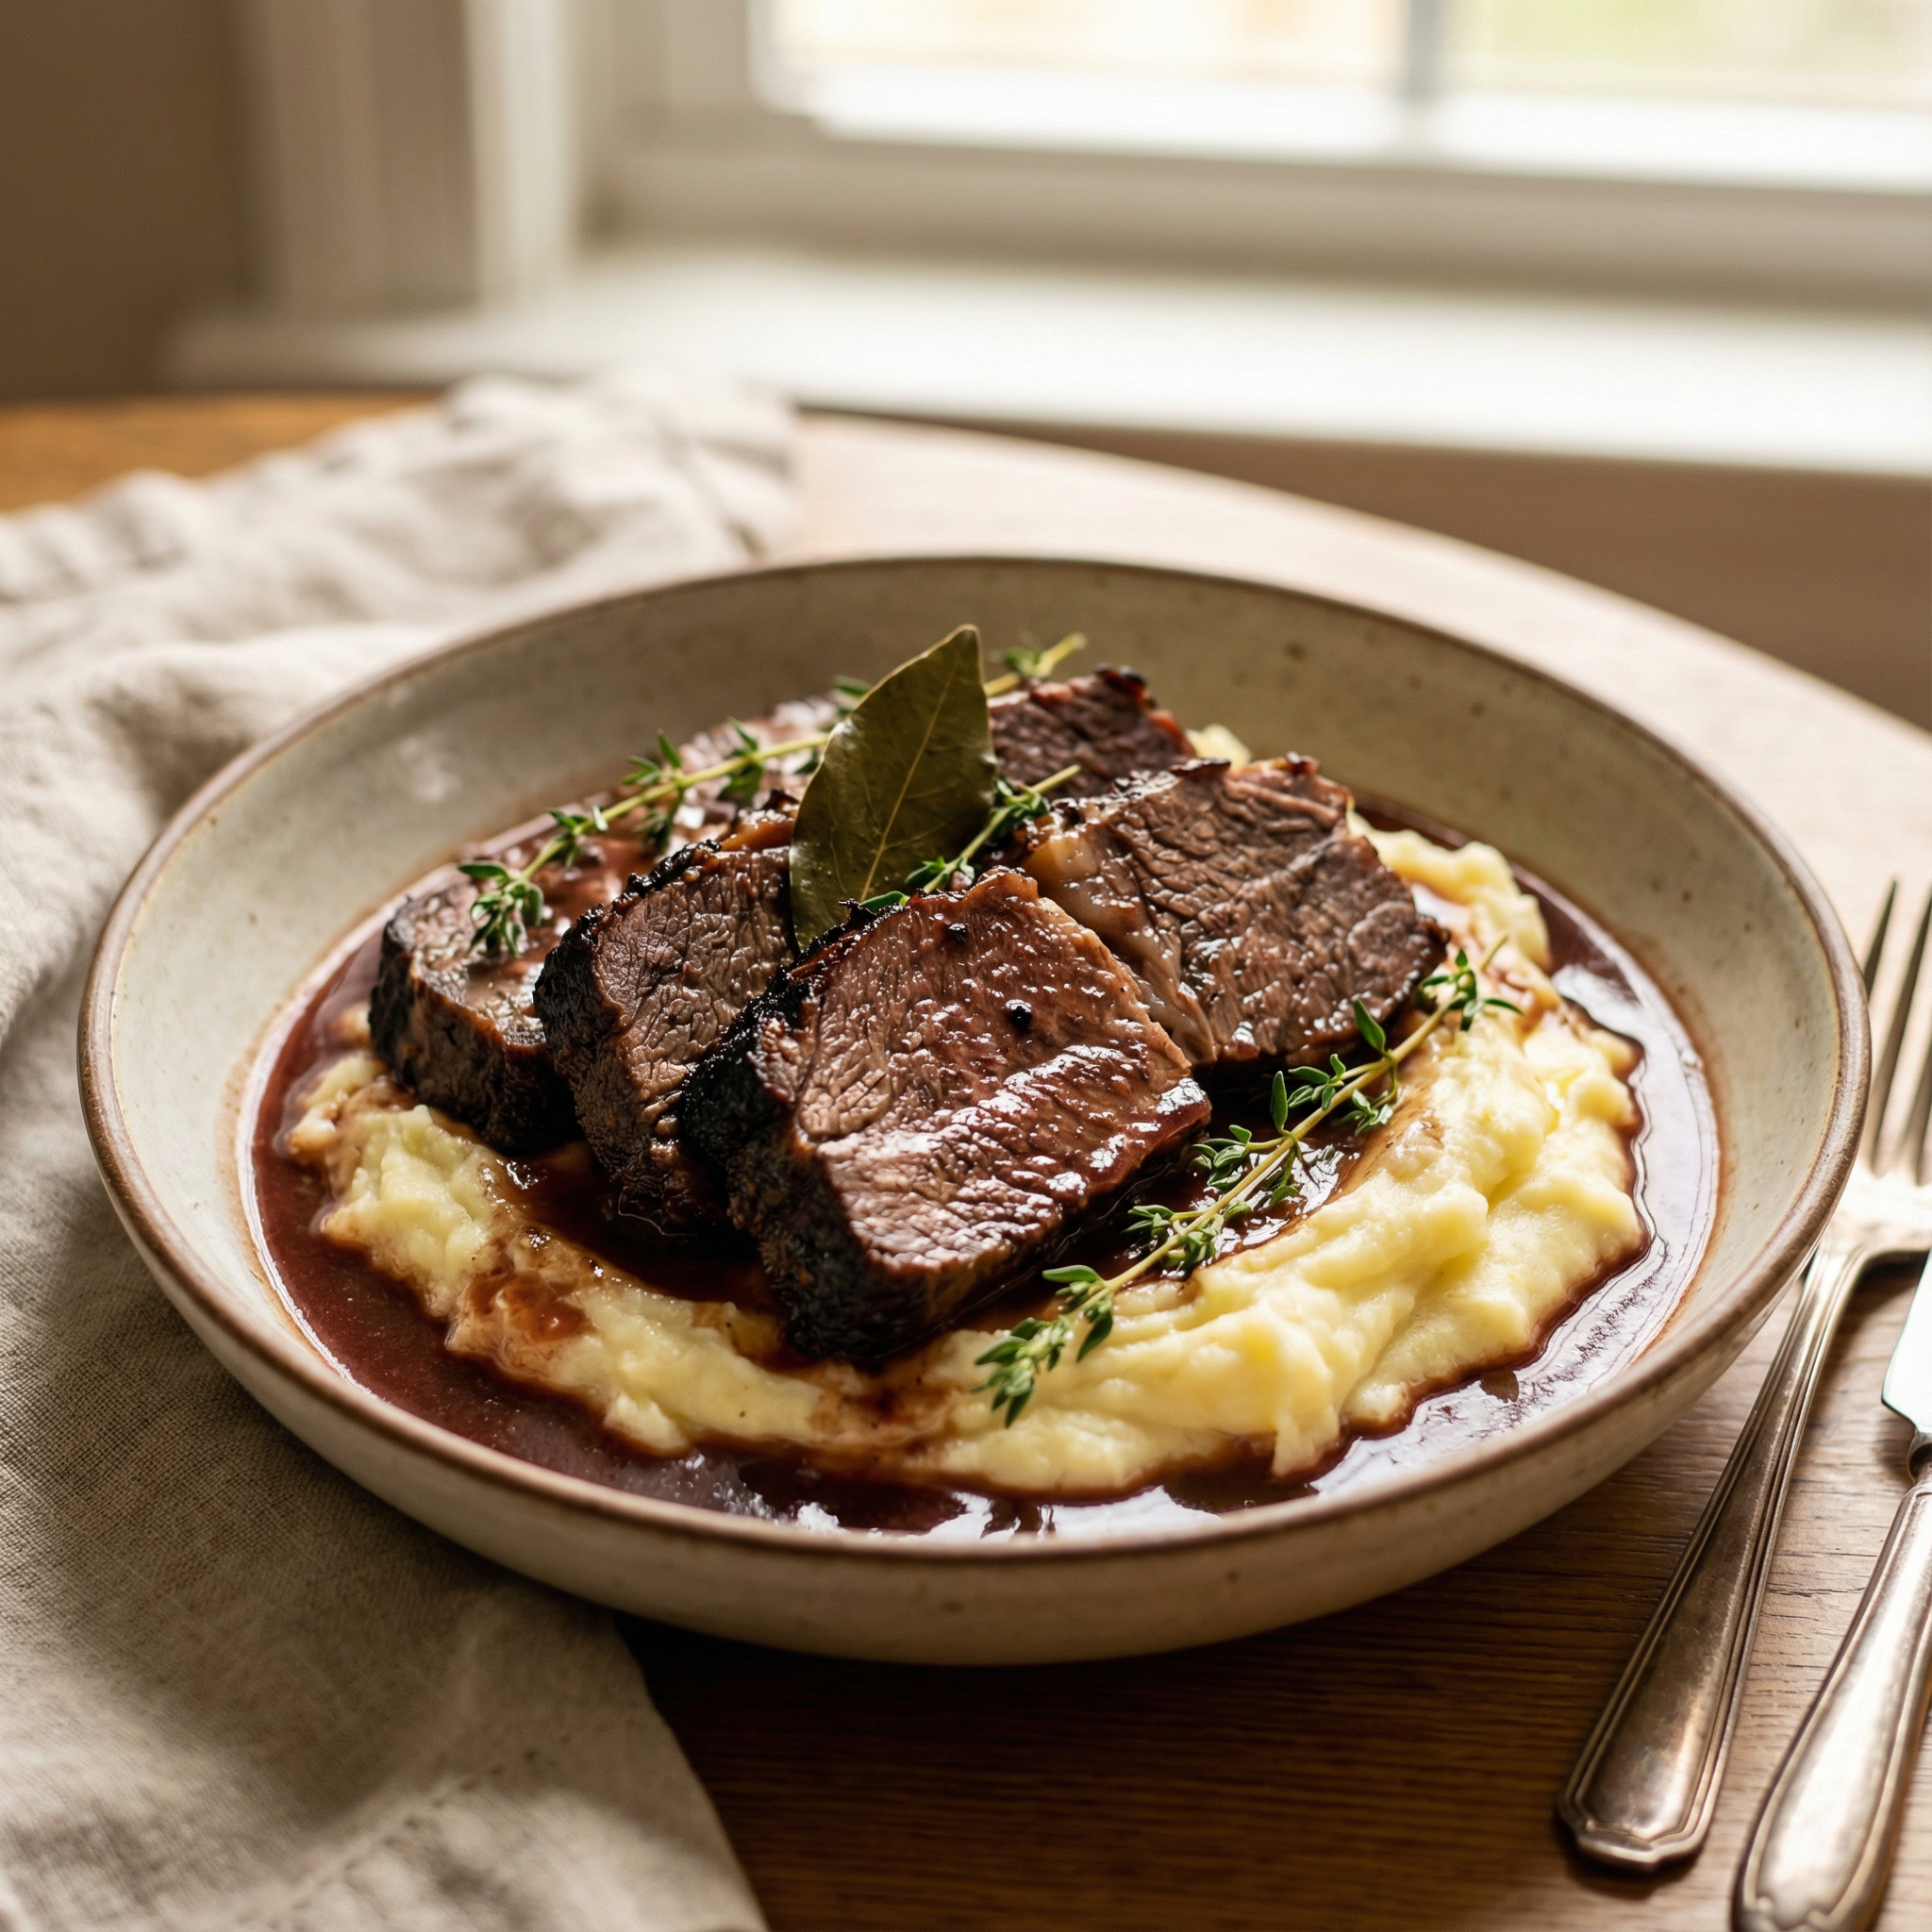
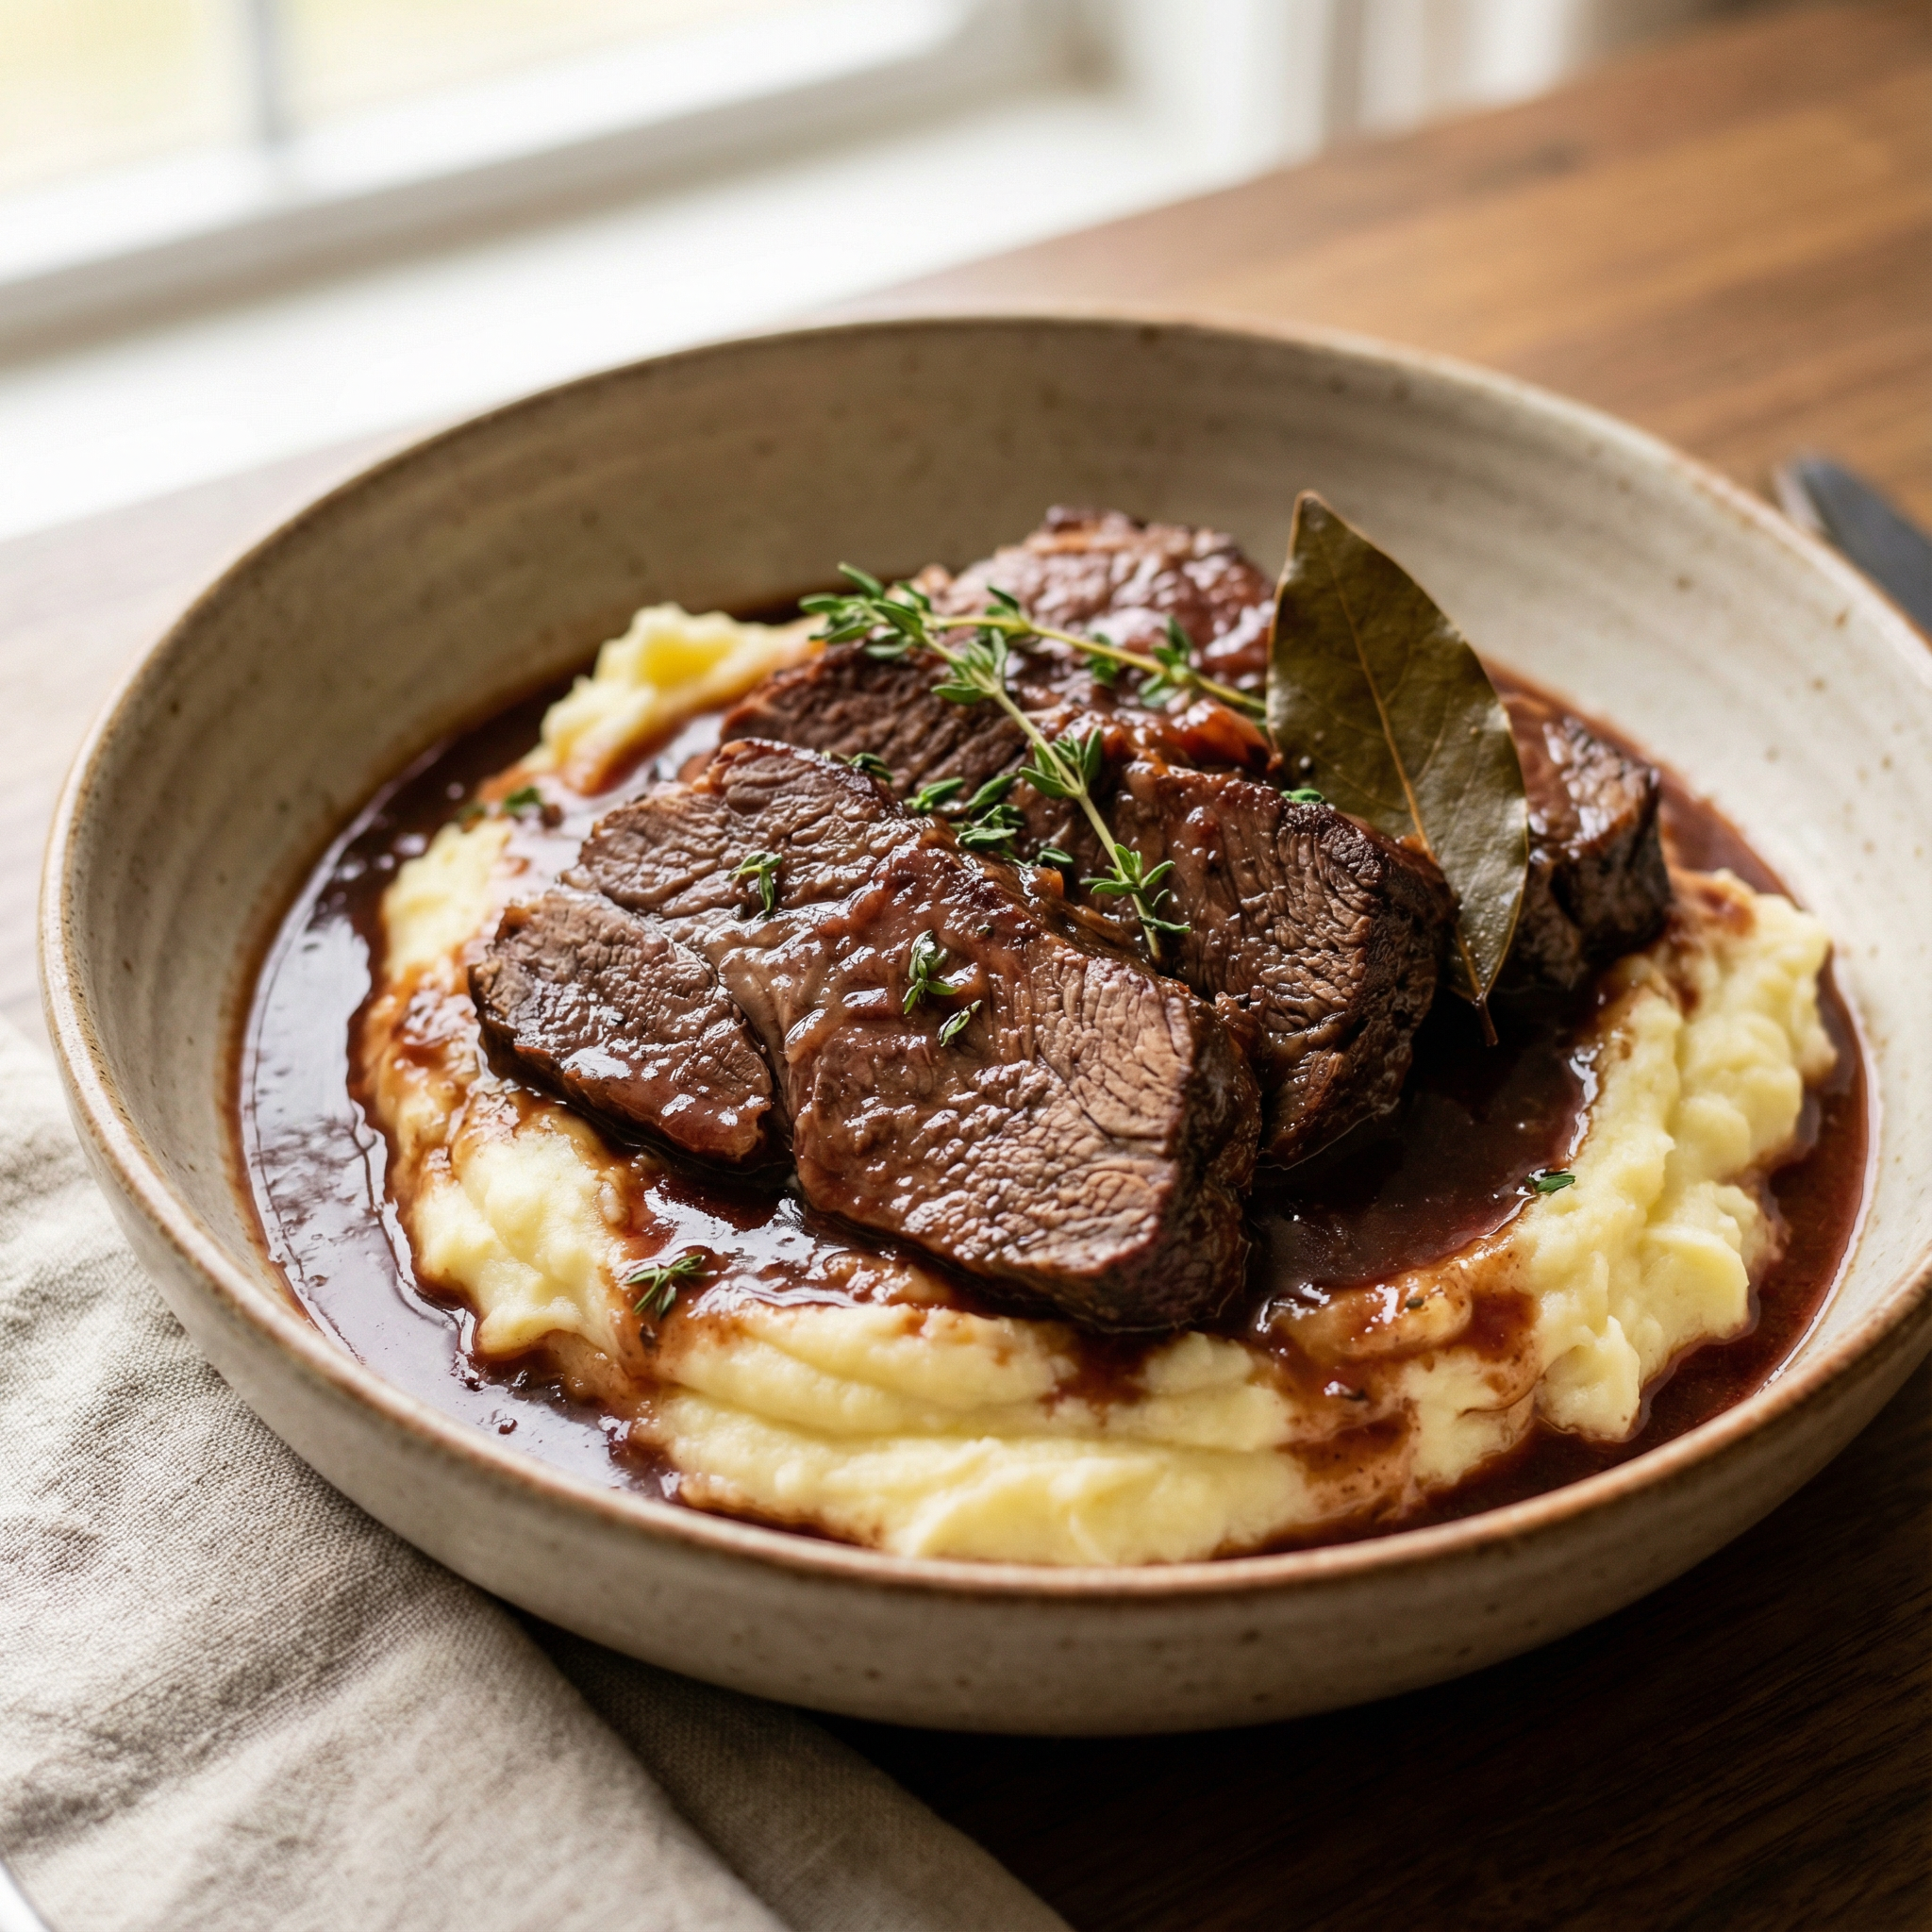
Rest the meat in its juices for 45 minutes so it stays glossy and tender, then skim the fat layer before serving. Serve over creamy mashed potatoes or soft polenta so the sauce gets every last spoonful.
I’ll walk you through timing, smart swaps, and small pro moves—like generous seasoning and drying the meat—that make the method feel reliable and kind to your weeknight or special Sunday table.
Key Takeaways
- Sear first to build color and depth of flavor.
- Use about 3–4 lb chuck, 2 cups wine, and 2 cups stock for a balanced braise.
- Cook low and slow for 3–3.5 hours until collagen becomes silky.
- Rest 45 minutes in the cooking juices, then skim fat before serving.
- Serve over mashed potatoes or polenta to soak up the sauce.
- Simple pro moves—drying and seasoning—lift the final dish.
Why this slow-braised classic works every time
A hot sear at the start is the single step that turns plain roast into something soulful and memorable.
I sear to trigger the Maillard reaction — that deep brown crust creates concentrated flavor that then flavors the sauce. After searing, the roast cooks low and covered in a modest amount of liquid so the environment stays humid while the top remains exposed for concentrated taste.
Over several hours, collagen in tougher cuts melts into gelatin. That change makes the meat silky and tender, and it also thickens the sauce naturally.
- Bring chuck to room temperature, pat dry, and season about 1 tsp kosher salt per pound for even seasoning.
- Sear hard, then add wine and stock so the liquid reaches roughly halfway up the roast.
- Braise at 300–350°F in the oven or a gentle stovetop simmer until the roast pulls apart easily — this can take 2.5–3.5 hours depending on size.
| Method | Heat | Best for |
|---|---|---|
| Oven braise | 300–350°F | Even, hands-off cooking |
| Stovetop | Gentle simmer | Quick checks and stove control |
Key ingredients that build deep, layered flavor
Begin with confident, simple choices—quality meat, a bright soffritto, and a fragrant herb bundle—and the rest falls into place.
Beef, aromatics, and herbs: the foundation
I reach for a 3–4 lb chuck roast because the marbling bastes the meat from within. Pat it dry and season well; that initial spell of salt and pepper is flavor insurance.
For the soffritto, use one medium onion, two carrots, and one rib of celery, all diced small, plus 4–6 garlic cloves smashed. Sauté until sweet and golden; those sugars balance the rich meat.
Tuck in a sprig of fresh thyme and two bay leaves so herbal aromas infuse the pot as the meat cooks.
Stock, wine, and umami boosters for a rich braising liquid
Use 2 cups dry red wine and 2 cups good beef stock. The wine brings acidity and fruit; the stock supplies body. If you can, choose homemade stock or a high-quality store brand.
Add a tablespoon of tomato paste, a teaspoon of Dijon, and a splash of Worcestershire to deepen the braising liquid without extra cost.
Seasoning smart and finishing touches
Start with a generous rub of salt and pepper on the roast, then taste the reduced sauce and adjust. A tablespoon of olive oil helps with a confident sear and a glossy finish to the sauce.
Essential tools for stress-free braising
Good tools turn a fussy dinner into a calm, joyful one—start by choosing cookware that feels reliable in your hands. The right gear saves time, cuts down on cleanup, and gives you consistent results every time.
Dutch oven or braiser: size, material, and why it matters
I favor a 5–5.5‑quart enameled dut‑ch oven because thick walls and a tight lid keep steady heat and moisture. That capacity fits a 3–4 lb roast and leaves room for aromatics and liquid without crowding.
High-heat oils, sturdy utensils, and a sharp chef’s knife
- The heavy bottom prevents scorching, so you can sear confidently and get deep color in just a few minutes per side.
- A neutral, high‑smoke‑point oil is best for strong sears; it won’t break down under high heat.
- A well‑balanced chef’s knife speeds prep and gives clean cuts on vegetables and meat so pieces cook evenly.
- A sturdy wooden spoon helps you scrape up browned bits after deglazing—those bits add huge flavor.
- If you prefer to sear in a skillet, do so and then transfer to your pot to braise; this lets you build fond without juggling pans.
- Use a heatproof ladle and fine skimmer to manage excess liquid or fat before reducing the sauce.
- Measuring cups keep wine and stock ratios consistent, and oven‑safe cookware means an easy move from stovetop to oven.
italian braised beef with red wine recipe: step-by-step method
A confident start—dry, salted meat and a hot pot—sets the stage for slow, flavorful cooking. Bring the roast to room temperature for up to 1 hour, pat it dry, and rub 1 tsp kosher salt per pound plus cracked pepper.
Prep the roast
Letting the chuck rest at room temp helps it cook evenly. Drying prevents steaming so the surface browns properly and builds flavor.
Sear hard for flavor
Heat oil until it shimmers, then sear 3–5 minutes per side until a deep mahogany crust forms. That fond is the backbone of your sauce.
Sauté vegetables and deglaze
Sauté onion, carrots, and garlic just until fragrant. Pour in 2 cups red wine and scrape up the browned bits—those bits become instant complexity in the braising liquid.
Nestle, cover, and braise
Add 2 cups stock, thyme, and bay leaves. Keep liquid halfway up the roast, cover, and braise at 300–350°F for 3–3.5 hours, or simmer gently on the stovetop. Check every 45–60 minutes and add a splash of water if needed.
Rest, skim, and finish
When the roast yields easily to a fork, rest it 45 minutes in the pot. Skim off fat, reduce or thicken the braising liquid with a flour slurry if you like, then warm gently. Serve over mashed potatoes and spoon the sauce over the braised beef for rich, homey comfort.
For a related family-style method, see this authentic family-style brasato for more tips.
Choosing the right cut: tender results from humble beef
The cut you buy sets the tone for texture, sauce body, and cooking time. I help you pick the best piece for steady, forgiving low-and-slow cooking.
Chuck roast: economical, well-marbled, and reliably succulent
My go-to is a 3–4 lb chuck roast. Look for even marbling and compact grain; that internal fat bastes the meat as it melts. Ask your butcher for a piece that hangs together for steady slicing after braising.
Brisket: flat vs point and trimming tips
The flat gives neat slices; the point brings richer texture but more fat. Trim excess fat from the point so the sauce stays glossy, not greasy. Budget extra time if you choose brisket—it rewards patience.
Short ribs: show-stopping flavor for smaller tables
Short ribs deliver deep taste and a gelatinous mouthfeel. They cost more, so save them for company. Sear well, then let the liquid and oven work their magic.
- I sear hard up front, then braise in an oven or on the stove for steady heat.
- Chill the pot briefly after cooking to firm the fat cap, then skim cleanly.
- Check doneness by feel: when a fork slides in, it’s ready to serve.
| Cut | Best use | Fat / Marbling | Result |
|---|---|---|---|
| Chuck roast | Everyday family meal | High, even marbling | Balanced body, juicy slices |
| Brisket (flat) | Neat slices for sharing | Moderate, leaner | Silky finish |
| Brisket (point) | Richer texture | Higher fat | Deep flavor, trim before cooking |
| Short ribs | Special occasions | High connective tissue | Gelatinous, show-stopping |
Red wine picks and smart substitutions
Choose a bottle that will cook down and lift the sauce. I favor dry, drinkable reds that match the roast rather than drown it.
Best wine styles
For everyday luxury, Merlot or Chianti gives steady body and bright fruit. I use Cabernet or Syrah when I want more structure and grip. For a real splurge, Barolo turns the dish into a centerpiece.
No-alcohol option
Skip the bottle? Replace the liquid with more good beef stock and a splash of water. The meat stays comforting though the aroma is softer.
- Pick a wine you’d enjoy by the glass—if it tastes good poured, it will make a balanced braising liquid.
- Add thyme and bay leaves when you omit alcohol; they help rebuild lost complexity.
- Taste in the last minutes and adjust acidity, salt, and body so the sauce and meat feel in sync.
| Choice | Profile | When to use |
|---|---|---|
| Merlot / Chianti | Medium, fruity | Everyday roast, balanced sauce |
| Cabernet / Syrah | Bold, tannic | When you want intensity |
| Barolo | Complex, elegant | Special-occasion braising |
| Stock + water | Comforting, round | Alcohol-free swap |
What to serve alongside for a complete, cozy meal
A comforting pot needs company on the plate—sides that catch sauce and cut fat make the meal sing. Pick textures and bright notes so the main stays center stage while each bite feels balanced.
Mashed potatoes or creamy polenta to catch every drop
I spoon the sauce over mashed potatoes or creamy polenta so every drop ends up on your fork. Start the pot of polenta early; it holds well and you can loosen it with a splash of stock before serving.
Leafy salads for freshness and balance
Bright, leafy salads—think a lemony kale Caesar—add acidity and crunch. Toss the greens in the last minutes so they stay crisp while the roast rests.
Buttery rolls and simple green vegetables
Warm dinner rolls are perfect for sopping up juices; set them on top of the plate for easy mopping. Simple greens like green beans, broccoli, or sautéed spinach give color and snap.
Sweet finishes that pair with rich mains
- Almond ricotta cake or apple crisp—light, not cloying—make a lovely finish to this hearty dish.
- Roasted carrots or quick pan veg bring an earthy sweetness that complements the main.
| Side | Why it works | Make-ahead tip |
|---|---|---|
| Mashed potatoes | Creamy base for sauce | Rewarm with a splash of milk or stock |
| Polenta | Holds sauce, silky texture | Keep covered; loosen before serving |
| Leafy salad | Bright contrast, cuts richness | Dress at the last minute |
Make-ahead, storing, freezing, and reheating without drying out
Plan ahead and your pot will reward you. After cooking, cool the roast 1–2 hours, then chill overnight so flavors meld and the top fat firms for easy skimming.
Refrigerate the meat and its liquid together for 4–6 days in the pot or airtight containers to keep fibers juicy. For longer storage, portion with carrots, celery, and onion, cover with enough liquid, press out air, label with the date and bay and freeze up to 3 months.
To reheat, warm gently in a dutch oven or skillet over low heat. Add a splash of stock or water, stir slowly, and check every few minutes. Keep the heat low so the beef stays tender. Skim the top fat, season with a touch of salt and pepper, and finish with a drizzle of olive oil. If the sauce is loose, reduce; if tight, loosen with a little more liquid. For oven reheating, cover and set at 300°F, checking every 15–20 minutes.
Italian Braised Beef with Red Wine (Brasato-Style Chuck Roast)
Ingredients
Method
Notes
- Drying the meat matters. Wet beef steams and loses crust.
- Resting in the liquid keeps slices juicy and glossy.
- Chilling overnight deepens flavor and firms fat for easy removal.
- Serve with starches that hold sauce. Polenta and mashed potatoes work best.