
Jump to Recipe
There’s a quiet satisfaction in creating something beautiful and useful with your own hands. The rich scent of toasted almonds and warm spices filling your kitchen feels like a genuine embrace. This tradition connects us to generations of home cooks who understood that the best presents are those made with care and meant to be shared.
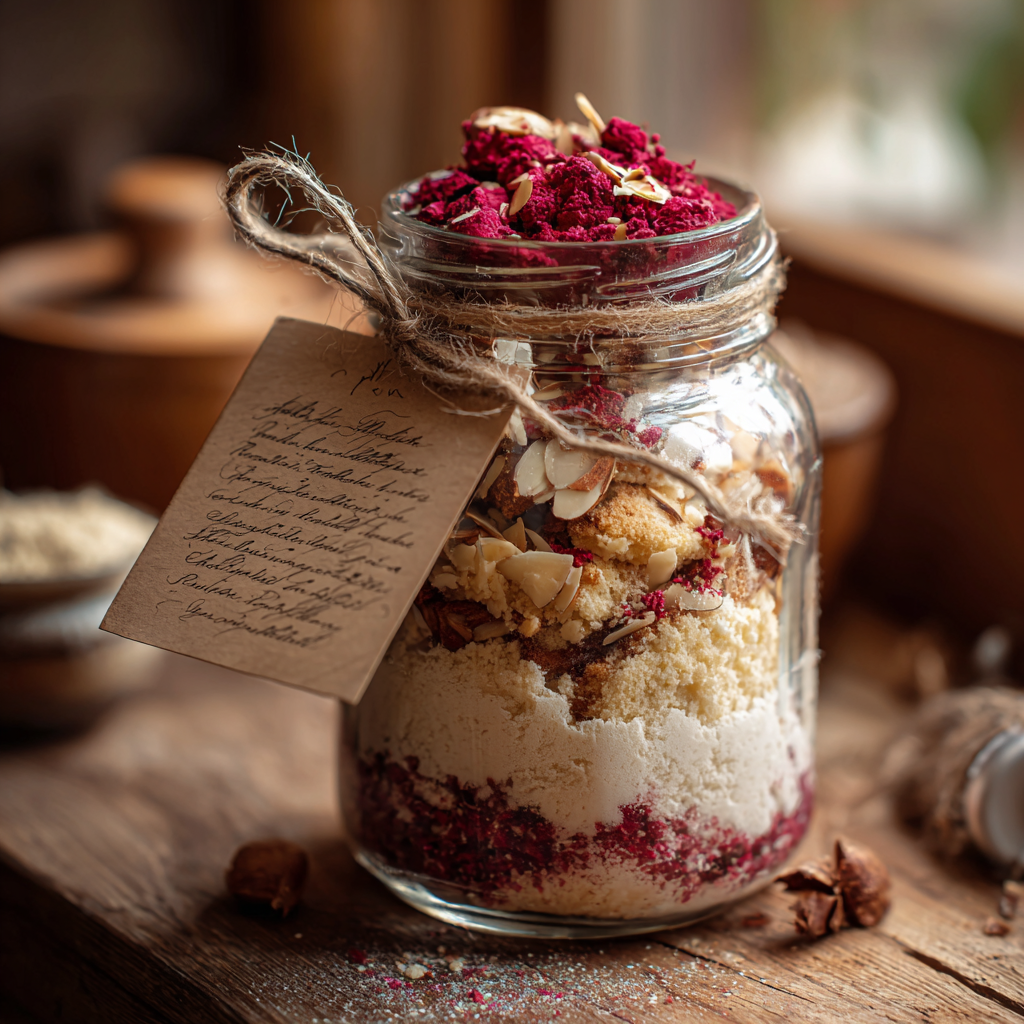
Creating these layered mixes is a wonderfully practical project. It brings the visual charm of sand art into the realm of homemade food. You carefully arrange the dry ingredients in a clear container, building stripes of flour, sugar, and nuts. The result is as pleasing to the eye as the finished cookies are to the palate.
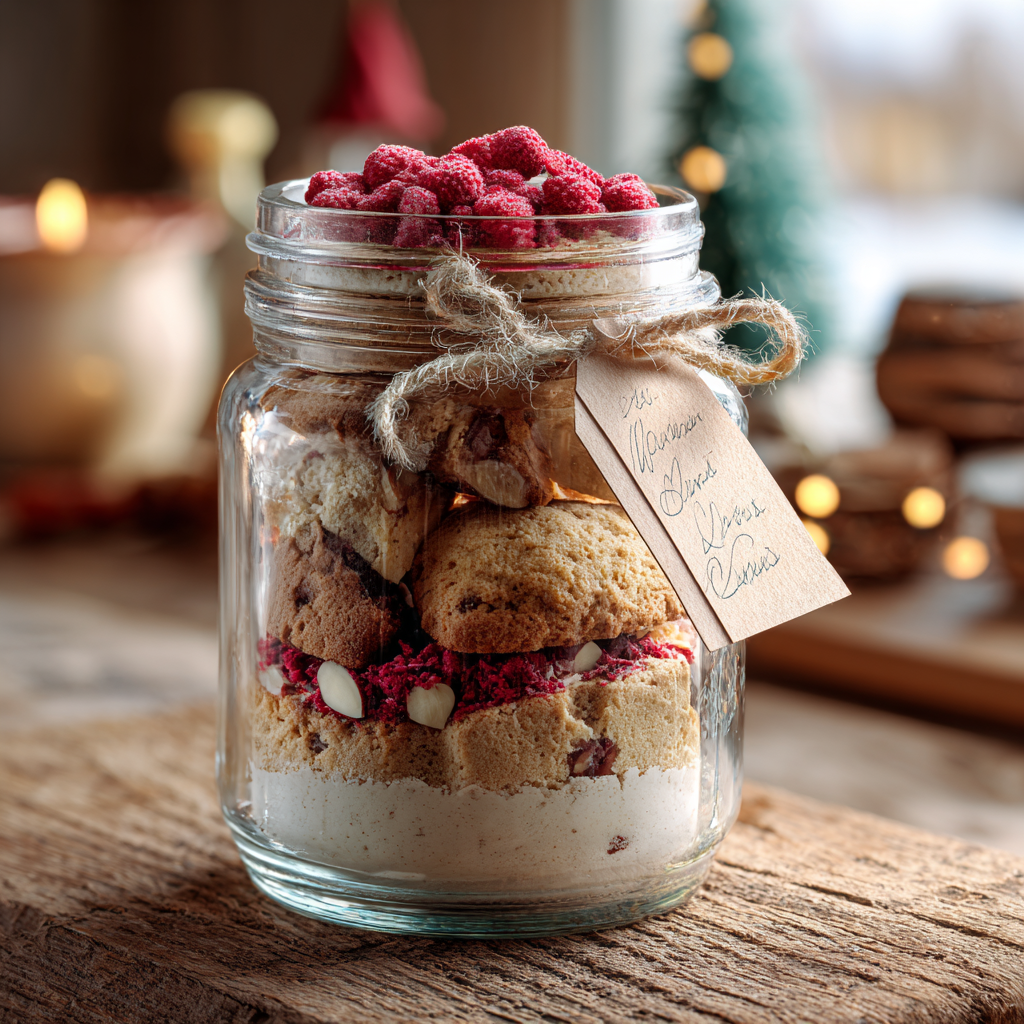
This approach is perfect for the holiday season. It allows you to give the gift of fresh baking without the recipient needing any special skills. They simply add a few common wet ingredients to the contents of the jar. Soon, their home will be filled with the same wonderful aroma of baking cookies.
We will walk through each step to ensure your success. You’ll learn how to select the best ingredients for flavor and texture. We will cover the art of layering for a stunning presentation. You’ll also discover how to customize your creations with different flavors.
Key Takeaways
- These layered jars combine visual appeal with the convenience of a ready-to-bake mix.
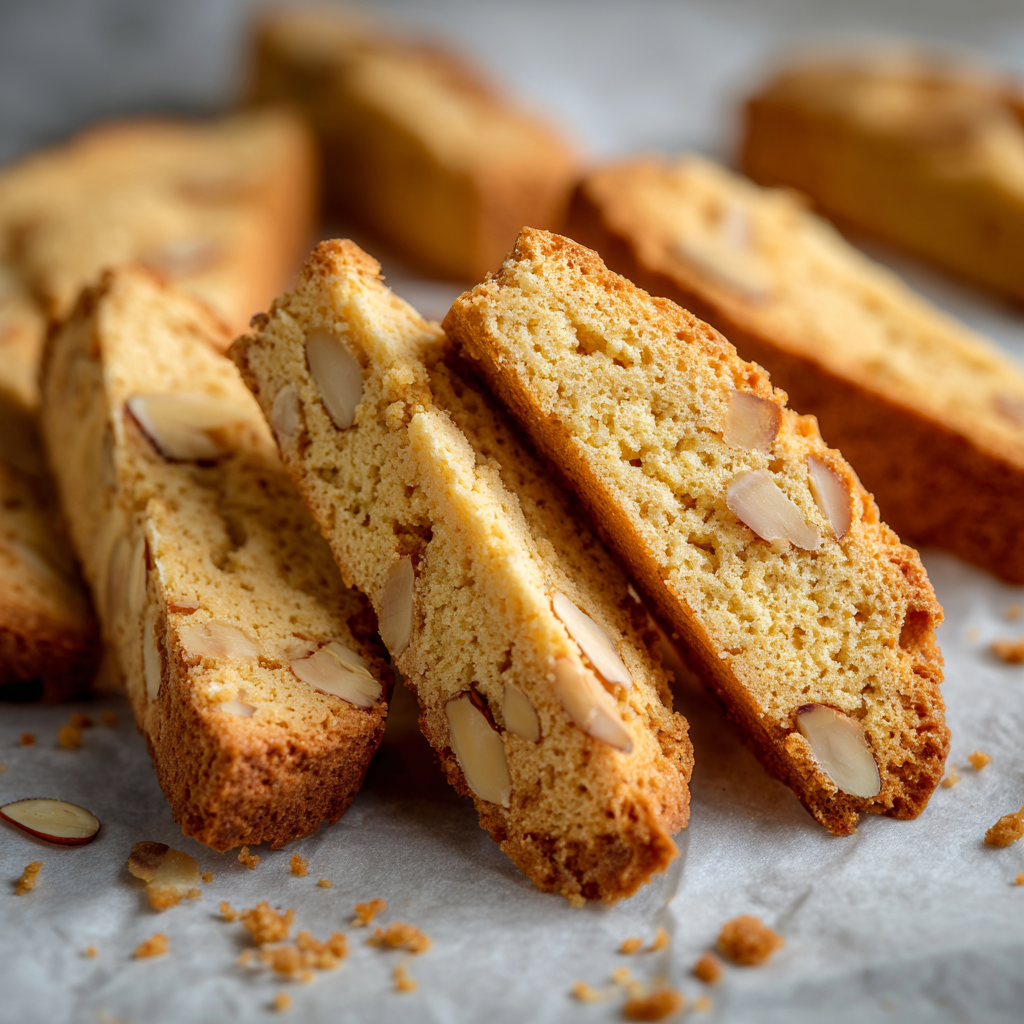
- The tradition stems from twice-baked cookies known for their satisfying crunch.
- Homemade food gifts show thoughtfulness and personal care.
- This project is versatile and suitable for many people on your holiday list.
- This guide covers ingredient selection, layering techniques, and flavor variations.
- Recients only need to add a few wet ingredients to bake fresh cookies.
- Proper instructions ensure anyone can successfully create the final treat.
Celebrating the Tradition of Biscotti Gift Jars
Layered baking mixes in containers represent a beautiful fusion of visual art and practical cooking. This approach transforms simple ingredients into something truly special.
The Sweet Story Behind Homemade Gifting
Handcrafted presents carry emotional weight that store-bought items cannot match. When someone invests time to create something tailored to your tastes, it communicates genuine care.
These mixes offer busy home cooks a wonderful way to share homemade food. You experience the satisfaction of giving without the logistical challenges of baking and delivering fresh cookies during hectic seasons.
This type of present stands apart from typical cookie mixes. It appeals to those with more refined tastes who appreciate sophisticated flavors.
Drawing Inspiration from Classic Sand Art and Bars-in-Jars Trends
The visual technique traces back to the 1970s sand art phenomenon. Layered gift recipes began appearing in American cookbooks like HP Books’ “Make a Mix Cookery” around this same time.
Families can enjoy preparing these creations together. Older children can work independently while younger ones participate with supervision, learning measuring and sequencing skills.
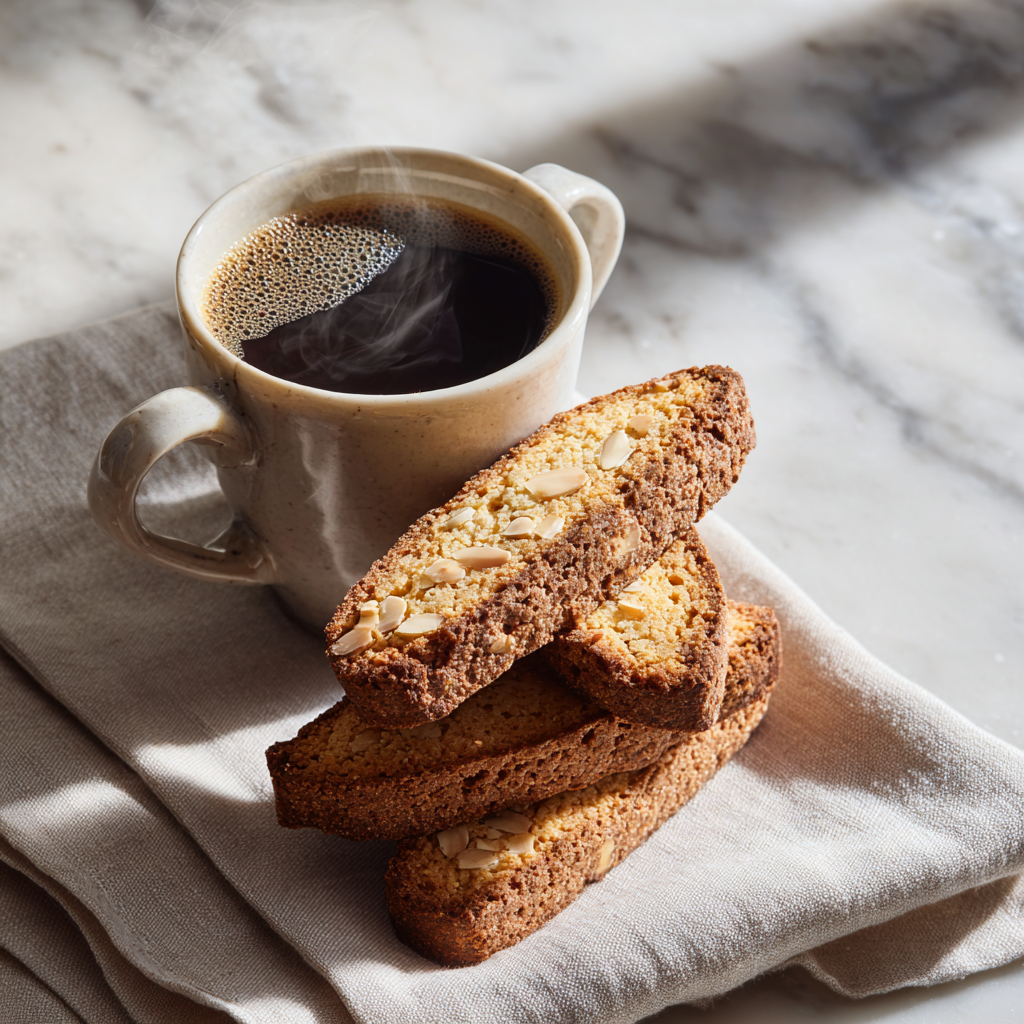
Clear instructions are essential for success. Include detailed steps either printed decoratively or attached as a card. This ensures recipients know exactly how to transform the dry mix into finished biscotti that pair perfectly with coffee.
Gathering Your Essential Ingredients and Tools
Successful preparation begins with thoughtful selection of your core elements. The right components ensure both visual appeal and delicious results.
Selecting Quality Almonds, Freeze-Dried Berries, and More
Your choice of flour significantly impacts texture and authenticity. Consider these options based on your preferences and needs.
| Flour Type | Best For | Texture Result | Notes |
|---|---|---|---|
| Italian 00 Flour | Traditional approach | Fine, delicate crumb | Handles high heat well |
| All-Purpose Flour | Convenience baking | Standard texture | Widely available |
| Gluten-Free Blend | Dietary needs | Slightly denser | May require adjustments |
| 50-50 White/Whole Wheat | Nutrition balance | Heartier texture | Adds fiber content |
Raw unblanched almonds provide authentic flavor and satisfying crunch. Shelled pistachios save preparation time while adding visual interest.
Freeze-dried raspberries offer intense flavor with minimal moisture. Dried cherries or cranberries provide chewier texture alternatives.
Traditional versions skip butter entirely for maximum crispness. A small amount creates richer cookies if preferred.
Tools That Make Layering and Mixing a Breeze
Clear quart-sized containers showcase your beautiful layered work. They allow the colorful ingredients to shine through.
Accurate measuring cups ensure proper proportions. A funnel helps create neat, distinct layers without spillage.
Attach clear instructions for successful baking. Sturdy paper or recycled cards work perfectly for this purpose.
Mastering the Italian Biscotti Gift Jars Recipe
Creating distinct, stable layers is both an art and a practical science. The sequence matters for both appearance and baking success.
Layering the Dry and Wet Ingredients with Care
Begin with your flour mixture in the container. Combine 1½ to 2¼ cups all-purpose white flour with ½ teaspoon baking powder and scant ½ teaspoon salt.
Use a funnel for clean pouring. This prevents streaking and maintains sharp layer definition.
| Layer Sequence | Ingredients | Purpose | Preparation Tip |
|---|---|---|---|
| 1. Base Layer | Flour, baking powder, salt | Structural foundation | Mix thoroughly before adding |
| 2. Middle Layer | Sugar with nuts/spices | Flavor distribution | Combine granulated sugar with chopped almonds |
| 3. Top Layer | Dried fruits/berries | Visual appeal | Add colorful freeze-dried options |
After each addition, gently tap the container on your counter. This settles the contents and creates stable strata.
The sugar layer should include your chosen nuts and spices. Mix ½ to ¾ cup granulated sugar with almonds and cinnamon before adding.
Baking Tips for Achieving the Perfect Crunch
Recipients combine the contents with wet ingredients. They’ll need 2 large eggs, oil, and citrus zest.
Beating eggs and sugar until pale yellow is crucial. This aeration creates the proper texture.
Shape the dough into a 14-inch log on parchment paper. Press to ¾-inch thickness for even baking.
Bake at 350°F until lightly golden, then cool completely. This resting period prevents crumbling during slicing.
The second bake at 325°F delivers the characteristic crispness. For more holiday baking inspiration, explore this family tradition collection.
Exploring Flavor Variations and Creative Twists
The real joy of these baking mixes comes from their incredible adaptability. You can create entirely different experiences by swapping just a few key ingredients.
This flexibility lets you match each gift to the recipient’s preferences. Think about what flavors they enjoy with their coffee or tea.
Infusing Unique Nuts, Citrus Zest, and Dried Fruits
Classic almond pairs beautifully with vanilla for a traditional profile. For something more distinctive, try almond extract with anise.
Citrus zest brings wonderful brightness to the cookies. Lemon provides sharp acidity while orange offers sweeter aromatic notes.
Consider different nut combinations for varied textures. Hazelnuts add earthy richness while pistachios contribute subtle sweetness.
Dried fruits like cherries or cranberries provide tart contrast. Figs and dates introduce caramel notes that complement the crisp texture.
Substitutions and Customizations to Suit Every Taste
Chocolate lovers can add dark chips for bittersweet pockets. White chocolate creates creamy sweetness throughout each bite.
Spices like cinnamon work naturally with almonds and fruit. Cardamom adds floral notes that pair wonderfully with pistachios.
For texture variations, stone-ground cornmeal increases crunch. Unsweetened coconut provides chewiness without extra sweetness.
The butter question comes down to personal preference. Traditional versions skip it for maximum crunch ideal for dunking.
Adding just one ounce creates slightly richer, softer cookies. Both approaches yield delicious results depending on your texture goals.
Packaging, Presenting, and Storing Your Biscotti Gifts
Thoughtful packaging ensures your homemade creation arrives ready for baking success. The final presentation transforms your layered ingredients into a complete baking experience.
Clear instructions are essential for anyone receiving your mix. Attach them securely to the container with ribbon or twine.
Creative Jar Decoration and Recipe Card Ideas
Recycled Christmas card fronts make excellent instruction cards. Simply paste the baking directions on the back for an eco-friendly touch.
Colorful cardstock printed with clear steps creates a professional look. Include every detail from preheating the oven to 350 degrees to lining the baking sheet with parchment paper.
Helpful tips make a difference for novice bakers. Mention that cooling the baked log for 30 minutes prevents crumbling. Suggest using a serrated knife for clean diagonal slices.
Best Practices for Long-Lasting Freshness
Your unopened mix stays fresh for about one month at room temperature. Refrigeration extends this to two months if needed.
Consider including foil pans if your recipient lacks proper baking equipment. This ensures they have everything required for success.
Finished cookies store beautifully in air-tight containers. Their low moisture content keeps them crisp for weeks. Flavors actually improve after a day or two as they meld together.
Celebrating Your Biscotti Journey and Holiday Cheer
Your work assembling these mixes culminates in a gift that offers more than just cookies. It delivers an entire baking experience wrapped in thoughtful presentation.
Suggest enjoying these crunchy treats with hot coffee for dunking or explore traditional pairings like Vin Santo. The authentic preparation method creates cookies that stay crisp for weeks.
These creations work beautifully as holiday presents because they combine convenience with homemade care. You can prepare them ahead of time, reducing seasonal stress while delivering something special.
The satisfaction comes from knowing recipients will bake fresh treats using your carefully layered ingredients. For those interested in traditional methods, this almond biscotti recipe offers deeper insight into classic techniques.
Italian Almond Biscotti Gift Jars
Ingredients
Method
- In a bowl, combine flour, baking powder, and salt. Mix well.
- Using a funnel, pour the flour mixture into a clear quart-size jar. Tap gently to level.
- Mix sugar with chopped almonds and cinnamon.
- Carefully spoon the sugar-nut mixture over the flour layer. Tap gently again.
- Add freeze-dried berries or dried fruit as the top layer.
- Close the jar tightly. Attach baking instructions for the recipient.
- Heat oven to 350°F (175°C). Line a baking sheet with parchment paper.
- In a bowl, beat eggs until pale. Add oil, vanilla, and citrus zest.
- Add all dry ingredients from the jar. Mix until a sticky dough forms.
- Transfer dough to the baking sheet. Shape into a 14-inch log, about ¾-inch thick.
- Bake for 25–30 minutes, until lightly golden and firm.
- Cool the log for 15–20 minutes. Slice diagonally using a serrated knife.
- Reduce oven to 325°F (165°C). Bake slices for 10–12 minutes per side until crisp.
- Let biscotti cool fully before storing.
Notes
- Traditional biscotti do not use butter, which keeps them extra crisp and perfect for dunking.
- Freeze-dried fruit gives strong flavor without adding moisture.
- Biscotti stay fresh for up to two weeks in an airtight container.
- Flavors improve after a day as everything settles.
- Pair with coffee, espresso, or Vin Santo for a classic experience.