
Jump to Recipe
There’s a particular comfort that comes from pulling a golden, fragrant bread from your own oven. The scent of good olive oil and herbs warming together fills the kitchen, promising something simple and deeply satisfying. It’s a feeling I chase in my own cooking, a small piece of Italian tradition made real at home.
Many home cooks feel hesitant about baking bread without traditional wheat flour. The process can seem technical and unforgiving. This preparation breaks that pattern completely. The mixture is meant to be wet and sticky, more like a thick batter than a pliable dough. There is no kneading required, and no special shaping skills are needed.
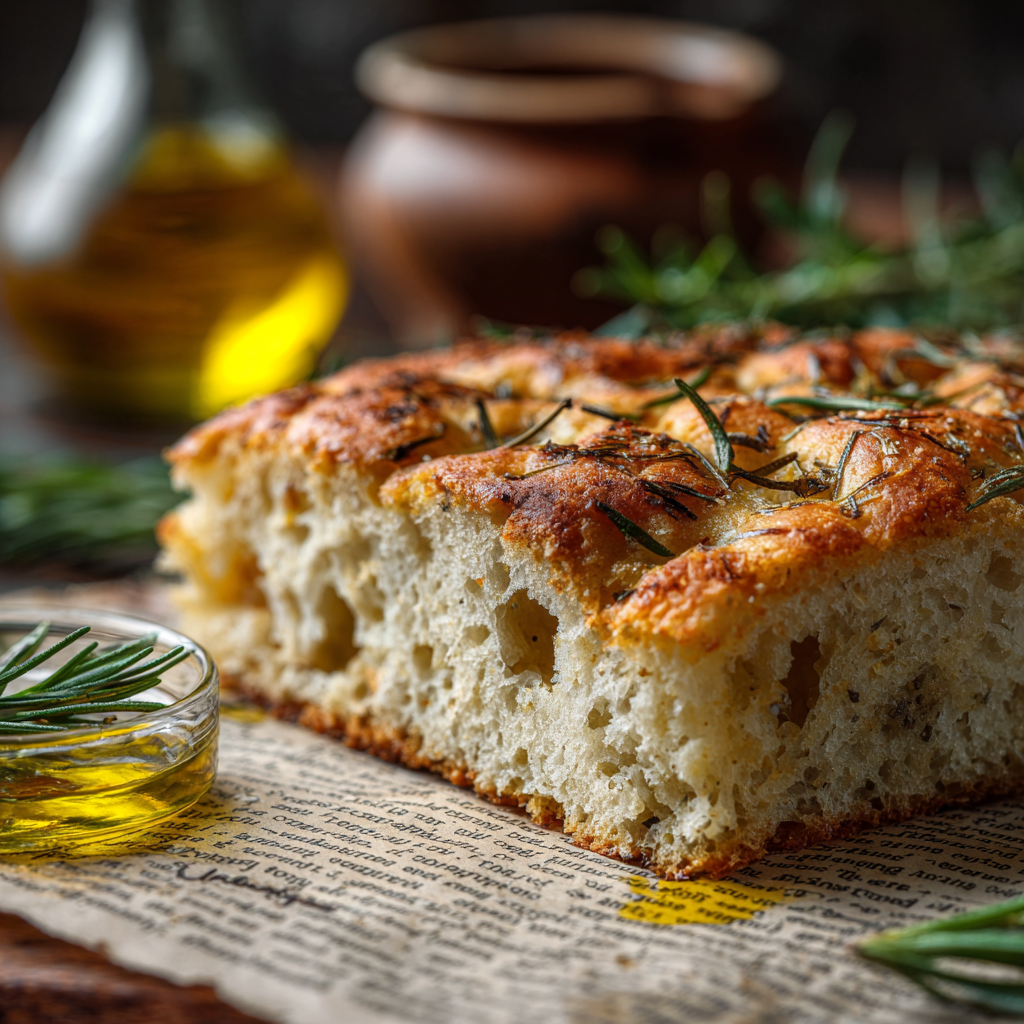
Traditional versions rely on gluten for their signature airy texture and crisp edges. This approach achieves the same wonderful result through a different method. In fact, it simplifies the entire process. I’ve made this many times, watching it become a regular in my kitchen rotation because it delivers authentic flavor without complexity.
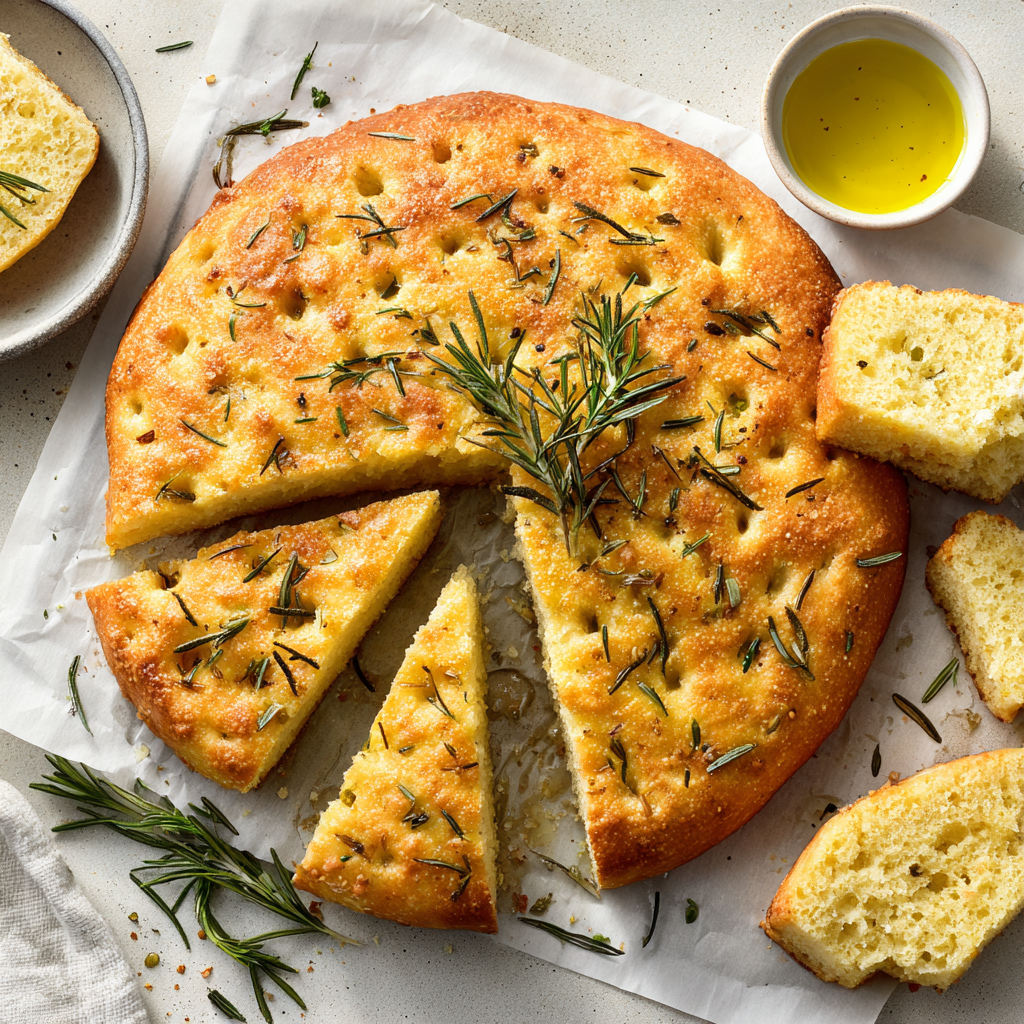
Fresh rosemary, quality olive oil, and flaky sea salt are the classic toppings that define this type of flatbread. These humble ingredients create something that tastes like it came from a bakery in Italy. The entire process, from mixing to a golden loaf, takes about an hour with only minutes of active work.
Remember that the mixture will look different from what you might expect. It should be loose and pourable. Resist the urge to add more flour. I’ve tested this with different flour blends and pan sizes, finding consistent success when following these key principles.
Key Takeaways
- This method is surprisingly simple, requiring no kneading or advanced baking skills.
- The wet, batter-like consistency is correct and essential for the right texture.
- High-quality olive oil, fresh rosemary, and sea salt create the authentic flavor profile.
- From start to finish, the process takes about an hour with minimal hands-on time.
- The final product works beautifully as a side dish, for sandwiches, or for dipping.
- Trust the process—the loose dough is intentional and leads to the best results.
Ingredients That Make a Difference
In alternative baking, ingredient choices carry more weight than in traditional methods. The right flour blend can mean the difference between a perfect loaf and a disappointing one. I’ve found that King Arthur Measure for Measure consistently delivers the best results.
This particular blend achieves a golden crust with a properly cooked center. Other options like Bob’s Red Mill 1-to-1 can work but may result in a softer texture. Some bakers report a gummy center that never fully sets with that brand.
Key Gluten-Free Flours and Additives
Stick with all-purpose blends that include xanthan gum already mixed in. This additive acts as the structural substitute, allowing the dough to trap air bubbles properly. Single-grain flours alone won’t provide the necessary texture.
Combining baking powder with yeast creates a double lift effect. The yeast develops flavor while the baking powder ensures good height. Instant yeast cuts rising time in half compared to active dry varieties.
A small amount of sugar or honey serves an important purpose beyond sweetness. It feeds the yeast organisms, activating proper fermentation for better rise and flavor development.
Fresh Rosemary, Olive Oil, and Sea Salt Essentials
Extra virgin olive oil contributes in three distinct ways throughout the process. It enriches the dough, creates a crispy bottom crust, and adds authentic Italian flavor when drizzled on top. Quality truly matters here.
Fresh chopped rosemary delivers the most aromatic, authentic taste. If using dried, reduce the amount to one-third of the fresh measurement. The difference in flavor intensity is noticeable.
Flaky sea salt like Maldon adds textural contrast and little bursts of salinity. This makes each bite more interesting than regular table salt would. The combination of these simple ingredients creates remarkable depth.
The Art of Mixing and Activating Yeast
The transformation from simple ingredients to a risen loaf begins with precise temperature control. This step is where many bakers face their first hurdle. Getting it right ensures everything that follows works as intended.
I always recommend using an instant-read thermometer for accuracy. It removes the guesswork. Your goal is water that feels warm, not hot, to the touch.
Step-by-Step Process for Creating the Dough
Start by combining your yeast and a pinch of sugar in a large bowl. Pour warm water over it. The right temperature is key.
For active dry yeast, aim for 105-110°F. Instant yeast prefers 120-130°F. Let this mixture sit for about five minutes. You should see a foamy layer form on top.
This foam means your yeast is alive and active. If nothing happens, check your water temperature or yeast expiration date. While the yeast blooms, whisk your dry ingredients together in a separate bowl.
This ensures even distribution. Now, combine the wet and dry mixtures. Use a stand mixer or handheld mixer on medium speed.
Beat the batter for three to five minutes. It will be very sticky and wet. This is correct. Resist the urge to add more flour.
Tips on Blooming Yeast and Managing Water Temperature
If you don’t have a thermometer, use the touch test. You should be able to hold your finger in the water comfortably for several seconds. If it’s too hot, let it cool.
Also, ensure any added egg is at room temperature. A cold egg can cool the mixture and slow the rising process. If needed, place a cold egg in warm water for a few minutes first.
The entire mixing process is fast. It takes less than five minutes of active time. This efficiency is one reason this classic garlic and rosemary combination is so rewarding to make at home.
Mastering Dough Handling and Texture
Working with this unique dough consistency feels unfamiliar at first but quickly becomes intuitive. The mixture pours rather than shapes, requiring a different approach than traditional bread preparation.
Parchment paper is essential insurance against sticking. This batter will adhere firmly to any surface without this protective layer.
Ensuring a Sticky Yet Balanced Batter
Begin by lining your chosen pan with parchment. Pour 2-3 tablespoons of olive oil directly onto the paper before adding the dough. This creates the crispy bottom crust we all love.
Add another 1-2 tablespoons of oil on top of the dough. Use oil-coated fingertips to gently spread the mixture toward the pan edges. The oil prevents sticking while creating those characteristic dimples.
Choose your pan size carefully, as it directly affects the final texture:
| Pan Type | Dimensions | Resulting Texture | Baking Time |
|---|---|---|---|
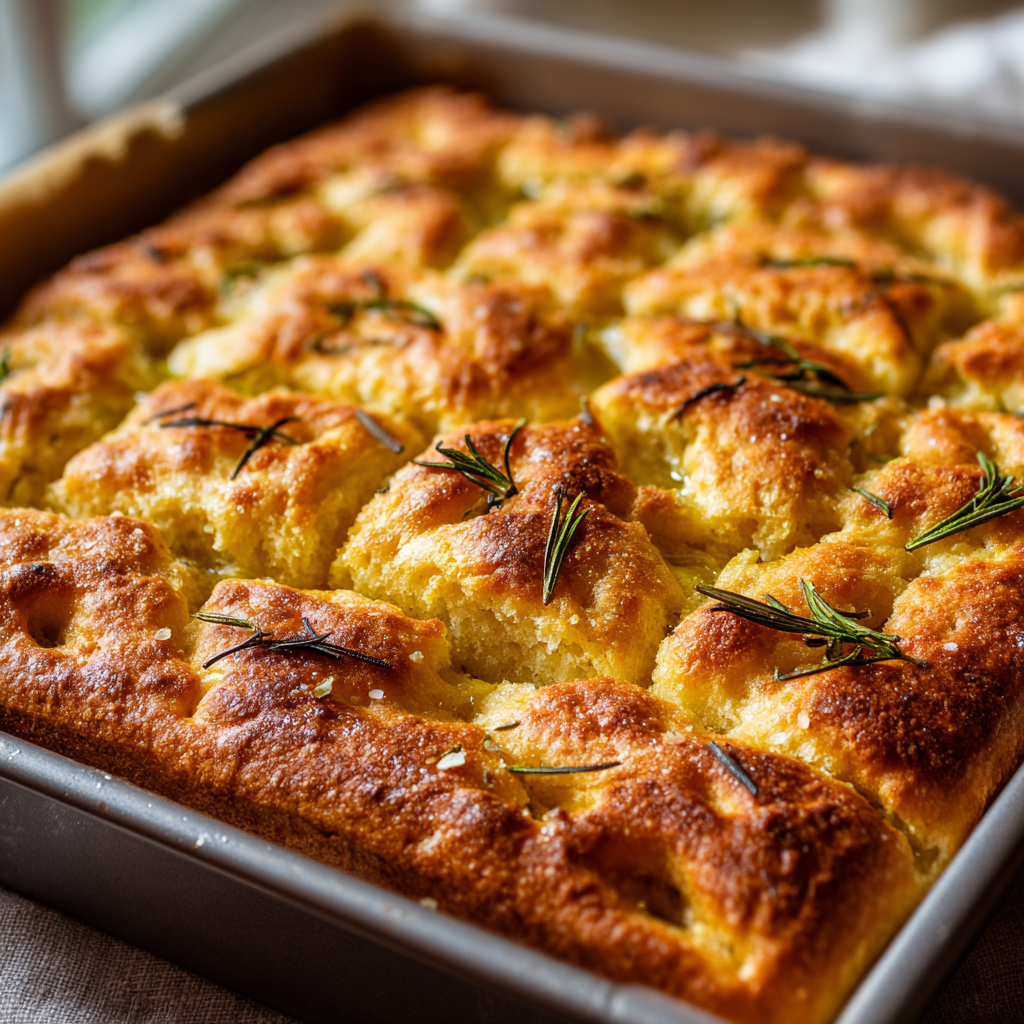
| Square Baking Pan | 8×8 or 9×9 inches | Thicker, softer center | Longer bake required |
| Cast Iron Skillet | 12-inch diameter | Crispy crust, even heat | Traditional timing |
| Baking Sheet | Free-form rectangle | Thinner, crispier result | Shorter bake time |
Cover the pan and let it rise in a warm place. The dough will puff visibly but won’t double dramatically like wheat-based versions. This modest rise still creates that wonderful airy texture when baked.
Some preparations allow refrigerating the dough for up to a week. This slow fermentation develops deeper flavor while offering convenient make-ahead flexibility.
Expert Tips for a Gluten Free Focaccia Rosemary Recipe
Successful baking often comes down to a few simple but critical details that make all the difference. I’ve learned through experience that these fundamentals separate good results from great ones.
Time-Saving Techniques and Critical Reminders
Always test your baking powder and yeast before starting. Drop a teaspoon of powder into hot water – it should bubble vigorously. Watch for foam during yeast blooming to confirm it’s active.
Most home ovens run 25-30 degrees off their set temperature. A simple oven thermometer shows the true heat inside. This accuracy prevents underbaked centers.
Instant yeast cuts rising time in half without affecting flavor. Parchment paper is essential – I learned this through sticky disappointments. The full olive oil amount creates proper texture and crust.
Adjusting for Different Pan Sizes and Oven Conditions
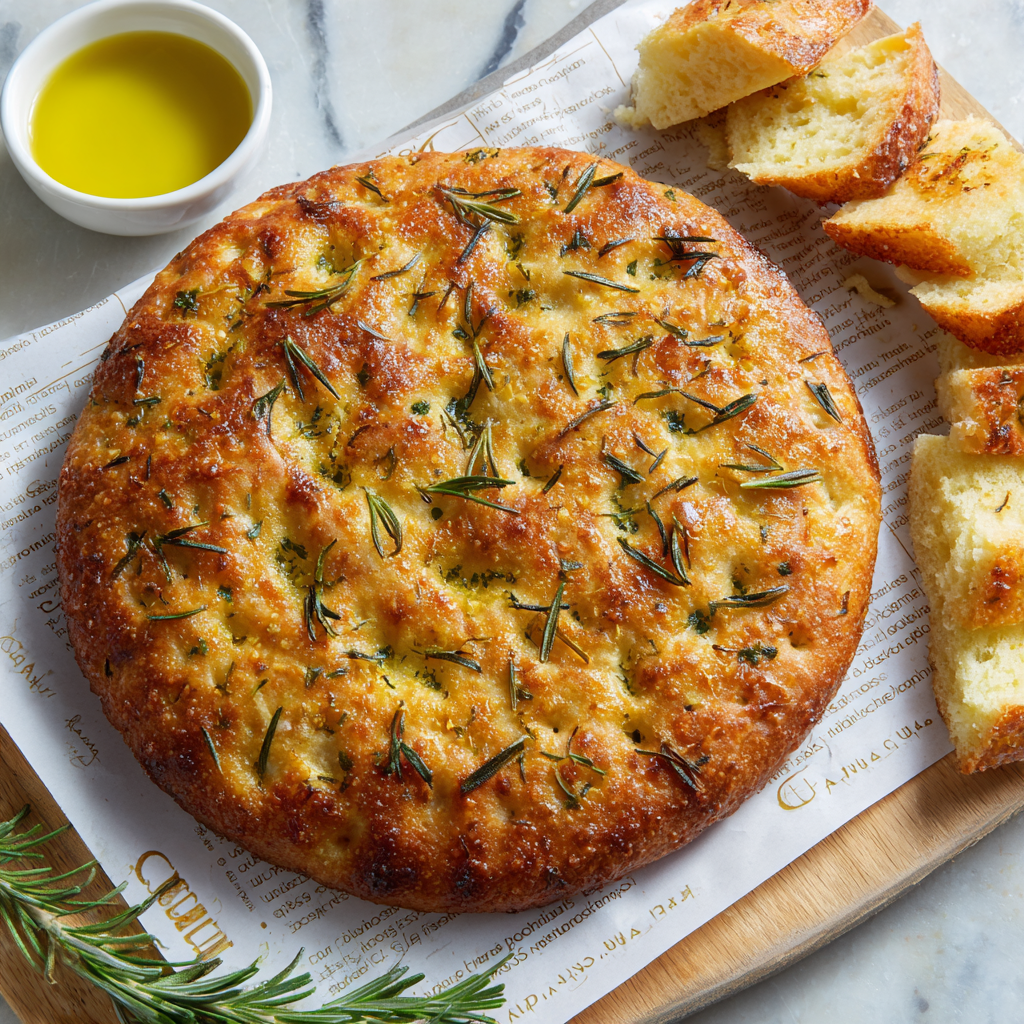
This preparation adapts well to various pan sizes. The full batch makes two 12-inch rounds or one large sheet pan version. Thicker dough needs longer baking time.
| Pan Size | Dough Thickness | Baking Time Adjustment | Final Texture |
|---|---|---|---|
| 8×8 inch square | Thick | +5-10 minutes | Softer center |
| 12-inch round | Medium | Standard time | Balanced texture |
| Half sheet pan | Thin | -5 minutes | Crispy result |
The same base mixture works beautifully for pan pizza. This versatility makes the preparation even more valuable in your kitchen rotation.
Secrets to Achieving a Crispy Crust and Fluffy Center
Achieving that perfect contrast between crisp exterior and tender interior requires understanding how oil and temperature work together. The characteristic dimples serve more than decoration—they create wells that hold oil and prevent doming during baking.
Baking Temperature and Duration Insights
Four hundred degrees Fahrenheit provides the ideal heat for this preparation. It creates a golden crust without burning the oil or herbs. Check at twenty-five minutes for even browning.
Edges typically darken first, with the center following over the full thirty-minute timeframe. If your loaf appears pale, extend baking by a few extra minutes. The oil beneath the dough fries the bottom for satisfying crunch.
Enhancing Texture with Extra Virgin Olive Oil
After rising, coat your fingertips generously with oil. Press straight down to create indentations without deflating the dough. Some bakers add a final drizzle before toppings for extra richness.
Extra virgin olive oil contributes fruity, peppery notes that become part of the flavor profile. Let your creation cool for ten to twelve minutes before slicing. This allows the interior crumb to set properly.
Serve warm to appreciate the full flavor without burning your mouth. If the center feels gummy despite proper baking time, consider testing a different flour blend.
Adapting Traditional Italian Flavors in Gluten-Free Baking
Once you’ve mastered the basic technique, exploring creative variations becomes an exciting culinary adventure. Italian baking traditions include countless regional interpretations that honor local ingredients.
The classic preparation uses rosemary for good reason. Its piney aroma stands up beautifully to high heat and complements olive oil perfectly. Yet many other herbs create equally authentic results.
Creative Herb and Cheese Variations
Woody herbs like thyme, oregano, and sage work wonderfully because they tolerate baking temperatures without burning. Each brings distinct Italian character to your creation.
Consider these flavorful combinations for your next batch:
| Topping Combination | Flavor Profile | Preparation Notes |
|---|---|---|
| Caramelized Onion & Roasted Garlic | Deeply savory with subtle sweetness | Pre-cook onions until golden brown |
| Kalamata Olives & Sun-Dried Tomatoes | Briny sharpness with concentrated tomato | Pat olives dry to prevent excess moisture |
| Fresh Cherry Tomatoes & Red Onion | Bright acidity cutting through rich oil | Halve tomatoes to release juices during baking |
| Parmesan & Fresh Thyme | Nutty saltiness with earthy herbs | Add cheese after dimpling to prevent sinking |
Cheese options range from traditional parmesan to sharper asiago. Each adds its own complexity to the final result. Aged white cheddar creates an unexpected but delicious variation.
For a garlic bread twist, mix grated garlic with melted butter and sea salt. Brush this over the top before baking. While less traditional, it delivers irresistible flavor.
Always add toppings after the final rise and dimpling. This ensures they bake into the surface rather than sinking. Start with classic preparations before experimenting with creative combinations.
Troubleshooting Common Baking Hurdles
When your baking results don’t match your expectations, troubleshooting becomes an essential skill. Many challenges have simple solutions that can transform your experience.
How to Fix Overly Sticky Dough
The wet, sticky consistency of this dough is intentional and correct. Adding extra flour will create a dense, dry result.
If you need to handle the mixture, coat your hands with olive oil instead of flour. This prevents sticking without altering the hydration balance.
Preventing a Gummy or Underbaked Center
Some flour blends tend to create gummy centers that never fully set. Switching brands often solves this issue completely.
Oven temperature accuracy matters greatly. An oven thermometer ensures you’re baking at the correct heat. Thicker loaves need additional minutes to cook through properly.
| Common Issue | Likely Cause | Simple Solution |
|---|---|---|
| Sticky dough | Normal consistency | Use oil-coated hands |
| Gummy center | Flour blend or low temperature | Check oven heat, adjust time |
| No rise | Old yeast or cold environment | Test yeast freshness first |
| Sticking to pan | Missing parchment paper | Always line your baking vessel |
Test your yeast and baking powder before starting. Proper rising depends on their freshness. The right tools and techniques prevent most common problems.
Creative Toppings and Serving Suggestions
The true joy of this bread emerges not just from baking but from how you share it at the table. Serve it warm, when the surface oil remains liquid and the crust crackles perfectly. Tearing pieces by hand feels authentic and creates more texture for dipping.
Seasonal Variations and Dipping Sauces
Create a simple seasoned oil for dipping. Start with about one-third cup of good olive oil as your base. Add dried garlic, coarse salt, pepper, and herbs like oregano or basil to taste.
Let the mixture sit for ten minutes before serving. This allows the flavors to bloom beautifully. Marinara sauce also makes a wonderful traditional dipping option.
For sandwiches, slice your loaf horizontally through the middle. Fill it with Italian cold cuts, cheese, or roasted vegetables. The sturdy texture holds up well to hearty fillings.
Pair this bread with autumn soups or summer salads. It complements pasta dishes like spaghetti perfectly. Leftover slices toast nicely for bruschetta or quick pizza snacks.
Experiment with seasonal toppings throughout the year. Try fresh basil in spring or roasted garlic in fall. Each variation brings new character to your favorite recipes.
Essential Equipment and Preparation Essentials
While this preparation requires minimal specialized tools, choosing the right ones ensures reliable results every time. The equipment list is mercifully short and basic, focusing on items most home kitchens already contain.
Selecting the Right Pan and Using Parchment Paper
Your choice of baking vessel significantly impacts the final texture. Cast iron skillets produce excellent crust due to even heat distribution. Metal baking pans offer accessibility without the learning curve.
Parchment paper is genuinely non-negotiable for preventing sticking. Silicone baking mats work as reusable alternatives but may not achieve the same crispy bottom crust.
| Pan Type | Best For | Crust Quality | Considerations |
|---|---|---|---|
| Cast Iron Skillet | Superior crispiness | Excellent | Heavy, requires seasoning |
| Metal Baking Pan | Accessible results | Very Good | Lightweight, easy to handle |
| Round Cake Pan | Wedges for serving | Good | Thicker center texture |
The Importance of Oven and Instant-Read Thermometers
An instant-read thermometer provides cheap insurance against killing yeast with incorrect water temperatures. It removes guesswork from this critical step.
Oven thermometers are equally important but often overlooked. They reveal whether your oven’s actual temperature matches the dial setting, preventing underbaked centers.
Large mixing bowls accommodate the dough’s expansion during rising. A cooling rack prevents sogginess by allowing air circulation after baking.
Final Thoughts on Enjoying Your Homemade Gluten-Free Creation
That moment you pull your golden creation from the oven marks a real baking achievement. The crisp crust and tender interior deliver authentic Italian character that surprises many tasters. We find most people cannot tell this bread is different from traditional versions.
Enjoy your masterpiece within two days for the best texture. Store it wrapped tightly at room temperature. For longer keeping, freeze individual portions for up to two months.
Reheating restores the wonderful contrast between crispy edges and soft center. A brief warm-up in a regular oven works perfectly. This simple process brings back the fresh-baked quality.
Consider making this preparation part of your regular kitchen routine. The minimal hands-on time yields impressive results worth sharing. Each attempt builds confidence and understanding of how the method works in your kitchen.
Gluten-Free Rosemary Focaccia
Ingredients
Method
Notes
- You can use any good gluten-free flour blend with xanthan gum already mixed in for the best texture.
- If using dried rosemary, reduce the amount to one-third of the fresh measurement.
- You can also make this dough ahead of time and refrigerate it for up to a week for a deeper flavor.