
Jump to Recipe
I knead this dough with music on low, fingers pressing to feel the spring beneath a wet surface. The kitchen warms, the scent of herbs drifts, and I know the short folds will give the crumb that open, airy life I want.
I prefer bread flour for strength, warm tap water at about 100–108°F to wake the yeast, and a gentle stretch-and-fold rhythm that replaces marathon kneading. A buttered pan, parchment, then a slick of olive oil makes a bottom crust that crackles just right.
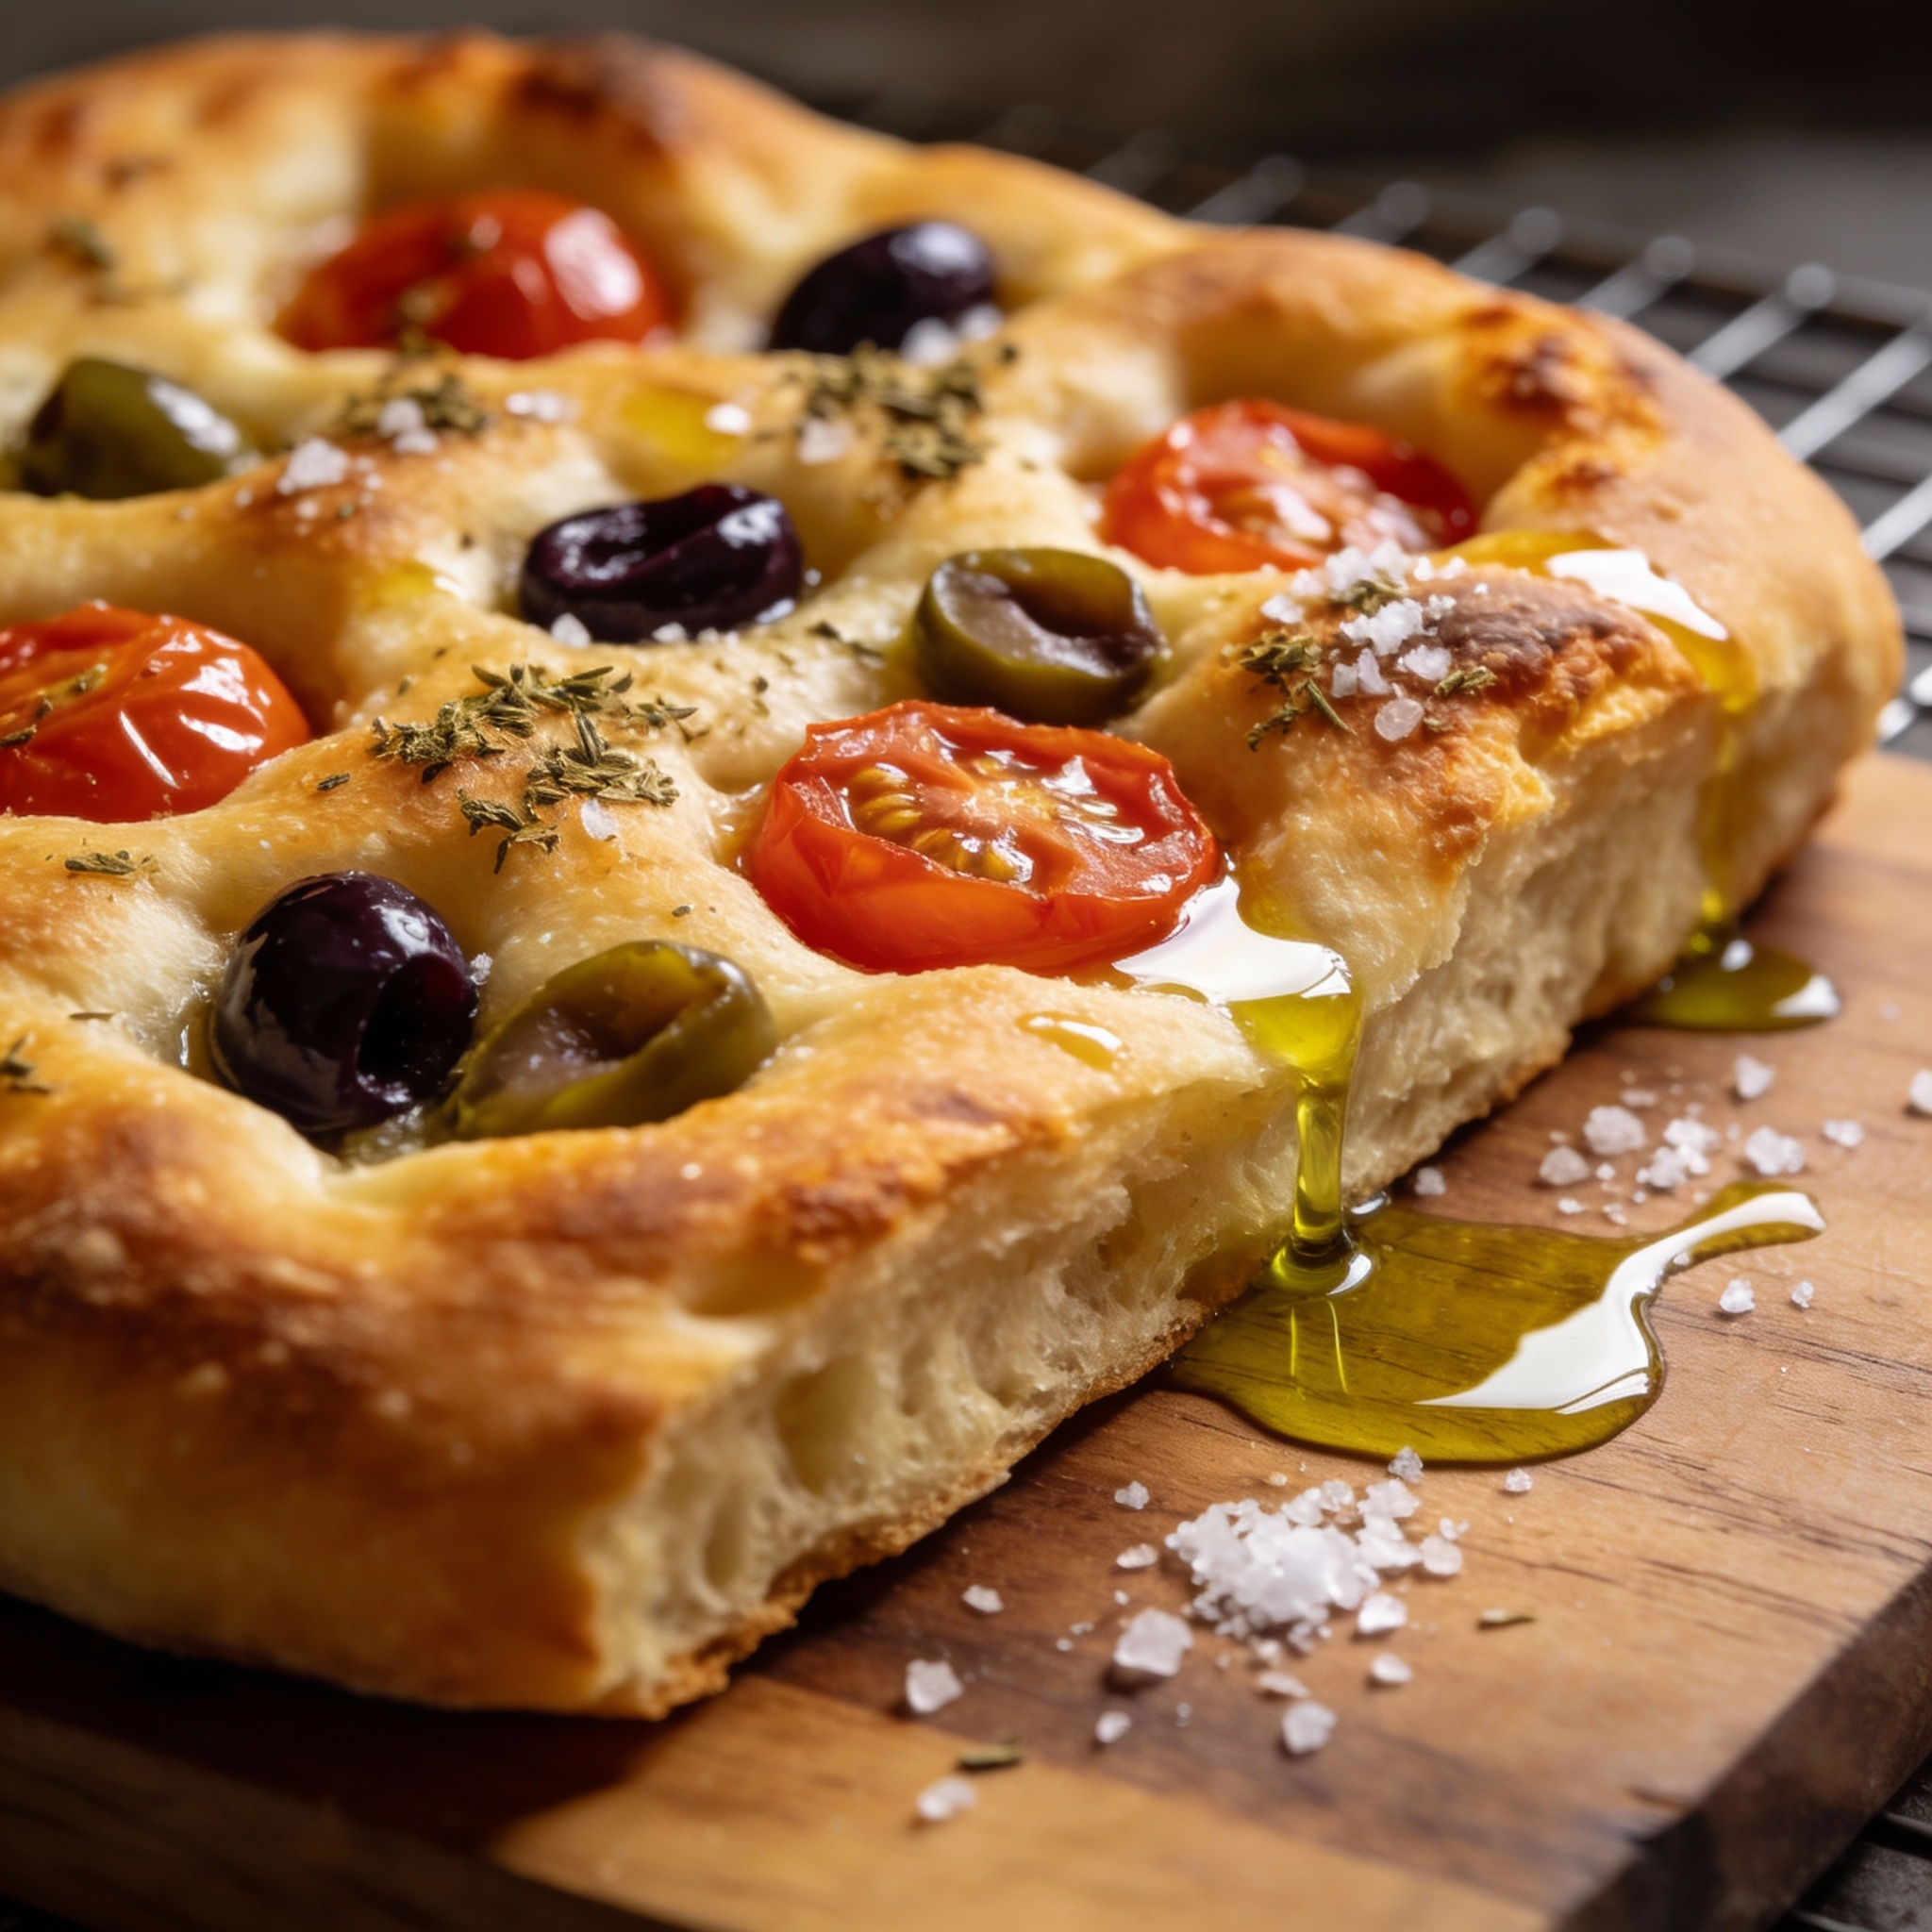
Timing is honest: quick rises, short folds, a hot 475°F oven for a brisk 15–20 minutes, then cooling on a rack. I press in halved cherry tomatoes, briny olives, a scatter of oregano, and a finish of flaky sea salt so every bite feels like an afternoon in a small Italian kitchen.
Key Takeaways
- Use bread flour for higher protein and bigger air pockets.
- Warm water (100–108°F) activates instant yeast best.
- Stretch-and-fold builds strength without heavy kneading.
- Butter, parchment, then oil the pan for a crisp bottom crust.
- Bake hot (475°F) for 15–20 minutes; cool on a wire rack.
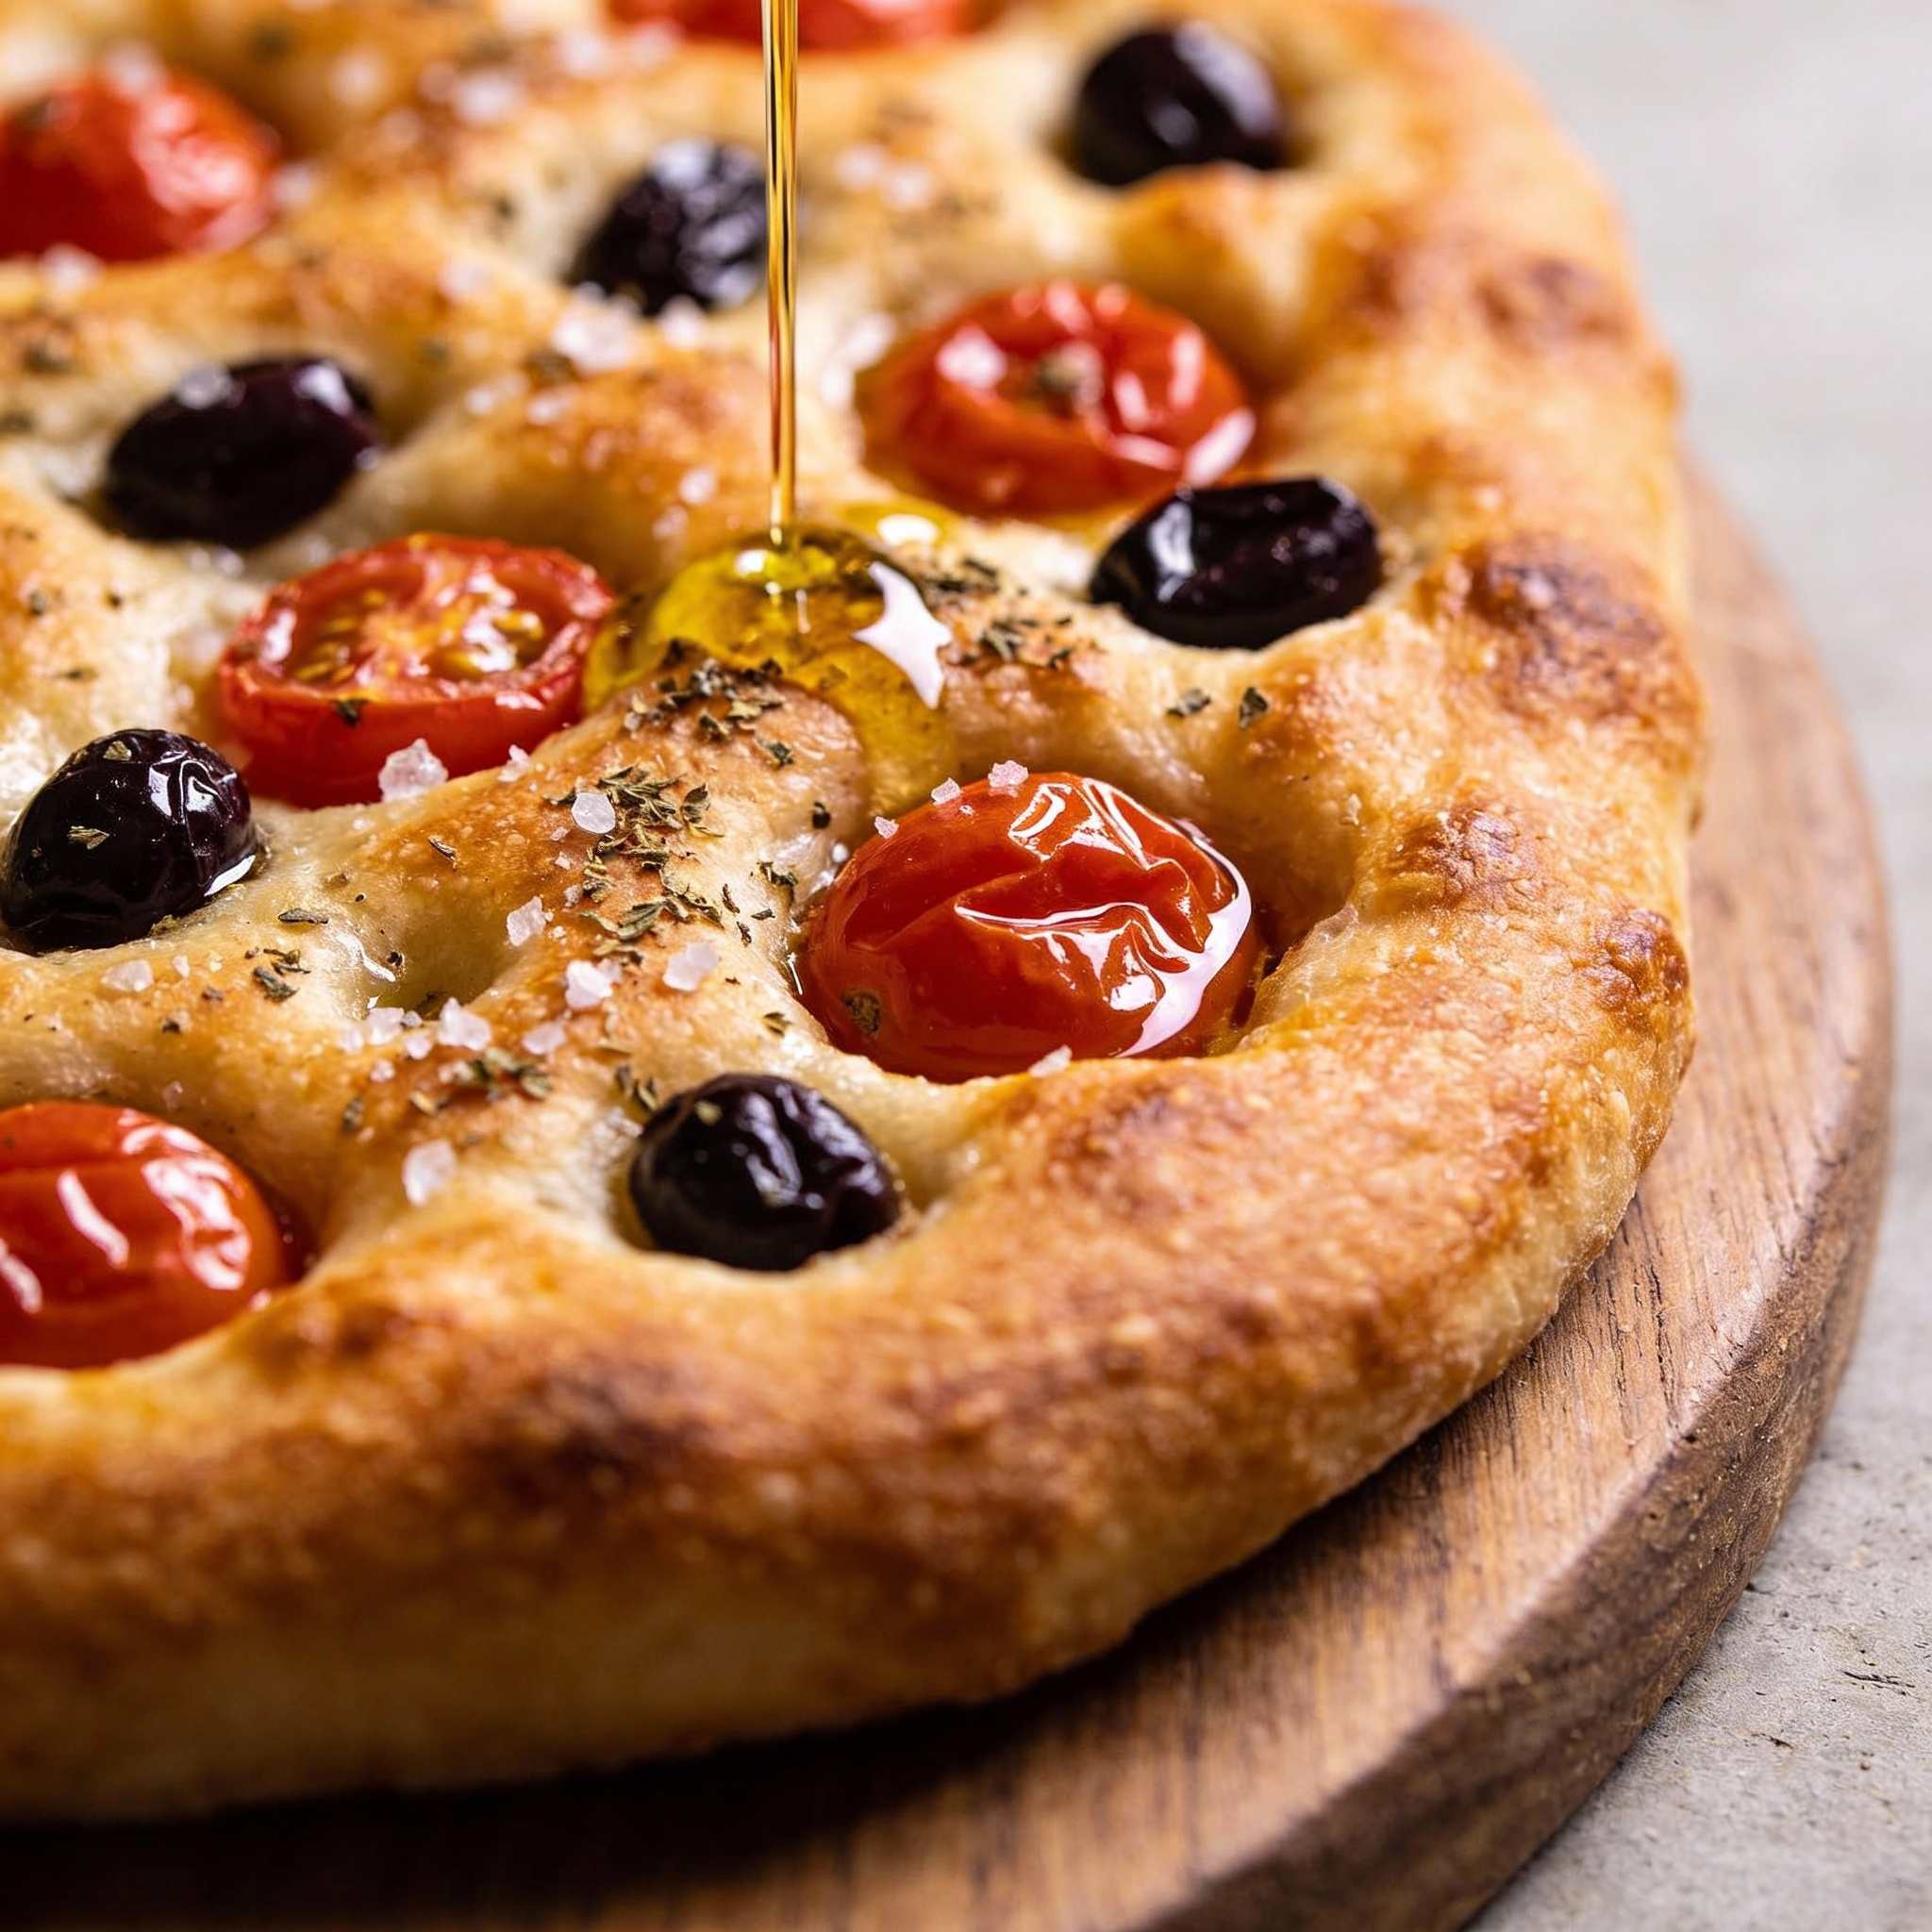
- Finish with flaky sea salt and a light oil drizzle for shine.
Why this Italian-style focaccia hits all the right notes
A wet, lively dough sets the stage for a glossy top and an open crumb. I use higher-protein flour so the structure can stretch without collapsing during the rise. That stronger gluten gives those big, uneven holes that make each slice feel light but chewy.
Stretch-and-fold is my shortcut to strength. Short, gentle folds during fermentation firm the dough while keeping trapped gas intact. This means a lively oven spring and a tender interior without marathon kneading sessions.
- Wetter dough rises higher and carries extra virgin olive oil and aromatics more evenly.
- Deep dimpling creates channels that hold oil, cherry tomato juices, oregano, and brine from olives.
- A finish of flaky sea salt and a drizzle of oil crisps edges and boosts savory-sweet balance.
You’ll taste technique: a caramelized, slightly crackly top and a supple crumb that stays vibrant at room temp. For notes on family methods and related recipes, see this short piece on a traditional onion focaccia for context: traditional onion focaccia.
Ingredients that make it sing: flour, yeast, oil, tomatoes, and olives
Every loaf begins with choices: which flour, which oil, how warm the water. I keep things simple so the dough behaves predictably and the topping flavors shine.
Bread flour, instant yeast, and water temperature that sets you up for success
I reach for bread flour because its higher protein builds stronger gluten. That strength traps gas and gives an open, airy crumb. King Arthur Bread Flour at 12.7% protein performs noticeably better than AP at 11.7%.
Instant yeast is easy: sprinkle it into the bowl and use warm tap water at 100–108°F. Check with an instant thermometer. Some flours are thirstier, so aim for a thick, shaggy dough and add water if the mix feels tight.
Olive oil and salt: choosing extra virgin, sea salt, and how they impact crumb and crust
I use a mild olive oil in the dough for tenderness and an extra virgin olive to finish. The finishing oil perfumes the crust and lifts toppings.
Salt does double duty—fine salt in the dough for structure and flavor, and a sprinkle of sea salt after baking for that bright pop.
Tomatoes, olives, and herbs: cherry tomatoes, Castelvetrano or Kalamata, and dried oregano
- Cherry tomatoes halved roast into sweet pockets of juice.
- Pick buttery Castelvetrano for mellow notes or briny Kalamata for depth.
- Dried oregano is classic; fresh rosemary or thyme also works well.
These choices make the dough more resilient, the crust more flavorful, and the final tomato olive focaccia truly inviting.
Tools and techniques for bakery-level results at home
Small choices on gear and gentle moves make a big difference. I keep my kit simple so technique, not toys, decides the outcome.
Stand mixer vs. by hand: practical options
If you own a stand mixer, use it for the initial mix, then switch to hands to feel the dough. No mixer? A dough scraper and a large bowl work perfectly.
| Tool | Best for | Why it helps |
|---|---|---|
| Stand mixer | Speedy mixing | Handles hydration, keeps work tidy |
| By hand | Control, less handling | Gives tactile feedback to shape the dough |
| Scraper & bowl | Clean workflow | Easy folding and transfer to the pan |
The stretch-and-fold for open crumb
Every 30–60 minutes I slide wet hands under the dough, stretch it up, and fold it over, rotating the bowl. Repeat for a few rounds; strength builds without rough kneading.
Dimpling, microclimates, and pan prep
Keep the surface lightly oiled so the dough stays supple. Use your fingers to make deep dimples—those pockets hold oil and toppings.
- Create a warm rise spot: steamy microwave, a barely-warm oven with the light on, or the top of the fridge.
- Cover with plastic wrap to keep humidity; do not let a skin form during long hours of rise.
- Grease the pan with butter, line with parchment, then add a slick of oil for a crisp base—this helps olive focaccia finish with good color.
Tomato and Olive Focaccia Bread Recipe: Step-by-Step
I begin at the bowl: flour, yeast, a splash of warm water, then the slow ribbon of olive oil and honey. Stir until the mass looks shaggy and wet with no dry streaks hiding at the bottom.
Mix the dough
Whisk flour, yeast, and salt in a bowl. Add water (100–108°F), honey, and olive oil. Stir until evenly moistened; the texture should be loose and tacky.
Rise and fold
Cover and set aside in a warm spot for 30 minutes. Do one quick stretch-and-fold, cover again for about 60 minutes, then repeat the fold. Notice how the dough grows softer and more elastic after each round.
Prep pans and shape
Butter the pan, lay parchment, brush with butter, then drizzle 1 Tbsp of oil per pan. Divide the dough in half and place each in its pan; cover with plastic wrap and set aside for 30 minutes until puffy.
Add toppings and bake
With lightly oiled fingers, dimple deeply. Scatter halved tomatoes and olives, sprinkle dried oregano and black pepper, and finish with a ribbon of oil. Preheat the oven to 475°F and bake 15–20 minutes on the center rack until golden.
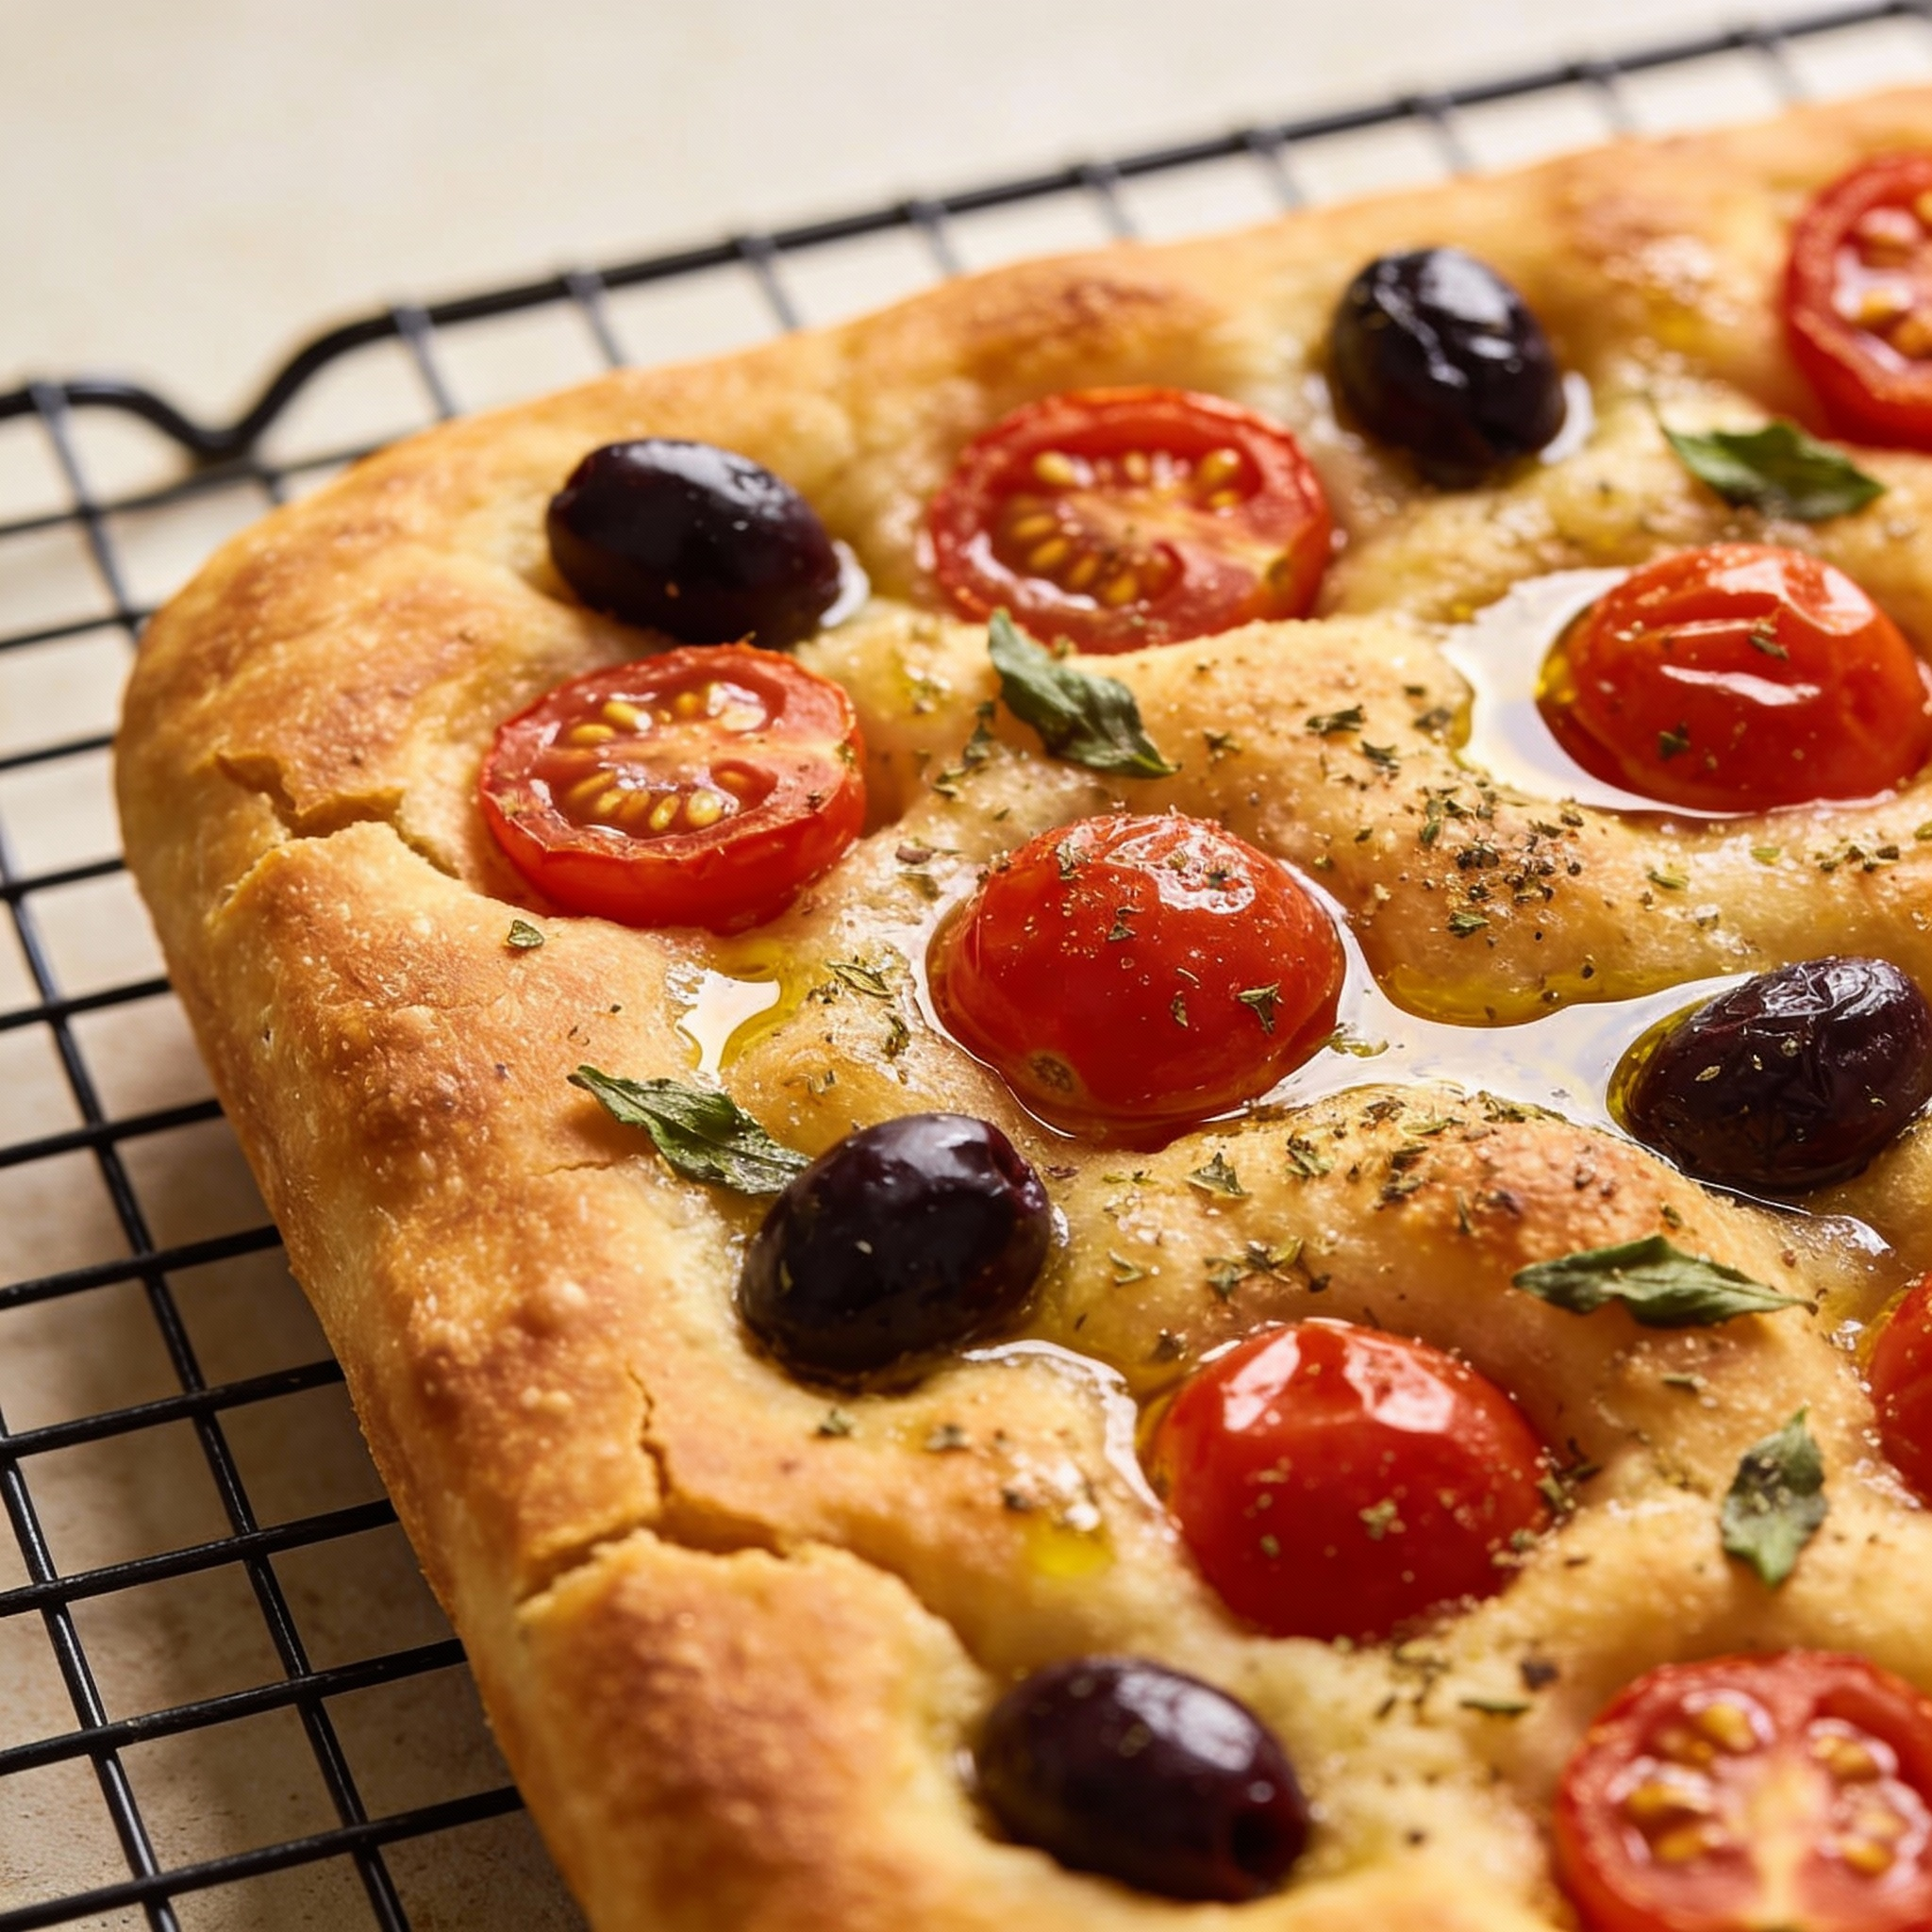
Cool and finish
Rest 5 minutes in the pan, then transfer to a wire rack to cool for 30 minutes. Finish with flaky sea salt before slicing. This is your classic tomato olive focaccia moment—simple, proud, and worth the wait.
| Step | Time | Why it matters |
|---|---|---|
| Initial rest | 30 minutes | Hydrates flour and starts gluten formation |
| Bulk rise | 60 minutes | Strengthens structure with gentle folds |
| Final proof | 30 minutes | Allows the dough to relax and spread in the pan |
| Bake | 15–20 minutes | High heat creates a crisp, golden top and open crumb |
Pro tips to nail the crumb, rise, and flavor every time
I watch the dough bloom in the bowl, glossy and sticky, as the kitchen fills with warm yeast perfume. That feel is your first signal: hydrate, resist extra flour, and trust the process.
Hydration and protein: why wet dough and bread flour create those airy pockets
A wet dough that clings to the bowl yields the open, irregular holes we love. Don’t rescue tackiness with extra dry flour—do the opposite and embrace sticky hands for structure.
Bread flour gives the protein to support big bubbles. Use warm water to help gluten relax, so the interior stretches without tearing during oven spring.
Timing tweaks: overnight cold rise, checking yeast freshness, and adjusting for room temp
An overnight cold rest in the fridge deepens flavor and makes handling easier the next day—four to 18 hours works well depending on your schedule.
Always check yeast date; weak yeast kills lift no matter how well you mix. If your kitchen is cool, add extra time rather than extra flour; the dough will thank you with better texture.
- Use a stand mixer for very sticky doughs, or a dough scraper and a lightly oiled surface if you work by hand.
- Let time guide you: give an extra 15–30 minutes when the dough looks underproofed rather than rushing the oven.
- Finish with a light brush of extra virgin oil and a sprinkle of salt—this seasons from the crust inward without weighing the crumb down.
| What | Why | Practical tip |
|---|---|---|
| Hydration | Fuels large air pockets | Start wet; add small pinches of flour only if truly unworkable |
| Cold rest | Builds flavor | Chill 4–18 hours, then bring to room temp before baking |
| Yeast check | Ensures lift | Proof a spoonful in warm water if unsure |
Serving, storing, and freezing without losing that crackly crust
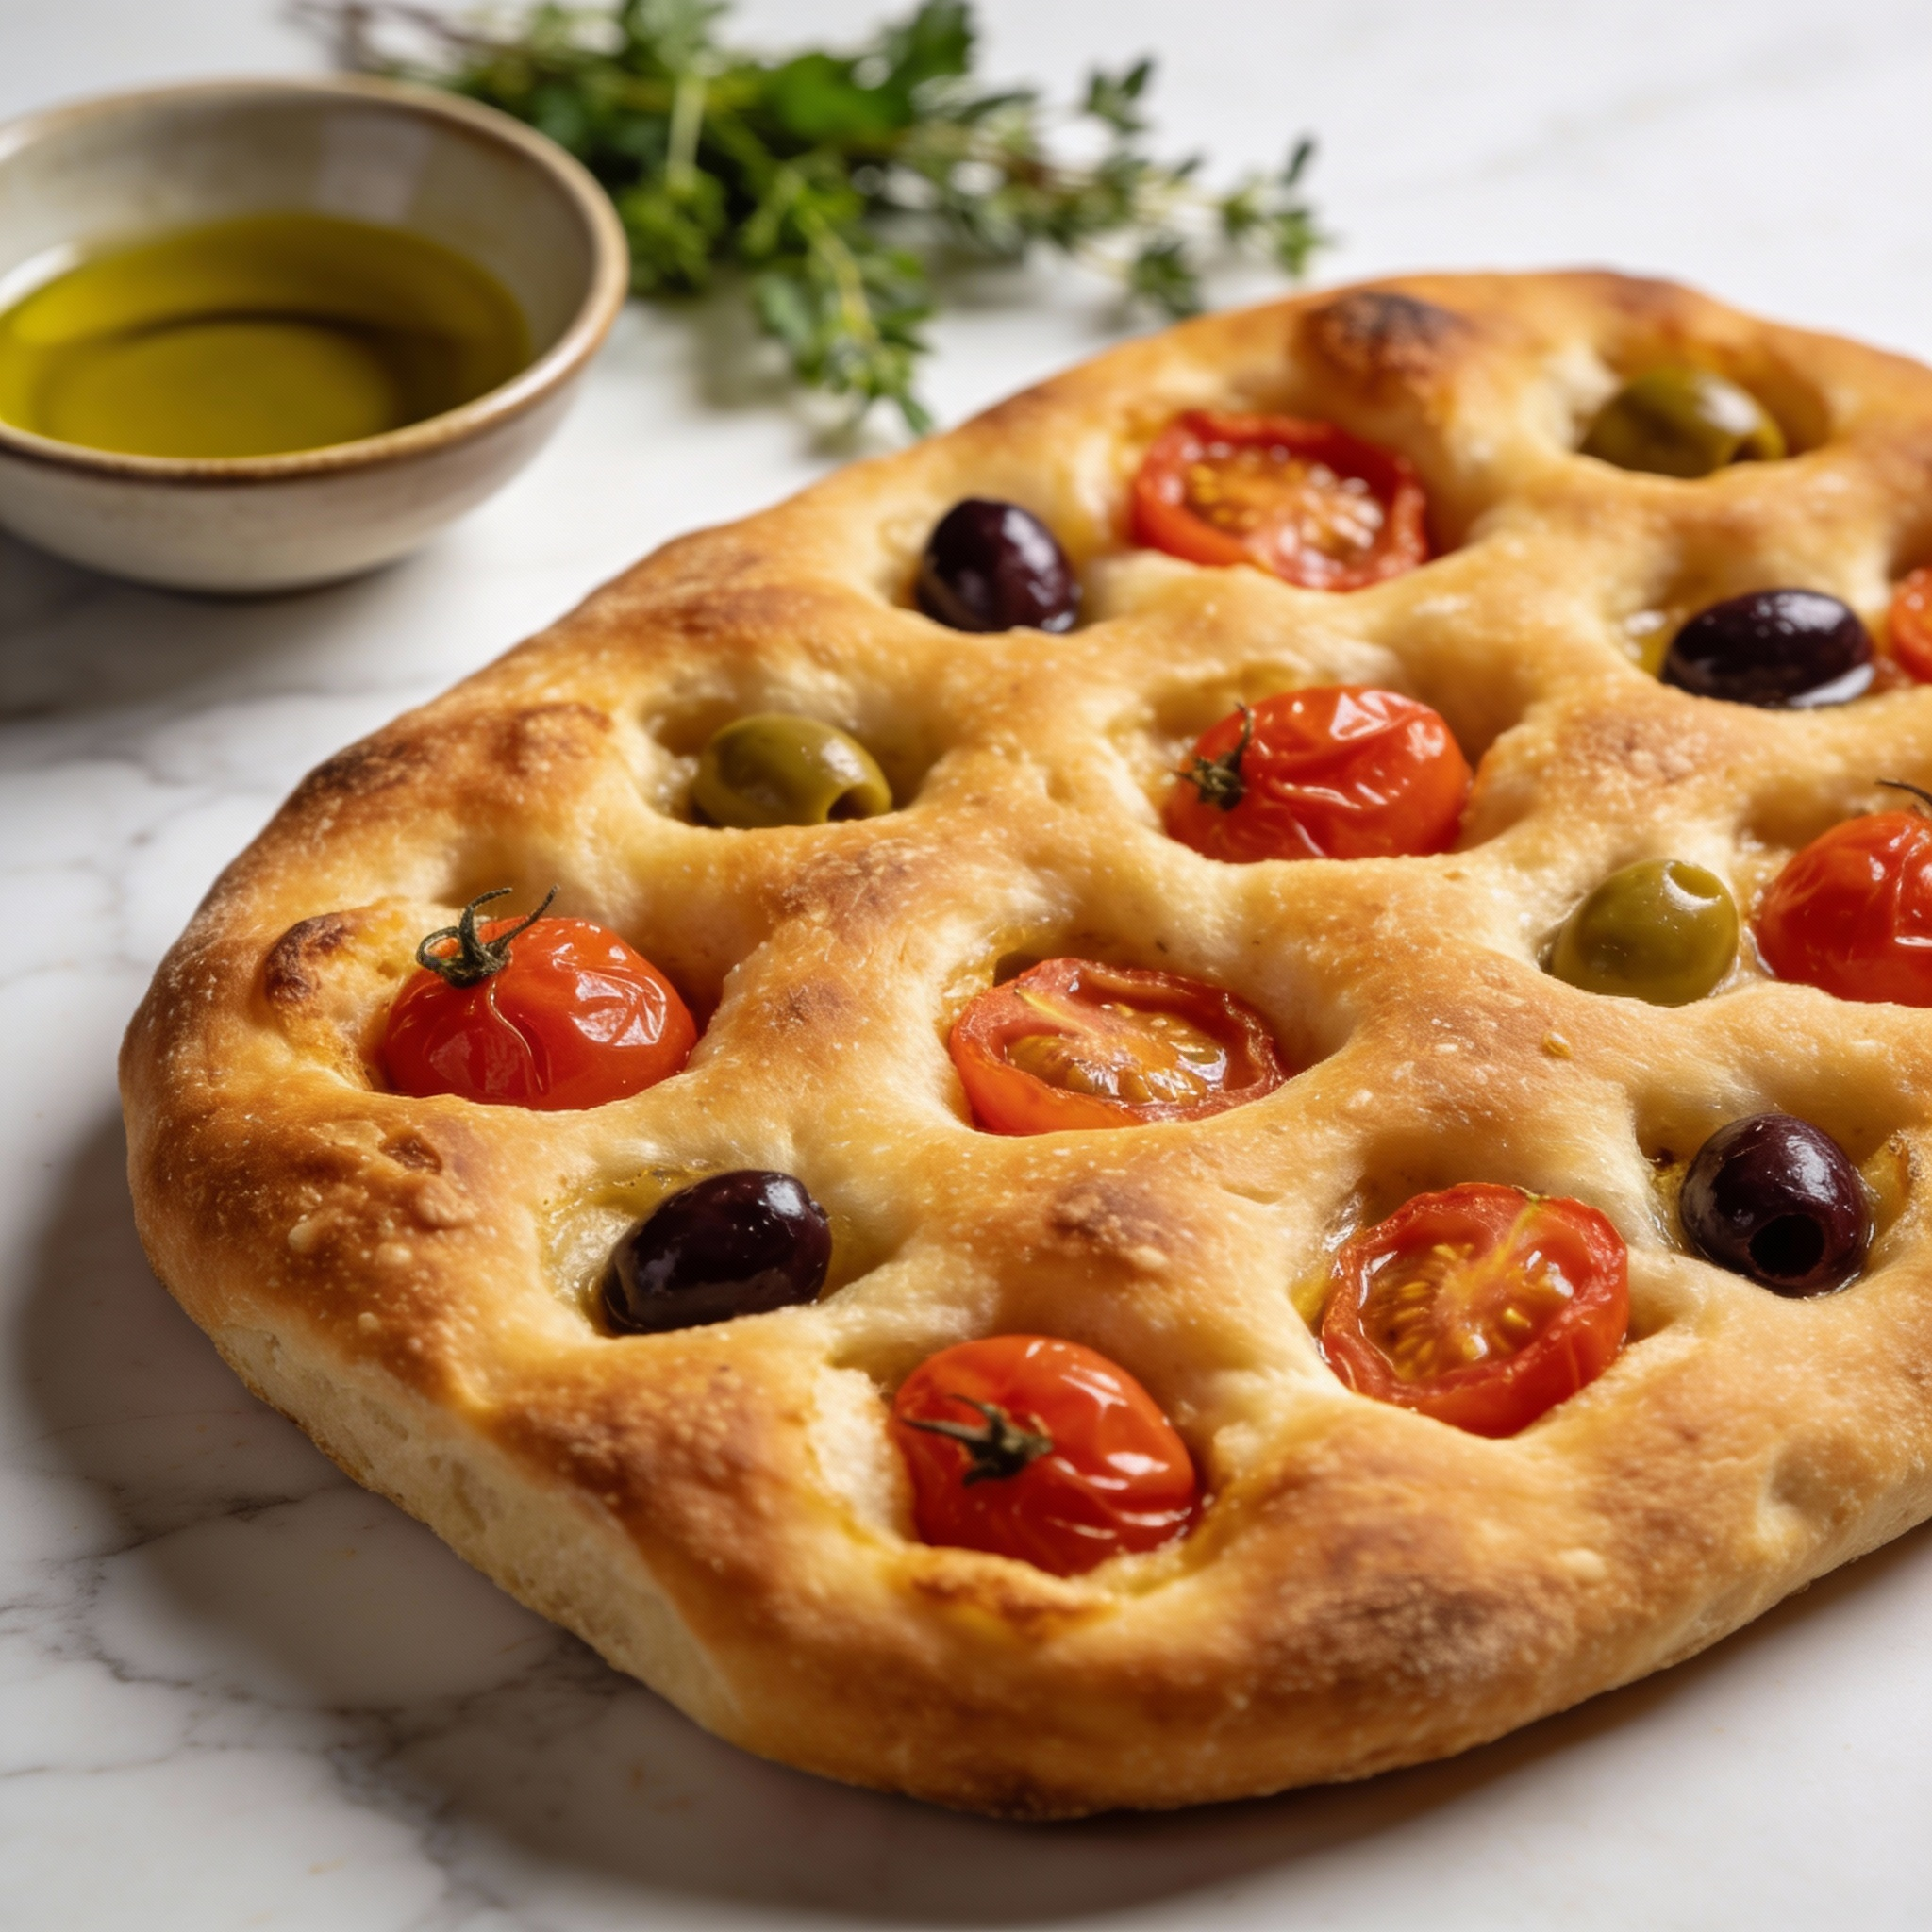
Fresh from the oven, a warm loaf begs to be shared. I like to set one on a board with olives, cheeses, and a small bowl of peppery oil for dipping. It makes a welcoming dish for guests or a simple family night.
Ways to serve
Split squares for sandwiches filled with roasted veg, mozzarella, or prosciutto. The open crumb holds sauces without turning soggy.
Serve warm beside a tomato-forward pasta or a brothy bean dish. A slice rounds out a weeknight meal beautifully.
Keep it fresh: storage and freezing tips
Cool completely on a wire rack so steam escapes and the bottom stays crisp. This step is worth the short wait.
- For next-day use, slide pieces into a zippered bag with most air pressed out.
- Freeze in 1–1½ inch strips so you can pull only a cup or two when you want a snack.
- Reheat on a preheated sheet or pan for a few minutes with a whisper of olive oil to re-crisp the top and edges.
| Action | Why | Time |
|---|---|---|
| Cool on rack | Prevents soggy base | 30 minutes |
| Freeze strips | Easy portioning | Store weeks |
| Reheat | Revives crust | 3–6 minutes in oven |
Bring the aroma of a Roman bakery to your kitchen
Tonight, with a simple bowl, a cup of warm water, and a bit of patience, you can bring a Roman forno home. My hope is to make this approachable: short hands-on minutes, a hot oven, then a patient cool on the rack.
Press halved tomatoes and olives into the surface, dust with oregano, drizzle extra virgin olive and finish with flaky sea salt. Bake until the top gleams and the crust crackles; the dough inside stays soft and tender.
Keep this tomato olive focaccia in your recipes — it rewards both quick folds and long, slow hours in the fridge. Tear a piece, taste the salt and oil, and you’ll know why this focaccia bread lives on my table.
Tomato and Olive Focaccia Bread
Ingredients
Method
- In a large bowl, whisk together the bread flour, instant yeast, and fine salt. Add the warm water, honey, and 3 tablespoons of olive oil. Stir until the dough is evenly moistened and shaggy. The dough should be sticky, not dry.
- Cover the dough and let it rest in a warm spot for 30 minutes. Then perform a quick stretch-and-fold (lift the dough, stretch it up, and fold it over). Let it rest for another hour, performing another stretch-and-fold in the second hour. Repeat for 3-4 rounds, giving the dough strength and elasticity.
- Butter a large baking pan, then line it with parchment paper. Drizzle 1 tablespoon of olive oil over the parchment and spread it evenly. This will help create a crisp bottom crust.
- Divide the dough in half and place each portion into the prepared pans. Cover with plastic wrap and let it proof for about 30 minutes, until puffy.
- Use lightly oiled fingers to dimple the dough deeply. Scatter the halved tomatoes and olives over the dough. Sprinkle with oregano, black pepper, and drizzle with a little more olive oil.
- Preheat your oven to 475°F. Place the pan on the center rack.
- Bake the focaccia for 15–20 minutes, or until the top is golden and crisp. The bread should rise and form large air pockets in the crumb.
- Let the focaccia cool in the pan for 5 minutes. Then transfer it to a wire rack and let it cool for 30 minutes before slicing. Finish with a sprinkle of flaky sea salt for extra flavor.
Notes
- If you prefer a deeper flavor, let the dough rest overnight in the fridge (12-24 hours).
- You can also make a variation using rosemary or thyme for a more herby flavor.
- This focaccia is best eaten fresh but can be stored for a day or two at room temperature or frozen for later use.