
Jump to Recipe
The oven warms the kitchen like a small festa, and the smell of toasty crust brings everyone to the table. I press my palm to the warm loaf and remember conversations and slow afternoons in a lived-in cucina.
I teach two dependable paths here: an olive oil Roman dough and a richer Panini al Latte with milk and butter, plus a no‑knead crusty variation for busy days. I share exact weights and cues—5 g fresh yeast, 250 g cool water, 500 g bread flour—so you can match the texture every time.
Expect clear guidance on proofing at 77°F/25°C (about 1.5 hours), dividing into 75 g pieces, a second rise of 45–50 minutes, and a bake at 350°F/180°C for 15 minutes, then covering with a cotton towel to keep the crumb soft. I’ll note when to dip rolls in sesame and when a hotter 440°F/220°C oven gives you a crisp, rustic finish that pairs beautifully with pizza or simple fillings.
Bring basic ingredients and a little patience; the method turns simple flour, yeast, and water into tender, shareable loaves that feel like home.
Key Takeaways
- Two main doughs: olive oil Roman and milk‑and‑butter Panini al Latte for different textures.
- Use gram measurements for consistent results: 500 g flour, 250 g water, 5 g fresh yeast.
- Proof at 77°F/25°C for about 1.5 hours; second rise 45–50 minutes for the olive oil dough.
- Bake at 350°F/180°C for soft rolls; 440°F/220°C for a crusty, no‑knead version.
- Cover hot loaves with a cotton towel to keep the crumb tender after baking.
What makes these panini so irresistibly soft and truly Italian
Softness starts in the mixing bowl, where flour, fat, and patient yeast meet. I mean it: simple choices at this stage shape the whole loaf. Use a flour that matches your goal—bread for spring, all-purpose for a gentler crumb—and measure water so the dough feels supple, not slack.
Extra virgin olive oil and an egg yolk in the Roman-style dough add moisture and color without greasiness. For Panini al Latte, warm milk and melted butter bring natural sugars and proteins that boost browning and give a slightly sweet, brioche-adjacent finish. A pinch of sugar wakes the yeast; salt keeps the structure honest.
- Room temperature proofing around 77°F/25°C gives steady fermentation and even bubbles.
- Hydration and gentle handling form a fine, cloud-like interior.
- Covering hot buns with a towel traps steam and leaves a thin, tender crust.
| Choice | Typical use | Result |
|---|---|---|
| Bread flour | Springy rolls | More chew |
| All-purpose | Soft family rolls | Delicate crumb |
| Olive oil / butter | Enrichment | Moist, tender crumb |
I love serving these warm with thin slices of cheese or a smear of jam. The loaf whispers, it does not shout—letting fillings shine while delivering that signature, irresistible texture that makes people reach for a second piece.
Italian Milk Bread Panini Morbidi Recipe
I start by laying out ingredients and tools so nothing slows the process. Use a kitchen scale for accuracy, a sturdy bowl or stand mixer, a dough scraper, a baking sheet lined with parchment, and a towel or plastic wrap to cover dough.
Key ingredients (exact measures for the Roman-style)
For the olive-oil Roman-style dough: 500 g bread flour, 250 g cool water, 5 g fresh yeast, 65 g extra virgin olive oil, 50 g sugar, 1 egg yolk, 10 g salt, plus sesame if you like. For the milk-and-butter path use all-purpose flour, warm milk, melted butter, whole egg, and active dry yeast; second rise is shorter.
Tools that keep results consistent
- Kitchen scale for grams — far better than a cup for repeatability.
- Large bowl or stand mixer with hook; a dough scraper for neat divisions.
- Baking sheet or sheet with parchment; room towels or plastic wrap for proofing.
Target temperatures and quick timing
Let rise at room temperature near 77°F/25°C. Bulk rise for Roman-style: ~1.5 hours. Divide into 75 g pieces, then a second rise of 45–50 minutes. Bake at 350°F/180°C — Roman-style for about 15 minutes; the enriched rolls take 20–25 minutes. No-knead crusty rolls proof 30–40 minutes in a warmed, off oven and bake at 440°F/220°C for a thin, crisp shell.
| Version | Key ingredients | Timing & bake |
|---|---|---|
| Roman-style (olive oil) | 500 g bread flour; 250 g water; 5 g fresh yeast; 65 g olive oil; egg yolk; 50 g sugar; 10 g salt | Bulk rise 1.5 hours at 77°F/25°C; divide into 75 g pieces; second rise 45–50 minutes; bake 350°F/180°C for 15 minutes |
| Panini al Latte | All-purpose flour; warm milk; melted butter; whole egg; active dry yeast; sugar; salt | Shorter second rise ~30 minutes; bake 350°F/180°C for 20–25 minutes |
| No-knead crusty | High-hydration flour mix; minimal handling; yeast | Warm-oven proof 30–40 minutes; bake 440°F/220°C for 20–25 minutes |
Make the dough: two authentic paths to the same pillowy crumb
I walk you through two simple dough paths that lead to the same cloud-like crumb. Decide if you want a leaner, oil-based loaf or a richer, butter- and milk-enriched one. Both begin in a bowl and reward gentle hands.
Olive-oil Roman-style method
Dissolve fresh yeast in cool water, then stir in bread flour until a cohesive mass forms. Add olive oil slowly so it emulsifies into the gluten without tearing it.
Next fold in sugar, then an egg yolk, and finish with salt. Knead until the dough is smooth and elastic — a satiny ball that springs back when pressed.
Bulk rise about 1.5 hours at 77°F/25°C, divide into 75 g pieces, and bake at 350°F/180°C for 15 minutes for soft, tender loaves.
Milk-and-butter Panini al Latte path
Warm milk with melted butter, mix in an egg, a touch of sugar and salt, then sprinkle in all-purpose flour with active dry yeast. Knead by hand, mixer, or a bread machine until soft and silky.
Butter adds fat that enriches the crumb; milk proteins and lactose improve browning and flavor. Let the second rise about 30 minutes, then bake at 350°F/180°C for 20–25 minutes.
- If you use a cup, scoop lightly; a scale gives perfect hydration every time.
- Both methods can rest overnight in the fridge to deepen flavor and make shaping easier.
- Handle gently to preserve gas bubbles — that yields the soft crumb you want after baking.
| Feature | Roman-style | Milk-and-butter |
|---|---|---|
| Main enrichment | Olive oil | Butter & milk |
| Flour type | bread flour | all-purpose flour |
| Typical bake | 350°F, 15 minutes | 350°F, 20–25 minutes |
For more traditional techniques and a related loaf story, see my family’s torta al testo for inspiration as you continue baking.
Shape, proof, and bake like a panetteria
Shaping is where a loaf’s promise turns into something you can hold — confident, even, and ready to bake. Move with calm hands and clear steps so each roll comes out uniform and tender.
Divide and shape: equal pieces, smooth balls, optional sesame dip
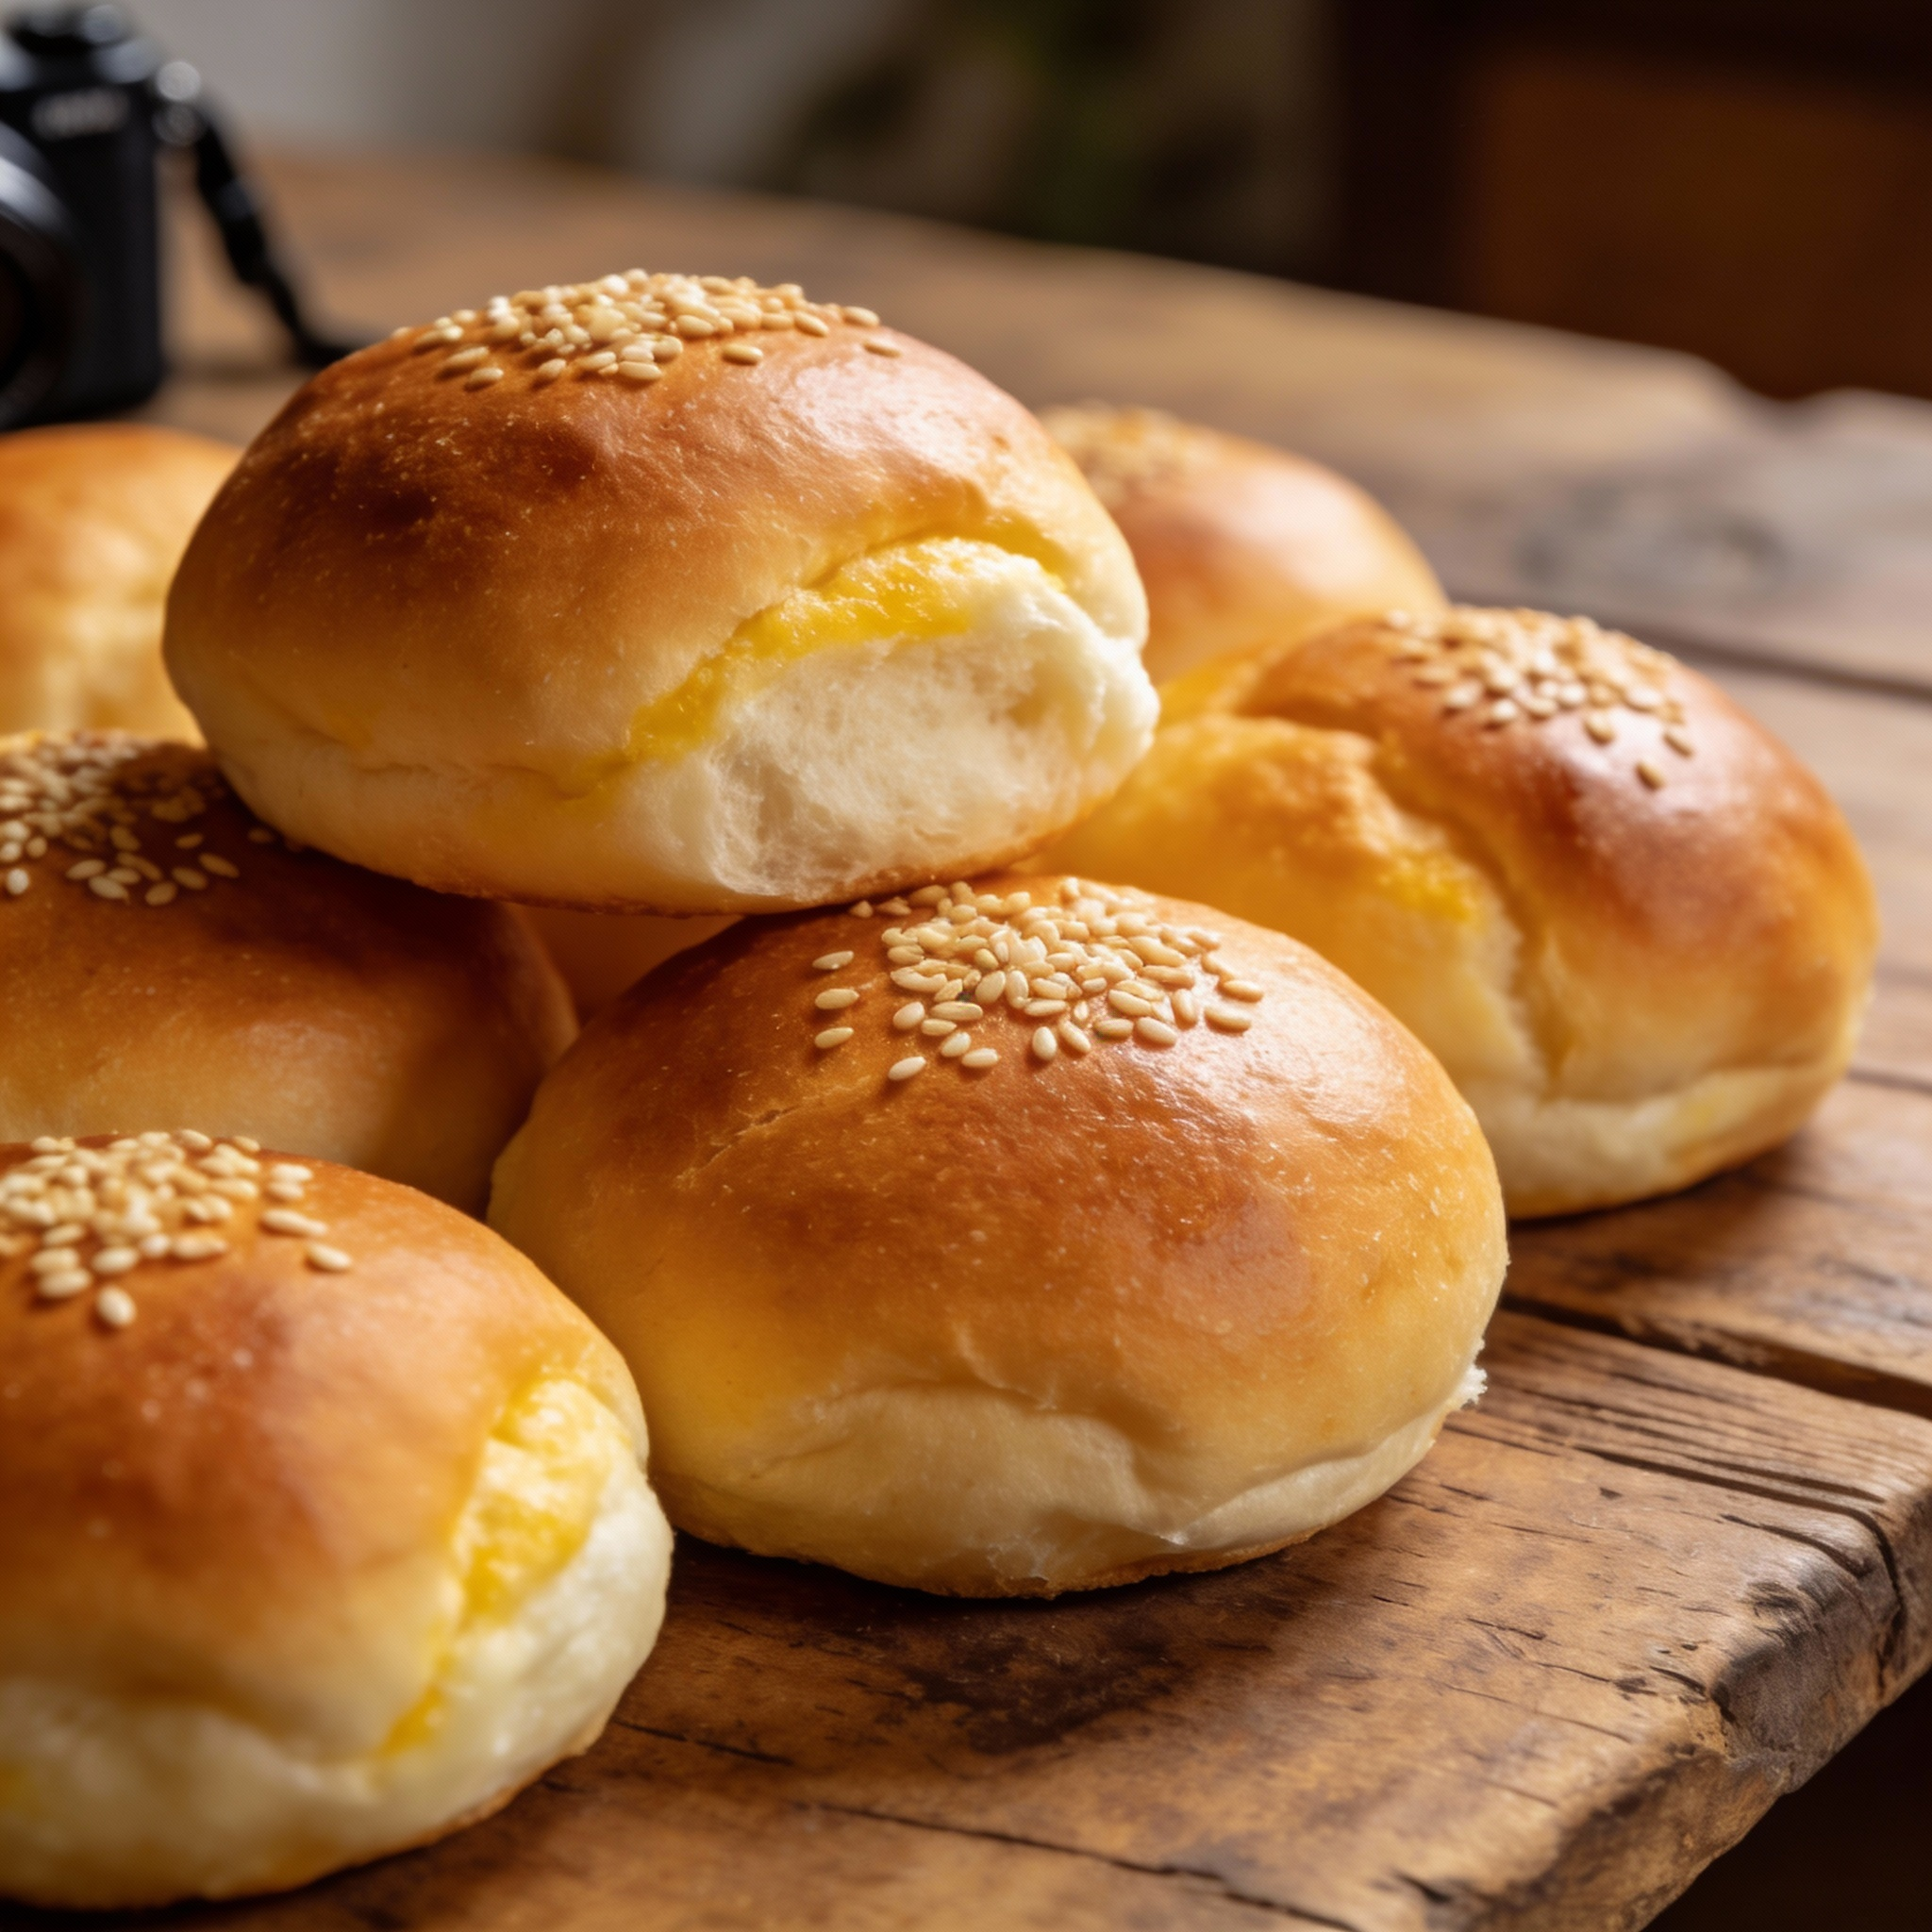
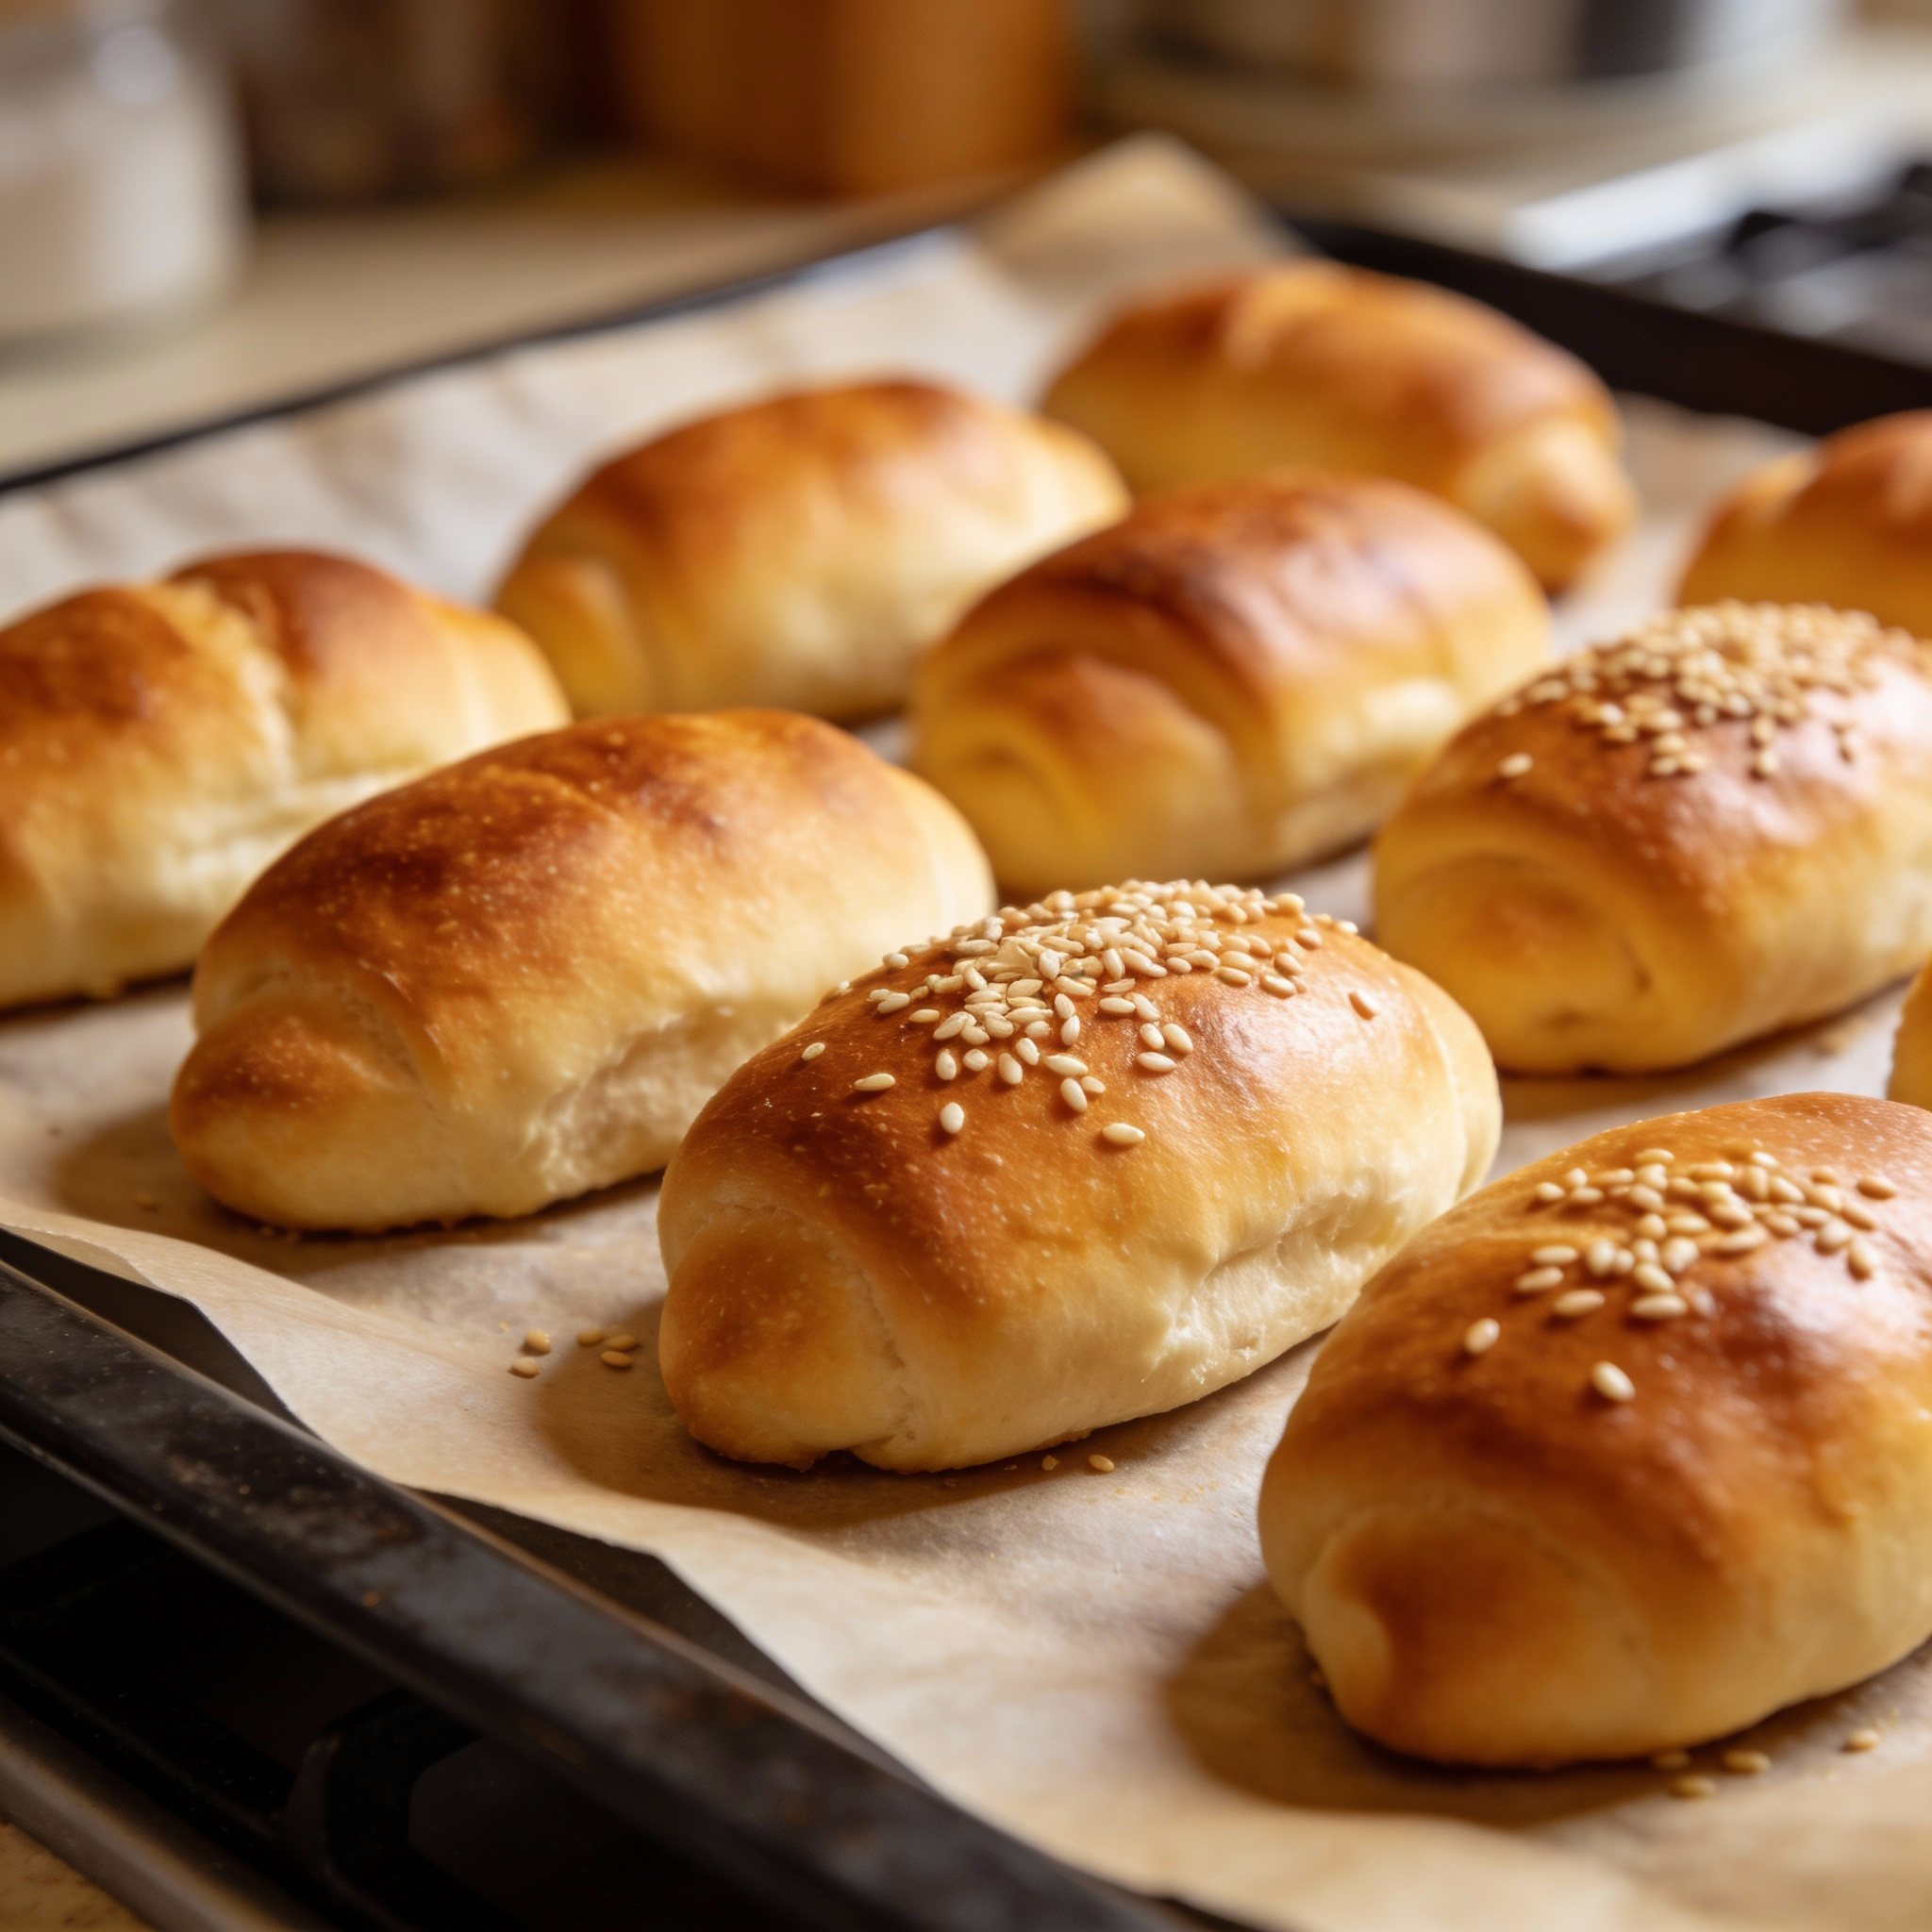
After the first proof, turn the dough out gently and weigh equal pieces. Seventy-five grams per piece gives tidy, sandwich-ready rolls that bake evenly.
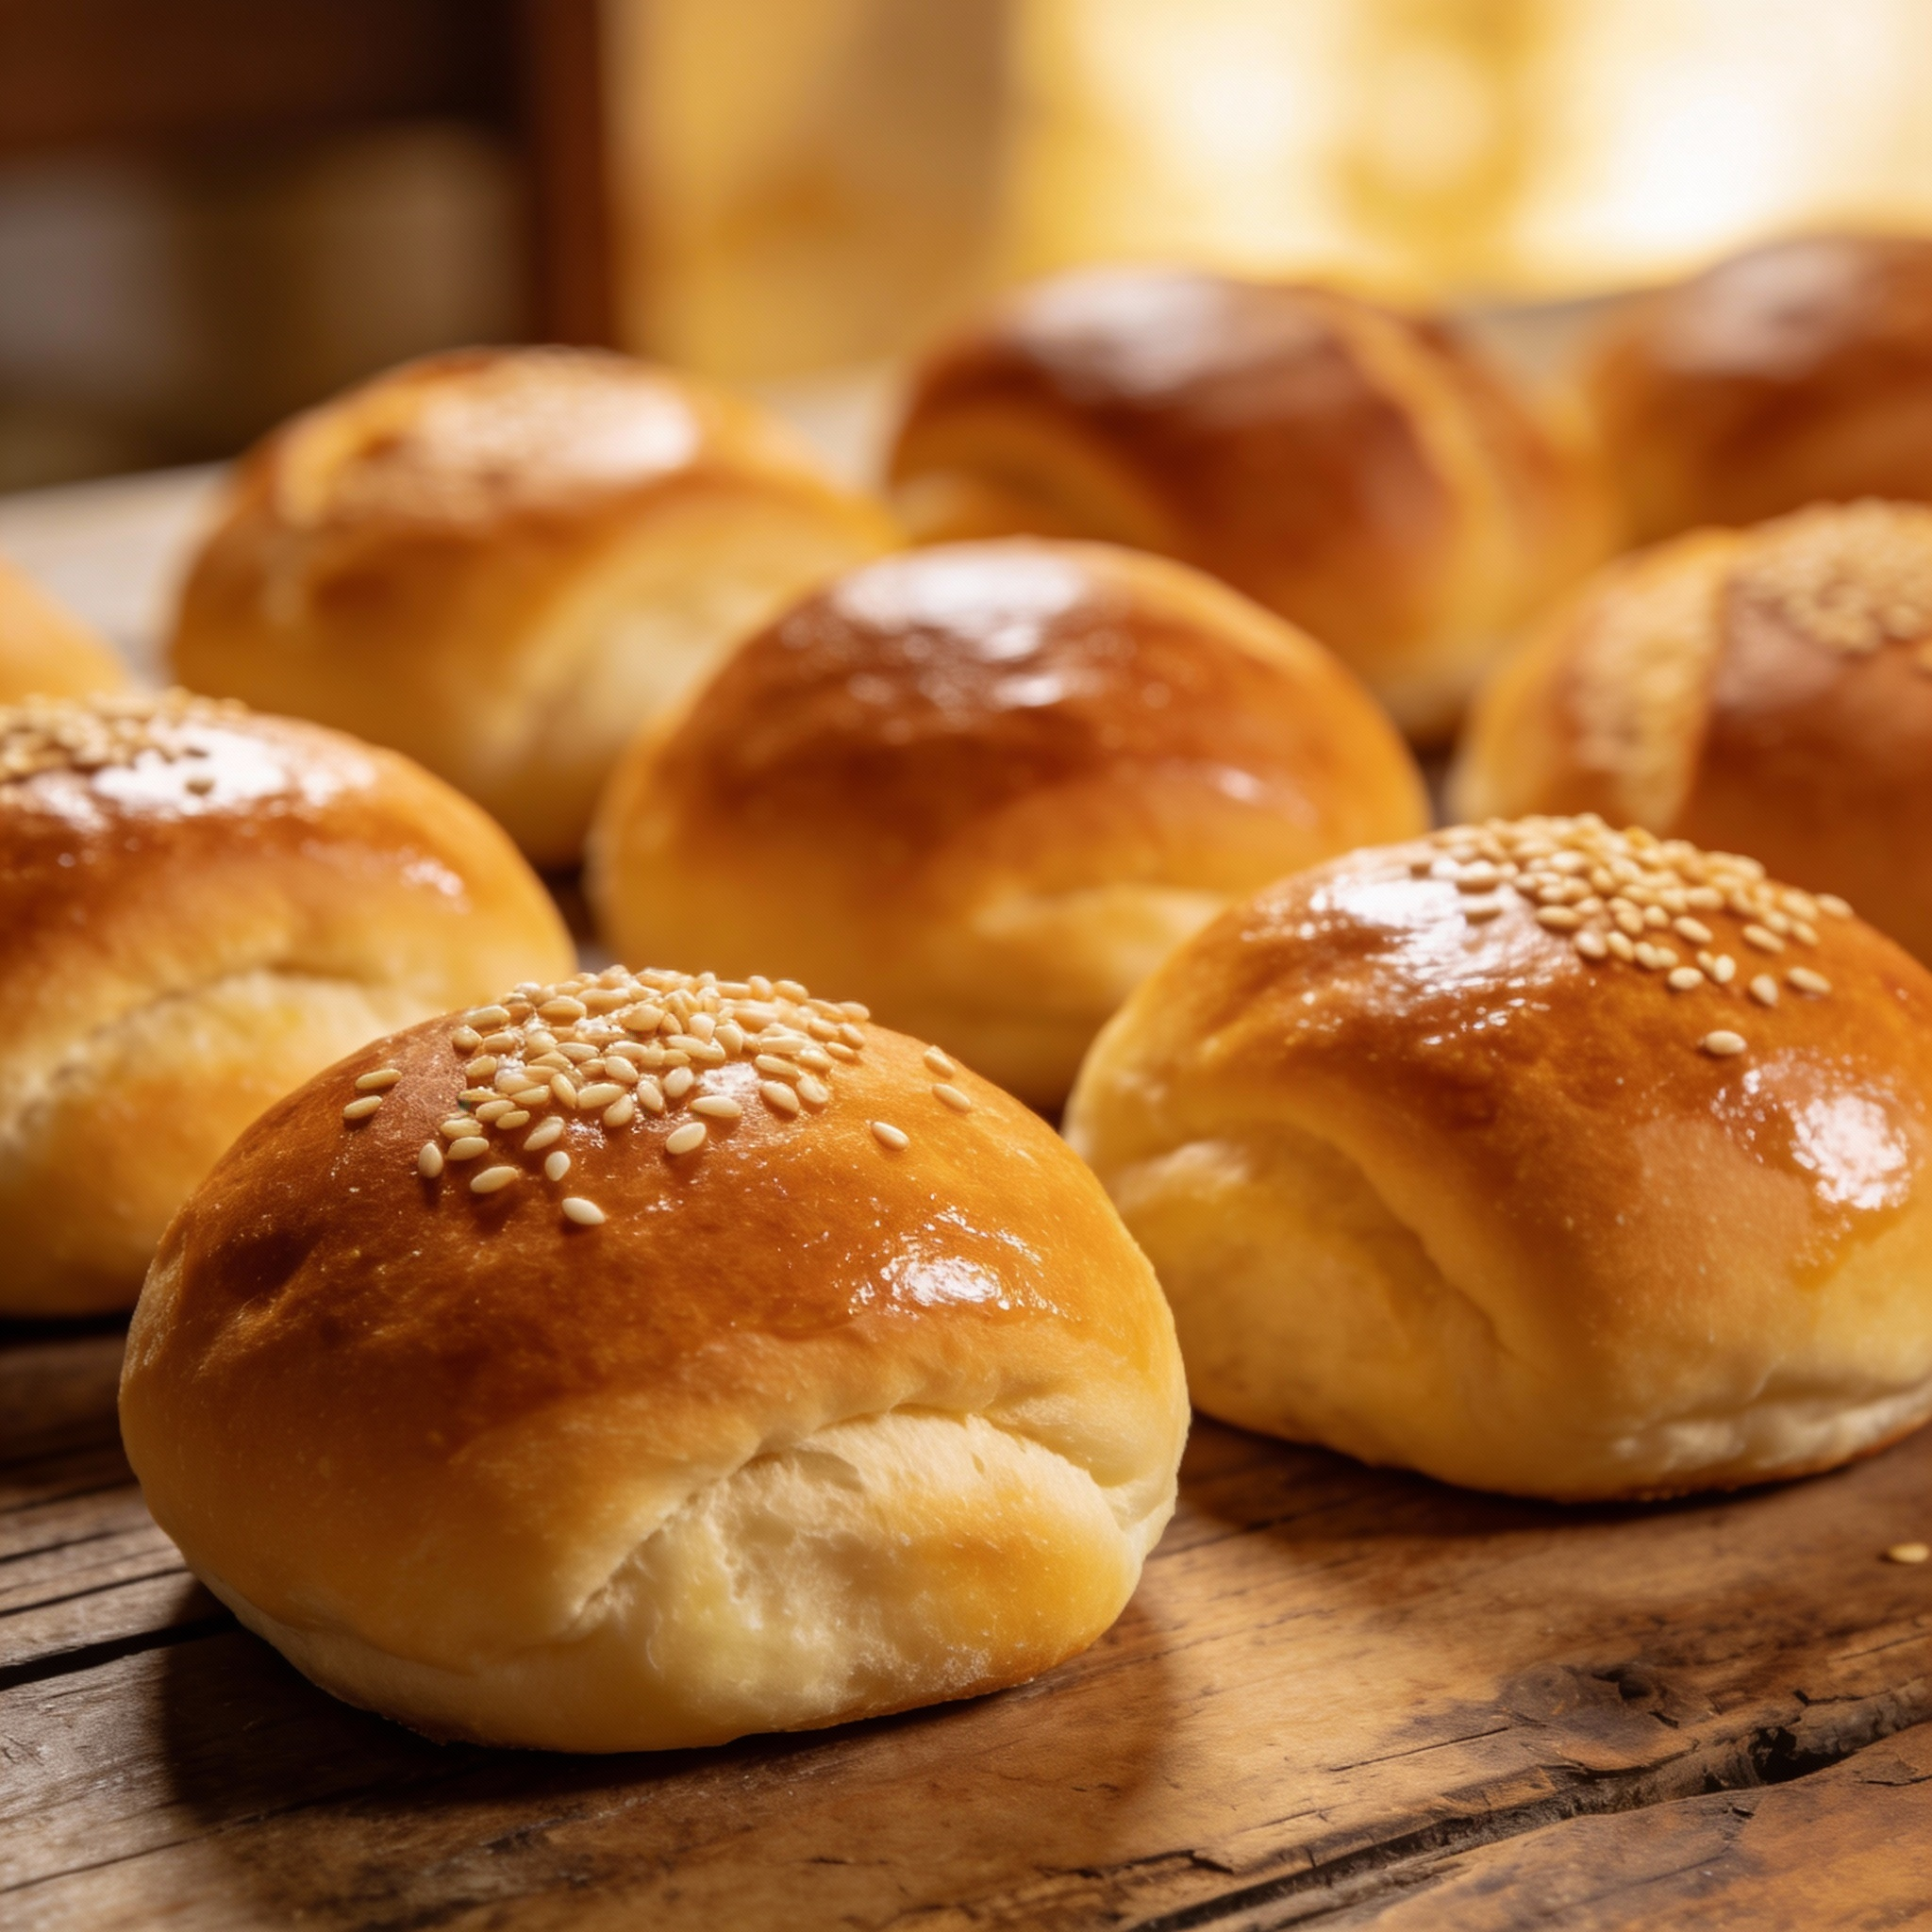
Cup your hands and roll each portion into a tight ball to build surface tension. For extra aroma, dampen the tops and dip them in sesame seeds before arranging them on a baking sheet two inches apart.
Second rise cues: size, springiness, and room temperature timing
Cover the sheet loosely with plastic so the pieces do not dry. Let rise at room temperature near 77°F/25°C for about 45–50 minutes.
They’re ready when puffy and springy — press lightly and the dough should bounce back slowly. If your kitchen runs cool, add a few extra minutes rather than rushing the process.
Bake and finish: 350°F/180°C, milk or egg wash, towel cover for a tender crust
Preheat oven to 350°F/180°C while they finish proofing. Brush with milk for a soft, matte finish or use an egg wash for a glossier top.
- Place baking sheet in the preheated oven and bake about 15 minutes for the olive-oil version. Adjust a few minutes longer for richer rolls.
- As soon as the rolls come out, cover them with a clean towel to trap steam and keep the crust thin and tender.
- Transfer to a rack so the bottom of the sheet does not collect condensation as the rolls cool.
Pro tips for achieving that cloud-soft texture every time
A few small adjustments at the bench make a huge difference to how soft the rolls feel when you tear into them. I share practical steps you can use right away, based on years of hands-on baking.
Kneading and gluten development
Knead just until the dough is smooth and elastic. Stop before it feels rubbery; that preserves a fine crumb and avoids toughness.
If the dough tightens while shaping, let it rest for five to ten minutes. That short pause relaxes gluten and makes shaping easier.
Proofing, washes, and flour choices
If you need faster proofing, use the warm-oven trick: preheat to 250°F/120°C, turn the oven off, then proof inside for 30–40 minutes. It gives a steady temperature without risking overproofing.
- Choose a milk wash for a soft, subtle color; use an egg wash for deeper gold and shine.
- Bread flour builds structure and a mild chew; all-purpose flour gives a softer crumb. Try a blend for balance.
- Keep the room draft-free and use a kitchen scale for consistent hydration and repeatable results.
| Finish | Flour choice | Proof method |
|---|---|---|
| Milk wash — soft matte color | All-purpose — softer crumb | Room proof at 77°F/25°C — gentle, reliable rise |
| Egg wash — glossy, golden top | Bread flour — more structure, chew | Warm-oven proof — faster, stable 30–40 min |
| No wash — rustic, tender crust | Blend (half/half) — best of both | Cold overnight retard — deeper flavor, easier shaping |
Watch the dough, not the clock: a slow bounce-back on the fingertip test is your final step before baking. That touch tells you the perfect time to slide the tray into a hot oven and meet the soft texture you’re aiming for.
Serving ideas: classic Italian fillings and modern pairings
A warm platter of fillings turns these soft rolls into a simple feast everyone will reach for. I like to keep things seasonal and bright so each bite feels balanced.
From prosciutto and mozzarella to roast beef with onion relish
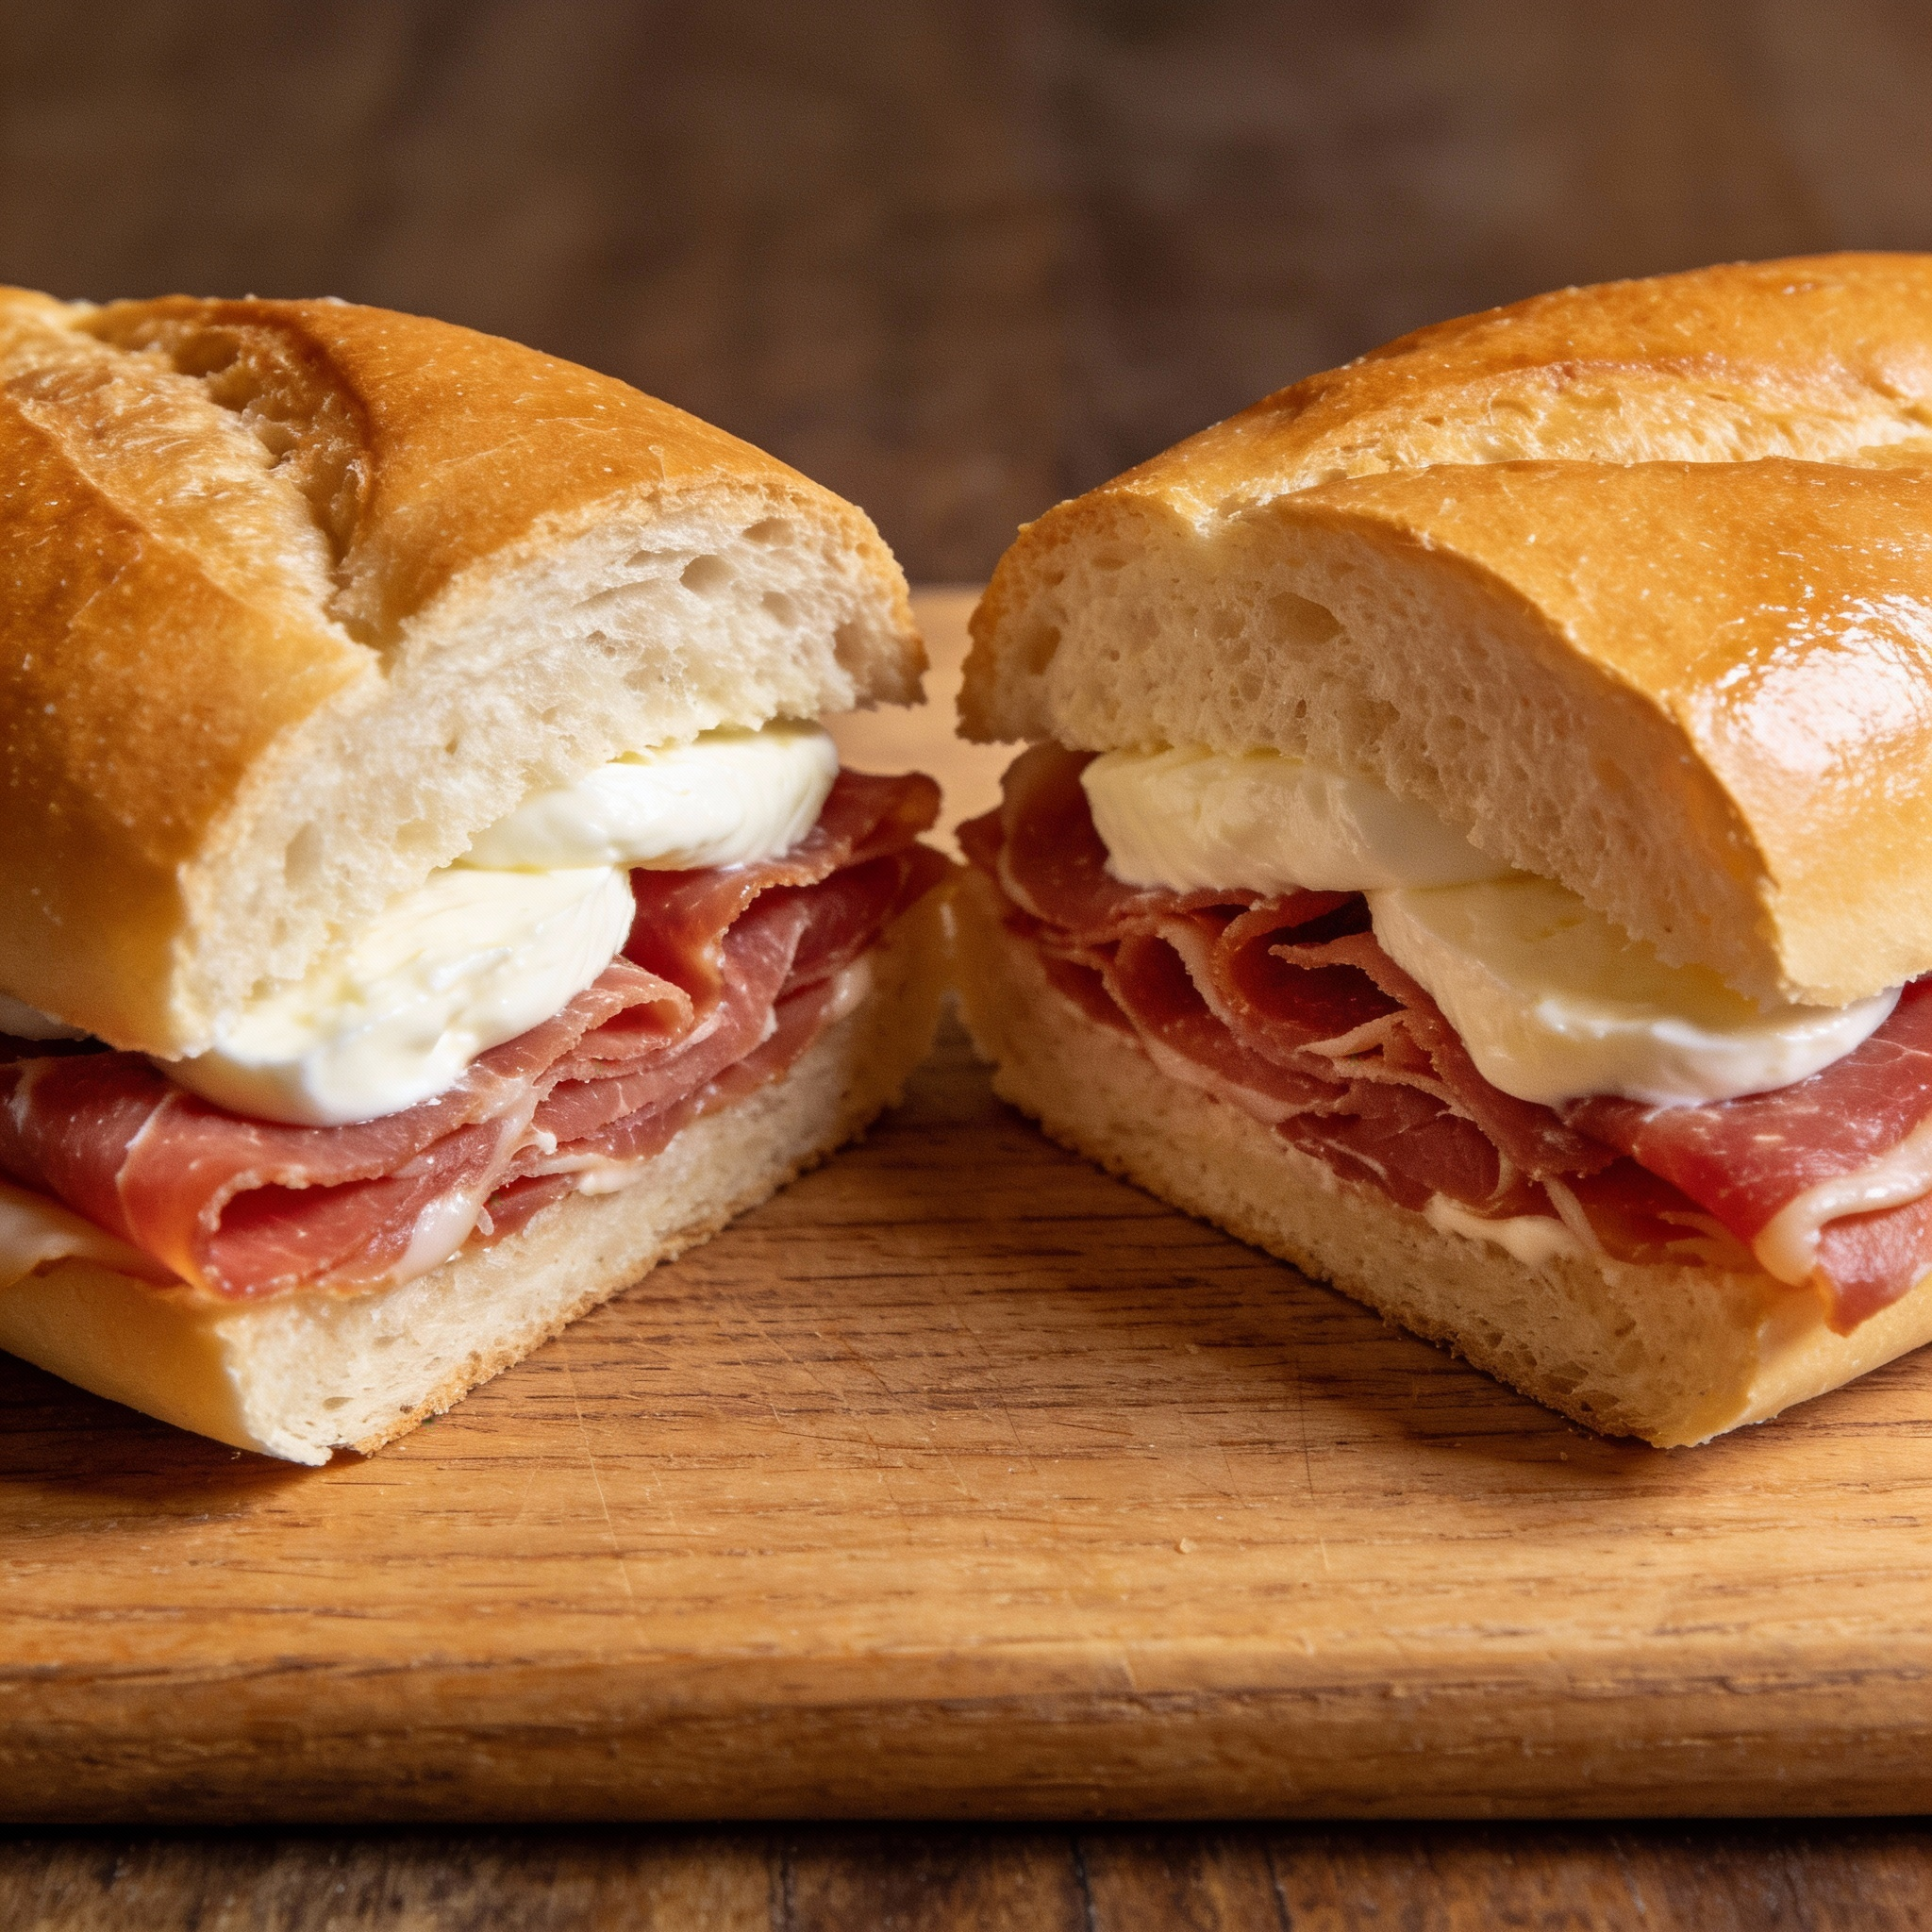
I often split a roll and layer prosciutto with fresh mozzarella, a drizzle of extra virgin olive oil, and a whisper of sea salt. It’s semplice and perfect with a crisp salad.
For a heartier choice, roast beef with sweet onion relish makes a rich, savory sandwich. The slightly sweet roll soaks up jus without getting soggy.
Breakfast, snack, and mini burger sliders the Italian way
In the morning I add a soft scramble, a slice of cheese, and peppery arugula to a warm bun. For quick snacks, butter and jam or a spoon of chocolate-hazelnut hit the spot.
Make mini sliders by shaping small rolls and filling with chicken milanese, shredded pork, or petite burgers. These soft panini bread rounds keep every bite tender.
| Filling | Why it works | Serving tip |
|---|---|---|
| Prosciutto & mozzarella | Salty and creamy balance | Drizzle olive oil, add basil |
| Roast beef & onion relish | Sweet meets savory | Serve warm, slice thin |
| Grilled veg & pesto | Bright, vegetarian option | Press lightly on a griddle |
When hosting, set out platters of salumi, cheese, and marinated olives so guests can build their own. These combinations honor simplicity: excellent ingredients that let the panini and panini bread support the fillings, not hide them.
Plan ahead: resting, storing, and freezing without losing freshness
A simple storage plan keeps those tender rolls tasting fresh and fragrant. A few small choices after baking protect texture and flavor, whether you eat the same day or save for later.
Same-day best practices and short-term care
Right after baking, let rest briefly under a towel to trap steam and keep the crumb soft. Enjoy within a few hours; this is when the rolls show their best texture.
To store for 1–2 hours or up to 48 hours, cool completely, then place in a paper or lightly vented container to limit condensation. For extra softness on day two, wrap in plastic at room temperature and rewarm for a few minutes before serving.
Freezer strategy and reheating tips
- Once cool, slip rolls into a sealed plastic bag, press out air, and freeze for easy meals later.
- Thaw at room temperature without unwrapping so moisture returns to the crumb.
- To revive a bit of crust, warm briefly in a low oven or on a hot pan; a minute of toasting gives a thin, crisp edge.
| Method | Timing | Finish |
|---|---|---|
| Same day | Hours: eat within a few | Cover with towel, serve warm |
| Short term | 1–2 days | Cool, vented container or plastic for softness |
| Frozen | Months | Thaw at room, warm in oven minutes |
Smart swaps, variations, and dough versatility
Small swaps and bold add-ins let you bend this dough toward sweet, savory, or soup-night comfort. I encourage you to experiment, but keep one change at a time so results stay predictable.
Panini con pancetta, raisin buns, and olive-sun-dried tomato twists
Fold crisp pancetta into the mix for salty richness, or scatter raisins for a lightly sweet bun that pairs with morning coffee. For a Mediterranean note, knead in chopped olive and sun-dried tomato—pulse gently so the dough keeps its lift.
No-knead crusty panini rolls for faster bakes and soup nights
For speed, use the no-knead approach: mix flour, water, yeast, salt, a touch of sugar, and olive oil in one bowl. Proof in a warmed oven 30–40 minutes, then bake at 440°F/220°C for 20–25 minutes for crusty rolls that love soup.
Flour choices, yeast options, and oil vs butter for flavor and feel
Swap flours with intent: all-purpose for softer crumb, bread flour for more chew. Use instant or active dry yeast if you prefer. Choose oil for a leaner loaf or butter for a richer aroma—both are authentic and delicious.
- Shape irregular pieces for rustic character and bake on a preheated baking sheet.
- If a formula lists a cup, be consistent; I still shift back to grams for repeatable results.
- Save some dough for pizza night—small rolls make a lovely side and link the meal.
| Variation | Key change | When to use |
|---|---|---|
| Panini con Pancetta | Add crisp pancetta, fold gently | Sandwiches, savory snacks |
| Raisin buns | Scatter raisins, slight sugar bump | Breakfast or sweet pairings |
| Olive & sun‑dried tomato | Chopped olive, tomatoes, a swirl of olive oil | Mediterranean boards, aperitivo |
| No‑knead crusty | One‑bowl mix; warm‑oven proof; high temp bake | Quick crusty rolls, soup nights |
Troubleshooting: dough, rise, and bake-time fixes
A balky rise or sticky ball doesn’t mean failure—just a simple adjustment away from success. Below I walk you through common problems, clear causes, and fast steps you can take mid-process.
Sticky dough, slow yeast, pale tops, or tough crust—what to adjust
If the dough feels sticky, dust your hands and the bench with a light sprinkle of flour and let the piece rest for five minutes. That pause relaxes gluten so the ball shapes without needing more water.
For a slow rise, check the yeast and move the bowl to a warmer spot near 77°F/25°C. Using fresh active or dry yeast and allowing extra hours will fix a dense crumb.
- Pale tops: brush with a milk or egg wash before you place the sheet in the preheated oven and add 2–3 minutes if color is slow.
- Tough crust: cover rolls immediately with a clean towel after baking; to soften cooled rolls, steam briefly in a warm oven.
- Gummy interior: extend baking by 2–3 minutes, reduce oven crowding, and verify temperature with a thermometer.
Room temperature impacts, hydration tweaks, and bake-time calibration
Too slack? Strengthen the dough with a short fold or add a tablespoon of flour, not a cup at once. Too tight? Add a teaspoon or two of water and knead until smooth.
Rotate trays to avoid uneven browning and preheat oven fully so the dough springs correctly. For no-knead crusty loaves, use 440°F/220°C for 20–25 minutes; standard bakes do well at 350°F/180°C for 15–25 minutes depending on style.
| Issue | Likely cause | Quick fix |
|---|---|---|
| Sticky dough | High hydration or tight gluten | Light dusting of flour, rest 5–10 minutes |
| Slow rise / dense crumb | Weak yeast or cool room | Move bowl to 77°F/25°C, allow more hours |
| Pale top | Insufficient wash or low heat | Apply milk/egg wash, preheat oven, add minutes |
| Cracked top / collapse | Underproofed or cool oven | Let rise a bit longer, place sheet in fully preheated oven |
If you want a related method for delicate, thin-crust bakes, see this step-by-step guide for additional technique ideas.
Bake today, share tonight: bring the aroma of an Italian bakery home
Bake a tray this afternoon and watch a simple loaf turn into an event around your table.
I want you to feel how fast these recipes reward you: a few hours of proofing and baking, and warm panini and panini bread are ready to share.
Take the sheet from the oven, cover the tray with a towel, then move the tray to a rack while you slice fillings. This keeps every roll soft and inviting.
Arrange meats, cheeses, olives, and a dish of olive oil for drizzling. Let friends build sandwiches with their hands and enjoy the easy rhythm of the step-by-step process.
Keep a frozen stash for impromptu gatherings; thaw quickly and they taste like they were made that day. Buon appetito—may your kitchen smell like a small panetteria and your table be full.
Italian Milk Bread Panini Morbidi
Ingredients
Method
- For Olive-oil Roman-style dough: Dissolve yeast in cool water, then mix in flour until a dough forms. Slowly add olive oil, sugar, egg yolk, and salt. Knead until smooth and elastic.
- For Panini al Latte dough: Warm the milk and melt the butter together. Mix in the egg, sugar, salt, and active dry yeast. Add in flour and knead until smooth and silky.
- Place the dough in a bowl and cover. Let it rise at room temperature (77°F/25°C) for about 1.5 hours for the olive-oil dough or 30 minutes for the milk-and-butter dough.
- After the first rise, divide the dough into 75 g pieces. Roll them into smooth balls. If using sesame seeds, dip the tops of the rolls in water and then sesame seeds.
- Place the rolls on a baking sheet with space between each. Cover loosely with plastic wrap or a towel and let rise for 45-50 minutes for the olive-oil dough or 30 minutes for the milk-and-butter dough.
- Preheat the oven to 350°F/180°C. If you want a soft crust, brush the rolls with milk before baking. Bake for about 15 minutes for the olive-oil dough, and 20-25 minutes for the milk-and-butter dough. The rolls should be golden brown.
- Once out of the oven, cover the hot rolls with a clean towel to keep the crumb soft. Allow them to cool slightly before serving.
Notes
- Flour choice: Use bread flour for a chewier, springier roll or all-purpose flour for a softer, more delicate crumb.
- Storage: Store in a paper bag or a lightly vented container for up to 2 days. Freeze leftovers for longer storage. Thaw at room temperature and refresh in the oven.
- Milk wash: For a softer finish, brush the rolls with warm milk before baking. For a shinier finish, use an egg wash instead.
- Optional add-ins: You can customize the bread by adding sesame seeds, raisins, or chopped olives to the dough.