

Jump to Recipe
I stand at the counter with a warm pan on the table and the smell of buttered bread in memory, ready to turn simple squash into something that feels like a hugged memory. When the skin crisps and the flesh yields just enough, you know the balance is right: sweet, savory, a hint of smoke from the oven and the slow perfume of olive oil.
I wrote this recipe the way I cook at home: clear timing, small swaps, and a few chef tricks to help you read doneness like a pro. Bake at 400°F for about 25–30 minutes, giving each piece room on a parchment-lined tray so edges brown evenly and the center stays tender but intact.
Choose flavor-forward varieties—Hokkaido, Red Kuri, or butternut—and avoid carving types that lack depth. Oil the pieces well to prevent sticking and to promote caramelization; save the pan juices to whisk into a quick glaze or dressing that lifts the whole dish at the table.
Key Takeaways
- Preheat to 400°F and space pieces for even browning.
- Use Hokkaido/Red Kuri or butternut for best flavor and texture.
- Coat thoroughly with olive oil to prevent sticking and aid caramelization.
- Bake 25–30 minutes until tender but still shaped; serve immediately for crisp edges.
- Reserve pan juices to make a simple dressing or glaze for leftovers.
Why this roasted pumpkin side works for busy fall dinners
On hectic weeknights I pick recipes that give big taste with little babysitting. This method bakes at 400°F for 25–30 minutes, so you set a timer and walk away. The timing is dependable; it fits easily into most weeknight routines.
Spacing and full oil coverage are the simple tricks that make the edges caramelize instead of steam. That texture is what turns raw squash into a memorable accompaniment for a quick protein.
- Hands-off bake time: about 25–30 minutes at steady heat.
- Scales on two racks if you keep pieces spaced for color.
- Minimal prep — for some varieties you can leave the skin on and save time.
Cleanup stays light with parchment, and flavors are forgiving: garlic and a savory blend do most of the work. Serve right away for the best crispness; leftovers store in the fridge up to two days and reheat well for lunches.
| Need | Quick Tip | Result |
|---|---|---|
| Hands-off time | Bake 25–30 minutes at 400°F | Tender center, browned edges |
| Scaling | Use two racks, keep space between pieces | Even caramelization |
| Storage | Refrigerate up to 2 days | Good for next-day meals |
Ingredients and smart swaps for Italian-herb perfection
I love pulling simple pantry staples together to make a side that feels special with almost no fuss. Below I list core ingredients, easy substitutions, and a few flavor boosters so you can match the dish to what you already have.
Core ingredients
Use quality pumpkin pieces, a good drizzle of olive oil, fresh garlic, a pinch of salt and pepper, and a sprinkle of Italian seasoning. These basics carry the flavor and keep prep quick.
Optional boosters
- Fresh rosemary for a woodsy note; add it sparingly so it doesn’t overpower.
- A dab of paprika or a whisper of cinnamon for warm spice complexity.
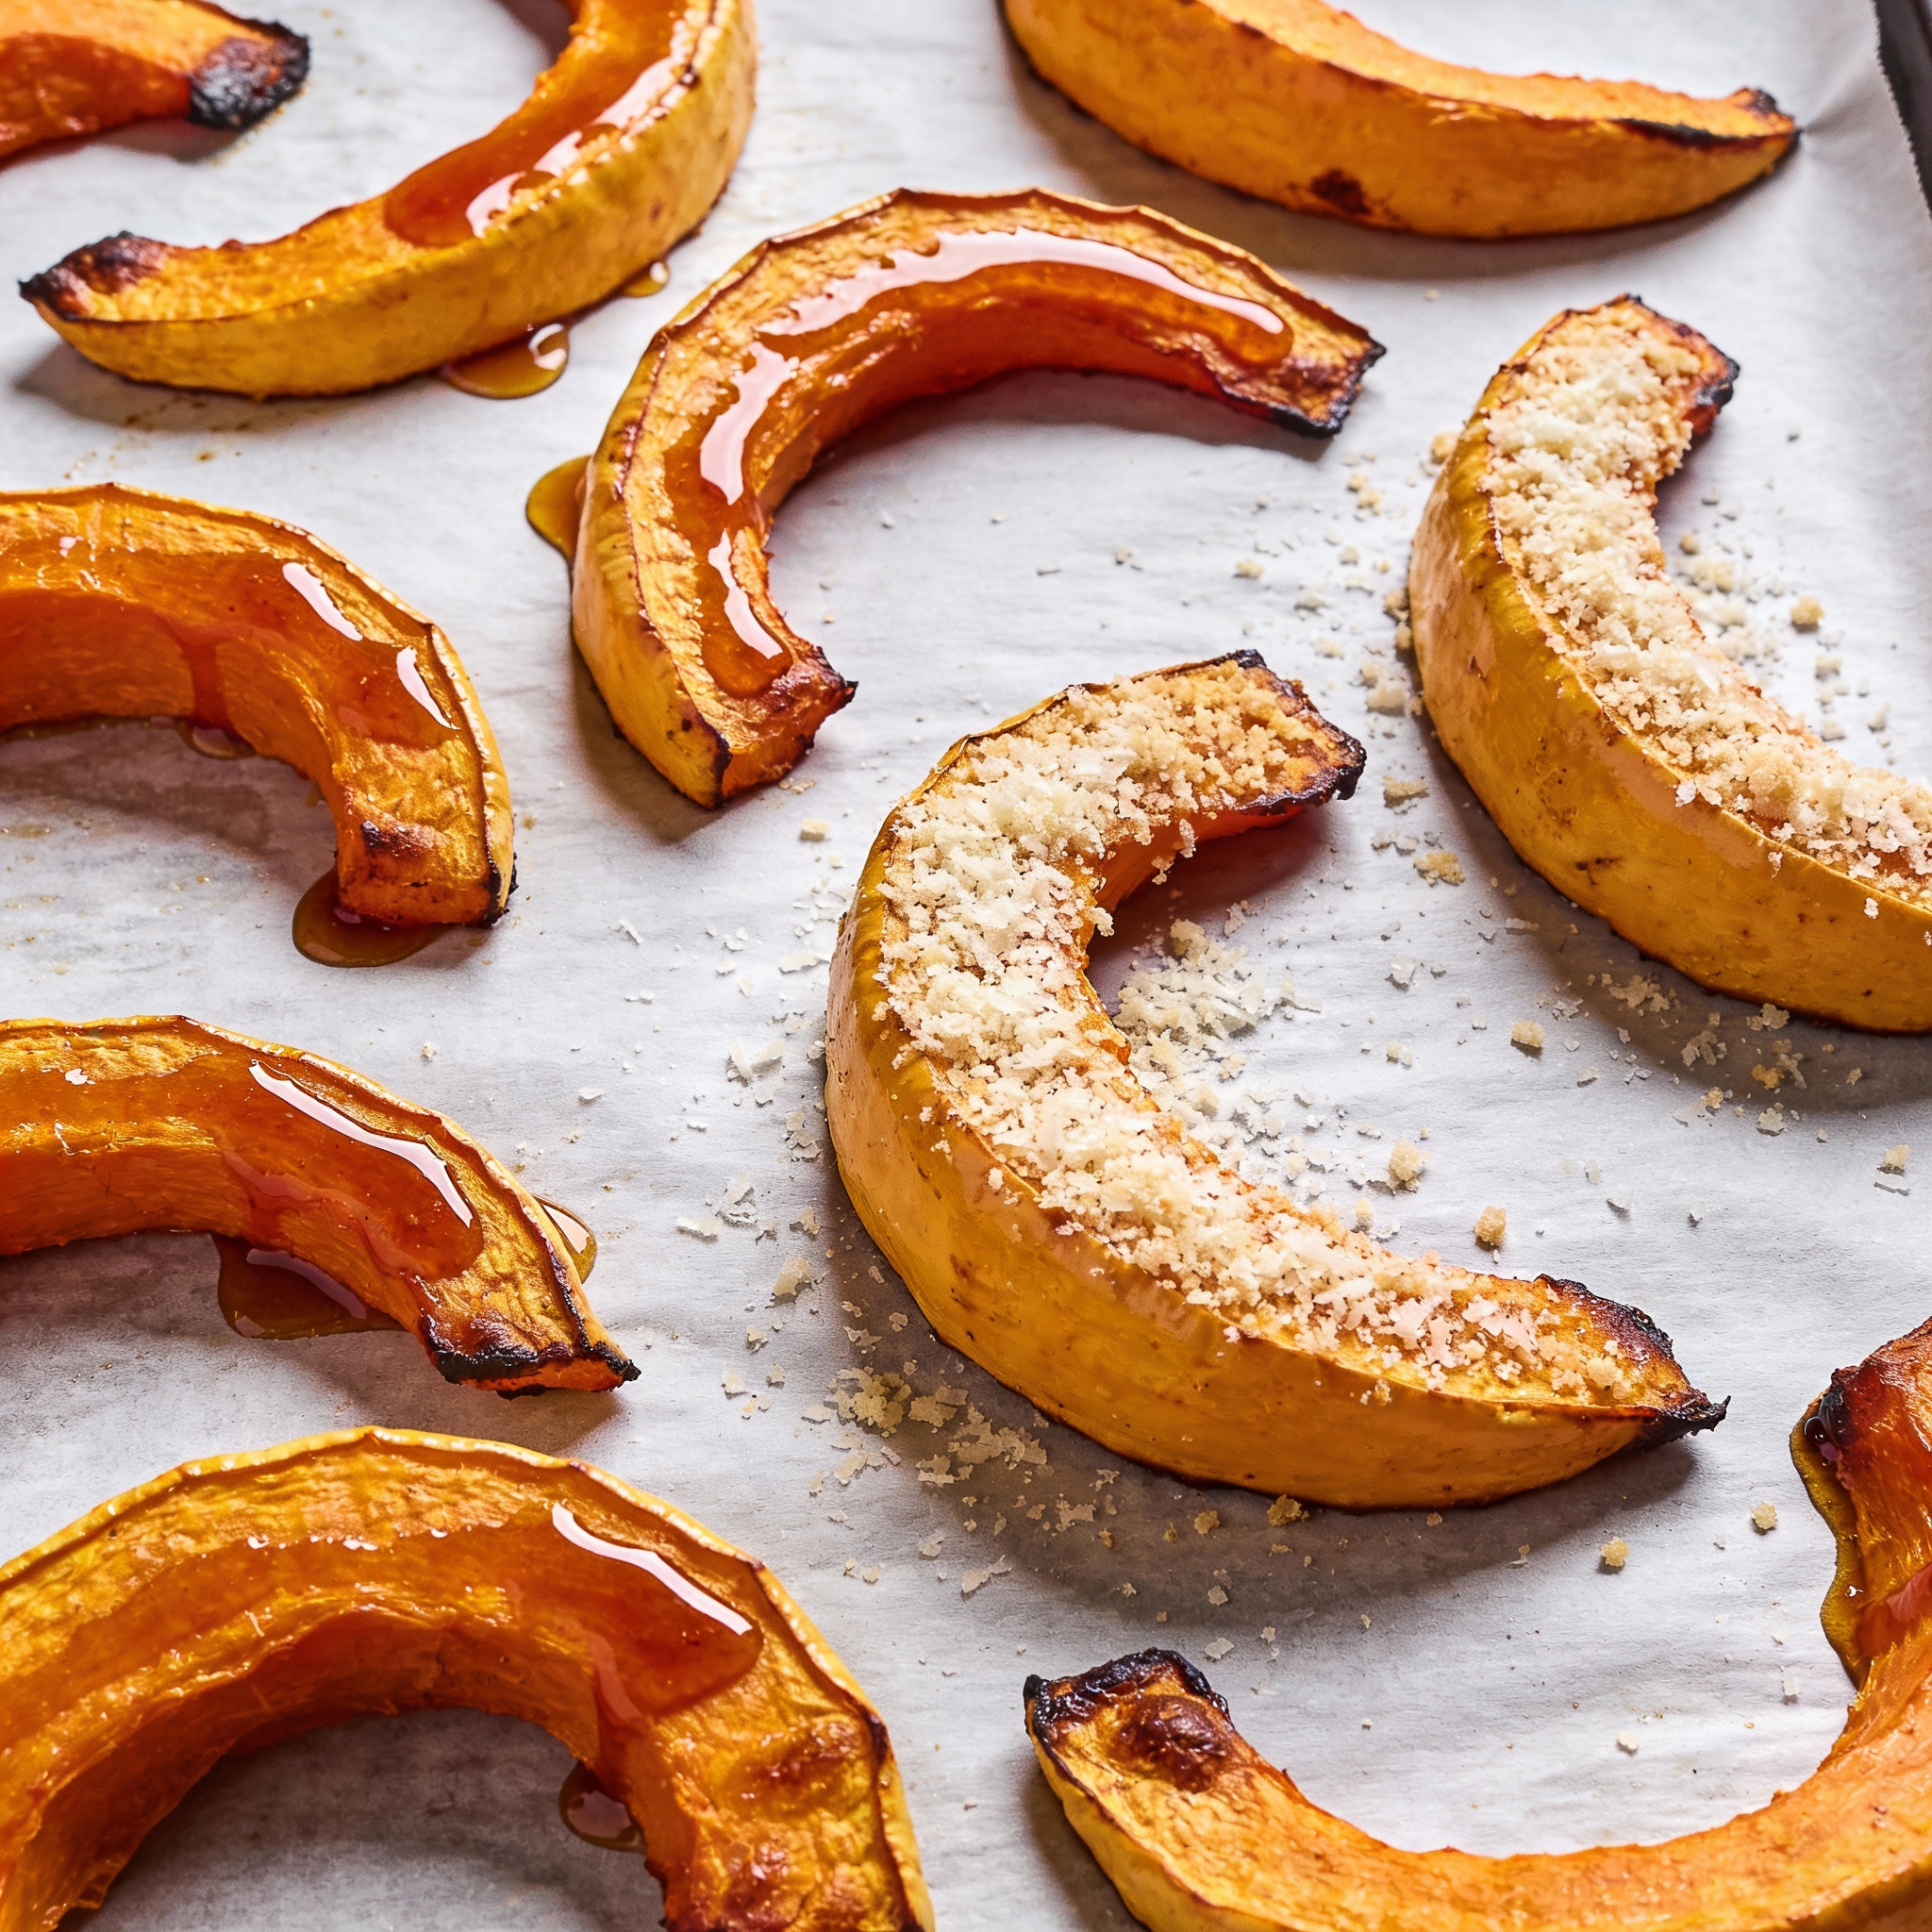
- Finish with a drizzle of maple or a sprinkle of Parmesan for sweet-savory contrast.
Best varieties and pantry tips
I favor Hokkaido/Red Kuri and butternut for reliable texture; Crown Prince brings a nutty depth when young. Avoid large carving types—they lack the sweetness and density you want.
| Variety | Flavor | Best finish |
|---|---|---|
| Hokkaido / Red Kuri | Sweet, creamy | Parmesan or goat cheese |
| Crown Prince | Nutty, deep | Rosemary and olive oil |
| Butternut | Neutral, versatile | Maple or paprika |
Roasted pumpkin wedges Italian herbs
Start with a hot oven and a lined sheet; those two moves do more than you think. I preheat oven to 400°F, and I always line a baking sheet with parchment paper so pieces release cleanly and brown evenly.
Prep at a glance
Cut uniform wedges so they cook at the same rate. Toss pieces with a light coating of oil and your seasoning so every surface caramelizes.
Toss, space, roast — the simple method
- Spread the wedges on a tray in a single layer with breathing room. Crowding traps steam and keeps edges soft.
- Roast about 25 to 30 minutes, checking at minute 20; ripe pumpkin may finish sooner but should stay soft yet firm.
- Rotate the tray once if your oven runs hot in the back to ensure even color and tenderness.
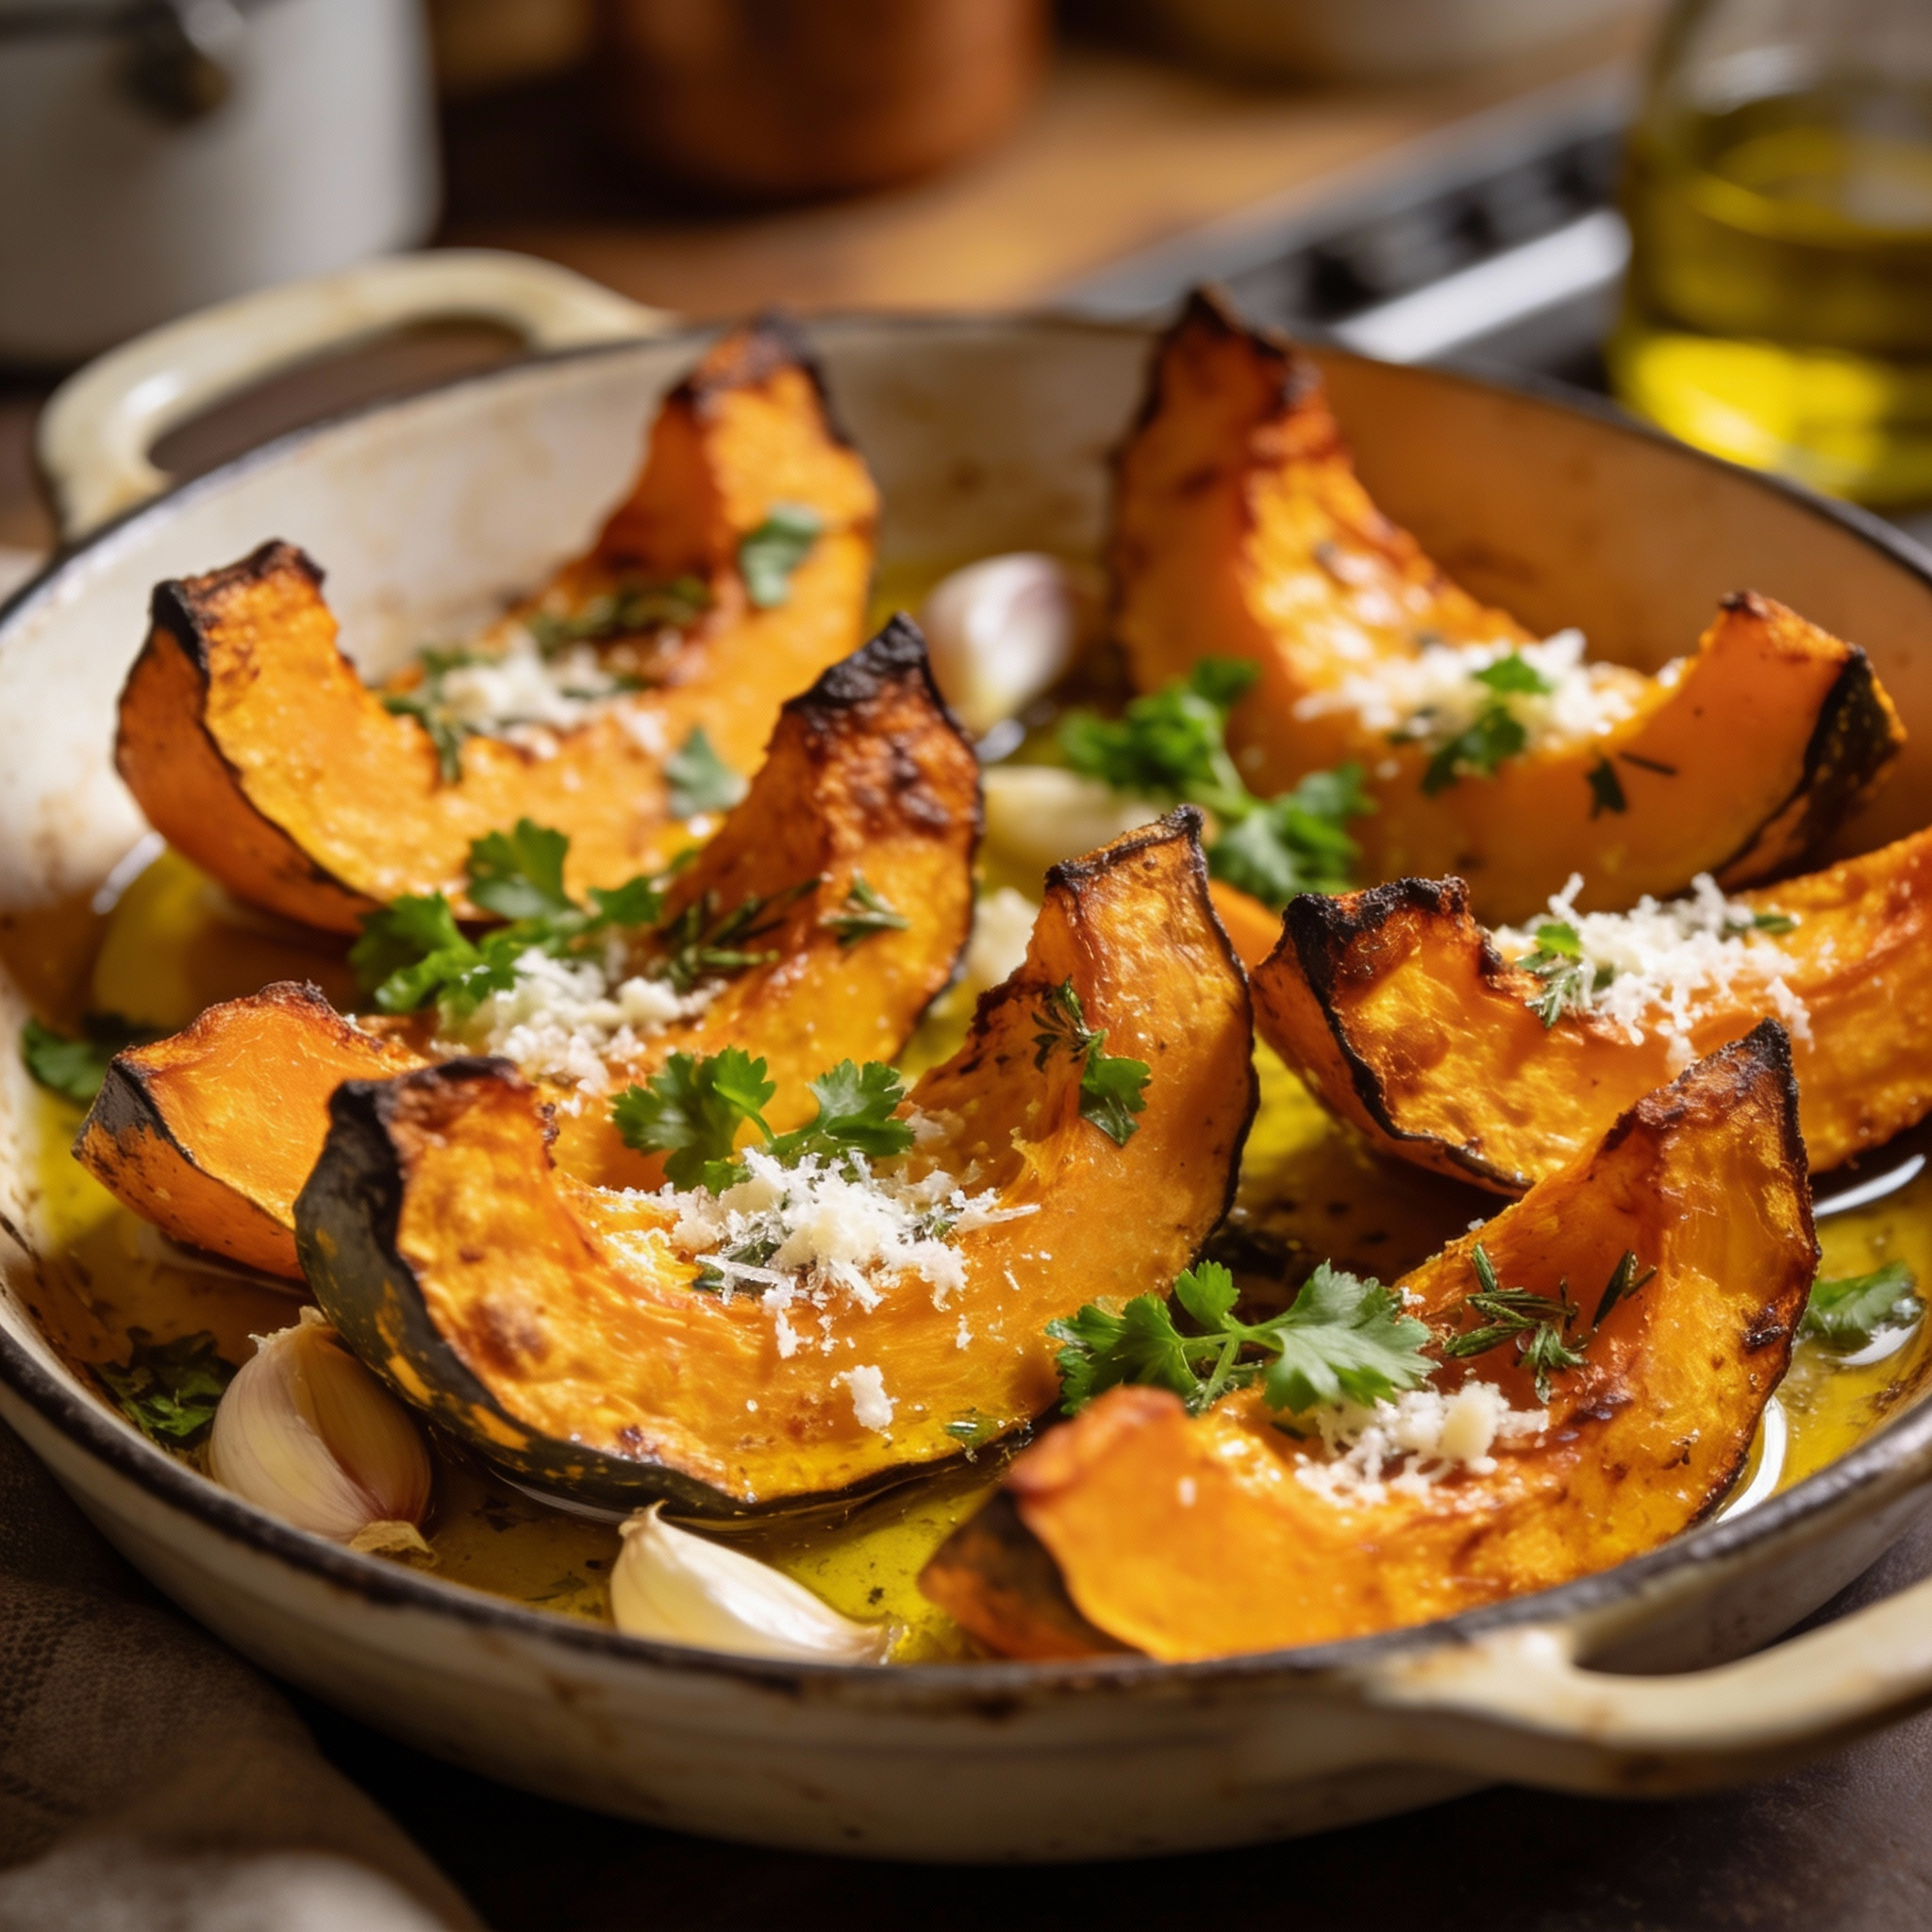
- For a glossy finish, toss hot pieces with a spoonful of pan juices. Garnish with chopped parsley or shaved Parmesan before serving.
| Step | Why it works | Result |
|---|---|---|
| Preheat oven & line sheet | High, even heat and nonstick surface | Clean release, even browning |
| Oil and seasoning | Coats surfaces for caramelization | Golden edges, seasoned interior |
| Space on tray | Allows moisture to escape | Crisp edges, tender centers |
When you follow these small steps, the final dish has contrast—crisp outer color and a soft, flavorful inside. I love the way a simple finish lifts the plate.
Choosing the right pumpkin (and when to keep the skin on)
Good flavor starts at the market: I look for dense flesh, a bright rind, and a weight that hints at sweetness. These visual cues predict how the piece will brown and hold texture under heat.
What to buy: flavor-forward varieties vs carving pumpkins
Buy for taste, not size. Hokkaido/Red Kuri and Crown Prince deliver real depth. Crown Prince can be nutty and sweet, and when young it roasts well with the skin left on.
- Avoid carving pumpkins — the flesh is often watery and bland.
- Butternut is a reliable choice; its fine texture makes it easy to use across dishes.
- Think broader: many thin-skinned squash behave similarly, so favor dense, sweet flesh.
Skin-on vs peeled: texture, nutrition, and time-saving
If the rind is thin and tender (Hokkaido, young Crown Prince), I keep it. Skin-on saves prep time, adds chew, and keeps nutrients in the pan juices.
When the skin seems tough, test a small piece. If it does not soften, peel before you cook to avoid a fibrous bite.
| Variety | Skin | Why choose it |
|---|---|---|
| Hokkaido / Red Kuri | Thin, edible | Sweet, creamy; no need to peel |
| Crown Prince | Young: thin; mature: firm | Nutty depth; roast skin-on when young |
| Butternut | Thicker, peel optional | Consistent sweetness; great for cubes |
How to cut pumpkin safely into wedges and cubes
A steady board, a sharp chef’s knife, and a calm hand turn an awkward gourd into neat, cookable pieces. I start by trimming a small flat base so the fruit will sit firm and not wobble.
Step-by-step: halving, scooping seeds, wedge cutting
Halve the pumpkin from stem to base with a controlled motion. Use a sturdy spoon to scoop out the seeds and stringy bits; save the seeds if you want to toast them later.
- Trim a flat base, then halve top to bottom with a sharp chef’s knife.
- Scoop seeds and fibers, scraping the cavity clean.
- Slice each half into even wedges so they roast at the same rate and get uniform caramelized edges.
When to cube: meal-prep and salad-friendly shapes
For cubes, slice halves into planks, peel if the skin is tough, then cut into bite-size cubes that suit salads and grain bowls. Roast cubes at 400°F for 30–40 minutes until tender and lightly caramelized; wedges usually need 25–35 minutes.
- Choose wedges for dramatic, crispy edges and a centerpiece side.
- Choose cubes for bowls, tacos, risotto, and easy meal-prep portions.
- Keep your guiding hand clawed and use a dry board to prevent slips—safety first, sempre.
| Cut | Prep tip | Roast time at 400°F |
|---|---|---|
| Wedges | Even arcs from each half for uniform cooking | 25–35 minutes |
| Cubes | Slice into planks, peel if needed, cut bite-size | 30–40 minutes |
| Seeds | Scoop, rinse, pat dry; toss with oil and salt to toast | 10–15 minutes (separate tray) |
| Pan handling | Slide a thin spatula under stuck pieces to preserve golden bits | Use gentle release |
Seasoning roadmap: classic Italian profile and tasty twists
Flavors tell the story, so I layer seasoning with purpose—each choice nudges aroma, texture, and sweetness. Start with a savory base, then decide if you want warmth, sweet-heat, or a crunchy finish.
Italian backbone with garlic
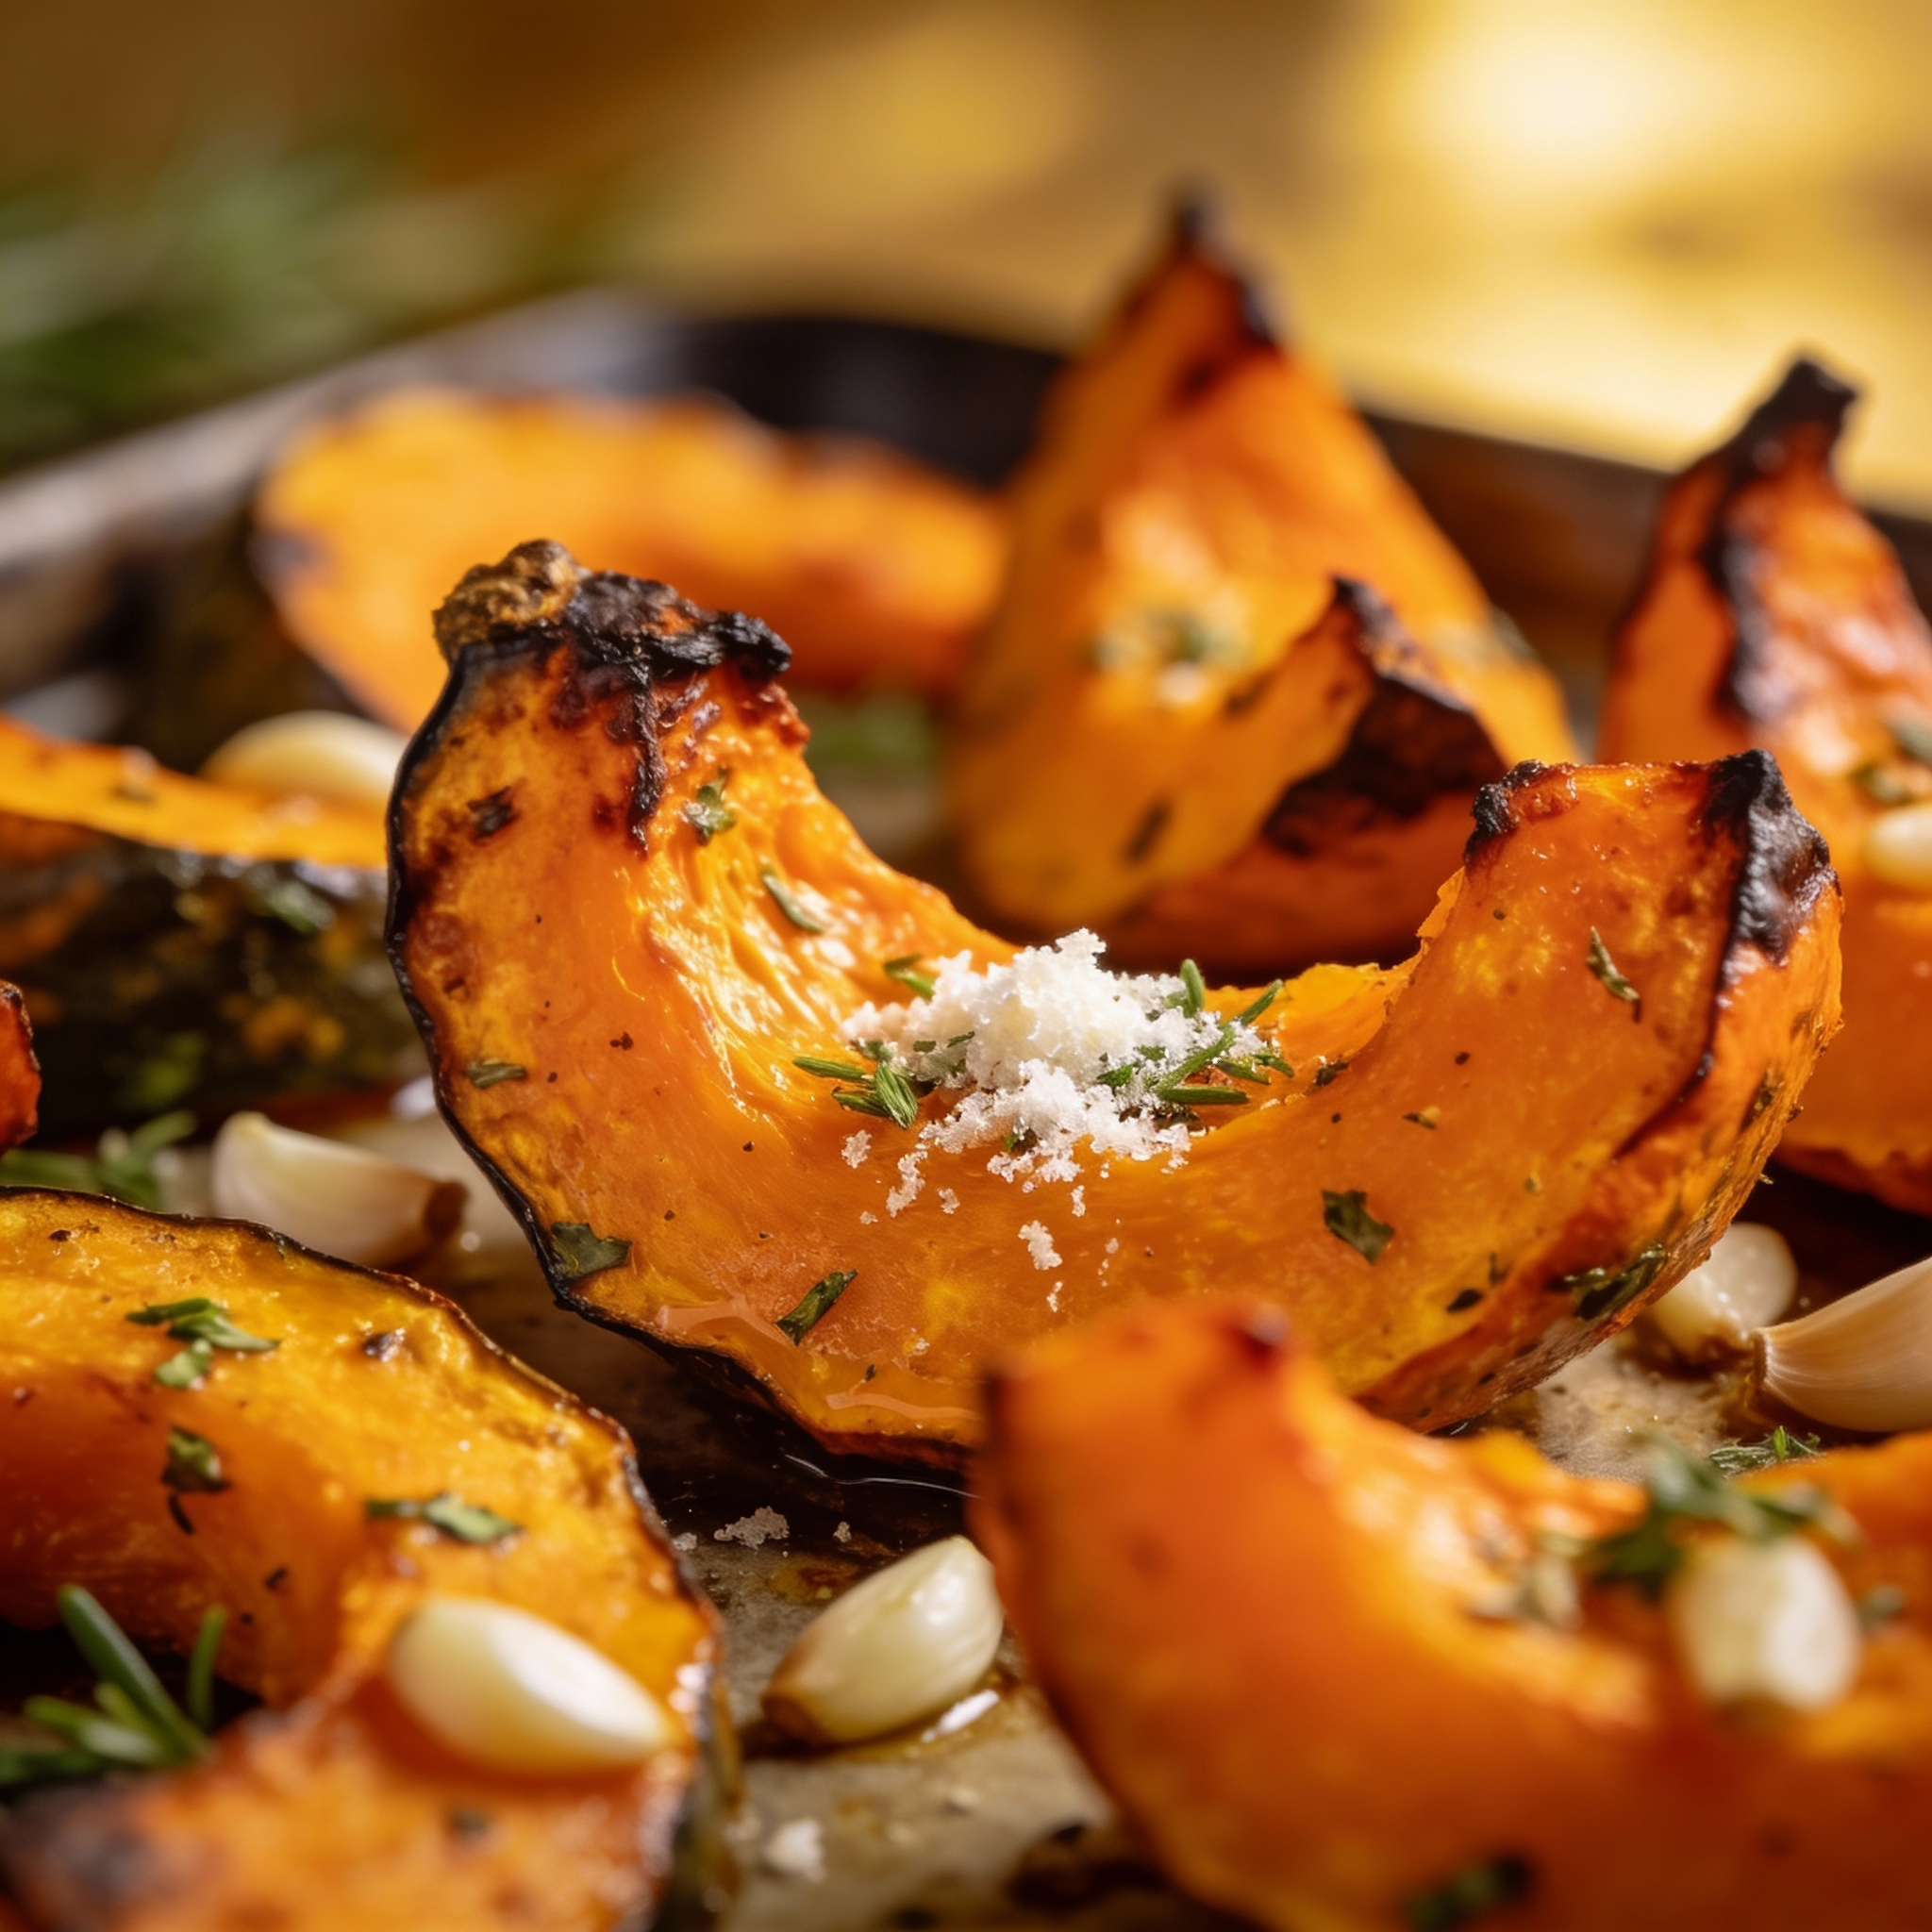
I begin with garlic and a classic seasoning blend for a balanced, savory aroma that flatters pumpkin’s natural sweetness. Light salt and pepper frame the taste without masking the caramelized edges.
For a woodsy note, bruise fresh rosemary and tuck sprigs among pieces before baking. The oils lift the dish while staying subtle.
Warm and sweet-heat variations
A pinch of paprika gives gentle smoke. A whisper of cinnamon adds cozy warmth when used sparingly.
If you like contrast, drizzle maple or honey and sprinkle chili flakes for sweet-heat. That push-pull makes each bite lively.
Cheesy finishes and crunchy toppers
Finish with grated Parmesan or a dollop of goat cheese for tang and cream. Add toasted nuts or dried cranberries for texture and balance.
- Build in layers: base garlic, then one bold twist.
- Salt and pepper last to taste; small adjustments matter.
- For sweeter notes, add a touch of sugar with cinnamon.
| Flavor element | Use | Effect on aroma | Best finish |
|---|---|---|---|
| Garlic + seasoning blend | Base coating | Savory, aromatic | Parmesan or mozzarella |
| Paprika / cinnamon | Light pinch | Warmth, subtle smoke | Maple drizzle or sugar |
| Maple / honey + chili | Post-roast drizzle | Sweet-heat pop | Toasted nuts or bacon crumbs |
| Rosemary | Tuck sprigs while baking | Woodsy, rustic | Finish with lemon squeeze |
Roasting time, temperature, and doneness cues
I set the oven to 400°F and trust that steady heat to make color and texture sing. Good timing gives caramelized edges without drying the flesh.
Test-kitchen timing guide
For wedges plan 25 to 35 minutes at 400°F. Check at minute 20 — a ripe pumpkin can finish sooner. Cubes need 30 to 40 minutes for even browning.
Doneness cues and adjustments
- Proper doneness is “soft but firm”: a knife tip slides in with slight resistance and edges show golden blistering.
- Smaller pieces finish faster; keep sizes consistent for even results.
- If color stalls, increase airflow by spreading pieces or moving the tray to a hotter rack for the final minutes.
- When unsure, taste one: a creamy interior with a gentle snap to the skin is the goal.
| Cut | Temp | Time (minutes) | Doneness cue |
|---|---|---|---|
| Wedges | 400°F | 25–35 | Knife tip slides in, golden edges |
| Cubes | 400°F | 30–40 | Tender throughout, flat sides caramelized |
| Small pieces | 400°F | Check at 20 | May cook faster if very ripe |
Pro tips for restaurant-level results
A few chef tricks make a home oven sing like a restaurant—small moves, big payoff. I keep my advice practical so you can repeat it every week and see better texture and flavor.
Oil coverage and spacing: the secret to browning, not steaming
Coat every surface with oil so fat conducts heat into the flesh and encourages even browning. I use a thin film of olive oil and rub it across each piece for full coverage.
Give pieces room on the tray. Airflow matters: crowded pans trap steam and keep edges soft. Space creates that crisp-chewy contrast we crave.
Pan juices trick: blend into a dressing or glaze
After roasting, tip the pan juices into a bowl, fish out stems, and blend until silky. That simple dressing brightens salads and ties the dish together.
If you want extra color, sear briefly in a hot pan before the oven or finish under the broiler for a minute—watch closely to avoid burning. Rotate the pan halfway if your oven browns unevenly.
- Season lightly before roasting and taste after; a final pinch of salt or squeeze of lemon lifts the plate.
- Serve immediately—the dish sings hottest off the pan, with a crisp surface and a lush interior.
| Technique | Why it matters | Result |
|---|---|---|
| Full oil coverage | Helps conduct heat and prevents sticking | Deep, even browning |
| Generous spacing on tray | Allows moisture to escape and air to circulate | Crisp edges, tender center |
| Blend pan juices | Concentrates flavor and recaptures fond | Silky dressing or glaze |
| Quick sear or broil finish | Adds Maillard color without drying | Restaurant-level crust and gloss |
What to serve with roast pumpkin (and how to repurpose leftovers)
Think of this as a versatile side that moves easily from the roast to salads, bowls, and quick pastas the next day. I pick pairings that balance sweet flesh with savory mains and bright, tangy sauces.
Protein pairings
- Classic holiday: serve with roast turkey or roast turkey breast for a comforting spread.
- Weeknight stars: creamy lemon-garlic chicken, lemon-pepper chicken, or Cajun chicken add zesty contrast.
- Bistro-style: garlic-butter steak bites, roast beef, or grilled sausages make the plate hearty and simple.
Leftover ideas and new dishes
Tomorrow’s lunch can be a pumpkin salad with mixed greens, dried cranberries, toasted nuts, and a sprinkle of cheese. For grain bowls, layer farro or quinoa, add pan-juice dressing, herbs, and a few slices of wedges or cubed squash.
Stir cubes into pasta or fold into risotto — the squash softens into a silky note. For a playful twist, try tacos with black beans, avocado, and a squeeze of lime.
| Use | Main pairing | Why it works | Serving tip |
|---|---|---|---|
| Holiday plate | Roast turkey / ham | Sweet meets savory, classic comfort | Finish with pan-juice glaze |
| Bistro dinner | Steak bites / sausages | Rich proteins contrast sweet flesh | Serve hot with a sprinkle of cheese |
| Next-day meals | Salads / grain bowls | Textural contrast from nuts and greens | Toast nuts for crunch, add dried cranberries |
| Pasta & risotto | Butter, sage, or light cream | Mellows into sauce for silky richness | See risotto ideas: risotto pairings |
Storage, reheating, and freezing guidance you can trust
Good storage rules mean your side dish tastes nearly as fresh on day two as it did hot from the oven. Cool pieces until steam eases, then refrigerate in an airtight container for 2–3 days. For faster service, reheat on a hot baking sheet to revive edges; the microwave works for convenience but expect a softer finish.
Don’t freeze whole wedges — they lose structure. Instead, roast and then blend into a smooth pumpkin puree. Freeze that pumpkin puree in labeled portions to use later in soups, oatmeal, quick breads, or pie. This little step saves flavor and time for busy nights.
Save pan juices in a jar, whisk with a pinch of salt and pepper for a speedy dressing. If you saved seeds, rinse and toast them for a crunchy garnish with cheese — nothing wasted, tutto buono.
Roasted Pumpkin Wedges with Italian Herbs
Ingredients
Method
Notes
- If you're short on time, you can cube the pumpkin instead of making wedges. The cubes will cook a little faster (30-40 minutes).
- For a more intense flavor, try adding a pinch of smoked paprika or cinnamon to the seasoning mix.
- You can save the pan juices and use them as a dressing or glaze for an extra burst of flavor.
- Make sure to space the pumpkin wedges out properly to avoid steaming and ensure they get that delicious crispy texture on the edges.