
Jump to Recipe
I teach a tidy method that keeps meat juicy and gives you a golden crust every time. Start to finish it’s about 45 minutes: 25 minutes prep, 20 minutes cook. I brown for roughly 4 minutes per side in olive oil and butter, then finish in a very hot oven at 425°F until an instant-read thermometer hits 145°F.
The breading station uses flour, beaten egg, and crumbs mixed with grated Parmesan, rubbed herb leaves, and bright zest. My approach guards texture—sear for color, bake to finish—so the center stays tender and the crust stays crisp. I note that nutrition counts use full breading amounts; what you eat will vary. Snap a photo if you like; this method makes plating simple and honest.
Key Takeaways
- Ready in about 45 minutes total—easy weeknight timing.
- Three-bowl breading keeps the crust even and tidy.
- Sear 4 minutes per side, then bake 10–15 minutes at 425°F.
- Finish when center reads 145°F, then rest briefly for juiciness.
- Zest in the crumbs adds bright aroma; Parmesan gives nuttiness.
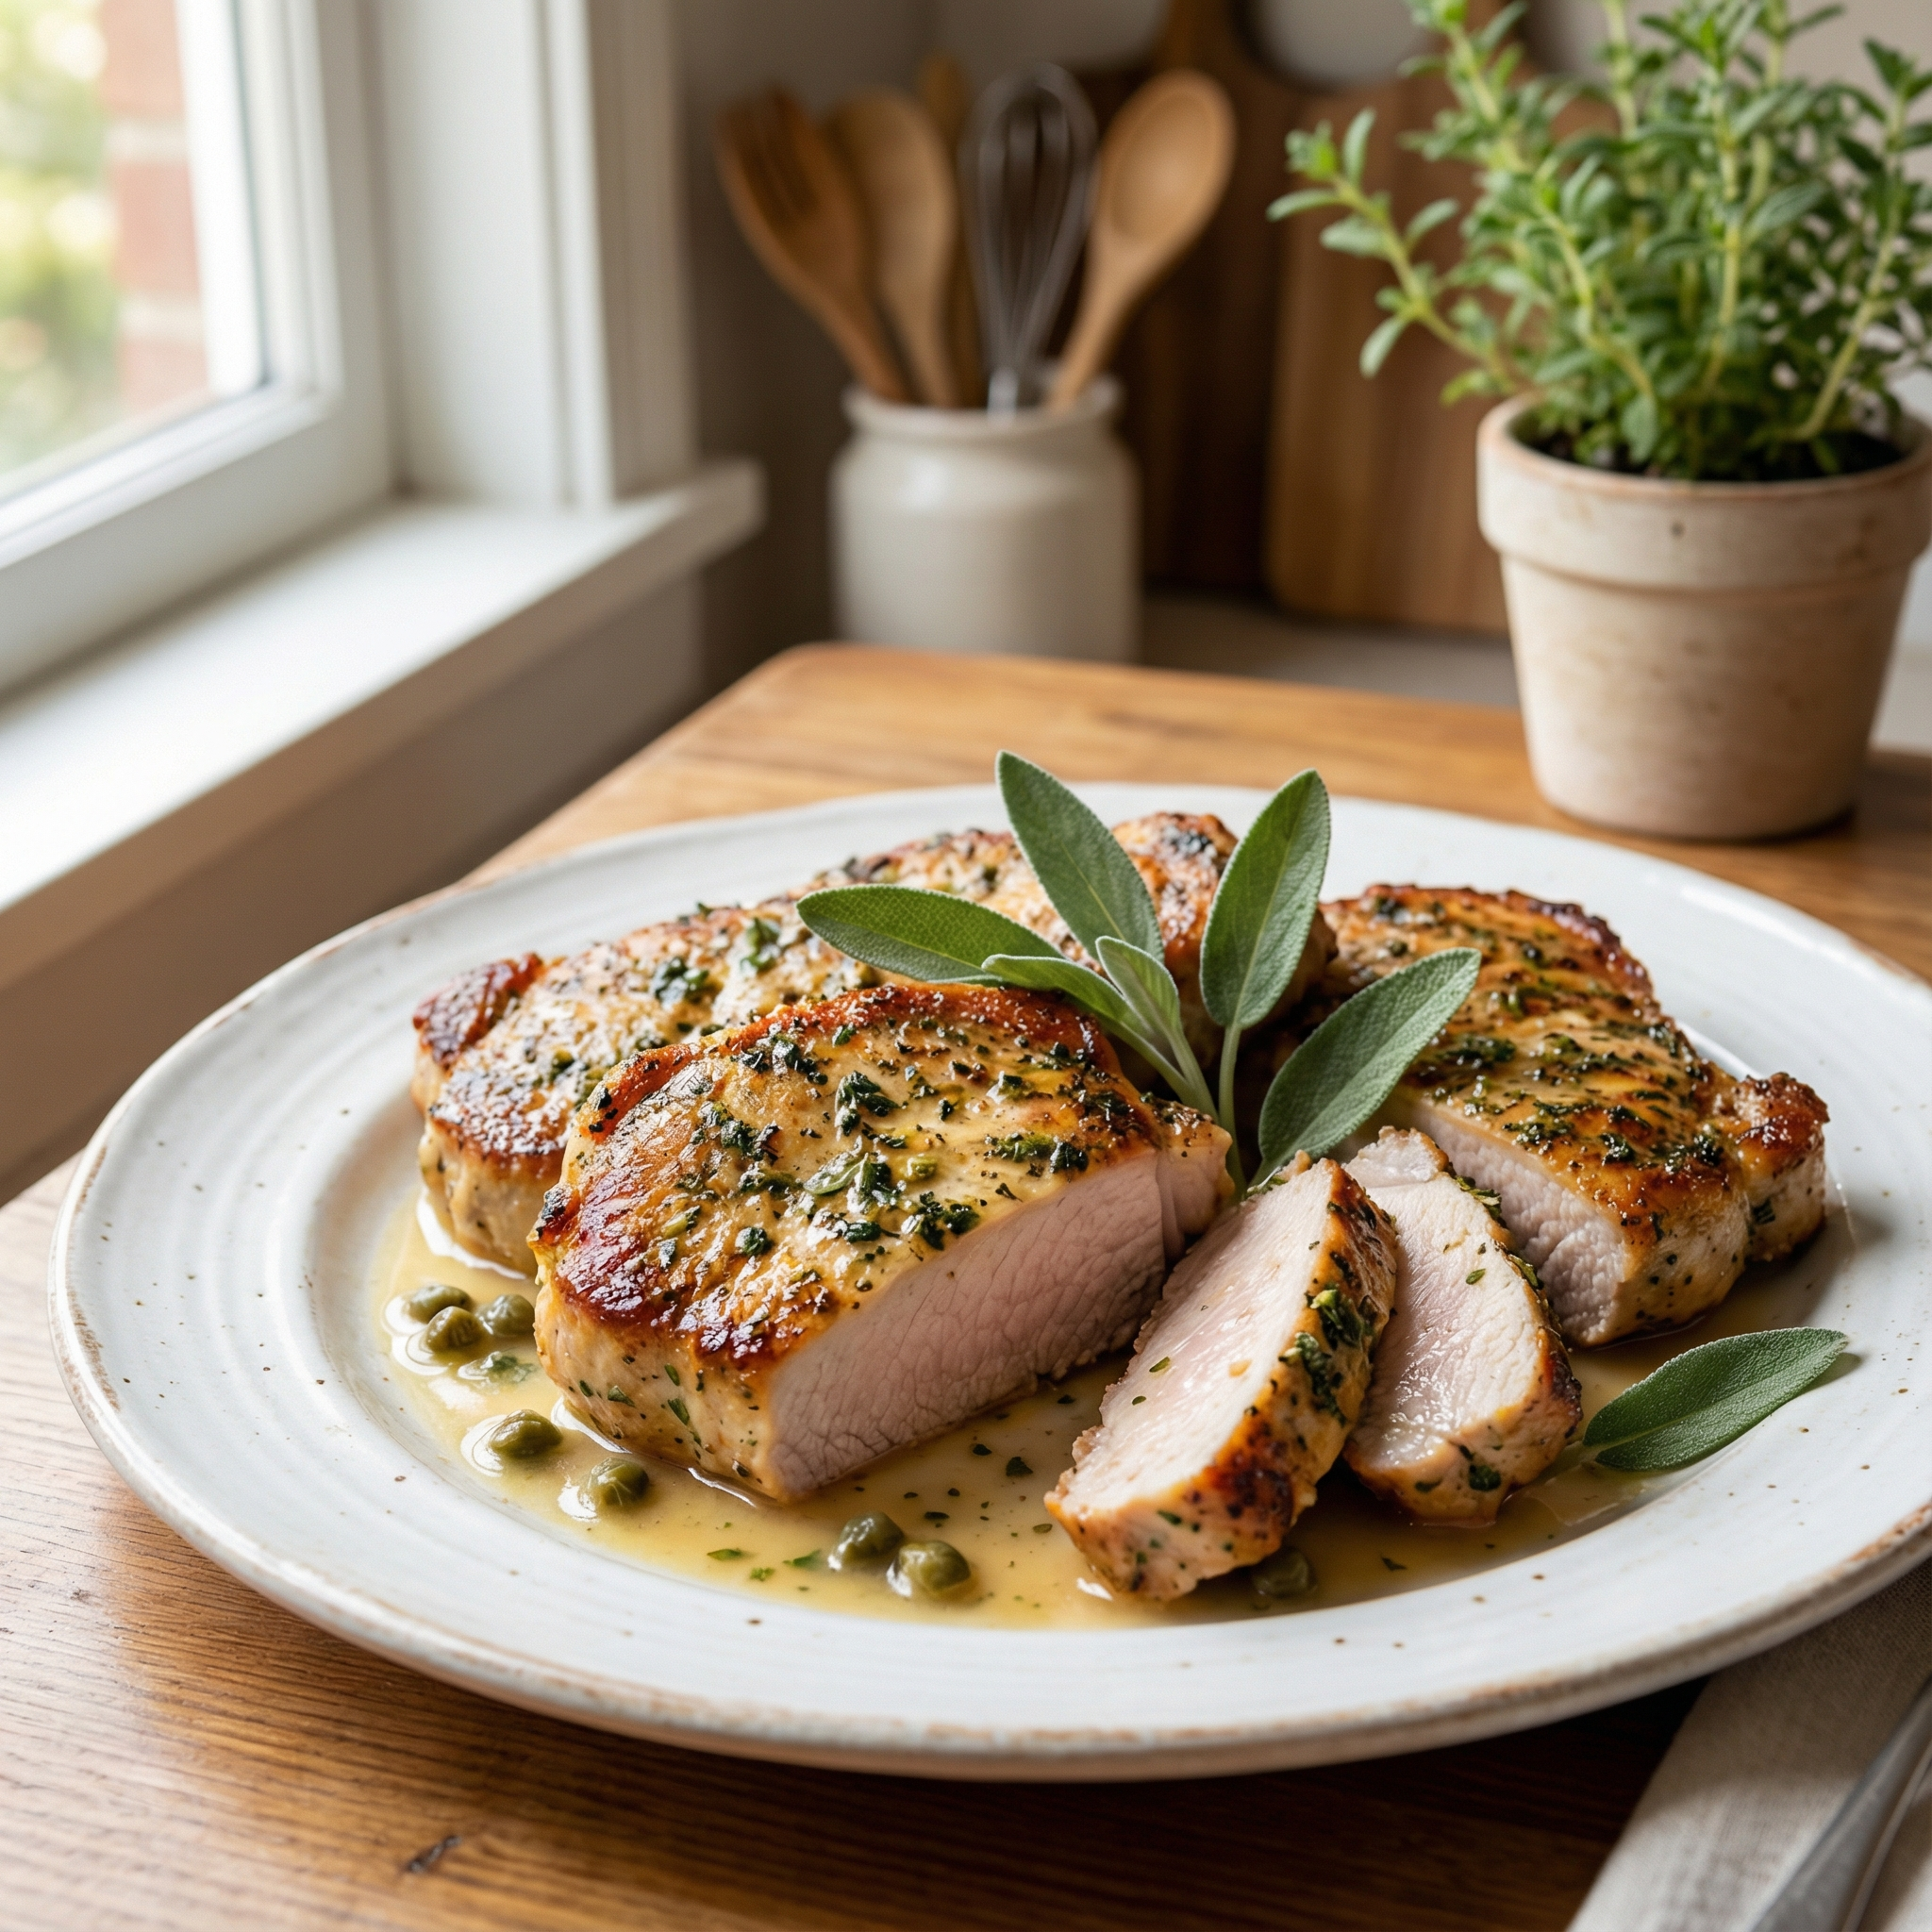
An easy Italian-style pork chop you’ll actually make on a weeknight
This Italian-style skillet method makes weeknight cooking feel like a small celebration. I keep steps tight so you spend less time fussing and more time enjoying dinner.
Why this works: crisp breadcrumb crust, bright lemon, and earthy sage
The crumb mix gives fast flavor. Parmesan adds umami, a hint of lemon zest keeps things lively, and rubbed sage adds classic warmth. Use a measured teaspoon of herb so the balance stays gentle.
Short searing in olive oil and butter builds a golden shell. Then a hot oven—425°F—finishes the interior without drying it. The result is a crisp exterior and a juicy center.
Quick snapshot: 45 to 50 minutes total time, serves 2 to 4
- Prep about 25 minutes, cook about 20 minutes—roughly 45 to 50 minutes total.
- Serves 2; scale to serve 3–4 by doubling ingredients and searing in batches.
- This no-fuss recipe uses a single skillet and an oven finish for easy cleanup and reliable doneness.
What you’ll need for standout flavor and texture
I always begin by selecting an inch-thick cut — it’s the easiest way to control doneness and texture. Choose boneless for quick slicing, or pick bone-in for extra flavor; both respond well to a sear and oven finish.
Primary ingredients
Set up a classic dredge: seasoned flour in one bowl, a beaten egg in another, and a breadcrumb mix in the third. Stir in 1/2 cup grated Parmesan, a 1/2 teaspoon of fine zest, plus salt and pepper so seasoning sticks from the first layer outward.
Tools that matter
- Use a heavy, oven-safe skillet so you can sear and transfer straight to a 425°F oven without losing heat.
- Have a small 7×11-inch baking dish or quarter sheet pan ready to avoid crowding; air circulation = crisp crust.
- An instant-read thermometer takes the guesswork out of timing; aim for accurate, repeatable results.
| Item | Why it helps | Tip |
|---|---|---|
| Skillet | Stable sear, oven-safe transfer | Preheat over medium-high for even color |
| 7×11 dish | Space to finish without crowding | Use a light layer of oil to prevent sticking |
| Thermometer | Precision doneness | Insert into the center, avoid bone |
Finally, measure ingredients—use a cup for cheese and a teaspoon for zest, and a tablespoon for melted butter in the pan. These small details help you repeat the same great result every time.
pork chops with sage and lemon recipe: step-by-step guide
I guide you through each step so the crust clings and the center stays juicy, every single time. Set up three stations first: seasoned flour, beaten egg, and the breadcrumb mix.
Season and set up dredging stations
Stir flour with salt pepper until even. Whisk the egg until smooth for a thin, reliable coat.
Mix breadcrumbs with Parmesan, rubbed herb leaves, and lemon zest so every bite tastes balanced.
Bread the pieces for a clingy, crisp coating
- Press each pork chop into flour, shake off excess.
- Dip into egg, then press into crumbs; lift and toss gently so loose bits fall away.
- Arrange on a plate in a single layer—do not stack.
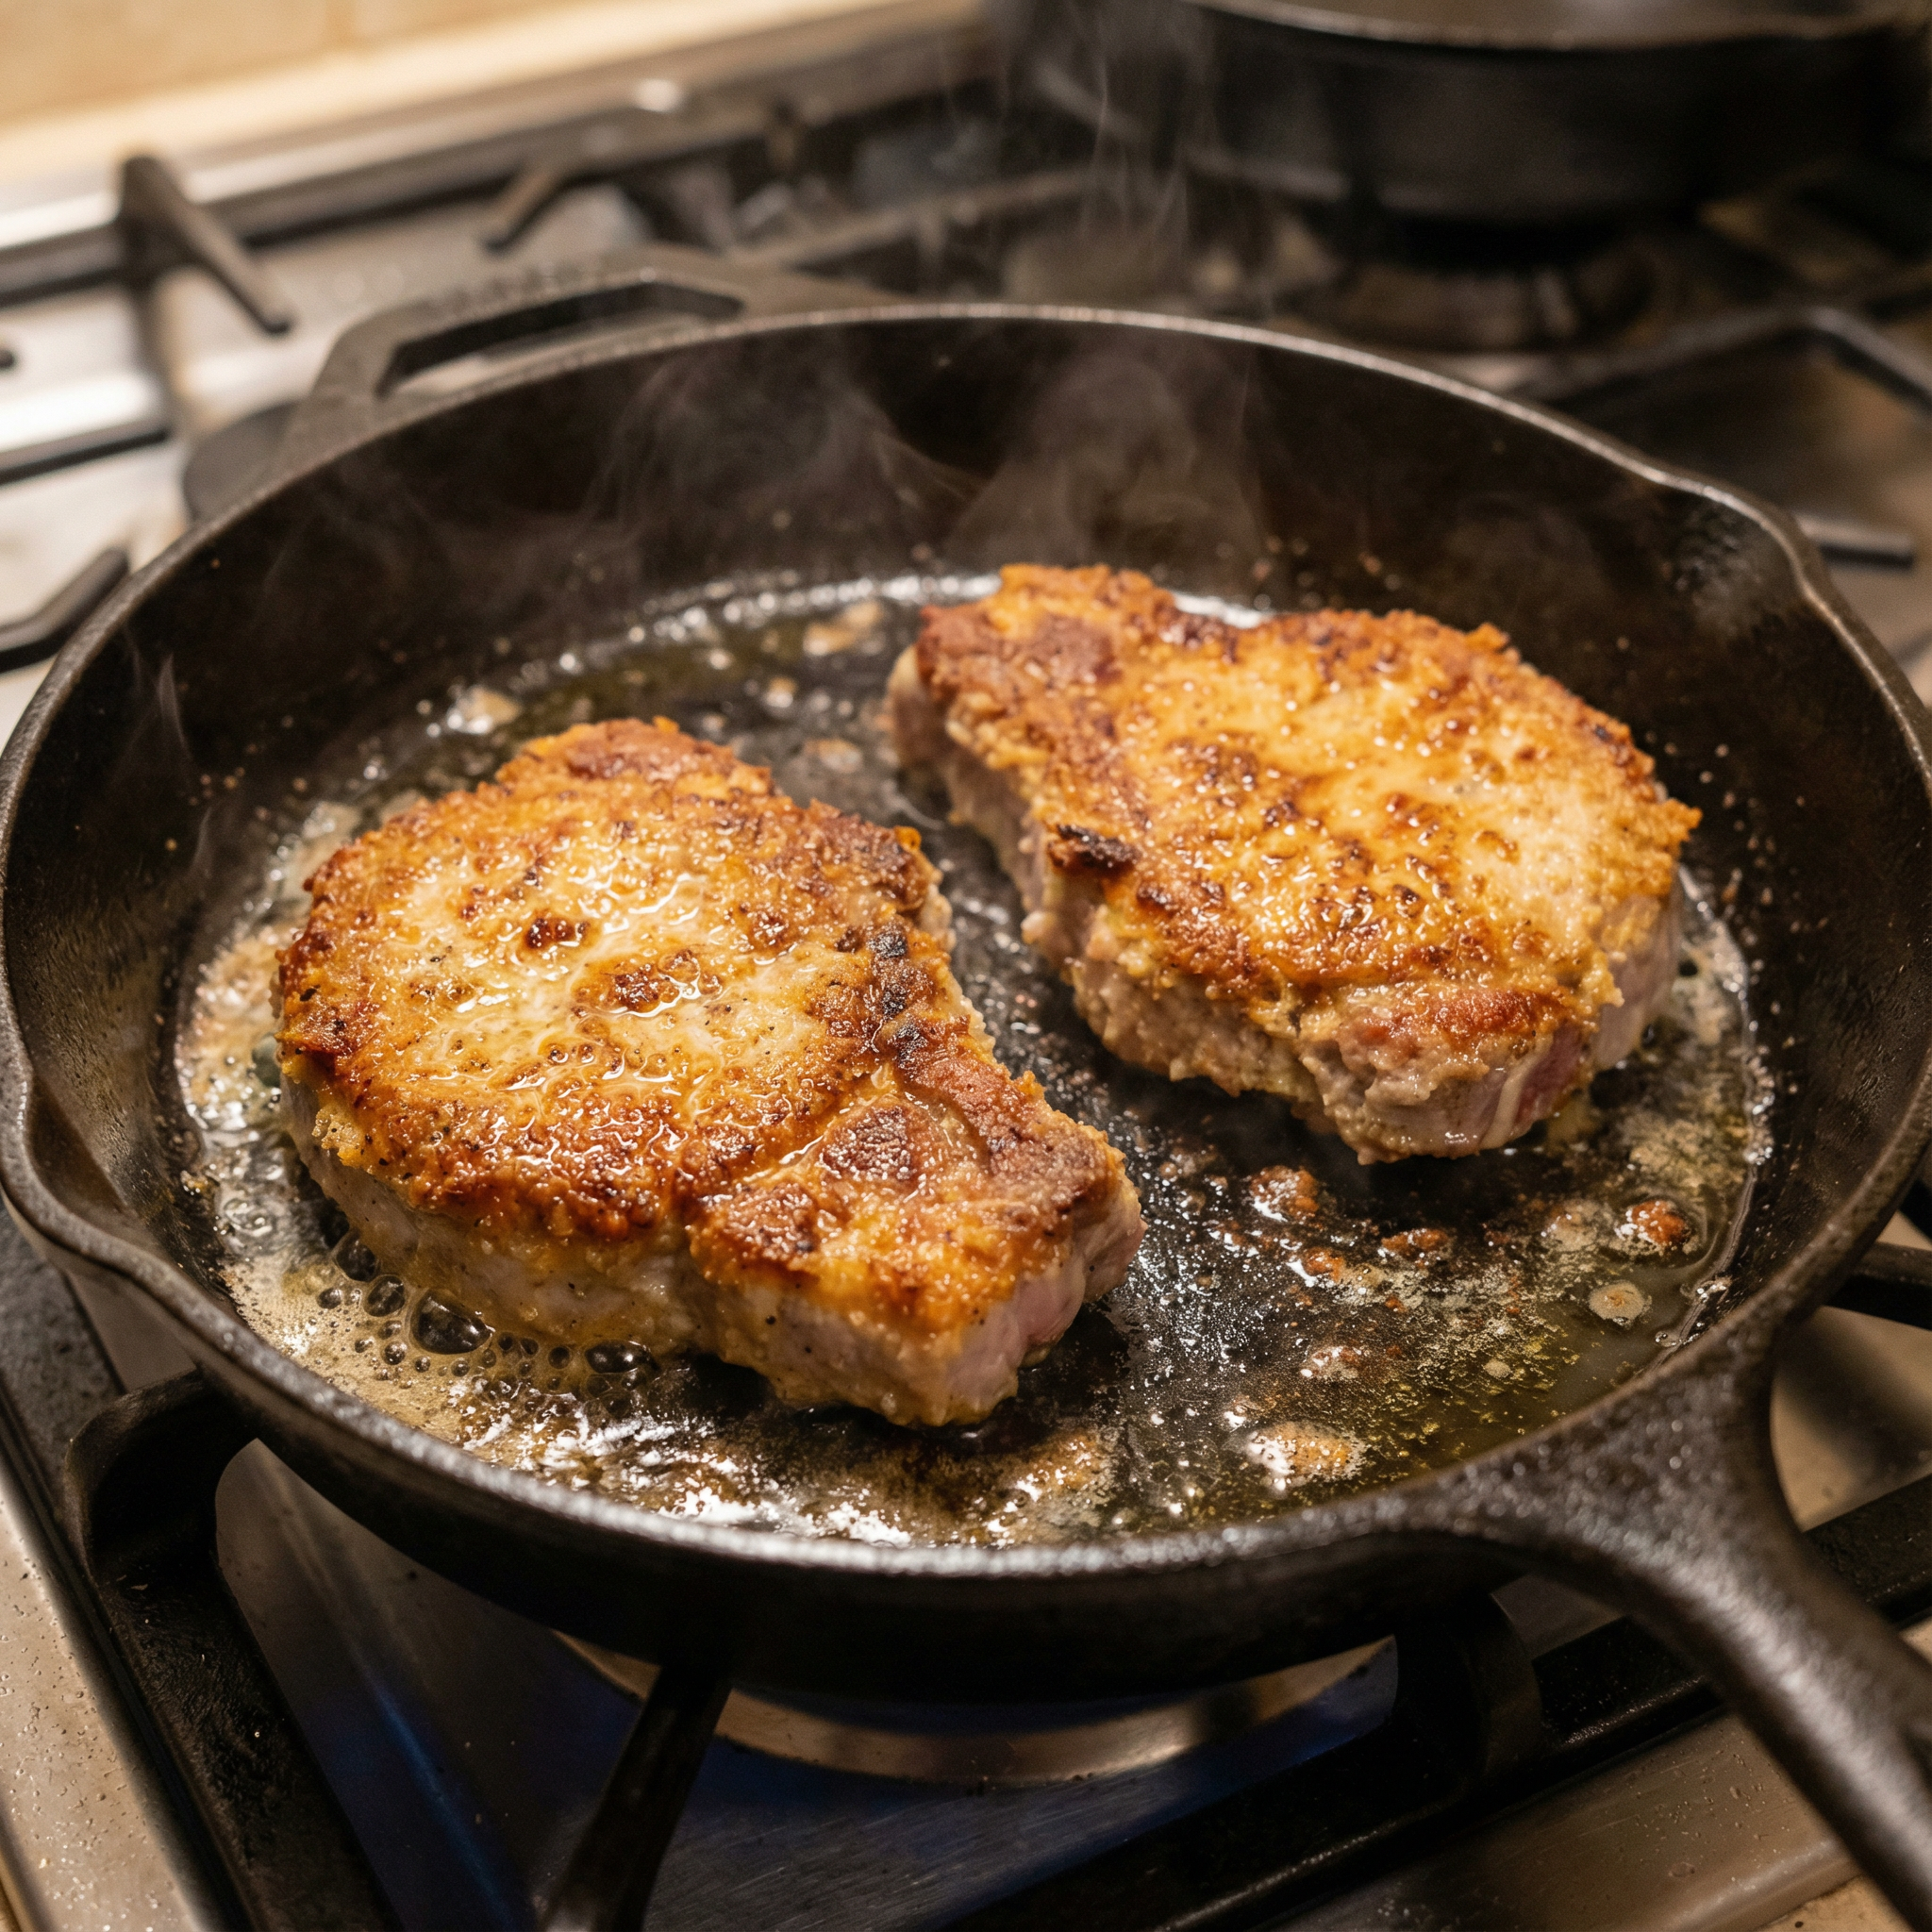
Brown in olive oil and butter over medium heat
Warm a skillet over medium heat until it gives steady heat. Add 1 tablespoon olive oil and 1 tablespoon butter; let them melt to a glossy sheen.
Sear about 4 minutes per side until deep golden. Lower the heat if the crust colors too fast.
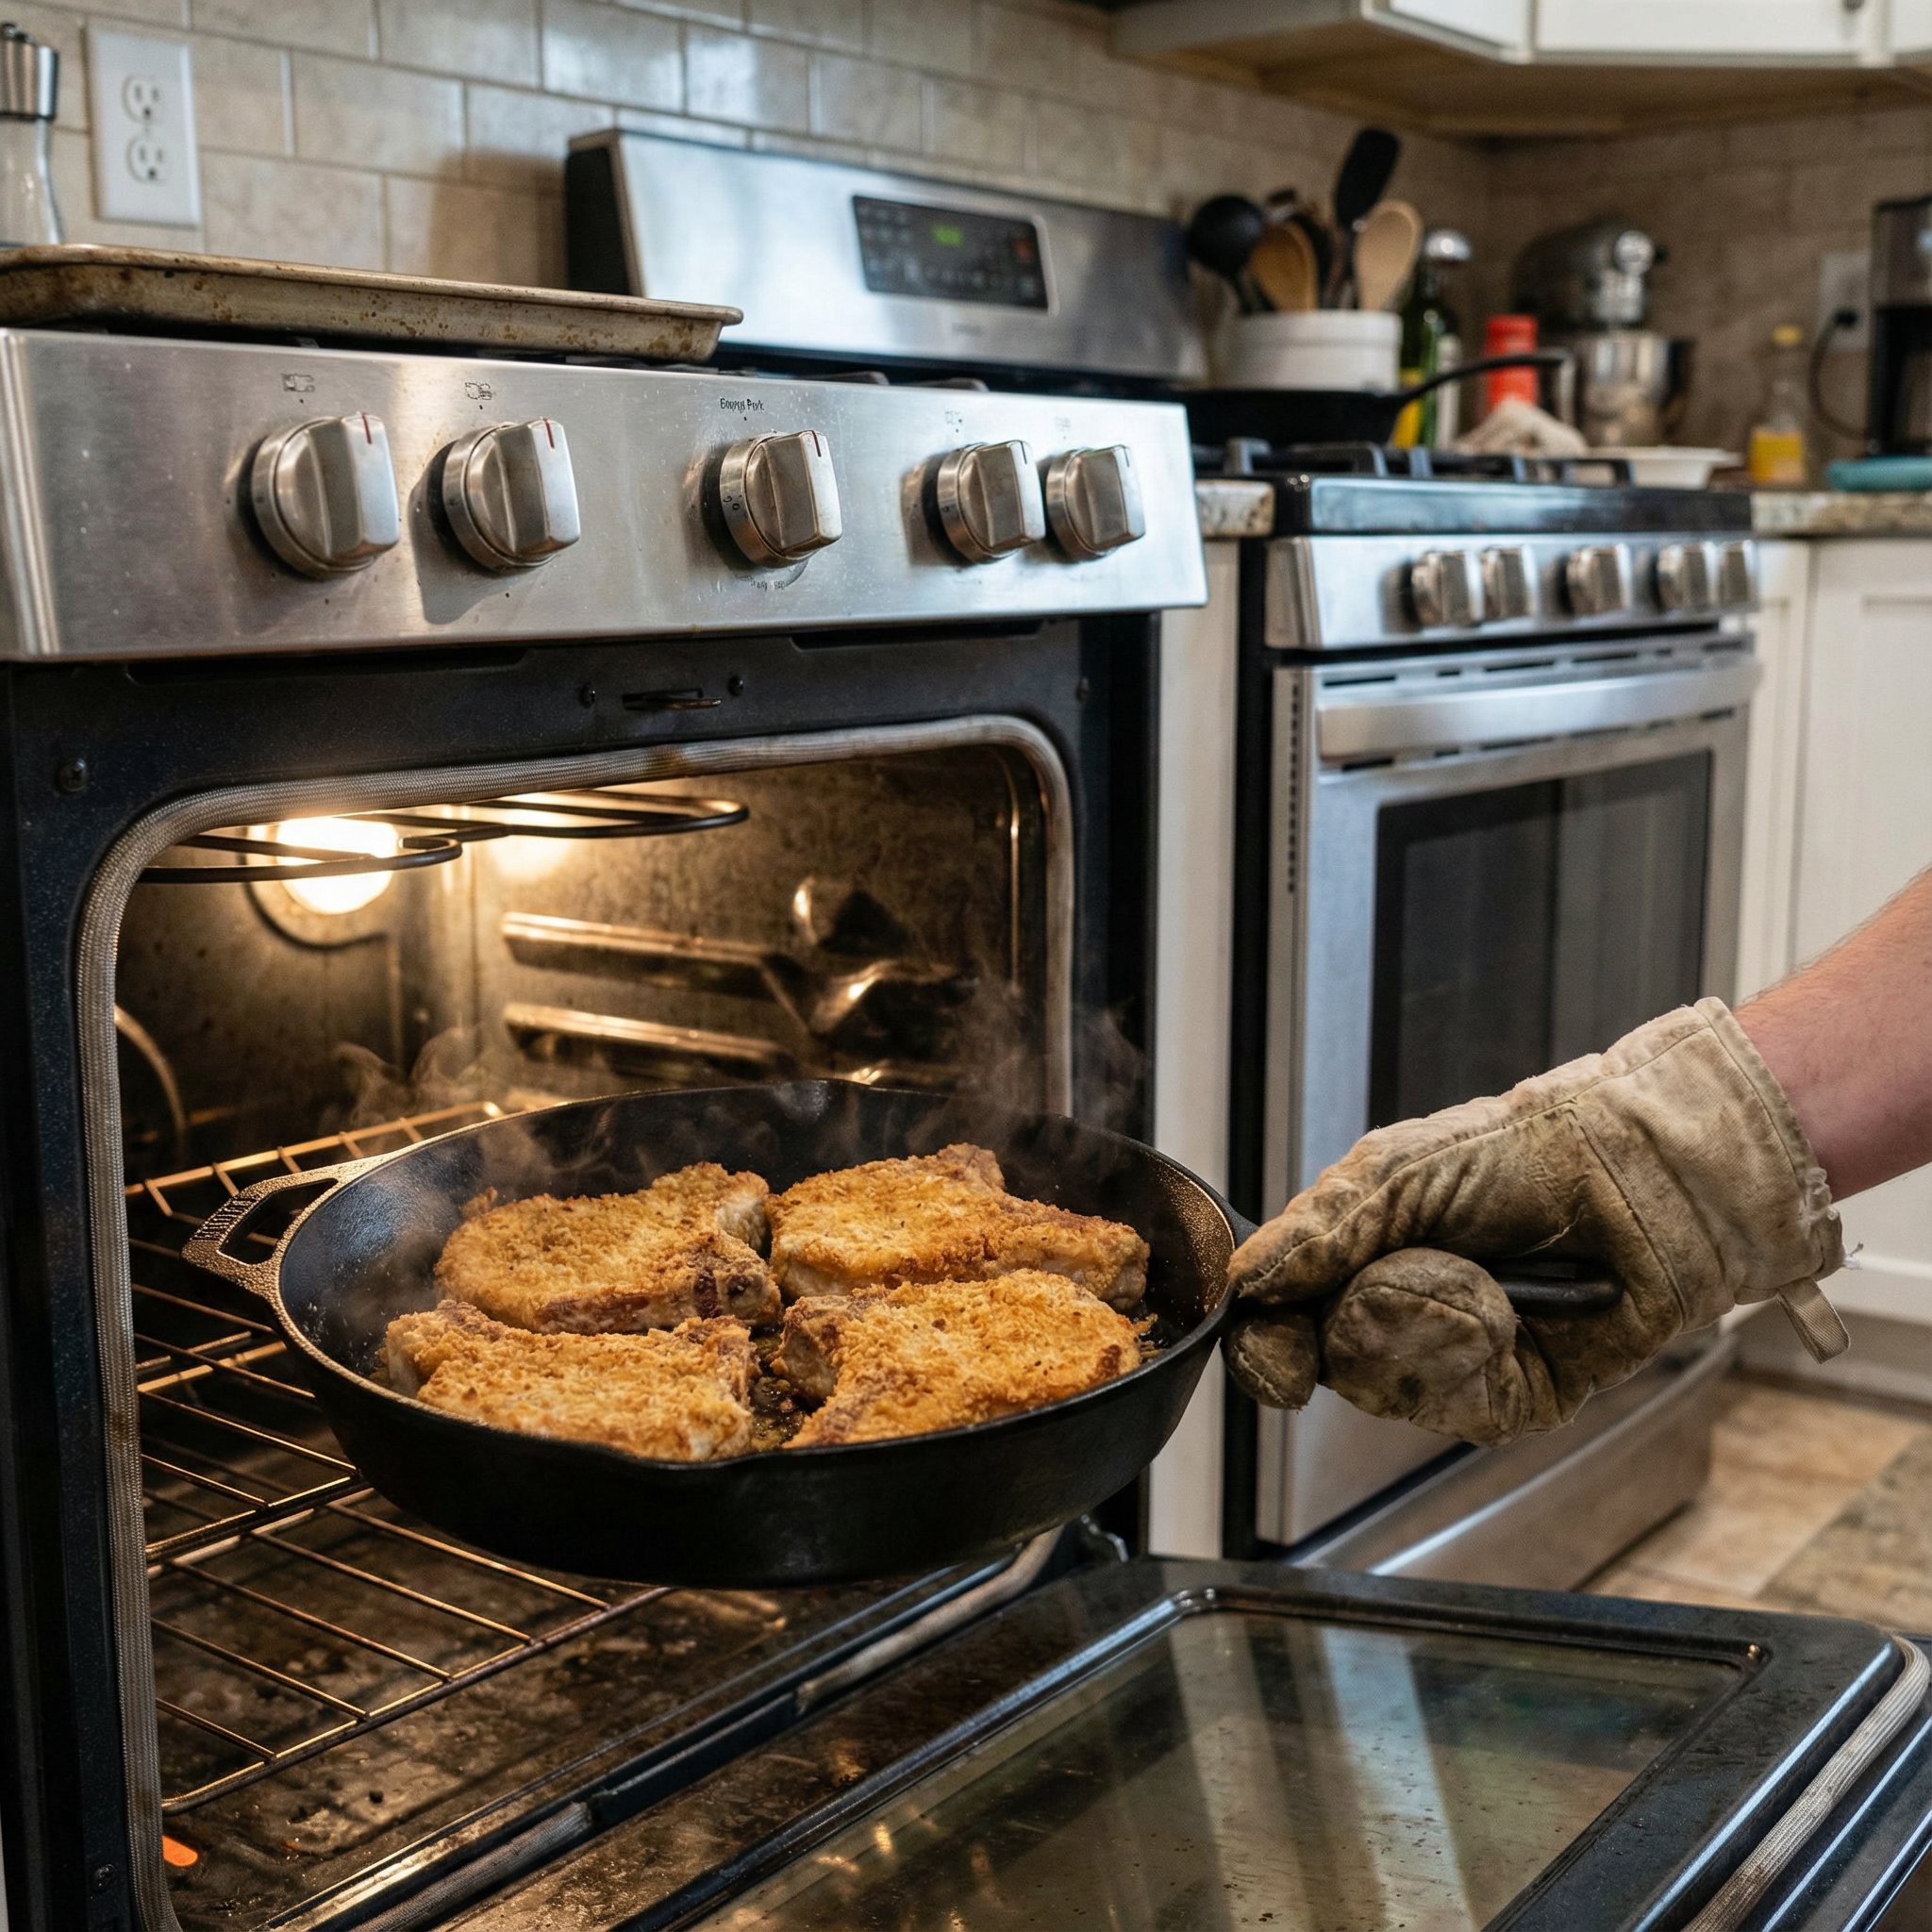
Finish in a 425°F oven for even cooking
Transfer the skillet to a 425°F oven and roast 10–15 minutes, checking at 10 minutes. Aim for 145°F in the center, then rest 5 minutes before slicing.
If you try chicken cutlets another night, the same breading logic holds—just shorten times and use the safe target temp for poultry.
| Step | Time | Tip |
|---|---|---|
| Dredge | 5 minutes | Use gentle presses so crumbs adhere evenly |
| Sear | 4 minutes per side | Medium heat; watch color, adjust as needed |
| Oven finish | 10–15 minutes | Check at 10 minutes; pull at 145°F and rest |
For a related classic, see my short note on saltimbocca alla romana to explore another Italian pan-to-oven approach.
Pro tips and troubleshooting that make all the difference
A handful of pro moves keeps the crust crisp and the center tender every time. I share quick fixes I use in my kitchen so you avoid common pitfalls.
Keep the crust crisp: shake off excess flour and crumbs
Shake each piece gently after dredging. Excess flour and loose crumbs fall into the pan and scorch, which tastes bitter.
Get deep color fast: don’t overcrowd the skillet
Preheat the pan until it shimmers. Give space between pieces so steam can escape and you get even browning.
- Use a blend of butter and oil for searing; butter adds flavor, oil raises the smoke point.
- Aim for about 4 minutes per side on the stove, then roast 10–15 minutes at 425°F.
- If the crust darkens too quickly, lower the heat a notch and add a teaspoon of butter to calm the pan.
- Check the center with an instant-read thermometer—145°F is the target for safe, juicy meat.
| Action | Why it helps | Quick tip |
|---|---|---|
| Sear | Builds color and crust | Medium-high heat, 4 min per side |
| Oven finish | Even cook without over-browning | 425°F, 10–15 min |
| Rest | Redistributes juices | Rest 5 minutes before slicing |
If a piece is thicker or bone-in, add a few minutes in the oven rather than prolonging the sear. Taste and small adjustments—salt and pepper after resting or more seasoning in the flour next time—make every attempt better than the last.
Smart variations and ingredient swaps
Small swaps and clever add-ons refresh this classic without losing its Italian heart. I like to keep the cooking steps the same while nudging flavors toward bright or savory depending on the night.
Boneless vs. bone-in: timing and flavor
Boneless cuts cook a touch faster and slice neatly. For a standard 1 inch piece, expect slightly less oven time to hit 145°F.
Bone-in brings a little extra flavor and moisture. Add a few minutes in the 425°F oven and let the meat rest a bit longer before slicing.
Garlic-herb breadcrumb or extra-citrus upgrades
Try adding one minced garlic to the crumb mix or rub a halved clove across the crust after searing. This gives fresh garlic aroma without burning.
- For brighter citrus, fold extra zest into crumbs and finish with a teaspoon of lemon juice just before serving.
- Swap half the crumbs for panko for a lighter crunch; keep a cup of crumbs total to ensure full coverage.
- Stir a tablespoon of chopped parsley or thyme into the mix, or add a pinch of red pepper flakes for gentle heat.
| Change | Effect | Measure |
|---|---|---|
| Garlic | Fresh aroma without bitterness | 1 clove minced |
| Panko | Airy, crisp crust | Use up to 1/2 cup swapped |
| Extra citrus | Bright finish | 1 teaspoon juice, extra zest to taste |
These small ideas keep the dish familiar yet playful. I often test one change at a time so the core technique stays reliable for weeknight cooking.
Serving ideas, simple pan sauce, and safe storage
After the oven rest, a quick skillet sauce makes each bite shine. I pull the pan from the oven, let the meat rest, then use the fond to build a bright sauce that ties the plate together.
Side dishes that complement the flavors
I love serving this with simple sides that echo the main notes. Roast potatoes tossed with herb leaves work well. Garlicky sautéed greens or a crisp arugula salad dressed in lemon vinaigrette are fresh choices.
Quick skillet sauce: lemon juice, butter, and fond
Return the hot skillet to medium and splash in a few tablespoons of stock or water to loosen the fond. Whisk in lemon juice and butter until glossy. Season with a pinch of salt and pepper and taste as you go.
A thread of olive at the end adds fruitiness and shine. If you made extra sauce, warm it gently and add a squeeze more lemon juice to refresh it.
Leftovers: cooling, refrigeration, reheating, and food safety
Let pieces cool about 20–30 minutes before covering. Store in a shallow dish in the fridge and eat within 3 days for best quality. To revive the crust, reheat on a rack in a 300–325°F oven for 10–15 minutes.
Avoid microwaving; it softens the coating. For meal prep, slice and layer between parchment so pieces don’t stick. Snap a quick photo while the crust is still crisp and the sauce glossy—then serve hot.
| Side | Why it works | Serving tip |
|---|---|---|
| Roasted potatoes | Earthy base that echoes herbs | Toss with a little oil and fresh leaves before roasting |
| Garlicky greens | Bright, slightly bitter contrast | Sauté quickly in oil, finish with a squeeze of juice |
| Polenta or buttered noodles | Creamy carrier for sauce | Serve hot so sauce clings well |
For another pan-to-oven Italian classic, try my short note on pollo alla cacciatora to explore a related approach to saucing and serving.
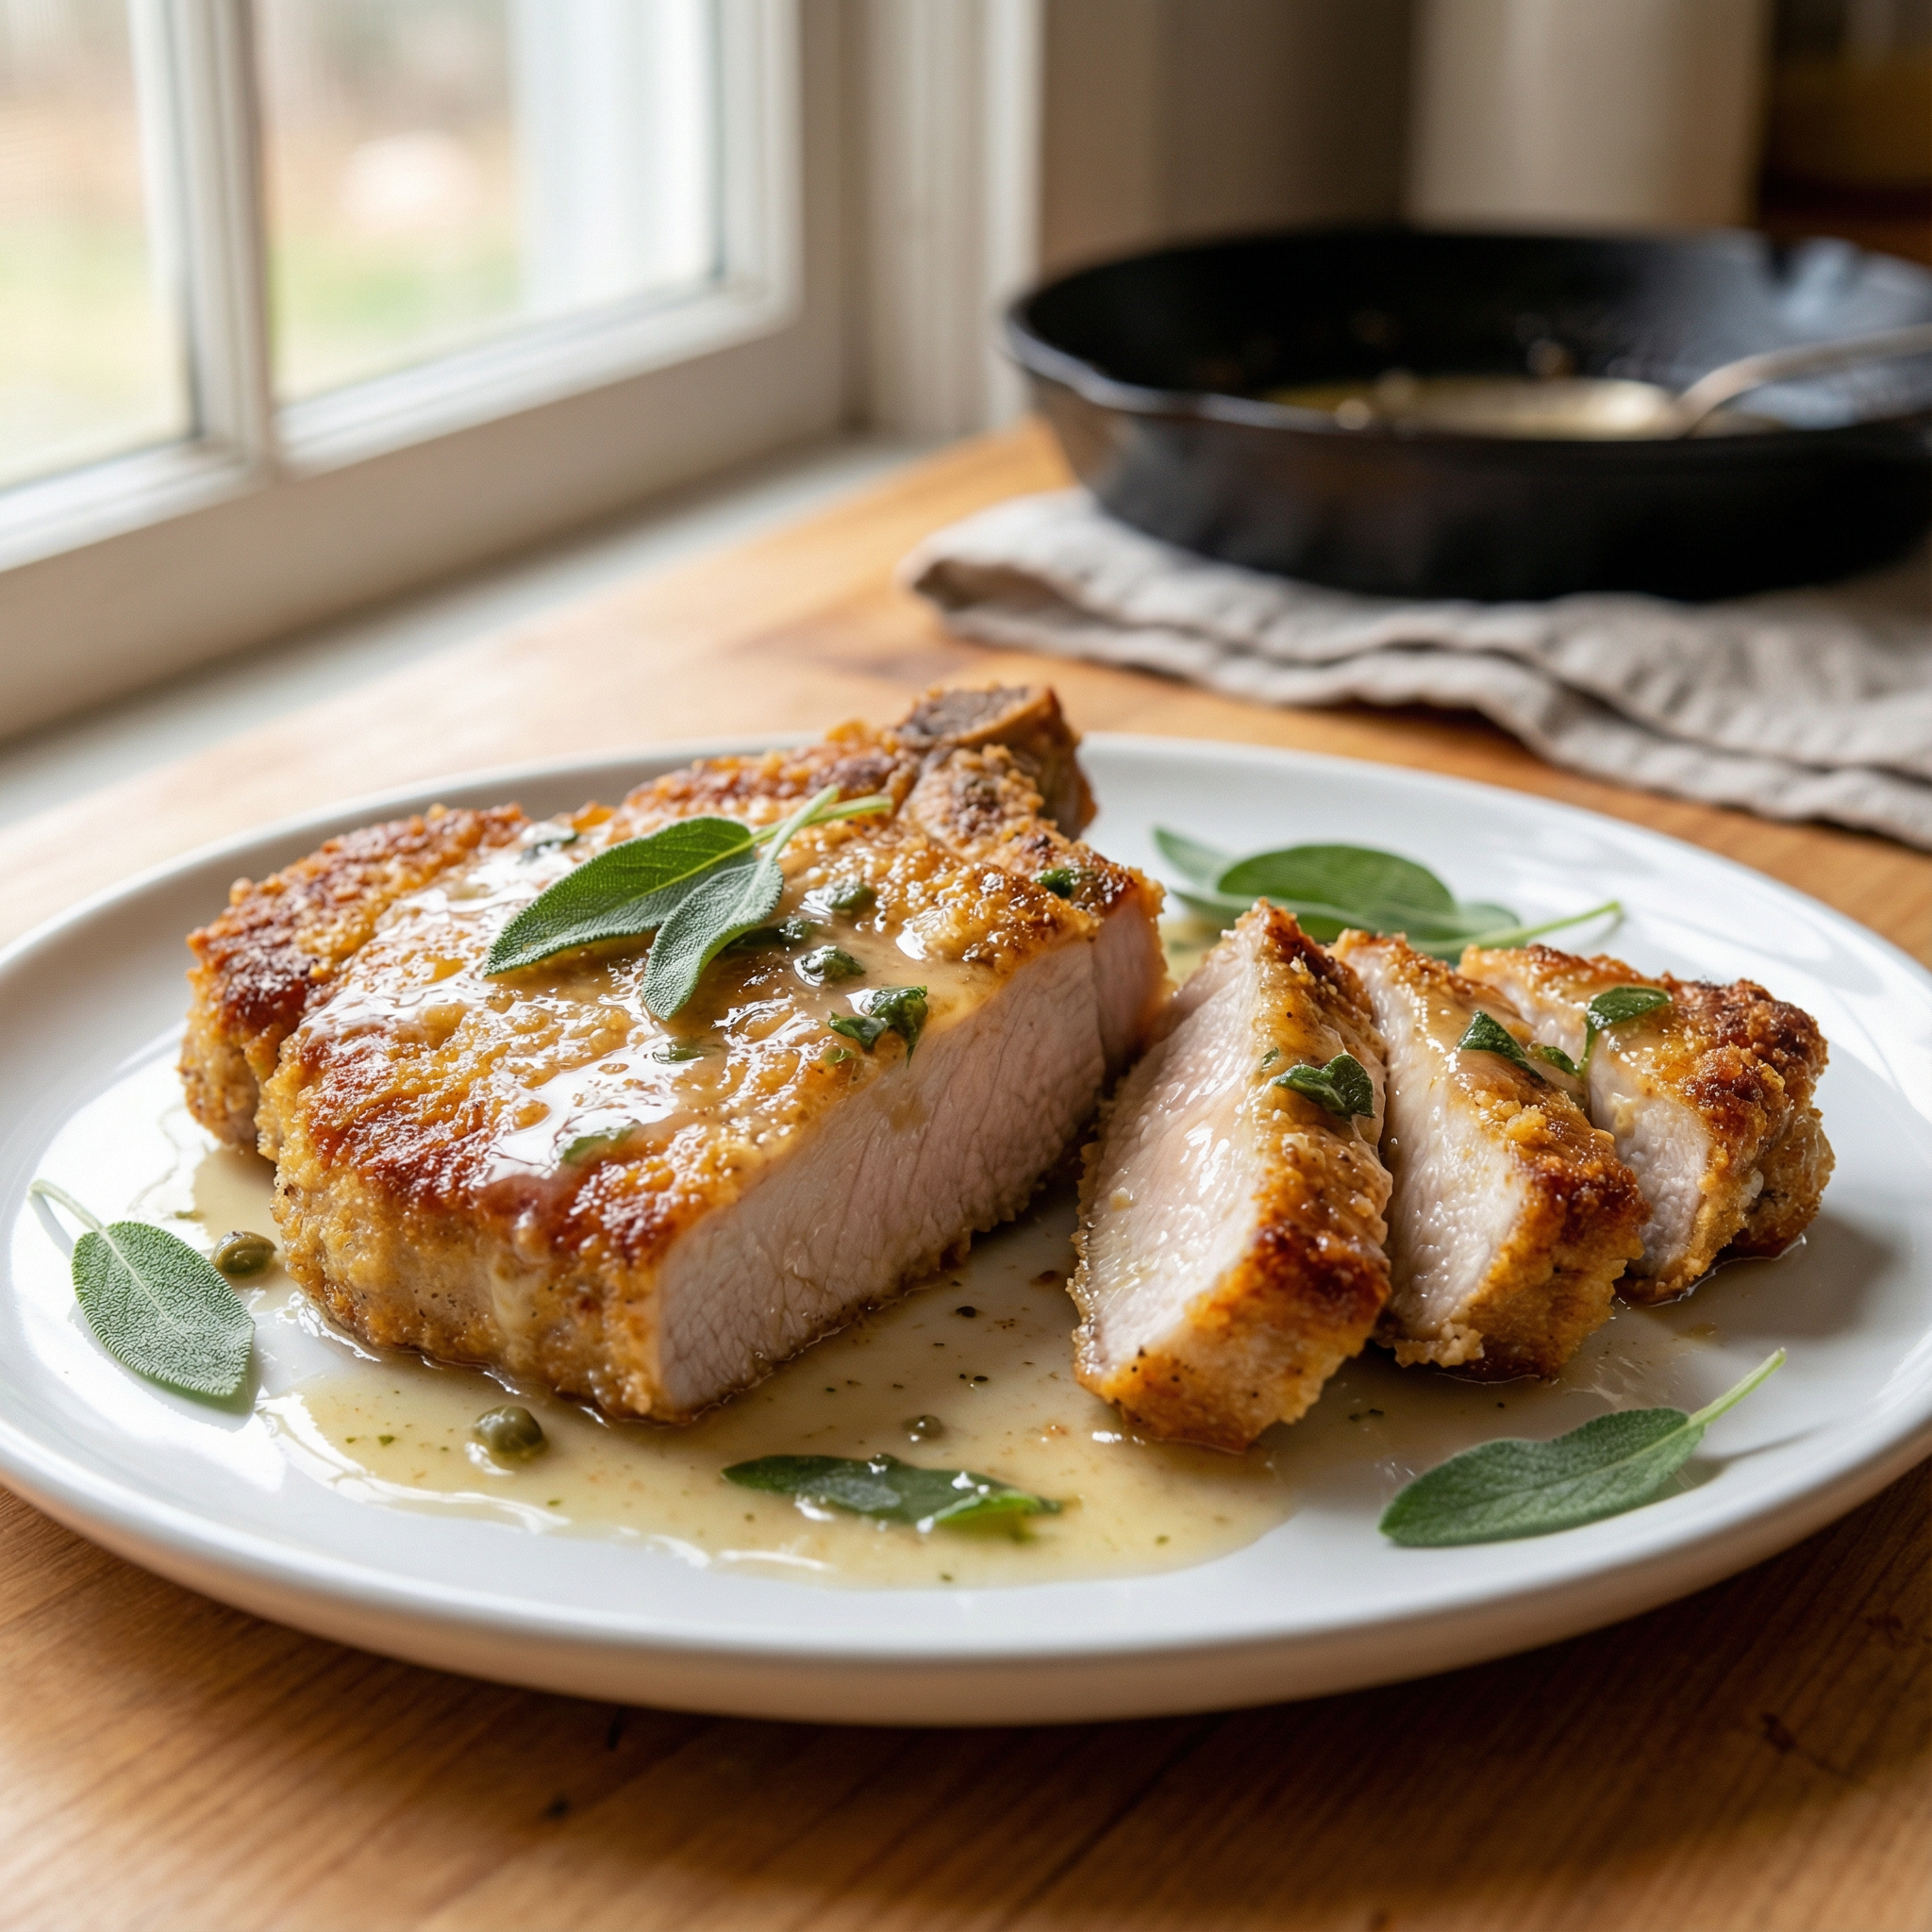
Bring it to the table: a bright, crispy pork chop worth repeating
A quick sear, an oven finish, and a few bright notes turn simple meat into a dinner worth repeating. I sear in a mix of butter and olive oil, roast at 425°F for 10–15 minutes, and pull at 145°F before a short rest for juicy results.
The crust sings of garlic and sage, and a spoonful of pan sauce—two tablespoons of stock or lemon juice whisked with butter—ties the plate together. Keep a measured cup of crumbs and a light dusting of flour so the coating clings and crisps.
Serve one bright side and one cozy side to balance texture. The same breading logic works for chicken on another night; just adjust the target temp. Season to taste with salt pepper, slice, and enjoy. Buon appetito!
Italian-Style Crispy Pork Chops with Sage and Lemon
Ingredients
Method
- Set oven to 425°F. Place a rack in the center.
- Bowl 1: mix flour with salt and pepper.
- Bowl 2: beat the egg until smooth.
- Bowl 3: mix breadcrumbs, Parmesan, lemon zest, sage, salt, and pepper.
- Pat pork chops dry.
- Coat in flour and shake off excess.
- Dip in egg.
- Press into breadcrumb mix until fully coated.
- Place on a plate in one layer.
- Heat a heavy oven-safe skillet over medium heat.
- Add olive oil and butter.
- When melted and glossy, add pork chops.
- Cook about 4 minutes per side until deep golden.
- Lower heat if browning too fast.
- Transfer the skillet to the oven.
- Bake 10–15 minutes.
- Check at 10 minutes.
- Remove when center hits 145°F.
- Let pork rest 5 minutes before slicing.
- Place skillet back on medium heat.
- Add stock or water.
- Scrape the pan.
- Whisk in lemon juice and butter.
- Taste and adjust salt.
Notes
• One-inch thickness gives the best balance of crust and juiciness.
• Do not crowd the skillet or the crust softens.
• Shake off loose crumbs before cooking to avoid burnt bits.
• Resting after cooking keeps juices inside the meat.
• Works with chicken cutlets if you shorten cooking time and use poultry safe temp.