
Jump to Recipe
I learned this italian easter bread recipe from my grandmother, and the first warm slice still smells like comfort — butter, citrus, and a hint of sugar that melts on the tongue.
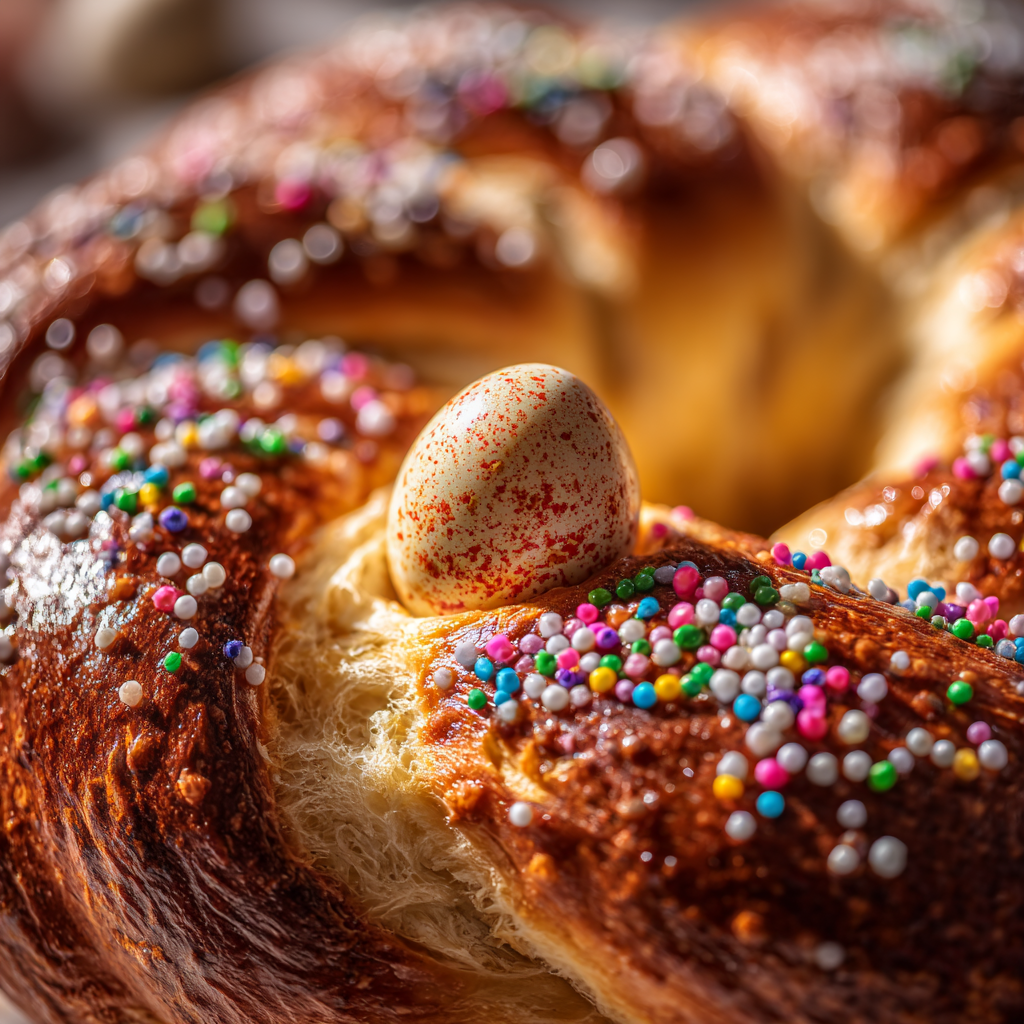
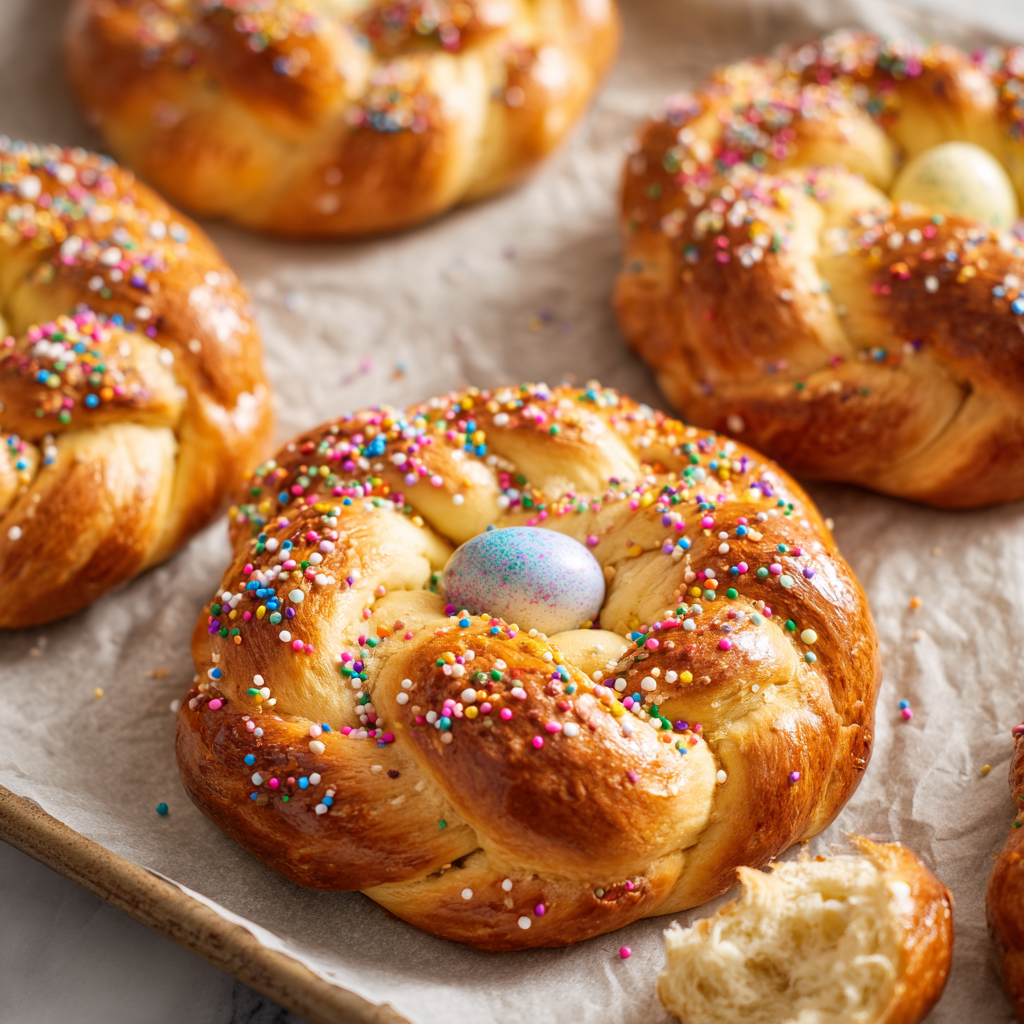
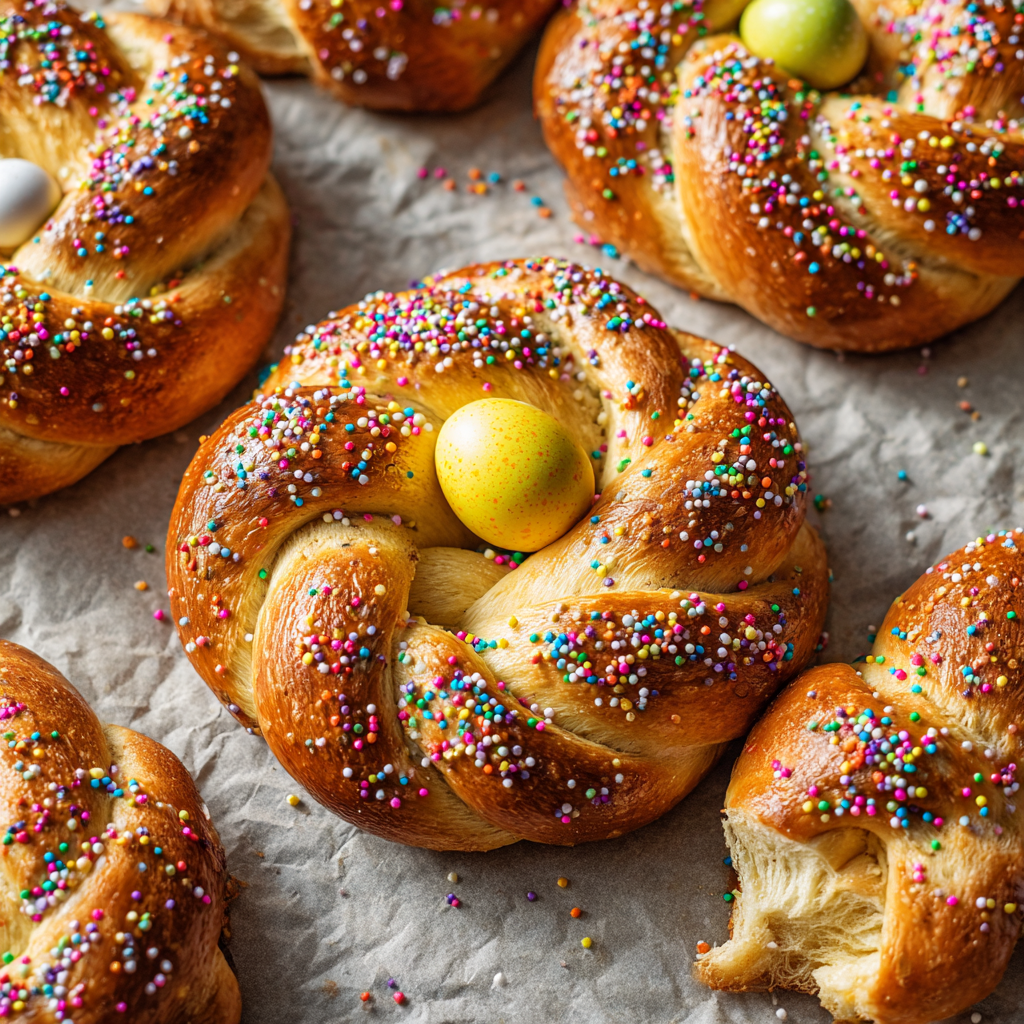
The dough is enriched with milk, eggs, and butter for a tender, brioche-like crumb. I shape it into wreaths and braids so each loaf carries meaning: the wreath nods to the crown of thorns and the braid to the Holy Trinity. A colored egg tucked in the center signals renewal, and colorful nonpareils add a festive crunch.
Technique matters: look for a tacky, elastic dough before you add butter, use the poke test to judge proofing, and aim for an internal temp near 185°F for a perfect crumb. I share practical cues, timings, and a friendly step-by-step that helps this bread feel doable and joyful at your table.
Key Takeaways
- This traditional loaf uses enriched dough for a soft, slightly sweet result.
- Wreaths and braids hold symbolic meanings tied to faith and renewal.
- Use the poke test and target 185°F internal temp for doneness.
- Small touches—citrus, egg wash, sprinkles—lift flavor and appearance.
- For a related regional variation, see our casatiello guide.
What makes this Italian Easter bread special right now
What makes this loaf special today is the balance: plush texture, gentle sweetness, and a story baked into every braid.
Enriched doughs blend milk, eggs, butter, sugar, and flour to create a brioche-like crumb that stays moist for gatherings. That softness lets bright flavors—orange or lemon zest, vanilla, a hint of anise—shine without overpowering coffee or jam.
A soft, slightly sweet brioche-style dough with festive symbolism
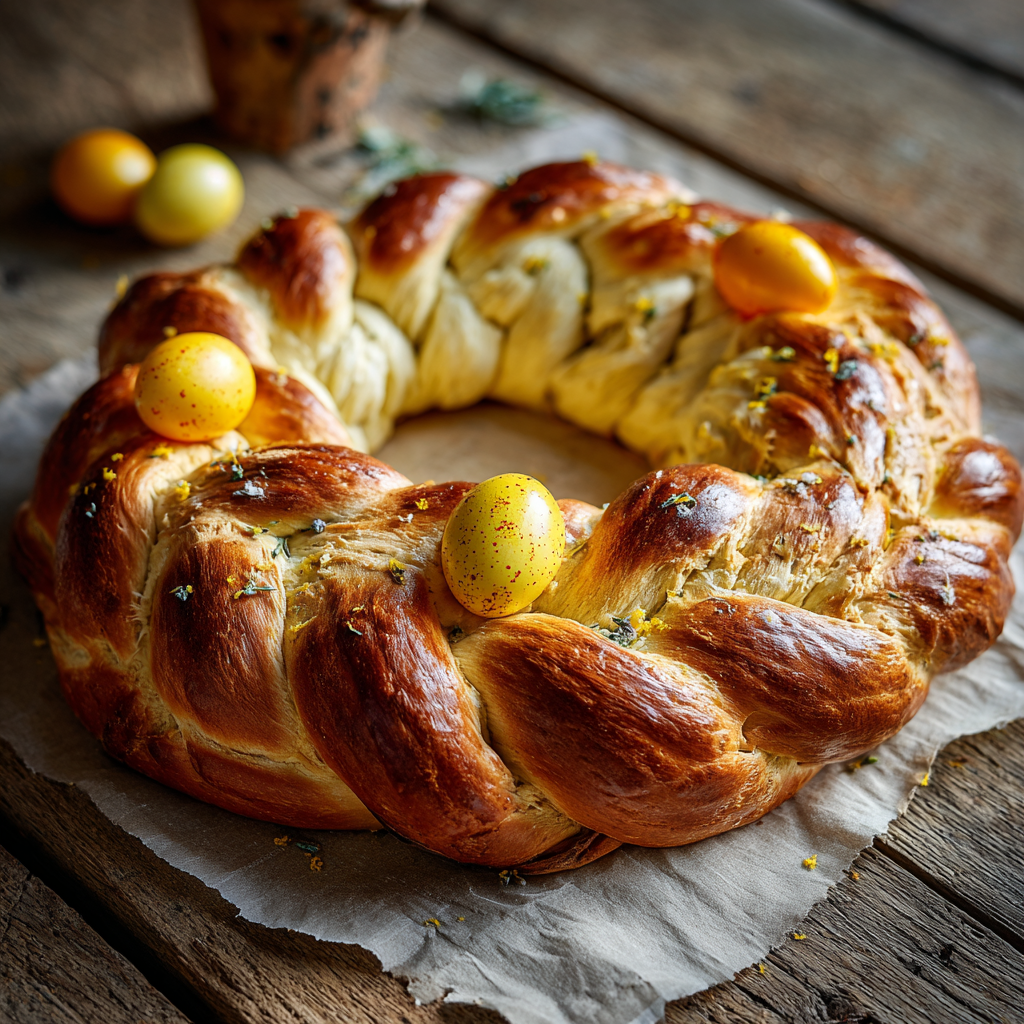
The braid speaks to the Trinity and a wreath recalls the crown of thorns, while an egg tucked in the center honors rebirth. Those shapes invite family participation, so the loaf becomes both food and ceremony.
My pro tips from years of holiday baking
- Build gluten before adding butter to keep the dough strong yet tender.
- Use the windowpane and tacky-not-sticky cues; add flour a teaspoon at a time if it clings.
- Choose instant yeast to save time with one rise, or active dry yeast for a slower, classic fermentation.
- Decide on raw or hard-boiled eggs based on how long you’ll sit and eat—they change texture when baked.
Ingredients that build flavor and structure
Good ingredients make the difference; each one plays a clear role in texture and flavor.
Flour is the framework. All-purpose gives enough protein to support braids without a tough crumb. Measure by weight or level cups for consistent results.
Milk brings proteins, fat, and natural sugars that brown the crust and soften the crumb. Whole milk is classic; 2% works well if you want a lighter finish.
- Sugar feeds yeast, helps caramelize the crust, and keeps the loaf moist.
- Eggs add richness, color, and structure; reserve one for an egg wash or a decorative center.
- Butter shortens gluten strands for a tender crumb—add after initial gluten development for silkiness that still holds shape.
- Salt strengthens gluten and controls fermentation; omit extra salt if you use salted butter.
Active dry yeast vs instant yeast
Use active dry yeast if you bloom in warm milk (95–110°F) and prefer two rises. Instant yeast mixes with dry ingredients and often needs only a single rise after shaping.
| Yeast | Prep | Rises |
|---|---|---|
| Active dry yeast | Bloom in warm milk | Two rises |
| Instant yeast | Mix with dry | One rise after shaping |
Flavorings and swaps
Rub citrus zest into sugar, add vanilla or a hint of anise, and stir in 1/2 to 3/4 cup dried fruit (dust with flour first). I favor unsalted butter to control seasoning; if you only have salted butter, skip added salt. For mixing, use a bowl or a stand mixer with a dough hook for consistent gluten development.
Tools and prep: set yourself up for success
Set up like a pro: tools in place, ingredients measured, and you’ll bake with confidence. A calm station cuts mistakes and keeps the process joyful.
Mixer, pans, and cooling gear
I fit my stand mixer with the dough hook before I measure anything. That lets me add butter gradually and develop gluten without overworking the dough.
Line each sheet with parchment and leave space for two wreaths so heat moves freely. After baking, move loaves to a wire rack right away to keep the crust crisp.
Room prep and small habits that matter
Bring butter and eggs to room temperature for even emulsification. A warm room helps yeast wake; cold ingredients slow fermentation and stiffen dough.
Keep a large bowl for mixing and proofing, and a small bowl of flour for your hands. Pre-measure zest, sugar, and milk so you can whisk together aromatics without pausing mid-mix.
- Set oven rack in the middle for even color.
- Have an instant-read thermometer handy to check internal temperature.
| Tool | Use | Tip |
|---|---|---|
| Stand mixer | Mix and knead dough | Attach dough hook; add butter slowly |
| Large bowl | Mixing and proofing | Lightly grease so dough releases cleanly |
| Parchment-lined sheet | Bake wreaths or braids | Two per sheet for even heat |
| Wire rack | Cool finished bread | Move loaves immediately to prevent sogginess |
italian easter bread recipe: step-by-step method
Warm milk is the quiet first step that sets the whole dough on the right path. Check the temperature: 95–110°F for active dry yeast, or 120–130°F when using instant yeast—never exceed 130°F.
Bloom or mix the yeast
In a bowl, whisk together warm milk, a pinch of sugar, and active dry yeast. Wait 5–10 minutes until foamy. If you use instant yeast, you can mix it with the dry ingredients and warmer liquid but stay below 130°F.
Mix, rest, then add butter
- Combine initial flour, sugar, salt, eggs, and the yeast mixture in a stand mixer. Mix 2 minutes until the dough pulls together.
- Rest 10 minutes, then add softened butter in small portions so the gluten holds.
Knead to smooth elasticity
Attach the dough hook and knead 8–12 minutes until the dough is smooth and slightly tacky. Use the windowpane test: a thin, see-through stretch means ready.
Shape into a tight ball, place in a greased bowl, cover, and let rise until puffed. Use the poke test to judge doneness. Bake and aim for an internal temperature near 185°F.
| Step | Temp | Time |
|---|---|---|
| Bloom | 95–110°F | 5–10 minutes |
| Mix | room temp | 2 minutes |
| Knead | room temp | 8–12 minutes |
Shape like a pro: ropes, braids, and classic wreaths
Shaping is where the dough becomes something you can see, touch, and share around the table. I guide you with tactile cues so your loaves look even and bake uniformly.
Divide, roll, and form even ropes
Turn the dough onto a lightly floured surface and divide dough into six even pieces; weighing the pieces keeps wreaths uniform. Pre-shape each piece into a short log and rest a few minutes so the gluten relaxes.
Roll each log into ropes about 14 inches long using light, even pressure. If a rope snaps back, let it rest two minutes, then continue rolling to length.
Braid, secure the ends, and arrange for baking
- Twist two ropes together like a gentle spiral, then bring the ends around to meet and pinch the ends firmly so the braid doesn’t unravel.
- Tuck the sealed ends under the wreath for a clean finish that holds through the bake.
- For a centerpiece, braid three longer ropes into one large wreath; increase bake time by a few minutes if needed.
Place only two wreaths per parchment-lined sheet to give them room to expand. Check the size of the wreath centers now; they should cradle an egg without it falling through the top.
Keep the surface lightly dusted—just enough for control—so the dough stays supple and bonds where you seal the ends. After shaping, let the pieces rise until puffy and light; this preserves definition while yielding a tender crumb.
Rise, bake, and test for doneness
A confident proof and a steady oven make the final loaf feel inevitable and calm. Proofing is where patience pays off: let shaped pieces rest in a warm, draft-free spot until they look noticeably puffed and almost doubled.
Use the poke test: press gently and watch the indent partially fill back. If it springs too fast, give the dough more time. If it barely moves, bake right away to save structure.
- Set the oven rack in the middle and preheat to 350°F for a classic golden top; raise to 390°F for deeper color.
- Bake one sheet at a time for even heat. Rotate the pan halfway if your oven runs hot in spots.
- Expect 15–20 minutes depending on wreath size; smaller rings need fewer minutes.
- For certainty, aim for an internal temperature near 185°F in the thickest part of each loaf.
- Or lift and tap the bottom: a clear hollow sound means the loaf is done.
- Transfer loaves immediately to a wire rack so steam escapes and the crust stays crisp.
If your kitchen is cool, let rise a bit longer—yeast responds to warmth more than the clock. Give the loaves a short rest on the rack before any glaze or decorations so the crumb sets without drying out.
Decorate safely: eggs, egg wash, sprinkles, and simple syrup
Decoration is where family hands and food-safety sense meet around the table. I keep it festive but clear: choose your eggs, plan timing, and pick a glaze that fits how you’ll serve the loaf.
Raw vs hard-boiled eggs and timing
Raw dyed eggs can go into the center before baking; the oven will bring them to a soft-to-medium cook. Hard-boiled eggs are better if the loaf will sit out longer or travel.
For safety, eat decorated eggs within about two hours at room temperature. If you plan to keep them longer, refrigerate the loaf or remove the eggs and chill them within minutes.
Shine, glaze, and color choices
Brush dough with an egg wash before baking for classic sheen and color. Apply nonpareils right after the wash so they stick but don’t melt into the crust.
For a sweet, lasting gloss, brush warm loaves with simple syrup (equal parts sugar and water) after baking. This is perfect for gifting or display; it keeps the finish bright for days.
- Place one egg in the wreath center without pressing—dough will rise around it.
- Bring eggs to room temperature before placing to avoid cracks from thermal shock.
- Try natural dyes: red cabbage for blue, onion skins for amber, paprika for warm tones.
- Use sprinkles sparingly; a light scatter adds color without soggy spots.
| Choice | When to use | Pros | Food-safety note |
|---|---|---|---|
| Raw dyed egg | Serve soon after baking | Soft-cooked center; traditional look | Eat within 2 hours at room temp or refrigerate |
| Hard-boiled egg | For longer display or gifting | Safe to leave out longer; firm texture | Store refrigerated until use; remove if loaf sits out |
| Egg wash vs simple syrup | Before bake vs after bake | Egg wash = deep color; syrup = sweet, lasting shine | Egg wash must be fully baked; syrup keeps surface glossy for days |
Make-ahead, storage, and freezing that keeps bread soft for days
Plan ahead and you’ll wake to a loaf that feels freshly baked even if you shaped it the night before. Shaping and chilling slow the yeast and buy you time without rushing the holiday morning.
Chill shaped dough and timing tips
Shape the dough, place it on a parchment-lined tray, cover tightly, and refrigerate overnight. The cold slows fermentation so you can sleep easy.
When you pull chilled loaves, give extra time to let rise. Cold dough needs longer at room temp to warm and let rise before baking.
Storing baked loaves
Cool completely on a wire rack so steam escapes and the crumb stays tender, not soggy. Once cool, store the loaf in an airtight bag at room temperature for up to 5 days.
Freezing and reheating
- Remove any egg on top before freezing. Wrap the loaf tightly and freeze for up to two months.
- Thaw wrapped at room temperature, then rewarm gently in a low oven (300°F for 5–8 minutes) to revive aroma and texture.
- Hard‑boiled eggs kept for serving should be refrigerated separately for food safety.
| Action | Storage | Notes |
|---|---|---|
| Shaped dough | Refrigerate overnight | Allow extra time to let rise after chilling |
| Baked loaf | Airtight, room temperature, 5 days | Cool on rack; enriched crumb stays soft |
| Freeze | Wrapped, up to 2 months | Remove egg; thaw then rewarm gently |
Flavor twists and regional touches to try
A few teaspoons of zest or a modest pinch of spice can change the whole mood at the table. These small swaps keep technique simple while letting family favorites feel fresh and local.
Bright aromatics and measured extracts
Use 1–2 teaspoons citrus zest rubbed into 1 tablespoon sugar to wake the oils. Add 1/2 to 1 teaspoon vanilla, almond, anise, or orange extract to the wet mix so it blends into the dough.
Spices and mix-ins
Keep spices gentle: 1/4 to 1 teaspoon cinnamon, cardamom, or nutmeg. Fold 1/2 to 3/4 cups raisins, currants, chopped cherries, or chocolate chips into the dough during the final knead.
Alternate shapes and portion ideas
Braid three long ropes into a crown and nestle three easter eggs along the top for a showstopper. Or divide dough into smaller ropes for mini rings that bake in fewer minutes and make lovely gifts.
- For even loaves, weigh pieces and divide dough consistently before shaping.
- When adding lots of mix-ins, knead gently so the gluten stays strong.
- Brush with egg wash before bake for color or simple syrup after for shine.
| Flavor | Amount | Effect |
|---|---|---|
| Citrus zest + sugar | 1–2 teaspoons zest; 1 tbsp sugar | Bright aroma; lift without extra sugar |
| Extracts (vanilla/almond/anise) | 1/2–1 teaspoon | Subtle depth; keeps milk and butter notes clear |
| Spices (cinnamon/cardamom) | 1/4–1 teaspoon | Warmth without overpowering |
| Mix-ins (dried fruit/chocolate) | 1/2–3/4 cups | Festive texture; panettone-like appeal |
Bring it to the table: serve warm and share the tradition
Bring the wreath to the table while it’s still slightly warm so steam and scent invite everyone close.
Let loaves rest on a rack for a few minutes so slices hold their shape. Present the wreath with the eggs centered, then remove them if you’ll slice at the table.
Serve with soft butter, citrus marmalade, or a cup of espresso. Minis are lovely passed around; larger rings make a centerpiece you can slice family-style.
Wrap a cooled loaf in parchment and ribbon for gifting. Warm leftovers in a low oven for a few minutes to revive aroma and texture.
May this simple loaf become your family ritual—shared stories, a crackling top, and the dough you shaped with care. For another savory centerpiece idea, see our pizza rustica guide.
Italian Easter Bread (Traditional Braided or Wreath-Style Holiday Bread)
Ingredients
Method
- In a bowl, mix warm milk with a pinch of sugar and the yeast.
- Let it sit 5–10 minutes until foamy.
- If using instant yeast, skip blooming and mix it directly with the dry ingredients.
- In a mixing bowl or stand mixer, whisk together flour, sugar, zest, and salt.
- Add eggs, vanilla or anise, and the milk/yeast mixture.
- Mix for about 2 minutes until it forms a rough dough.
- Let it rest 10 minutes.
- Add softened butter a little at a time.
- Knead 8–12 minutes until the dough is smooth, elastic, and slightly tacky.
- Use the windowpane test—stretch a small piece until thin and see-through.
- Shape the dough into a ball.
- Place it in a greased bowl, cover, and let rise until puffy.
- Use the poke test—if the indent slowly comes back halfway, it’s ready.
- Turn the dough onto a lightly floured surface and divide into 6 equal pieces.
- Roll each piece into a rope about 14 inches long.
- Twist two ropes together, then form a circle and pinch the ends.
- Tuck ends under for a clean look.
- Place on parchment-lined baking sheets (two per sheet).
- Add one dyed egg in the center of each wreath.
- Let shaped wreaths rise until puffy and lighter.
- Use the poke test again to avoid overproofing.
- Preheat oven to 350°F.
- Brush wreaths with egg wash and add a light sprinkle of nonpareils.
- Bake 15–20 minutes, one sheet at a time.
- Check for an internal temperature near 185°F.
- Transfer to a wire rack to cool.
- Brush warm bread with simple syrup for extra shine and a soft sweetness.
- Let cool before slicing.
Notes
- Room-temperature butter and eggs make the dough smoother and help it rise well.
- Instant yeast speeds things up if you're short on time.
- If your kitchen is cool, give the dough a little extra time to rise—yeast likes warmth more than the clock.
- Hard-boiled dyed eggs are safer for long display; raw dyed eggs work if the bread will be eaten soon.
- Let the bread cool slightly before slicing so the crumb sets and stays soft.