
Jump to Recipe
There’s a certain magic in the kitchen when flour dusts the counter and the warm, yeasty scent of dough fills the air. It’s a simple ritual that connects us to generations of home cooks, especially in Italy, where a few pristine ingredients can tell a whole story.
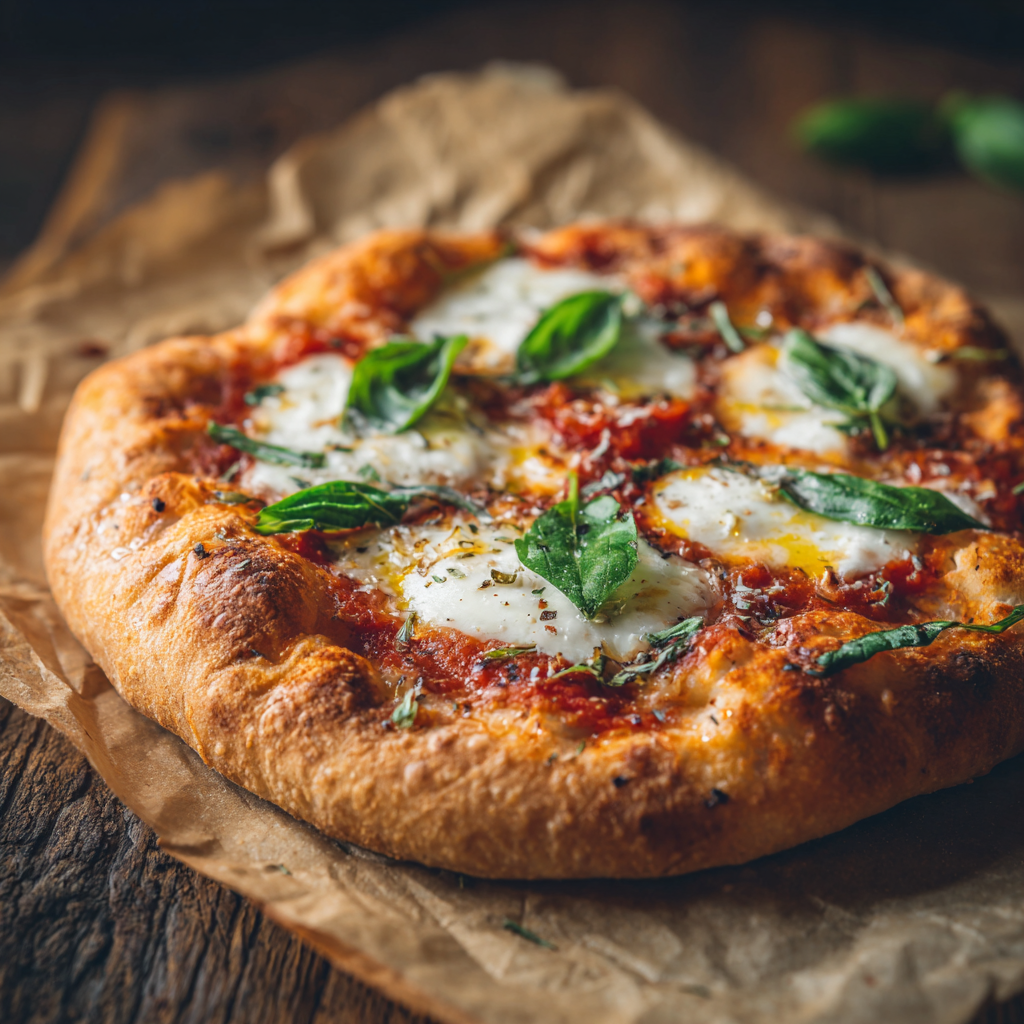
That story is beautifully captured in the classic combination named for a queen. The traditional version celebrates the colors of the Italian flag with bright tomato sauce, white mozzarella, and green basil. This plant-based interpretation honors that heritage, proving that authentic flavor needs no compromise.
We will craft every component from scratch. You’ll learn to create a bubbly crust with a crisp exterior, a lush tomato sauce, and a wonderfully melty plant-based cheese. While this isn’t a rushed weeknight project, the hands-on work is straightforward and deeply rewarding.
This guide is designed for real home kitchens. It offers flexibility with dough timing and cheese options, ensuring you can achieve a fantastic result that rivals any pizzeria pie. The satisfaction of slicing into a creation you made entirely yourself is unmatched.
Key Takeaways
- Understand the historical significance behind the classic combination of ingredients.
- Learn that a plant-based version delivers full, authentic flavor without compromise.
- Gain the confidence to make dough, sauce, and cheese completely from scratch.
- Follow a reliable method designed for achievable success in a home kitchen.
- Appreciate the flexible timing and ingredient options built into the process.
- Experience the deep satisfaction of creating a traditional dish with a modern twist.
Gathering Fresh Ingredients and Essential Tools
Quality ingredients are the foundation of any great homemade creation, and this traditional combination is no exception. Having the right tools on hand makes the process smoother and more enjoyable.
Key Ingredient Highlights and Their Roles
All-purpose flour forms the base of your dough, with about 3 3/4 cups to start. You may need an extra 1/2 to 1 cup for adjusting consistency. Optional semolina flour adds authentic texture.
For the yeast, choose your timing. Use 1/4 teaspoon for slow fermentation over 6-10 hours. This develops complex flavor. Or use 1 teaspoon for a quick 15-minute rise.
The sauce relies on tomato paste for concentrated flavor without excess moisture. Dried oregano, basil, and thyme create the classic Italian herb profile. Fresh garlic adds aromatic depth.
Cashews soaked in hot water form the creamy base for your plant-based cheese. Miso or nutritional yeast provides savory umami notes. A small amount of flour or cornstarch helps it thicken and melt beautifully.
For those with dietary needs, rice flour works for gluten-free thickening. Store-bought alternatives like Miyoko’s offer convenience when time is short.
Essential Kitchen Tools for Home Pizza Making
You’ll need a large mixing bowl for your dough and a blender for the cheese sauce. A skillet helps cook the cheese to the right consistency.
A baking sheet works perfectly fine for most home kitchens. A pizza stone creates an extra-crispy crust by absorbing moisture. Parchment paper prevents sticking.
Don’t forget measuring cups and spoons for accuracy. A wooden spoon or spatula handles mixing duties well. Fresh basil provides the final aromatic touch that defines this classic dish.
Crafting Your Homemade Vegan Pizza Dough
Whether you have minutes or days, understanding dough development transforms simple ingredients into something extraordinary. We’ll explore two reliable approaches to suit your schedule.
Step-by-Step Dough Preparation
The quick method delivers results in about 20 minutes. Start by activating yeast in warm water with a tablespoon of flour. After two minutes, combine this with your flour mixture.
Oil your hands and bring the dough together until just smooth. Avoid over-kneading. Limited gluten development means it spreads easily without resistance.
The traditional approach requires more time but develops deeper flavor. Combine dry ingredients in a large bowl. Gradually incorporate water while stirring with a spatula.
Knead briefly until a cohesive ball forms. Add extra flour if needed to prevent stickiness. Then let time work its magic.
| Method | Time Required | Key Technique | Final Texture |
|---|---|---|---|
| Quick Dough | 20 minutes total | Minimal kneading | Soft, easy to shape |
| Traditional Dough | 6-10 hours proofing | Extended fermentation | Chewy, complex flavor |
| Refrigerated Dough | 2-3 days optimal | Cold fermentation | Crispier, bubblier crust |
Proofing Techniques for a Light, Bubbly Crust
Proper proofing creates that characteristic airy texture. Yeast consumes flour sugars, producing carbon dioxide bubbles and flavor compounds.
For the traditional method, place your covered bowl in a draft-free spot at room temperature. Avoid cold windows or air conditioning vents.
Look for visual cues: doubled size, tiny surface bubbles, and a pillowy softness. The dough should spring back slowly when gently pressed.
This recipe yields enough for two medium pies. You can freeze half for future use or share your creation with friends.
Simple, Savory Marinara Sauce: From Scratch to Flavor

While store-bought options provide convenience, a homemade marinara sauce allows you to tailor flavors precisely to your preference in just minutes. This approach delivers fresher, brighter results that you can adjust as you go.
Quick Prep Marinara Techniques
The simplest method requires no cooking at all. Whisk tomato paste with water, olive oil, and dried herbs directly in a bowl. This creates a concentrated, spreadable mixture that won’t make your crust soggy.
Tomato paste works exceptionally well for this application. Its thick consistency means you get intense tomato flavor without excess moisture. Garlic provides essential depth while oregano and basil create that classic Italian profile.
Always taste your creation before using it. Add more salt if needed, or a pinch of sugar if the tomato paste tastes too acidic. Different brands can vary significantly.
This quick marinara stores beautifully. Cool it completely before transferring to an airtight container. It keeps in the refrigerator for up to one week.
For longer storage, freeze the sauce in glass jars. Leave adequate headspace since liquids expand when frozen. Thawed sauce reheats gently on the stovetop.
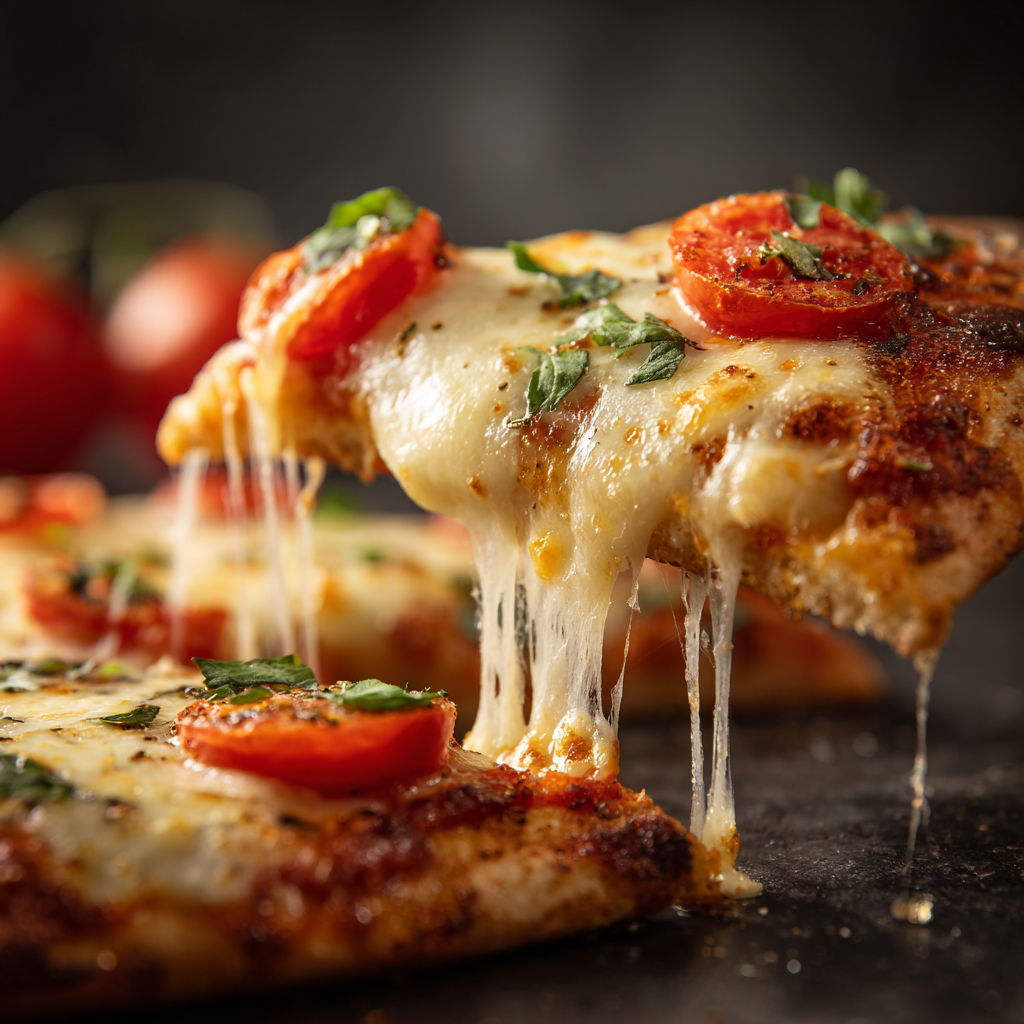
Creating Creamy Vegan Mozzarella and Cheese Alternatives
Let’s focus on the element that often concerns home cooks the most: creating a delicious, dairy-free cheese. Achieving a melty, satisfying topping is key to a great plant-based pie. We have reliable methods for every kitchen.
I find a simple cashew base works wonderfully. Soaking raw cashews in hot water softens them for a perfectly smooth blend.
Cashew-Based Mozzarella Variations
For the cream, blend the soaked nuts with water, olive oil, and a teaspoon of flour. Add garlic powder, salt, lemon juice, and a bit of miso for a rich, tangy flavor. This combination creates a convincing homemade vegan mozzarella.
Cook the blended mixture in a skillet over medium heat. Stir it for a few minutes until it thickens nicely. You want a thick, saucy consistency that will melt into beautiful pools in the oven.
The miso or nutritional yeast provides a deep umami taste. Lemon juice adds the necessary sharpness. This entire process is quite straightforward.
Exploring Nut-Free and Alternative Cheese Sauces
For a nut-free option, a thickened white bean or cauliflower alfredo sauce works well. Simply scoop spoonfuls onto your creation. Those avoiding gluten can use rice flour or cornstarch in the cashew cream.
Store-bought vegan cheese from brands like Miyoko’s offers a fantastic shortcut. You can cube it or mix it with plant-based cream cheese for a spreadable layer. This entire component can be made days ahead, making your final assembly much simpler.
Step-by-Step Vegan Pizza Margherita Recipe Assembly
This is where your preparation comes together into the final creation. The assembly process requires a gentle touch to preserve the delicate structure you’ve developed.
Layering Flavors: Sauce, Cheese, and Fresh Basil
Transfer your proofed dough to a floured surface. Divide it into two equal portions, gently molding each into a soft ball. The dough should feel pillowy and alive in your hands.
Place each ball on a prepared baking sheet. Use floured hands to press and stretch the dough outward. Avoid using a rolling pin, which can deflate the precious air bubbles.
If the dough resists and springs back, let it rest for five minutes. This allows the gluten to relax. Continue shaping until the dough covers most of your baking sheet.
Spread the dough thin, as it will rise significantly during baking. What seems thin now will become perfectly chewy. Too thick a base results in a bready texture.
For an optional moisture barrier, spread a thin layer of garlic-infused cream cheese first. This prevents sogginess from the tomato sauce and adds creamy richness.
Apply your sauce evenly, leaving a one-inch border for the crust. This ensures flavorful bites without overwhelming the base or causing spillage.
Layer fresh basil leaves directly on the sauce. They will char slightly, releasing aromatic oils. Add thin tomato slices if using, followed by a light salt sprinkle.
Dot the surface with spoonfuls of your mozzarella cream or arrange flattened cheese rounds. Drizzle one teaspoon of extra virgin olive oil over everything for richness and browning.
This is your moment to customize with other thinly sliced vegetables. For a traditional approach, keep the toppings simple and focused.
Use parchment paper or a sprinkle of cornmeal on your baking sheet. This creates a non-stick surface for easy transfer to the oven.
Baking Techniques for a Crispy, Chewy, Flavorful Crust
Proper baking technique separates a good homemade creation from an exceptional one, with oven management being the critical factor. The right approach ensures your crust develops that perfect combination of textures.
Preheating and Oven Settings
Always preheat your oven thoroughly before baking. Set the temperature between 435-475°F for optimal results. This intense heat quickly puffs the dough and crisps the bottom.
If using a pizza stone, place it in the oven during preheating. Let it heat for at least 30 minutes. The stone acts as a heat reservoir, mimicking professional oven conditions.
Metal baking sheets work perfectly well for home cooks. They conduct heat efficiently and most kitchens already have them. Just ensure they go into the fully heated oven.
Achieving the Perfect Bake Time and Texture
Baking times typically range from 13 to 20 minutes. Start checking around the 13-minute mark. The exact time depends on your oven and crust thickness.
Look for visual cues of doneness. The cheese should bubble slightly with golden spots. The crust edges should show some darker leopard-spotting.
Lift an edge with a spatula to check the bottom. It should be golden-brown and firm, not pale. For extra browning, use the broiler briefly at the end.
Add fresh basil in the final minutes to prevent burning. This timing allows the leaves to wilt perfectly while releasing their fragrance.
Customizing Toppings and Creative Variations
While the traditional combination stands beautifully on its own, many home cooks enjoy adding their personal touch. This homemade vegan margherita foundation provides the perfect canvas for creative expression.
Enhancing Your Pie with Extra Veggies and Herbs
Thinly sliced vegetables complement rather than overwhelm the classic profile. Bell peppers add sweetness, mushrooms contribute earthy depth, and red onions provide a sharp bite that mellows when roasted.
Always slice vegetables thinly to prevent excess moisture. Thick pieces won’t cook through properly during the short baking time. Fresh basil remains essential, but oregano or arugula can create delightful variations.
Personalizing Your Vegan Cheese Journey
Cheese customization offers another avenue for creativity. Mix different plant-based brands for complex flavor, or use less to let the tomato and basil shine. Extra cheese satisfies those wanting maximum creaminess.
Finishing touches like vegan parmesan or red pepper flakes add dimension. A final drizzle of quality olive oil contributes fruity richness. Remember that restraint has purpose—each ingredient should stand out clearly.
Once you master this margherita foundation, the techniques translate to endless variations. Whether you stay traditional or load it with favorites, the accomplishment of creating from scratch matters most.
Storing, Freezing, and Reheating Your Masterpiece
Planning ahead with proper storage techniques ensures your culinary efforts continue to delight beyond the initial meal. Most home cooks appreciate having components ready for quick assembly on busy evenings.
Meal-Prep and Freezing Advice for Busy Cooks
Your cashew mozzarella keeps well in a closed container for 3-5 days. The tomato sauce stays fresh for up to a week when refrigerated properly. Proofed dough can be chilled for three days before use.
For leftover slices, cool them completely before storage. Wrap individual portions tightly or use an airtight container. They maintain quality for about three days in the refrigerator.
Many people enjoy eating cooled slices straight from the fridge. For reheating, use short microwave bursts of about 10 seconds each. This warms the toppings without restoring the original crispness.
Freezing offers longer-term storage solutions. Dust your proofed dough with flour and wrap it well before freezing. It will keep for up to three months in an airtight container.
You can freeze assembled bases with sauce and vegetables, but wait to add cheese until baking. Freeze them flat on a tray first, then transfer to bags with minimal air. Our homemade pizza margherita recipe includes detailed freezing instructions.
Marinara sauce freezes beautifully in glass jars. Leave space below the freeze line to prevent cracking. Thaw frozen components overnight before use.
When cooking from frozen, preheat your oven and add fresh cheese toppings. Bake for 16-18 minutes until golden. This approach turns weekend preparation into weekday convenience.
Wrapping Up Your Pizza Night with a Final Slice
When you make food entirely with your own hands, the result carries special meaning. This homemade vegan margherita shows how plant-based cooking achieves traditional flavors beautifully.
The time investment pays off with minimal active work. Most hours involve waiting while dough proofs or ingredients bake. The satisfaction of creating from scratch makes every moment worthwhile.
These instructions give you foundational skills that extend beyond this single recipe. Whether you follow the classic approach or add personal touches, the experience creates more than dinner—it builds memories around the table.

Homemade Vegan Margherita Pizza (From Scratch)
Ingredients
Method
- In a large bowl, mix flour and salt.
- If using quick yeast, dissolve yeast in warm water with 1 tablespoon flour. Let sit 2 minutes.
- Add water mixture and olive oil to the flour. Mix until a soft dough forms.
- Knead lightly just until smooth. Cover and let rest:
- 15 minutes for quick dough
- 6–10 hours at room temperature for traditional dough
- Up to 3 days in the fridge for deeper flavor
- The dough should double in size and feel soft and airy.
- In a bowl, whisk tomato paste, water, olive oil, garlic, herbs, and salt until smooth.
- Taste and adjust salt or add a pinch of sugar if needed.
- Set aside or refrigerate until ready to use.
- Drain soaked cashews.
- Blend cashews with water, olive oil, flour, lemon juice, miso, salt, and garlic powder until completely smooth.
- Pour into a skillet and cook over medium heat, stirring constantly.
- After 3–5 minutes, it will thicken into a creamy, stretchy sauce. Remove from heat.
- Preheat oven to 450°F (230°C).
- Divide dough into two balls.
- Place one dough ball on a floured surface or parchment-lined baking sheet.
- Gently press and stretch outward with your hands. Do not use a rolling pin.
- Let rest 5 minutes if the dough resists.
- Spread a thin layer of sauce, leaving a 1-inch border.
- Place fresh basil leaves on the sauce.
- Spoon small pools of vegan mozzarella over the pizza.
- Drizzle lightly with olive oil.
- Bake for 13–20 minutes, until crust is golden and the cheese bubbles slightly.
- For extra browning, broil for 1–2 minutes at the end.
- Add extra fresh basil just before serving.
Notes
- The dough can be made up to 3 days ahead and stored in the fridge.
- Store-bought vegan mozzarella works if you are short on time.
- A pizza stone gives a crispier crust, but a preheated baking sheet works well.
- Keep toppings light to avoid a soggy center.
- This recipe freezes well for meal prep when baked without cheese.