
Jump to Recipe
There’s a quiet moment in every Italian kitchen during the holidays, where the air fills with the scent of something simple and sweet frying in oil. It’s a ritual that connects generations, a promise of shared joy to come.
This particular dessert, a hallmark of Neapolitan Christmas tables, transforms humble ingredients into a symbol of celebration. Tiny spheres of dough, each fried to a perfect golden crisp, create a treat that is both visually stunning and deeply satisfying.
The process is a labor of love, but one that yields impressive results. Coating the warm, fried pieces in a glossy glaze and decorating them makes for a stunning centerpiece. It’s a practical choice, too, as it stays fresh for days, easing the hustle of the season.
For an authentic guide to creating this classic, you can follow this detailed struffoli recipe that honors tradition while being perfectly achievable in a home kitchen.
Key Takeaways
- A classic Neapolitan dessert central to Christmas and New Year’s celebrations.
- Symbolizes wealth, good wishes, and shared abundance for the coming year.
- Features small, fried dough pieces with a crispy exterior and tender interior.
- The process is straightforward but requires patience for shaping the individual components.
- Finished with a warm, glossy coating and colorful decorations for a festive look.
- An excellent make-ahead option, as it remains fresh for several days.
- Represents an authentic taste of Southern Italian holiday tradition.
A Taste of Tradition: The Story Behind Struffoli
To understand the significance of this holiday staple, we must travel back to ancient times when Greek colonists first settled Southern Italy. Their culinary traditions laid the foundation for what would become a cherished Christmas custom.
Historic Roots and Cultural Significance
The Greek presence in the Gulf of Naples dates to the 7th century BC. They brought with them loukoumades, small fried dough pieces sweetened with sugar. The name itself derives from the Greek word “strongoulos,” meaning round.
Some historians suggest Spanish influence through similar desserts like Piñonate. Spain’s long rule in Naples provided ample opportunity for culinary exchange. Yet the Greek connection remains strongest in historical records.
Medieval convents played a crucial role in popularizing this treat. Nuns prepared them as Christmas gifts for noble families. This established the dessert’s association with celebration and generosity.
From Ancient Greece to Modern Italian Holidays
Regional variations developed across Southern Italy over centuries. Each area put its own spin on the basic concept. The table below shows how this sweet evolved differently throughout the regions.
| Region | Local Name | Distinct Characteristics | Occasion |
|---|---|---|---|
| Naples | Struffoli | Most traditional version, spherical shape | Christmas |
| Calabria | Turdiddi | Often larger pieces, sometimes twisted | Christmas |
| Umbria/Marches | Cicerchiata | Arranged in ring shape, Carnival treat | Carnival & Christmas |
Honey’s role connects ancient preservation methods with modern preparation. Greeks used it extensively in their cuisine. Today, it provides both sweetness and that characteristic glossy coating.
The Neapolitan version became the most recognized internationally. It represents the region’s rich pastry heritage. This sweet truly embodies centuries of Mediterranean culinary history.
Gathering Your Ingredients and Essential Tools
The foundation of any great holiday sweet lies in gathering the right components before you begin. Quality ingredients make a noticeable difference in the final result.
For the dough, you’ll need:
- 300-400g (2⅔-3 cups) all-purpose flour, depending on your preferred texture
- 3 large eggs at room temperature – they incorporate better than cold ones
- 80g (5¾ tablespoons) unsalted butter, softened for easy mixing
- 40g (2¾ tablespoons) granulated sugar for subtle sweetness
- Citrus zest from one orange or lemon, or both for brighter flavor
- 2-3 tablespoons of liquor like Grand Marnier or orange juice
- Optional ¾ teaspoon baking powder for lighter results
The coating requires 250-300g of wildflower or acacia honey. Choose pure, quality honey since it defines the flavor. For frying, use 2-3 inches of vegetable or peanut oil in a deep pot.
Decoration options include rainbow nonpareils sprinkles, slivered almonds, and various candied fruits. These add festive color and texture.
Essential tools make the process smoother. You’ll need a large mixing bowl, whisk, clean tea towel, and proper frying equipment. A cooking thermometer ensures consistent oil temperature. A slotted spoon and paper towels help with draining.
Having everything measured and organized before starting creates a calm cooking experience. This preparation step is just as important as the actual making.
Mastering the Dough: Tips for Perfect Texture
Working with dough requires both patience and understanding of basic food science principles. The right approach ensures your final creation has the ideal consistency.
Choosing Quality Ingredients and Room Temperature Basics
Start by bringing eggs and butter to room temperature about an hour before mixing. Cold ingredients don’t blend as smoothly into the flour mixture.
This simple step makes a noticeable difference in your final texture. Warmer components create more tender results.
The table below compares traditional and modern preparation methods:
| Method | Technique | Equipment Needed | Best For |
|---|---|---|---|
| Traditional Fontana | Flour mound with center well for wet ingredients | Work surface, fork, hands | Authentic experience |
| Modern Mixer | All ingredients combined in bowl | Stand mixer, large bowl | Efficiency and consistency |
| Hybrid Approach | Initial mixing in bowl, finishing by hand | Bowl, work surface, hands | Balanced control and ease |
Mixing Techniques for a Consistent Dough
Whisk your dry ingredients together first in a large bowl. Add butter, citrus zest, and sugar until the mixture becomes crumbly.
Incorporate eggs one at a time, mixing thoroughly after each addition. This prevents uneven texture in your dough.
When the mixture nearly comes together, transfer it to a lightly floured surface. Knead gently with your hands until smooth and homogeneous.
Cover the dough with a clean towel and let it rest for 30 minutes. This resting period allows the gluten to relax, making shaping easier.
Struffoli Napoletani Honey Balls Recipe: Step-by-Step Guide
This stage of preparation focuses on creating uniform shapes that will cook evenly and present beautifully. After the dough has rested for 30 minutes, we begin the methodical process of shaping each component.
Rolling, Cutting, and Shaping the Dough
Place the rested dough on a lightly floured surface. Work with manageable portions rather than the entire mass at once. Take a handful and form it into a rough ball between your palms.
Roll each ball into a long log shape, applying gentle pressure with flat hands. Occasionally pull the ends to stretch it thinner. Aim for a thickness similar to your little finger, about ¼ inch in diameter.
Cut the ropes into small cubes using a sharp knife. Keep sizes consistent at approximately ¼ inch or 1 cm. This ensures even cooking during the frying process.
The table below compares different approaches to shaping these traditional pieces:
| Shaping Method | Time Required | Final Appearance | Skill Level |
|---|---|---|---|
| Cube Shapes | 15-20 minutes | Rustic, geometric | Beginner |
| Hand-Rolled Balls | 30-40 minutes | Traditional, refined | Intermediate |
| Combination Approach | 25-30 minutes | Varied texture | All Levels |
You can leave the pieces as cubes or roll each one between your palms into smooth spheres. The ball-shaped version takes more time but creates a more traditional appearance.
Place finished pieces on a floured towel in a single layer. This prevents sticking while you complete the remaining dough. Just before frying, gently swish them in the towel to coat with a light dusting of flour.
Frying Your Struffoli: Techniques for Crisp Perfection
Proper frying technique creates the signature crisp texture of this dessert. The right approach ensures golden results without greasiness.
Maintaining the Ideal Oil Temperature
Choose a medium pot with high sides for safety. Fill it with 2-3 inches of peanut or vegetable oil. Heat the oil to 350°F (180°C).
A cooking thermometer provides accuracy. Without one, test with a bread cube. It should sizzle immediately with bubbles.
Correct heat is crucial. Too cool, and the dough absorbs oil. Too hot, and the outside burns before the inside cooks.
Batch Frying for Even Cooking and Safety
Add pieces in small handfuls. Crowding lowers the oil temperature. This leads to uneven cooking and soggy results.
The oil will bubble vigorously when you add the dough. Fry for 30-40 seconds, turning once with a slotted spoon.
Watch for a uniform golden brown color. This indicates perfect cooking. Remove them carefully from the hot oil.
Drain on paper towels to absorb excess oil. Let them cool completely before the next step. This ensures the coating adheres properly.
Coating with Honey and Decorative Touches
The final transformation of your fried dough pieces into a glistening holiday centerpiece begins with careful attention to the honey coating. This step brings together texture, flavor, and visual appeal in one cohesive finish.
Perfecting the Honey Glaze Consistency
Select a large sauté pan or wok that can comfortably hold all your fried pieces. Gently warm the honey over low to medium heat, stirring with a wooden spoon. Watch as it transforms from thick and viscous to fluid and slightly watery.
This warming step is essential. Room temperature honey won’t coat evenly. Properly warmed honey flows smoothly and adheres to every surface.
Add your completely cooled fried pieces to the warm honey. Stir or toss gently to ensure even coating without breaking them apart. Let them sit for a few minutes to absorb the sweetness.
Creative Garnishing with Sprinkles and Candied Fruit
Timing is critical here. Transfer the honey-coated pieces immediately to a lightly greased serving plate while still warm. Cooled honey hardens quickly, making shaping difficult.
Traditional shaping options include:
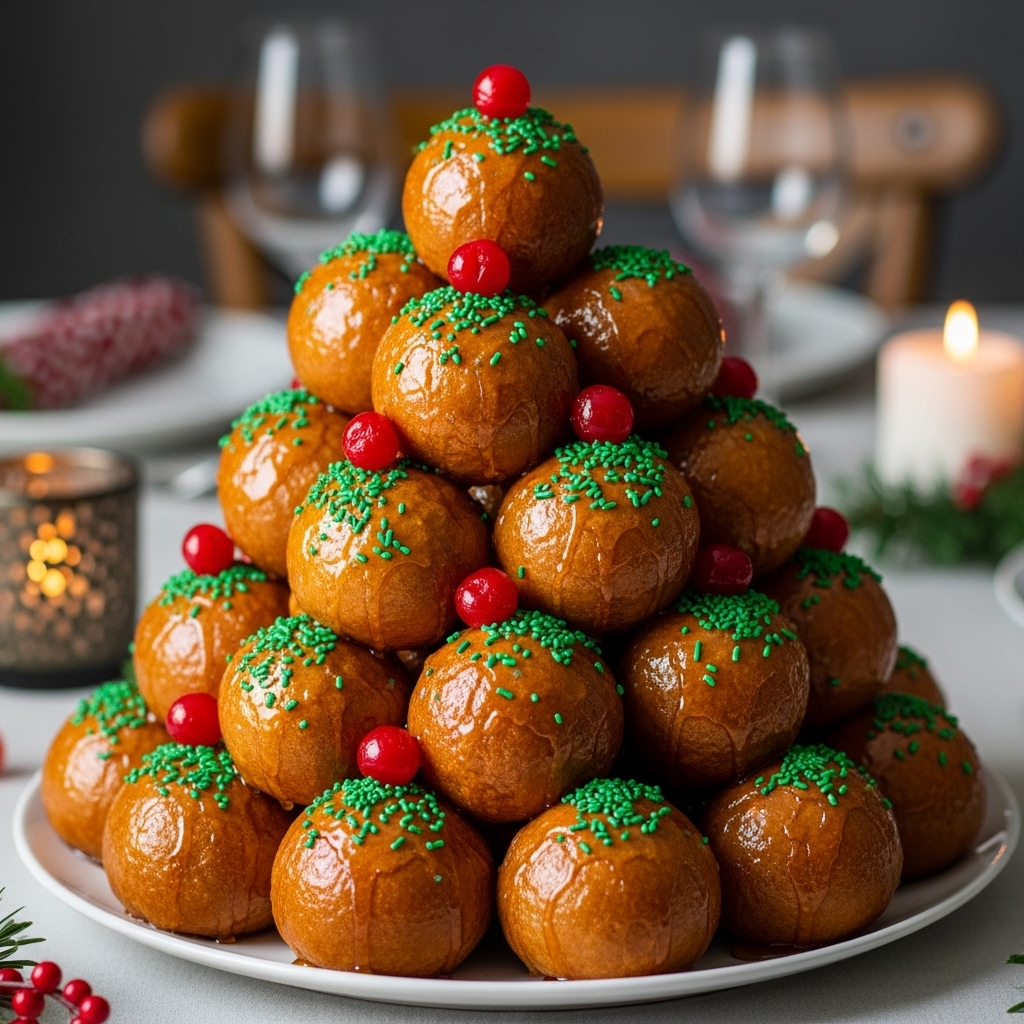
- Classic pyramid resembling Mount Vesuvius
- Simple dome shape
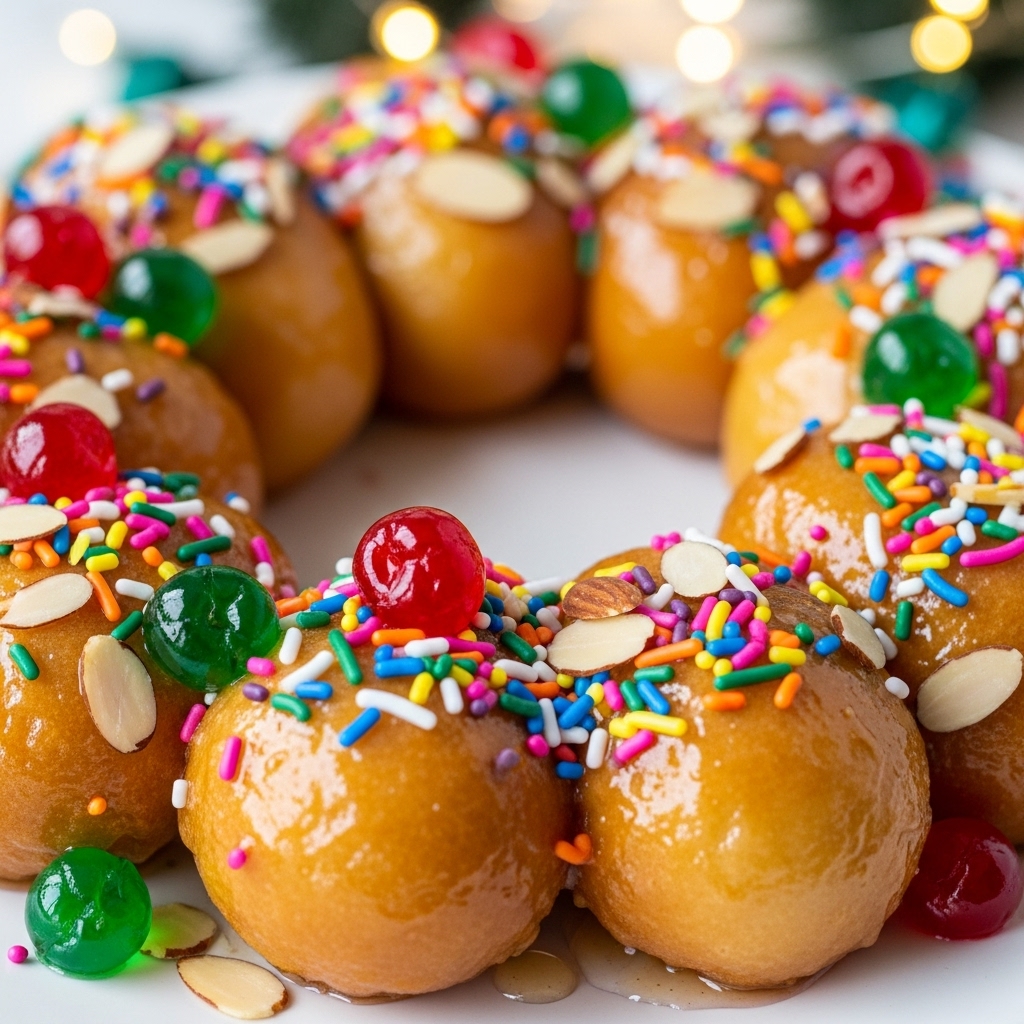
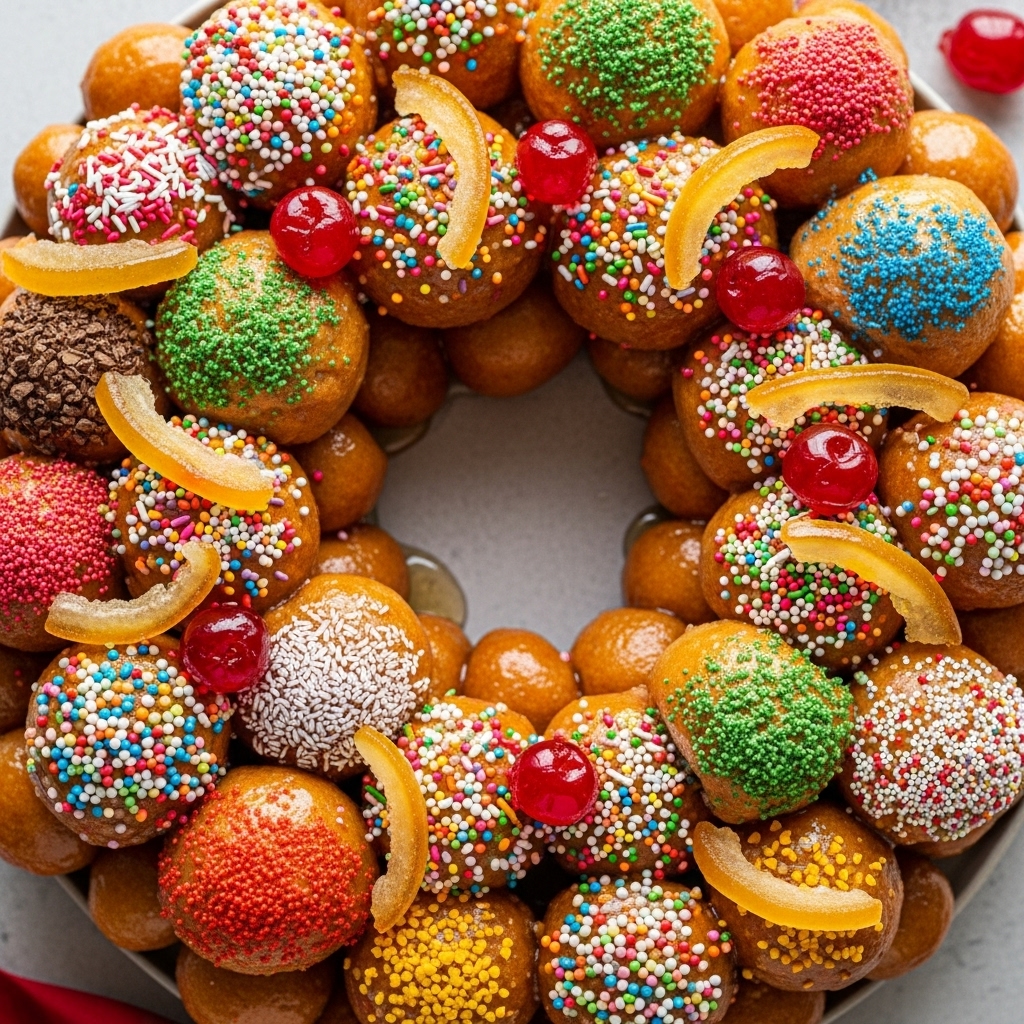
- Festive wreath arrangement
For the wreath shape, place a glass in the center of your plate. Arrange the sticky pieces around it using a spoon. Remove the glass once the honey sets.
A practical trick: use half an orange as a shaping tool. Press the cut side against the pieces to guide them into place without sticky hands.
Let the finished creation sit for about two hours until the honey solidifies. Then decorate with additional sprinkles, slivered almonds, and candied fruit. Red and green cherries create a festive Christmas appearance that completes this traditional dessert.
Exploring Regional Variations and Authentic Twists
Family kitchens throughout Italy’s southern provinces have adapted the basic concept to local tastes and available ingredients. This flexibility demonstrates how tradition evolves while maintaining its core spirit.
Neapolitan Essentials vs. Alternative Family Recipes
The classic Neapolitan version remains the most historically rooted preparation. Other regions developed their own names and slight modifications.
Calabria calls them “Turdiddi,” often making larger pieces. Umbria and Marches prepare “Cicerchiata,” sometimes as a Carnival treat.
The table below shows key regional differences:
| Region | Local Name | Shape Variation | Occasion |
|---|---|---|---|
| Naples | Struffoli | Small spheres | Christmas |
| Calabria | Turdiddi | Larger, sometimes twisted | Christmas |
| Umbria/Marches | Cicerchiata | Ring formation | Carnival & Christmas |
Traditional fats have evolved significantly. Older recipes used strutto (lard) for both the dough and frying. Modern versions typically use butter in the mixture and vegetable oil for cooking.
Citrus flavors vary by family tradition. Some prefer orange zest, others lemon zest. Food historian Jeanne Caròla Francesconi recommended using both for balanced flavor.
Liquor options range from traditional anisette to Grand Marnier or rum. Orange juice works well for alcohol-free versions. Each adds its own character to the final result.
Egg-to-flour ratios show interesting variations. While many follow the pasta rule of one egg per 100g flour, some families add extra yolks for richness. This small change affects both color and texture.
Modern adaptations sometimes include a bit of baking powder for lighter results. Traditional preparations omitted leavening entirely. Both approaches create delicious outcomes.
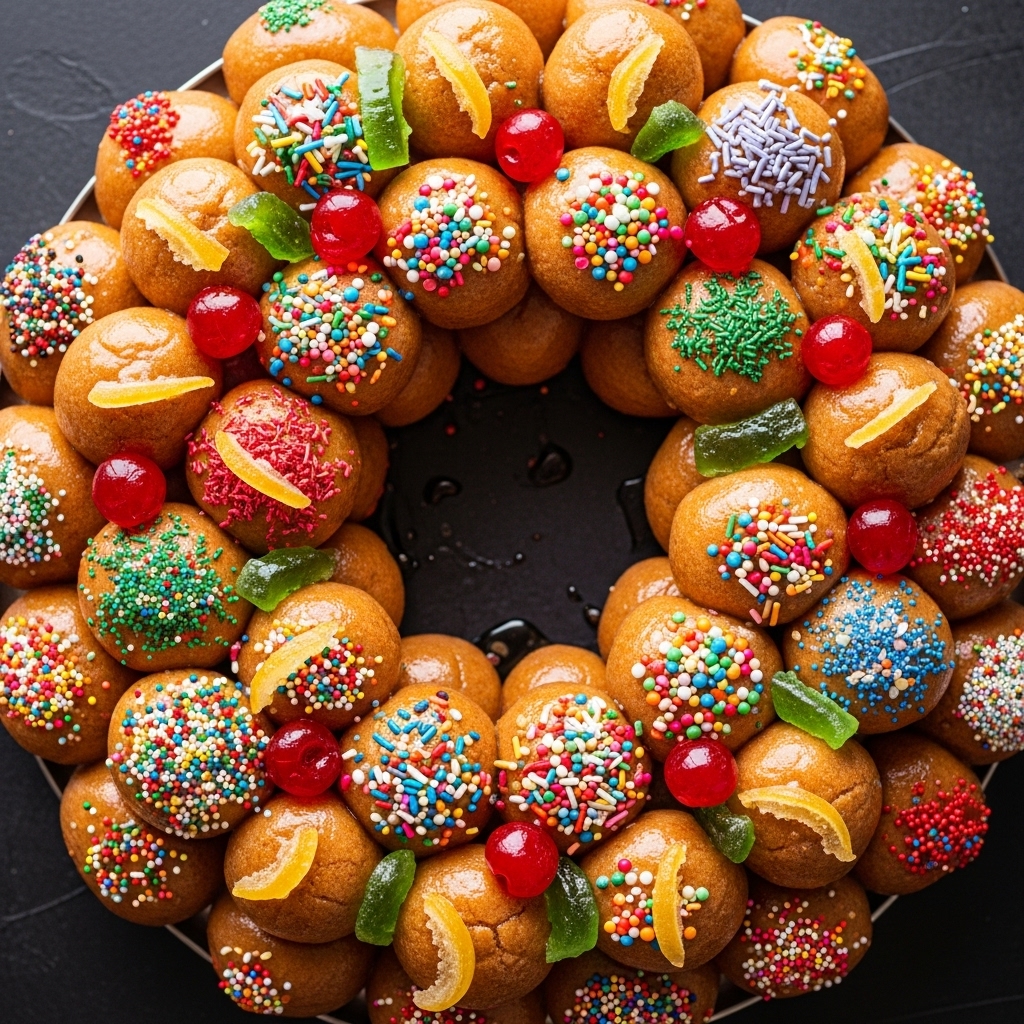
Decoration traditions have also shifted over time. Older recipes featured candied orange peel and citron. Today, colorful sprinkles and candied cherries are more common.
For those avoiding frying, a baked version offers a good alternative. Cook at 390°F for about 15 minutes, then apply a lighter coating. This method maintains the festive spirit with less fat.
Storage, Freshness, and Serving Suggestions
One of the most practical aspects of creating this traditional sweet is its excellent storage capabilities throughout the holiday season. Proper handling ensures your efforts result in a dessert that stays perfect for days.
Best Practices for Keeping Struffoli Fresh
Cover finished struffoli tightly with plastic wrap. They will keep at room temperature for up to three days. This makes advance preparation practical.
For even more flexibility, store fried but unglazed pieces in an airtight container. They last about five days this way. You can freeze them in food bags for longer storage.
The dough itself can be made up to 3 hours ahead. Chill it in the refrigerator until ready to use. Once decorated with honey and sprinkles, the final creation keeps well for about four days.
These treats actually improve with time. Flavors meld together beautifully. Making them a day ahead often yields better results than serving immediately.
Inspiring Ideas for Holiday Presentation
Traditional presentation shapes add festive charm. Arrange them in a ciambella (ring or wreath shape) to suggest a Christmas wreath. Or pile them high into a “Mount Vesuvius” pyramid.
Serve this dessert for Christmas Eve dinner, Christmas lunch, or New Year’s Eve celebrations. They work beautifully alongside other Italian sweets like Zuppa Inglese.
Consider giving struffoli as homemade gifts. Their attractive appearance and festive decoration make them feel special. Friends and relatives will appreciate this delicious and original Christmas treat.
Sweet Memories and Celebratory Tips
In my family, we called these ‘Nana’s honey balls,’ a name that carried the warmth of generations. This dessert is more than a treat; it’s a thread connecting us to grandmothers and great-grandmothers.
The process is straightforward, though shaping the small pieces requires a bit of patience. Keep your dough pieces small for even frying and a perfect balance of crispness and honey flavor.
I find great satisfaction in arranging the warm, coated pieces into a wreath or pyramid. Watching the honey set is a quiet, rewarding moment.
This recipe is wonderfully forgiving. The time you invest pays off in a stunning centerpiece that anchors your holiday table with authentic tradition.
Struffoli (Neapolitan Honey Balls)
Ingredients
Method
- Bring eggs and butter to room temperature about an hour before starting.
- In a large bowl, whisk together flour and sugar. Add softened butter and zest of orange (and/or lemon).
- Gradually add eggs one by one, mixing well between each addition.
- Optionally, add baking powder to lighten the dough.
- Once the mixture is crumbly, knead it on a lightly floured surface until smooth. Cover and let it rest for 30 minutes.
- After resting, divide the dough into manageable portions.
- Roll each portion into a long, thin log (about ¼ inch in diameter).
- Cut the logs into small cubes (about ¼ inch or 1 cm).
- Roll each cube into a small ball for a more traditional look, or leave them as cubes for a rustic appearance.
- Heat 2-3 inches of vegetable or peanut oil in a medium pot to 350°F (180°C). Use a thermometer for accuracy.
- Fry the dough balls in small batches, making sure not to overcrowd the pot.
- Fry for 30-40 seconds until golden brown. Turn the balls occasionally for even cooking.
- Remove from the oil and drain on paper towels to absorb excess oil.
- In a large pan, warm the honey over low to medium heat until it becomes runny.
- Add the cooled fried dough balls to the honey and stir gently to coat them evenly.
- Let them sit for a few minutes to absorb the sweetness.
- Arrange the honey-coated struffoli into a shape on a serving plate (classic pyramid or wreath).
- Decorate with rainbow sprinkles, slivered almonds, and candied fruits like cherries.
- Let the struffoli sit for about 2 hours until the honey hardens.
- Serve as a festive centerpiece or gift for the holidays.
Notes
- Struffoli can be made ahead of time and stored for up to 3 days at room temperature.
- If you prefer a lighter option, you can bake the dough at 390°F for about 15 minutes instead of frying, but it won’t have the same texture.
- You can add any colorful decorations or fruits you prefer, but traditionally, they include cherries, sprinkles, and candied fruits.