
Jump to Recipe
I grew up watching my neighbor lift a skillet over a low flame and coax a bright, lemon-scented finish from a few simple ingredients. The scent of garlic and parsley working with butter and olive oil still tells me it’s time to sit and talk while the seafood cooks. I’ll show you how to pick dry-packed scallops, time the heat so you hear that happy sizzle, and finish with a glossy pan sauce that keeps the meat sweet and tender.
This is an approachable method that blends Venetian touches and chef tricks, so you get color, balance, and true coastal flavor without fuss.
Key Takeaways
- Choose dry-packed scallops for better browning and flavor.
- Use olive oil first, finish with a little butter and lemon for shine.
- Start gentle with garlic, raise heat for quick color and sealed juices.
- Timing matters: short cook time keeps scallops tender.
- This seafood dish moves easily from antipasto to main with simple sides.
Nonna’s coastal touch: why this Italian-style sear works so beautifully
Along the Venetian lagoons, cooks prize small touches that let the sea speak for itself. I call this cucina di mare: simple techniques that protect sweetness and add just a whisper of aromatics.
The Venetian capesante alla veneziana approach is a good teacher. A light dredge in fine breadcrumbs is optional; more often, a quick finish in good olive with a garlic‑parsley mince and a squeeze of lemon shows how restraint wins.
- I use gentle heat when garlic is in the skillet to avoid bitterness and to keep the meat springy.
- Short cooking time creates a delicate crust while preserving the scallops’ natural sweetness.
- Season sparingly so the flavor of the sea remains the lead note on the plate.
This technique scales easily: serve a few as an antipasto or more as a secondo, and you still get that rustic, refined balance I cherish from Nonna’s kitchen.
| Element | Why it matters | Result |
|---|---|---|
| Heat | Start gentle with aromatics, raise for quick color | Golden exterior, tender center |
| Garlic & Parsley | Bright aroma with minimal cooking time | Fresh, herb-forward lift |
| Fat (olive + butter) | Olive for flavor, butter for gloss and finish | Balanced taste and shiny sauce |
Ingredients that make the dish sing, plus smart swaps
At the market I always ask the fishmonger to point out dry-packed sea scallops before I buy. Dry ones brown easily because they aren’t sitting in water with additives. Pat them dry with paper towels, then, if you can, rest them on towels in the fridge to pull out extra moisture.
Choose a mix of oil and butter: oil gives a higher smoke point and butter adds silk and flavor. Keep a tablespoon or two of butter at the ready for finishing the sauce.
Salt and pepper are simple but vital. Use a couple of cloves of garlic, chopped fine, and a handful of parsley for freshness. Meyer lemon is gentle if you want softer acidity, otherwise regular lemon works fine.
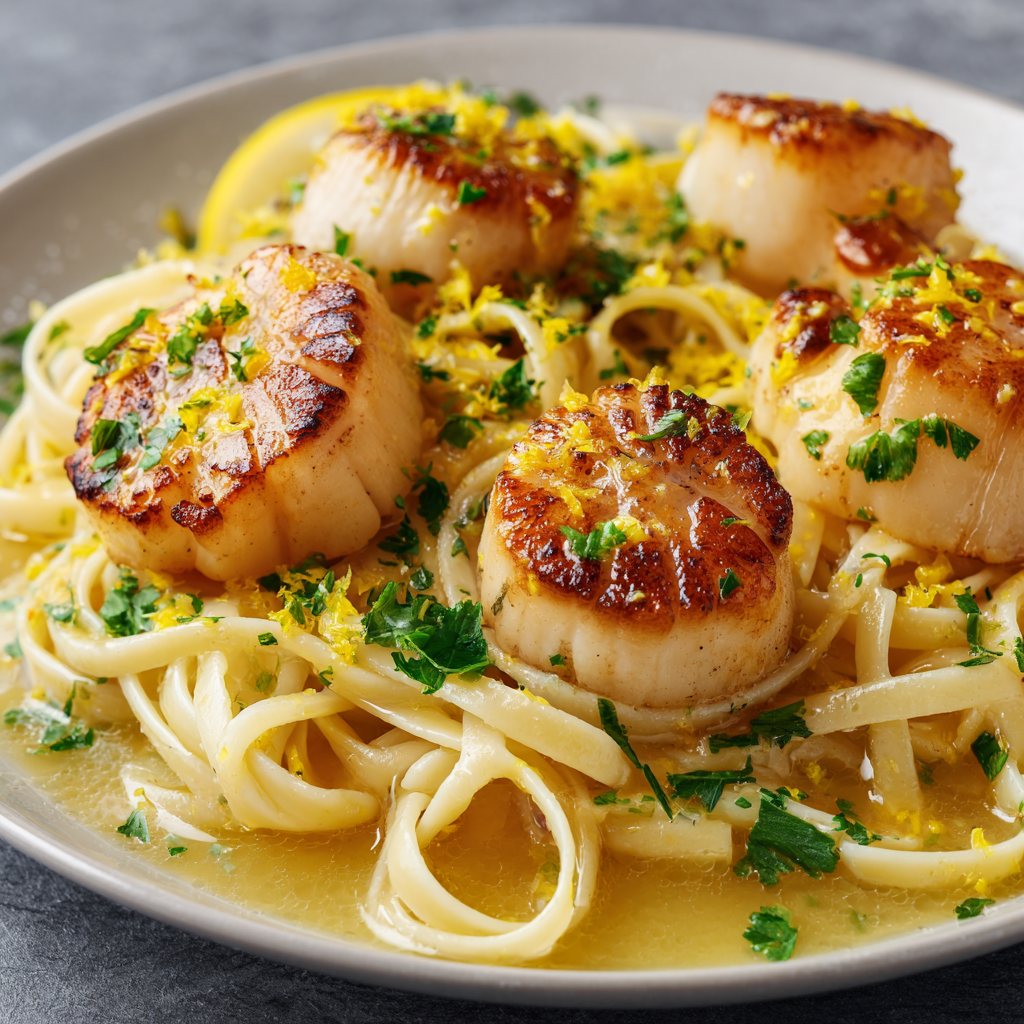
For a Venetian crunch, use very fine breadcrumbs so they cling without egg. If you prefer a pure sear, skip crumbs and go straight to the hot surface. Planning pasta? Toss warm pasta with the pan juices, a knob of butter, and parsley for an instant primo.
| Ingredient | Why it matters | Smart swap |
|---|---|---|
| Dry-packed sea scallops | Browns better; less water release | Ask fishmonger for firm, fresh pieces |
| Oil + butter | Oil raises smoke point; butter adds gloss | Use neutral oil or ghee for higher heat |
| Garlic, parsley, lemon | Bright, classic aromatics | Meyer lemon for softer juice |
| Breadcrumbs | Fine crumbs give Venetian crunch | Pulse coarse crumbs in a food mill |
Pan seared scallops italian style recipe: step-by-step you can trust
A confident sear starts with dry, cold seafood and a hot, clean surface. I’ll guide you through precise timing, sensory cues, and the little moves that make for consistent results.
Prep the scallops
Remove the small side muscle from each piece—it can be tough. Pat each scallop very dry with dry paper towels, then season lightly with salt and pepper.
Heat the pan
Use a stainless or cast iron skillet and add olive oil. Heat over medium-high until the oil shimmers and just begins to smoke. That heat gives you a fast, confident color.
Add scallops
Place the scallop flat-side down with space between each. Do not crowd; crowding traps steam and prevents a golden brown crust.
Flip and finish
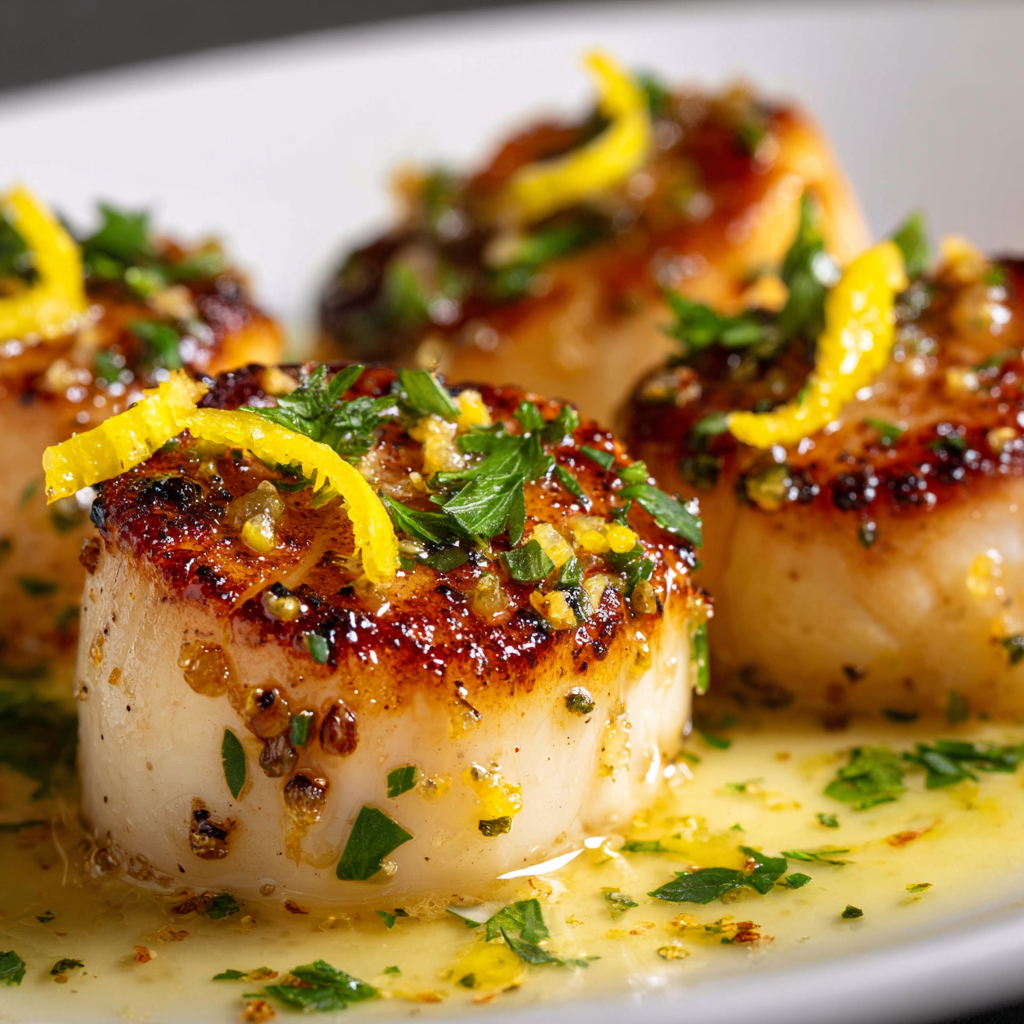
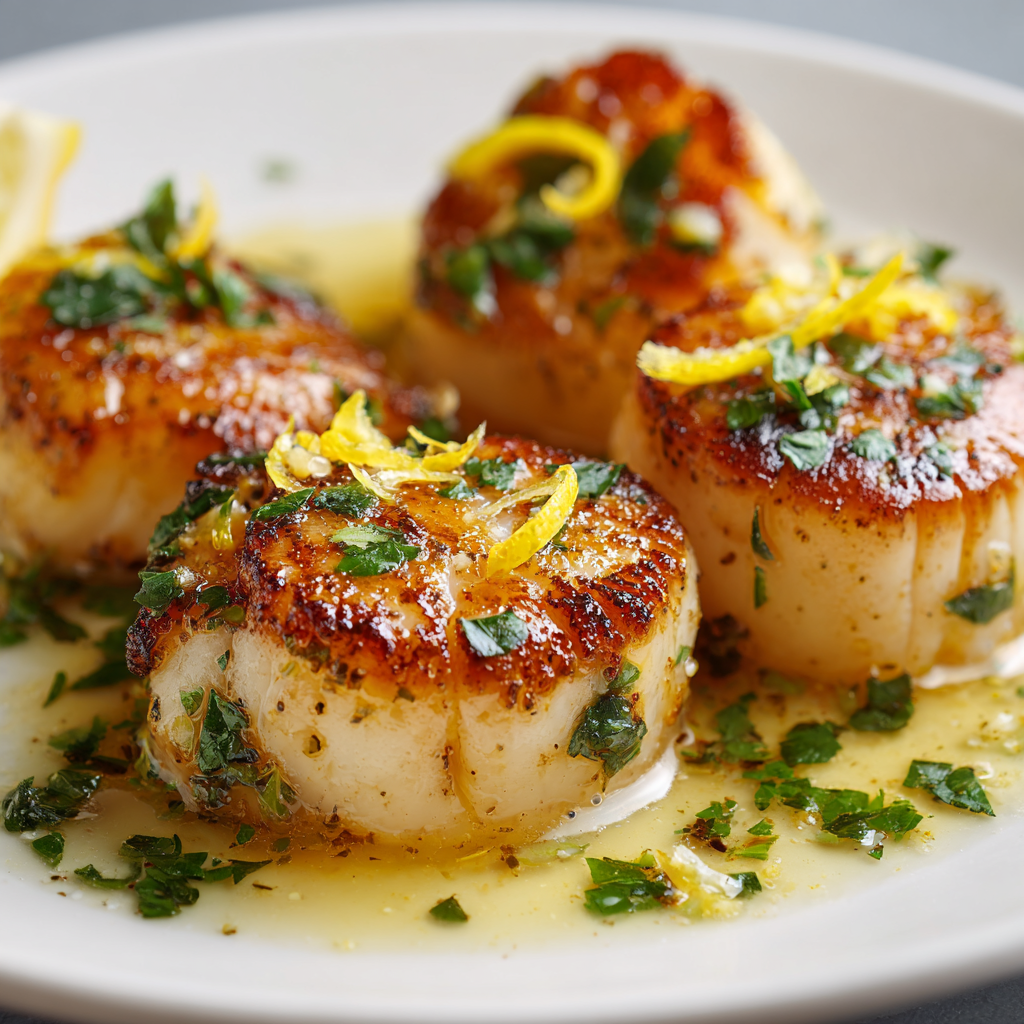
Sear about 1½ minutes, then flip and cook another 30–45 seconds, depending on size. Watch the sides change from translucent to opaque and feel for a springy touch.
Make the pan sauce
Pour off excess oil, deglaze with a splash of dry white wine and reduce to a few tablespoons. Remove from heat and whisk in butter to create a silky sauce. Add lemon and chopped parsley to brighten. If you want garlic, add a small pinch at the end so it perfumes without burning.
Serve immediately
Spoon the warm sauce over the scallops, finish with fine lemon zest, and serve at once. Make sure to work in batches if needed so each piece gets the same hot surface and tender center.
| Step | Timing cue | Sensory cue |
|---|---|---|
| Sear | ~1½ minutes | Thin crust, audible sizzle |
| Finish | 30–45 seconds | Sides turn opaque, springy touch |
| Reduce wine | To a few tablespoons | Liquid glossy, concentrated flavor |
Pro tips for restaurant-quality texture and flavor
A reliable finish comes from managing heat, moisture, and timing—not from fancy tricks. I’ll show why dry product browns cleaner and how small moves protect texture and taste.
Choose dry over wet; excess water stops browning and dilutes flavor. Dry-packed scallops give a true golden brown edge and sweeter meat. If you see pooling liquid, you likely overcrowded or used wet pieces—adjust batch size and surface area.
- Heat control: high heat for the quick sear, gentle heat when garlic is present to avoid bitterness.
- Season simply: add salt pepper just before cooking so the surface stays dry enough to form crust.
- Use a responsive pan: stainless, carbon steel, or cast iron hold steady and build fond; add a thin film of oil and finish with a bit of butter or other fat for gloss.
- Doneness cues: sides turn opaque, the center springs back, and carryover heat finishes the last degree—keep minutes short and confident.
| Focus | Why it matters | Quick fix |
|---|---|---|
| Moisture | Too much water prevents browning | Pat dry, work in batches |
| Heat | Controls color and texture | High for sear, low for aromatics |
| Tools | Material affects fond and evenness | Use stainless, carbon steel, or iron |
Italian-leaning variations and sauces to keep things exciting
I love building simple sauces that lift the sweet meat with bright acid, nutty depth, or herb freshness. Each finish is quick and forgiving, and you can mix them with pasta or serve as a small secondo.
Venetian breadcrumb finish
Lightly dredge in very fine crumbs, sauté in olive oil with a whisper of minced garlic and parsley, and finish with lemon. Keep heat gentle so garlic stays sweet and not bitter. This gives a crisp edge and bright citrus lift.
Lemon-herb butter
Deglaze with white wine, reduce to a few tablespoons, then whisk in cold butter off heat. Fold in shallot, chives, thyme, parsley, and lemon zest and juice for an elegant, glossy sauce.
Brown butter with capers
Brown the butter until nutty, add capers for briny snap, then add lemon to balance. Finish with chopped parsley and a grind of pepper. Very good with tossed pasta or a simple salad—molto buono.
- A tablespoon or two per portion highlights the meat without drowning it.
- Prefer a pure crust? Skip crumbs and use the same sauces for finishing.
- A pinch of Calabrian chili can play nicely with butter and capers.
| Variation | Key flavor | Best with |
|---|---|---|
| Breadcrumb | Olive, garlic, lemon | Light salad, bread |
| Lemon-herb butter | Wine, herbs, citrus | Buttery pasta |
| Brown butter & capers | Nutty, briny, bright | Simple pasta, roasted veg |
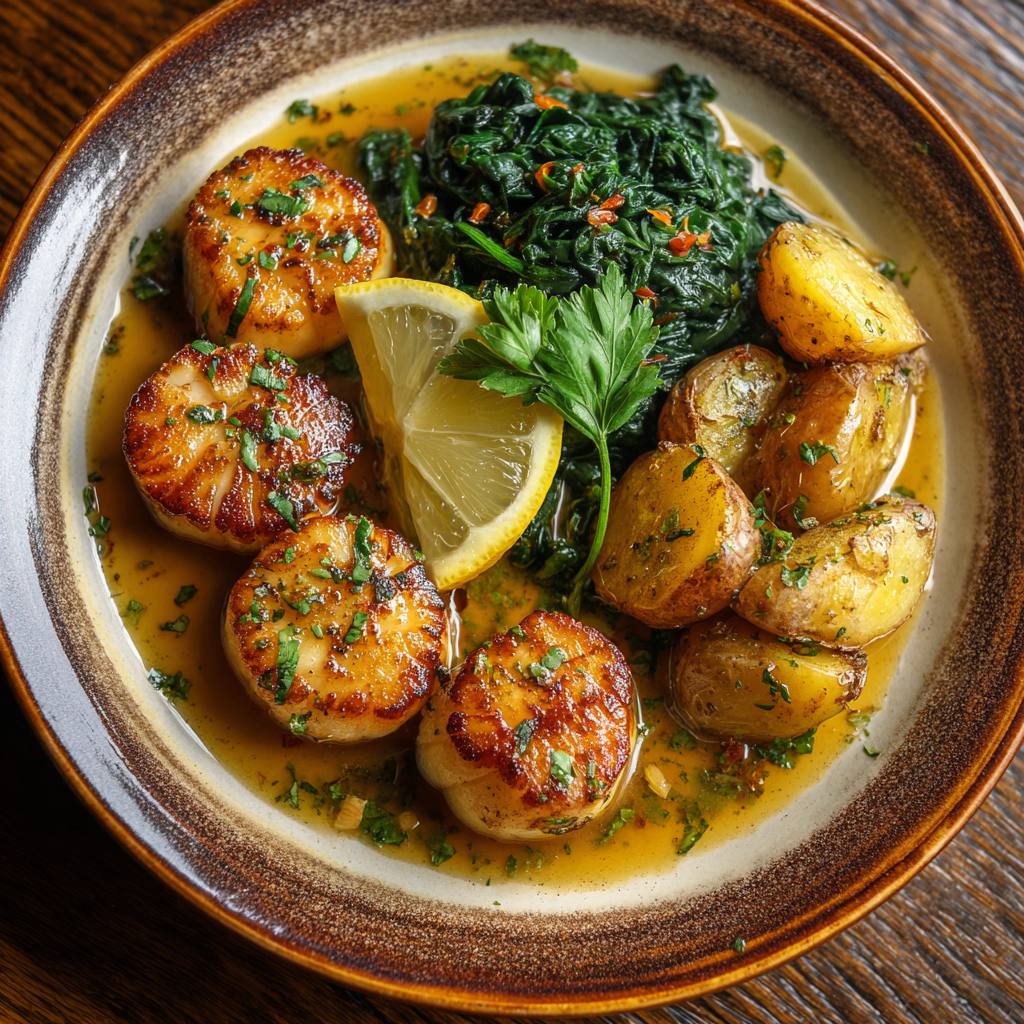
What to serve on the side and wines that flatter seafood
Simple sides and the right bottle of wine finish a dish with finesse and heart. I pick accompaniments that echo lemon, butter, and herbs so the main ingredient keeps center stage.
Smart side choices
- Garlicky broccolini — a bright, slightly bitter green that cuts through richness.
- Roasted potatoes — crispy edges and soft centers soak up the sauce nicely.
- Sautéed spinach — quick, silky, finished with a squeeze of lemon and a crack of pepper.
- Pasta — toss linguine or spaghetti with the sauce for a simple, comforting plate.
Wine pairings that make sense
I reach for Pinot Grigio or Ribolla with citrus-herb finishes; both flatter seafood without stealing the show. A crisp Sauvignon Blanc adds acidity and lift for butter-forward profiles.
| Side | Why it works | Best wine |
|---|---|---|
| Garlicky broccolini | Bright bitterness balances butter and lemon | Pinot Grigio |
| Roasted potatoes | Starchy, textural contrast absorbs pan juices | Ribolla |
| Sautéed spinach / pasta | Silky greens or tossed pasta make a light base | Sauvignon Blanc |
Serve everything within minutes of finishing the main so temperatures and flavors align. Keep seasoning light — a little salt pepper on the sides lets the sea scallops remain the star.
From stove to table: make it now, savor it hot, and store with care
When it’s time to serve, move fast: these take only a few minutes to shine. Warm plates, hot sauce, and steady heat keep the texture tender and the golden brown edge intact.
Dry the sea scallops on paper towels before cooking to draw off water and help browning. Season with a little salt and pepper and use just enough oil and butter to finish the sauce.
Store cooked seafood covered in the fridge up to three days, but expect a softer texture. To reheat, warm briefly in a hot pan with a dot of butter and a spoon of sauce—keep heat low and the time short. For leftovers, toss pasta with the pan sauce and a splash of cooking water for a quick second meal.
If you want more ideas, try the linked pasta variation: pasta con acciughe e pangrattato.
Pan-Seared Scallops Italian-Style
Ingredients
Method
- Remove the side muscle from each scallop.
- Pat each scallop dry with paper towels and season with salt and pepper.
- Heat a stainless steel or cast iron skillet over medium-high heat.
- Add 2 tablespoons of olive oil and heat until the oil shimmers and just begins to smoke.
- Place the scallops in the pan flat-side down, making sure to leave space between each one.
- Sear for about 1½ minutes until a golden-brown crust forms.
- Flip and cook for another 30–45 seconds, until the sides turn opaque and the texture is springy.
- Pour off any excess oil from the pan and deglaze with a splash of dry white wine.
- Let the wine reduce to a few tablespoons.
- Remove the pan from heat and whisk in 1–2 tablespoons of butter to create a silky sauce.
- Add lemon juice, zest, and chopped parsley to finish.
- Spoon the sauce over the scallops and serve immediately with optional pasta or side dishes.
Notes
- For a crisp, Venetian-style finish, you can dredge the scallops lightly in fine breadcrumbs before searing.
- Make sure the scallops are dry before cooking to ensure the best sear and texture.
- Serve immediately for the best flavor and texture, especially if paired with a light pasta or sautéed greens.