
Jump to Recipe
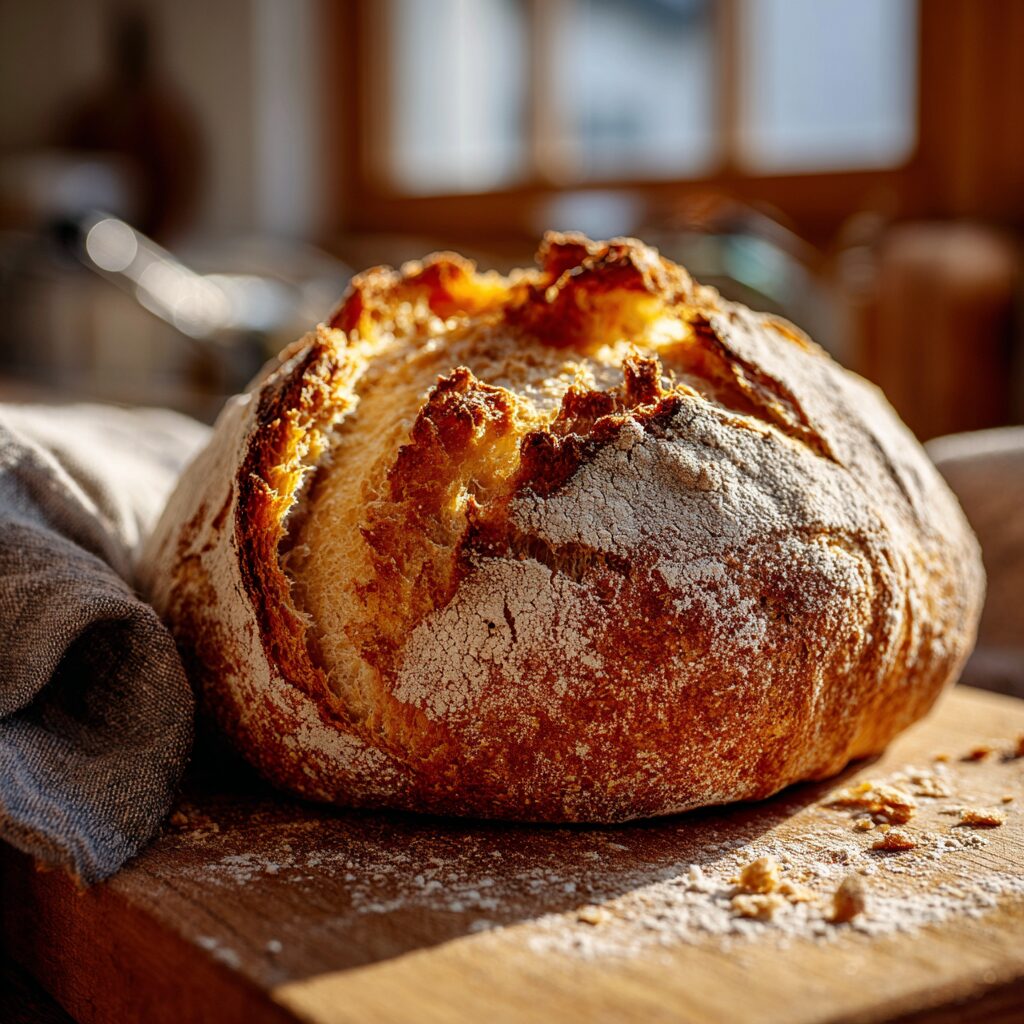
I invite you into my kitchen to bake the rustic loaf I grew up on, a bread with a chewy crust and a holey crumb that tastes like Sunday dinners and warm afternoons.
I’ll show the simple way I use a biga pre‑ferment—rested a few hours, sometimes left in the fridge for dough overnight—to build real flavor and structure. You’ll learn hands‑on cues: how the dough should feel in your bowl and under your hands, and why a towel and patience matter more than fancy gear.
We’ll cover two proven paths: a classic stone and steam bake with high heat, and a forgiving Dutch oven method that gives that same golden crust with less fuss. Along the way I explain times, temperatures, and the small fixes that turn shaky first loaves into confident, repeatable results.
Key Takeaways
- A short biga builds flavor and can rest in the fridge for flexibility.
- Texture cues—feel, stretch, and poke—tell you when the dough is ready.
- High heat with steam or a covered Dutch oven creates a chewy crust and open crumb.
- Simple tools like a bowl, towel, and a good bit of flour are often enough.
- I share precise times and temps so you get reliable results—happy baking.
What makes pane cafone special—and why this homemade recipe works in a U.S. kitchen
In a small kitchen and a standard oven, you can still coax bakery flavor and crusty texture from simple dough. The trick is time and gentle handling more than fancy gear. A slow rise at room temperature builds gluten and aroma so the crumb becomes chewy and studded with holes.
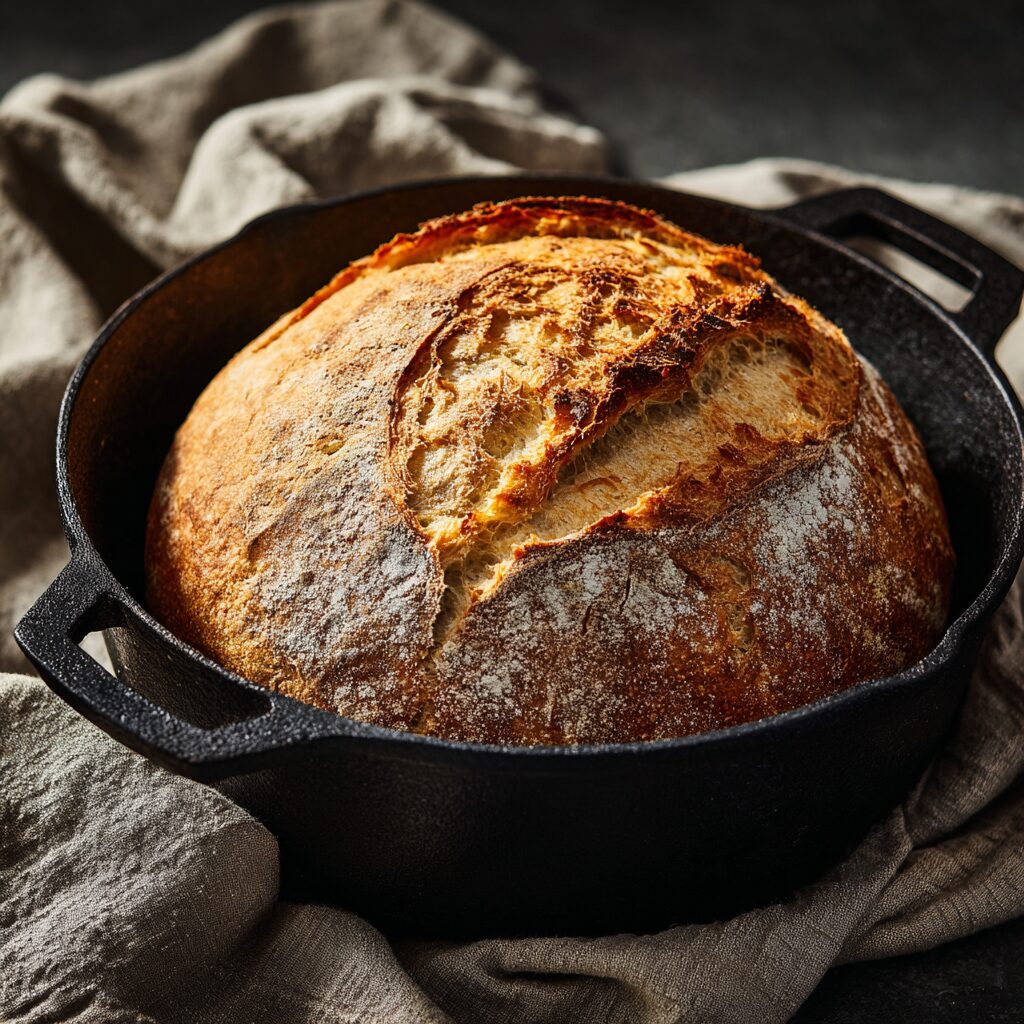
The crusty exterior comes from steam. At home I use a Dutch oven to trap moisture or a hot stone with a water pan. That steam delays crust set, giving the loaf better oven spring and a crackly finish.
- Country-style bread means a wheat-forward taste that pairs with olive oil and sauce.
- Bread flour helps structure and spring, but supermarket flour still performs well.
- Protect the gas bubbles on the surface while shaping to keep the big holes.
This way is purpose-built for home cooks. Follow simple time cues, watch the surface and minutes of proofing, and you’ll bake a loaf with satisfying tug in the crumb and a crust that shatters under the knife.
Ingredients, flour choices, and the simple tools that set you up for success
A handful of smart choices at the start—flour type, hydration, and a solid bowl—shapes everything that follows. This section gives clear information on what each ingredient does and the purpose of a few basic tools so you can bake with confidence.
Core ingredients: bread flour, semolina, water, yeast or starter, and salt
I rely on bread flour for taller loaves and a chewier crumb. When I’m out, all‑purpose still works; expect a slightly softer texture.
A spoonful or two of semolina brings color and a faint sweetness. Water, yeast and salt do the heavy lifting; if you keep a starter you can swap some yeast for it to deepen flavor without extra fuss.
Why bread flour (and when all-purpose is fine)
Bread flour has more protein, which builds structure and supports open holes. Use all‑purpose only when convenience wins; your loaf will be pleasant but less springy.
Helpful gear: stand mixer or spoon, bowl, tea towel, baking stone or Dutch oven, lame
- I mix by hand or with a stand mixer; a spoon works for early folds and to add flour a spoonful at a time during the biga.
- A sturdy bowl and a towel are enough for most home bakers. Keep the work surface lightly floured while shaping to protect the dough first.
- Cast iron traps steam best—Staub, Lodge, or Le Creuset (swap the plastic knob before high heat). A lame makes clean slashes; a sharp serrated knife will do in a pinch.
- When fridge space allows, chill preferments or shaped loaves to match your schedule and build extra flavor.
Pane cafone napoli homemade recipe: step-by-step with times, temps, and texture cues
Start by building the biga the night before so flavor and structure develop while you sleep. Whisk yeast into water until dissolved, then add flour a spoonful at a time. Knead to a smooth ball, rest 2–4 hours at room temperature, then move the biga to the fridge for up to 3 days.
Mixing and handling
By morning, tear the biga into a bowl, add water, and work it until milky and foamy. Gradually stir in flour and semolina until a shaggy mass forms. Cover and autolyse for 20 minutes, then knead about 10 minutes until the dough clears the bowl and feels supple.
Bulk, shaping, and bake cues
Oil the bowl lightly and set the dough seam-side down. Let it rise about 2 hours at room temperature, folding once or twice with wet hands to strengthen without deflating. Turn onto a lightly floured surface, shape into a round or batard, and proof seam-up in a floured cloth or basket until it holds shape.
Preheat the oven to 500°F with a stone and a pan for water. Score, load the loaf, pour hot water into the pan, and spritz the oven walls three times in the first 90 seconds. After 10–12 minutes lower to 450°F and bake until the crust is golden and the internal temperature reads 200°F. Cool 1–2 hours before slicing to let the crumb finish setting.
| Stage | Time | Temperature / Cue |
|---|---|---|
| Biga build | 2–4 hours rest, then fridge up to 3 days | room temp → fridge; smooth, elastic ball |
| Autolyse + knead | 20 minutes autolyse; 10 minutes knead | dough clears bowl; supple & cohesive |
| Bulk rise | ~2 hours | puffed, domed; gentle wet-hand folds |
| Bake | Initial blast 10–12 minutes; then 20–35 minutes | 500°F → 450°F; finish at 200°F internal |
No‑knead path to pane casereccio character using a Dutch oven
Letting a wet dough sleep while you do other things is my favorite way to coax airy holes and deep flavor. Mix flour, water, yeast, and salt, cover, and leave the dough overnight; the long rest and gentle fermentation do the work while you rest.
I use a roomy bowl to develop strength without kneading. By morning the mass will be bubbly and stringy. Scrape it onto a lightly floured surface, fold once, and form a loose round.
Proof the loaf seam-side up on a floured tea towel for 1–2 hours until puffy. Preheat a cast-iron Dutch oven to 450°F about 30 minutes before baking. Handle the hot pot with heavy mitts. Transfer the loaf into the pot, cover, and bake 30 minutes covered, then 15–20 minutes uncovered until the crust is richly colored and crisp.
Higher hydration and a touch of whole‑wheat make larger holes and a more rustic crumb. For schedule shifts, chill the shaped loaf briefly in the fridge and then bake from cold following the same pot routine.
| Step | Rest / Proof | Temp / Cue |
|---|---|---|
| Mix & cover | dough overnight | bubbly, stringy |
| Shape | 1–2 time hours | puffy on towel |
| Bake | 30 + 15–20 minutes | 450°F; check crust |
Old-school flavor with a starter: the sourdough-style approach
A lively starter can turn a simple dough into a loaf with real old‑world depth and a clean, tangy finish.
Two-stage levain builds
I use a two-stage levain when I want more aroma. First I feed a small amount at room temperature to wake the culture. Then I feed a larger build that peaks within hours and smells sweet‑lactic, not sharp.
- Make sure your starter is mature: it doubles predictably and floats in water.
- Mix final dough with bread flour and a portion of levain; rest briefly, then strengthen with gentle folds.
Cold final proof in the fridge
Once shaped I proof in the fridge to lock structure and fit baking into my day. The cold proof slows the rise but keeps activity alive.
Look for a gentle dome and a soft, aerated feel that springs back slowly when pressed. On bake day I score firmly and load into a hot oven so the temperature contrast gives that dramatic oven spring.
| Step | Cue | Timing |
|---|---|---|
| First levain | wake at room temperature; mild sweet scent | 2–4 hours |
| Second levain | peaks, active and airy | 2–6 hours |
| Final proof (fridge) | gently domed; slow spring back | overnight to 24 hours |
Expect a rounder, more complex bread with a tender, structured crumb. Small adjustments buy you calm, predictable results—comments welcome if you want specific timing for your kitchen.
Dial in crust and crumb: hydration, temperature, and timing that make the difference
A few measured tweaks to water and timing make the biggest difference in crust and crumb. I keep fixes simple: check hydration, watch proof cues, and protect the dough while shaping.
Quick fixes and why they work
If you see a tight crumb, your mix was likely low in hydration or handled roughly. Next time add water slowly and handle the dough lightly on the surface to preserve gas and encourage holes.
A pale crust means your oven lacks heat or steam. Preheat longer, bake the first minutes at a higher temperature, or use a Dutch oven or water pan to trap steam for better color and crunch.
If a loaf bursts or feels dense, it may be underproofed. Let it rest longer until a gentle poke springs back slowly. Oil the dough lightly to stop skinning during long proofs.
- Weak oven spring: bake from a well‑proofed or cold‑proofed loaf and score confidently.
- Gummy middle: bake until internal temp reaches about 200°F; then cool fully.
- Sour or slack: refresh your starter and keep bulk rise in a cooler place.
| Issue | Likely cause | Quick fix | Timing / Cue |
|---|---|---|---|
| Tight crumb | Low hydration or rough handling | Add water next mix; handle dough lightly | Increase hydration by small %; test in minutes |
| Pale crust | Insufficient heat or steam | Preheat longer, add steam or use covered pot | First 10–12 minutes hotter; then lower |
| Underproofed / dense | Too short bulk or final rise | Give more time; use poke test | Wait hours until slow spring‑back |
| Gummy center | Not fully baked | Extend bake minutes; check internal temp | Target ~200°F before cooling |
Change one variable at a time—hydration, temperature, or timing—and note results. I welcome your comments if a loaf keeps misbehaving; small, steady adjustments will get your bread where you want it.
Serving, storing, and enjoying: from scarpetta to tomorrow’s toast
When the loaf comes out of the oven, I slow down and let it finish its work before the first cut. I let bread cool on the board so the crumb can finish setting. For a no‑knead loaf that’s about an hour; a larger stone‑baked loaf can take 1–2 hours.
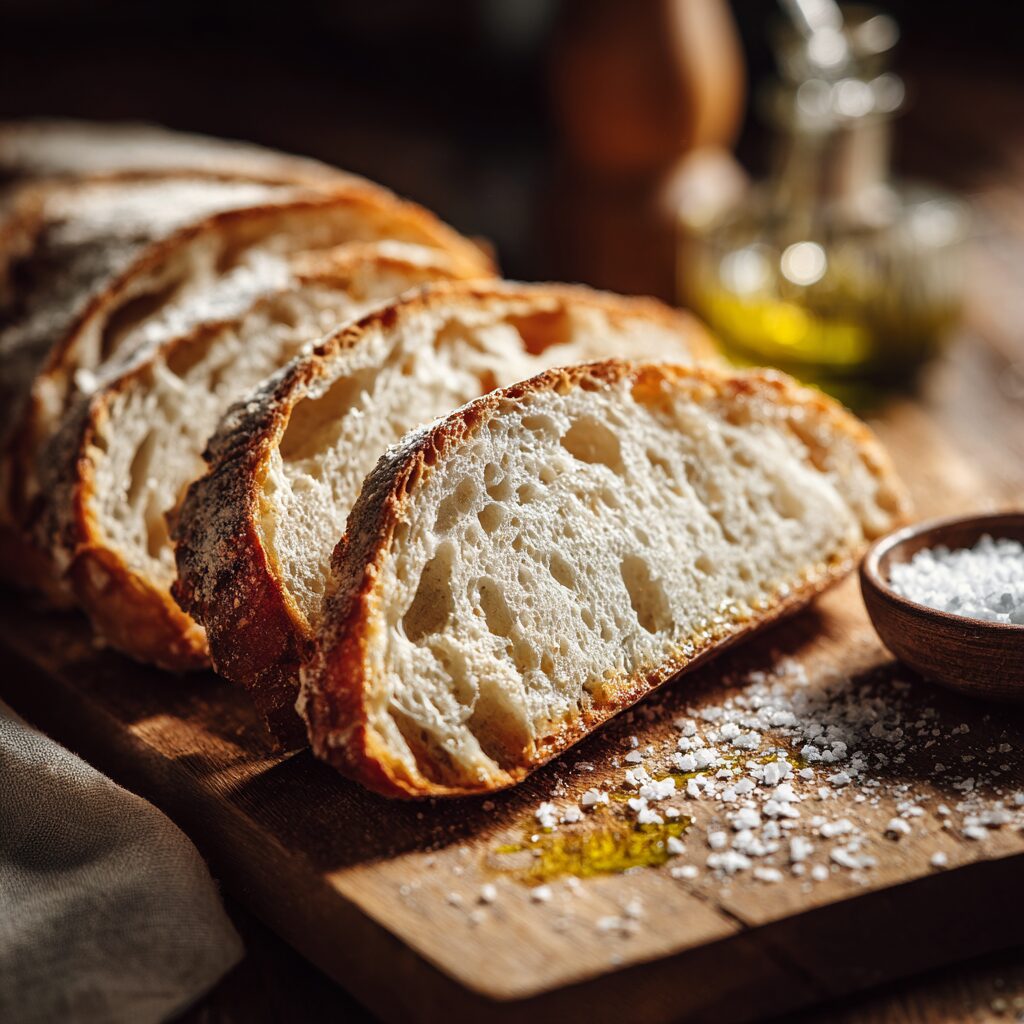
For serving, I slice thick pieces and drizzle good olive oil, adding a pinch of salt. Torn hunks for scarpetta show off the crisp crust and the holes in the crumb that catch every drop. If the loaf has semolina, resist cutting while warm—flavor blooms as it cools and the texture becomes tender‑chewy.
To store overnight, I place the loaf cut‑side down on a board and cover loosely with a towel. This protects the crust without trapping humidity. For longer storage I cool fully, slice, and freeze in a bag. Reheat slices from frozen so the crust re‑crispens and the interior stays moist.
I avoid the fridge unless I must; cold can firm the crumb and mute taste. If the cut face dries, a quick toast on the surface brings aroma back. Save scraps from the bowl for breadcrumbs or toast—they add lovely flavor to gratins and cutlets. I’d love your comments on how you like to serve yours.
| Method | Time | Best cue |
|---|---|---|
| Serve now | 1 hour (no‑knead) | crumb set; crust crisp |
| Overnight | Cover with towel | cut‑side down on board |
| Freeze | Slice & bag | reheat from frozen to crisp |
Conclusion
You now hold a simple plan to turn basic flour, water, and time into a confident, crusty bread at home. Two clear ways work every time: a biga‑based bread recipe with steam on a stone, or the no‑knead Dutch oven method that needs less fuss.
The essentials stay the same—high heat, controlled steam, patient time, and gentle handling of the dough. Make sure the loaf reaches about 200°F and then let bread cool fully before slicing; those two checkpoints change results more than any trick.
Use bread flour when you can, adjust flour and water to your kitchen, and fold in a levain plus a cold final proof if you keep a starter. This is all for the first place—the home oven—so you can bake with purpose and confidence.
I’d love your comments on how they taste at your table. Happy baking, and enjoy every slice.
Pane Cafone (Traditional Neapolitan Country Bread)
Ingredients
Method
- Dissolve yeast in water.
- Add flour gradually and mix until a smooth ball forms.
- Cover and rest 2–4 hours at room temp, then refrigerate overnight (up to 3 days).
- Tear biga into small pieces in a large bowl.
- Add water and mix until milky.
- Add remaining flour, semolina, and yeast (if using). Stir until shaggy.
- Cover and rest 20 minutes (autolyse).
- Add salt, then knead by hand or mixer for 8–10 minutes until smooth and elastic.
- Lightly oil a bowl and place dough seam-side down.
- Cover with a towel and rest 2 hours at room temp.
- During the rise, perform 1–2 gentle folds with wet hands to strengthen the dough.
- Turn dough onto a floured surface.
- Shape gently into a round (or oval batard).
- Place seam-side up in a floured towel or proofing basket.
- Proof until puffy and airy (1–2 hours).
- Stone & Steam Method:
- Preheat oven to 500°F (260°C) with a baking stone and a metal pan for water.
- Score the top, slide the loaf onto the hot stone, and pour 1 cup hot water into the pan.
- Spray oven walls lightly with water 2–3 times in the first 90 seconds.
- After 10–12 minutes, lower heat to 450°F (230°C) and bake another 25–30 minutes until deep golden brown and internal temp hits 200°F (93°C).
- Preheat a Dutch oven to 450°F for 30 minutes.
- Transfer the proofed dough into the hot pot (seam down).
- Cover and bake 30 minutes, then uncover and bake 15–20 minutes more.
- Let the loaf cool 1–2 hours before slicing.
- Serve with olive oil, soups, or use for scarpetta (bread dipping).
Notes
- Use bread flour for the best structure and open crumb.
- Don’t rush the rise—long, slow fermentation gives depth and texture.
- Always let the loaf cool completely before slicing; this sets the crumb.
- For more flavor, replace the yeast with a sourdough starter and refrigerate the final proof overnight.
- Store cut-side down on a board or freeze slices for long-term storage.