
Jump to Recipe
The kitchen fills with memories as I pull these delicate breadsticks. Each movement connects me to my family’s culinary traditions. My grandmother stretched the dough with precision.
She transformed simple ingredients into crispy golden treasures. They graced our Sunday table in Piedmont. Her hands moved with practiced skill.
These hand-pulled breadsticks from Turin represent more than a recipe. They’re a delicate dance of flour and technique. Generations of Italian wisdom passed through whispered kitchen secrets.
Key Takeaways
- Authentic Piedmont breadsticks are surprisingly simple to make at home
- Hand-pulling creates a unique texture impossible with machine-made versions
- These crispy breadsticks elevate any aperitivo or antipasto spread
- Traditional Italian recipes connect us to centuries of culinary heritage
- Homemade grissini offer a fresher, more flavorful alternative to store-bought versions
The History Behind Turin’s Legendary Breadsticks
The story of grissini stretches back to the royal courts of Piedmont. Tradition and culinary innovation intertwined to create an Italian icon. These delicate breadsticks first emerged in Turin as a solution to a young duke’s digestive challenges.

In the early 18th century, Victor Amadeus II of Savoy faced persistent health issues. His court physicians sought bread that would be easily digestible and nutritious. This royal medical quest gave birth to the grissini stirati.
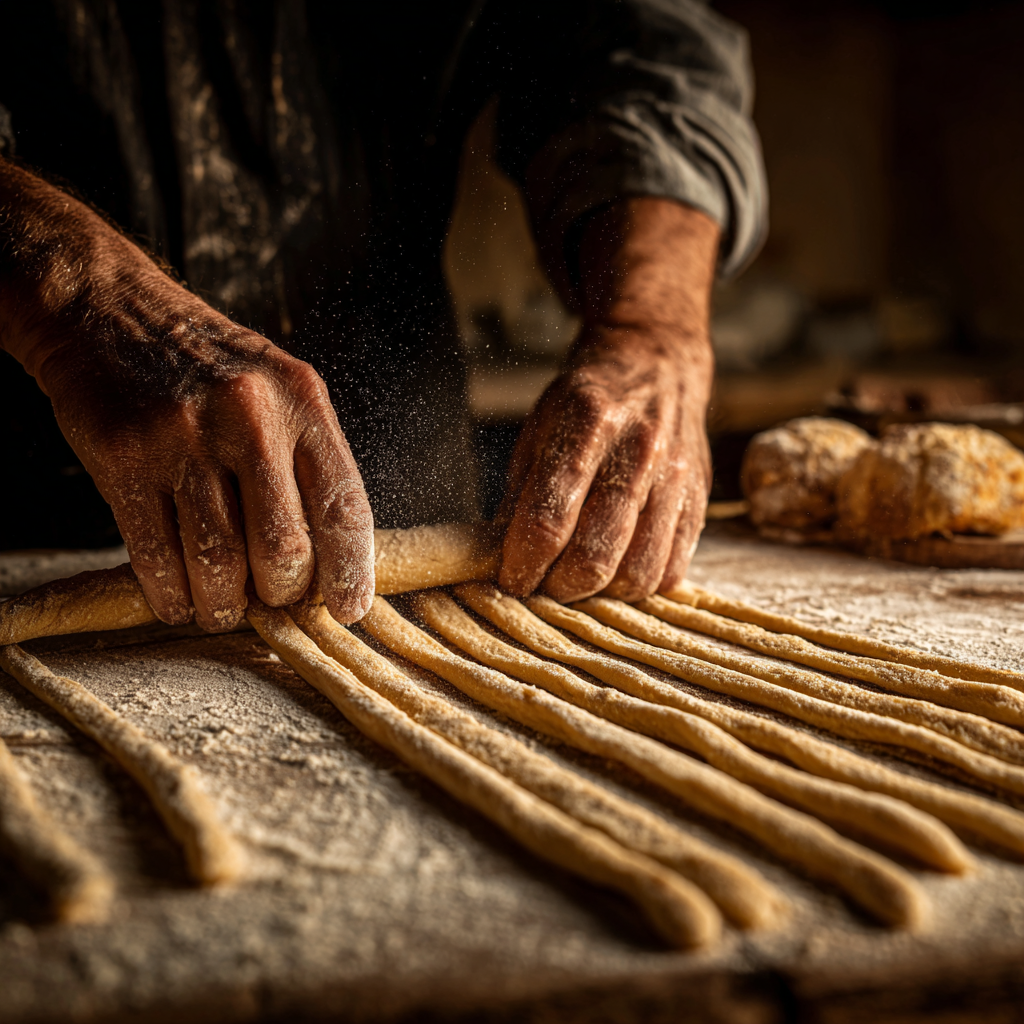
Breadsticks were crafted through a meticulous hand-pulling method. This technique would revolutionize Italian baking forever.
From Royal Necessity to Culinary Art
The hand-pulling method, known as “stirati” in Italian, transformed breadmaking into a personal craft. Italian bakers grasp each piece of dough, gently stretching it with care. This technique creates breadsticks with:
- Characteristically irregular, rustic lengths
- Unique texture that machine-made breadsticks could never replicate
- Visual evidence of the baker’s personal touch
The Soul of Authentic Breadmaking
Grissini stirati shine because of their imperfections born from human hands. Each breadstick tells a story of tradition. They reflect the Italian belief that handmade food carries the maker’s care and cultural heritage.
The slight variations in shape and texture are not flaws. They are marks of authenticity. These differences showcase the artisan’s skill and passion.
Pulling dough by hand does more than create a snack. It preserves a culinary tradition connecting us to generations of Italian bakers. True cooking is an act of love and respect for ingredients.
Grissini Torinesi Breadsticks Recipe
Creating authentic Italian grissini requires precision and passion. I’ll guide you through crafting these delicate breadsticks from Turin’s kitchens. The secret lies in understanding each ingredient and technique.
Ingredients You’ll Need
- 3½ cups bread flour (high protein content)
- 2¼ teaspoons active dry yeast
- 1½ teaspoons sea salt
- ¼ cup extra virgin olive oil
- 1 cup warm water (105-115°F)
- 2 tablespoons honey
- Semolina flour for coating
Activating the yeast is crucial. Combine warm water, honey, and active dry yeast in a small bowl. Watch for a foamy surface within 5-10 minutes.
Kneading and Preparing the Dough
Mix flour and sea salt in a large bowl. Create a well in the center. Pour in the yeast mixture and olive oil.
Knead the dough for 8-10 minutes until smooth and elastic. The dough should feel soft but not wet.
| Dough Stage | Key Characteristics | Duration |
|---|---|---|
| Initial Mixing | Combines ingredients | 5 minutes |
| Kneading | Develops gluten structure | 8-10 minutes |
| First Rest | Allows gluten to relax | 20 minutes |
| Rising | Develops flavor and texture | 1 hour |
Rest the dough for 20 minutes. Press into a 12×8 inch rectangle. Brush with olive oil, cover, and let rise for 1 hour.
Shaping and Baking
Cut the dough into 20 strips. Each should be ½ inch thick and 8 inches long. Stretch each strip to 12-16 inches for thin grissini.
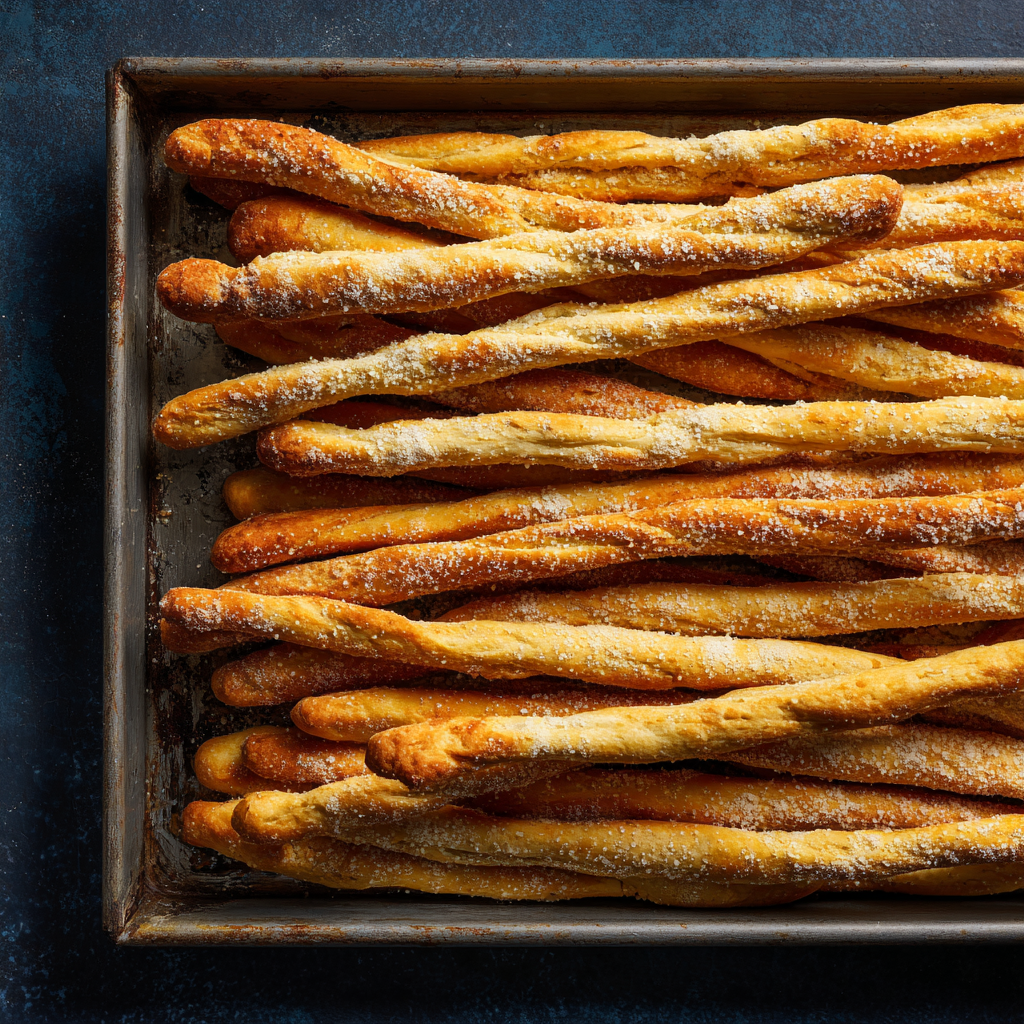
Roll each in semolina flour for extra crispness.
- Bake at 400°F for 20-25 minutes
- Aim for golden brown color
- Keep strips uniform for even baking
Flavor Variations
Experiment with your grissini by adding Parmesan or garlic. Try red pepper flakes or dried herbs like rosemary and thyme.
For a whole wheat version, blend 1½ cups whole wheat flour with ½ cup bread flour. Add 3 tablespoons extra oil.
Serving and Storing Your Homemade Italian Breadsticks
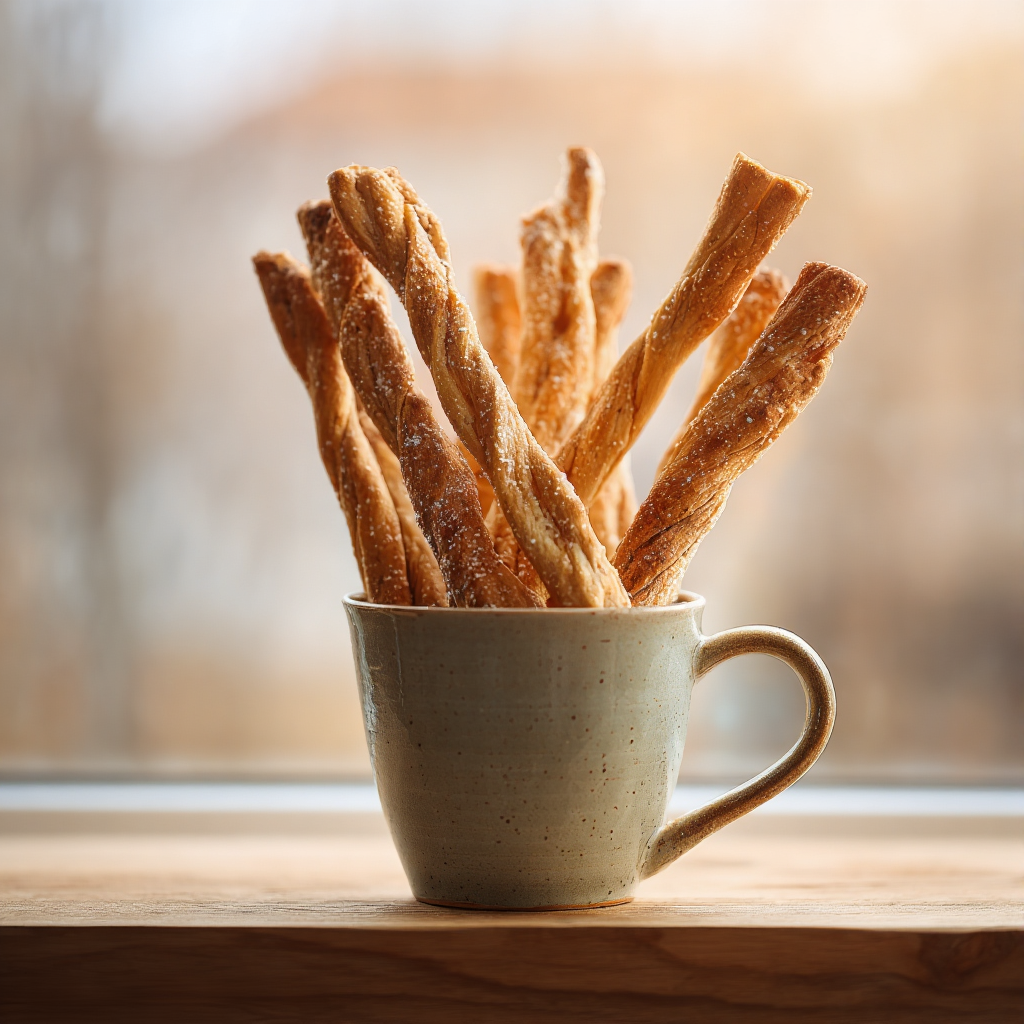
Our grissini torinesi transform any meal into a celebration of Italian culinary tradition. Picture these crispy breadsticks elegantly wrapped in prosciutto during an aperitivo. They stand tall in a rustic ceramic container surrounded by olives and aged cheese.
These breadsticks work perfectly for casual weeknight dinners or sophisticated wedding feasts alike. My family loves serving these versatile Italian appetizer sticks in multiple ways.
Try them alongside your favorite pasta dish or in a warm bread basket during Sunday family lunch. They make a crisp accompaniment to rich charcuterie boards. For those with a sweet tooth, dipping these breadsticks into Nutella creates an unexpected delight.
Storing your homemade grissini is simple. Keep them in an airtight container at room temperature for up to one week. They maintain their signature crunch and become a go-to snack.
Making these authentic breadsticks in your own kitchen brings a piece of Italy home. The warmth and hospitality embedded in this recipe transcend mere ingredients. They represent a culinary journey that invites family and friends to gather and share.
Grissini Torinesi (Hand-Pulled Italian Breadsticks)
Ingredients
Method
- In a small bowl, mix warm water, honey, and active dry yeast.
- Let it sit for 5–10 minutes until the surface becomes foamy.
- In a large bowl, combine the bread flour and sea salt.
- Create a well in the center and pour in the yeast mixture and olive oil.
- Mix until a shaggy dough forms.
- Transfer the dough to a lightly floured surface.
- Knead for 8–10 minutes until smooth, soft, and elastic.
- Cover the dough and let it rest for 20 minutes so the gluten can relax.
- Press the dough into a 12×8-inch rectangle.
- Brush the top lightly with olive oil.
- Cover and let rise for 1 hour until slightly puffy.
- Cut the dough into 20 strips, each about ½ inch thick and 8 inches long.
- Gently stretch each strip to 12–16 inches.
- Roll each strip in semolina flour for extra crunch.
- Preheat your oven to 400°F (200°C).
- Place the strips on a baking sheet with space between them.
- Bake for 20–25 minutes until crisp and golden brown.
- Let the breadsticks cool completely. They become even crispier as they rest.
Notes
- These breadsticks get their charm from their imperfections. Don’t worry if some are longer or thinner than others — that’s how real grissini look.
- For extra crunch, bake them a few minutes longer, but keep an eye on the color so they don’t burn.
- They pair beautifully with prosciutto, aged cheeses, olives, dips, and even Nutella for a fun sweet treat.
- Store in an airtight container at room temperature for up to a week.