
Jump to Recipe
I still remember the sizzle of extra virgin olive oil the first time I learned our family method for sauteed broccoli with garlic italian — it smelled like Sunday in my nonna’s kitchen and made the whole house sit up and notice.
We balance two beloved textures: an olive-green, silky version that steams low and slow for 15–20 minutes, and a bright, tender-crisp style that sears in a hot 12-inch skillet, then finishes under a lid for about five minutes.
I’ll show why peeling the stems matters, how much garlic gives the right punch without burning, and when to add a splash of water so you end up with vibrant color and deep flavor every time.
Key Takeaways
- Two classic textures: velvety olive-green and bright tender-crisp.
- Peel stems and salt generously for best taste and texture.
- Use extra virgin olive oil and control heat to avoid burned garlic.
- Short steam under a lid or quick sear in a 12-inch skillet for contrast.
- Finish options: lemon for brightness or Parmesan for richness.
- Practical minutes and visual cues make this an easy go-to dish.
A simple, authentic side that tastes like family
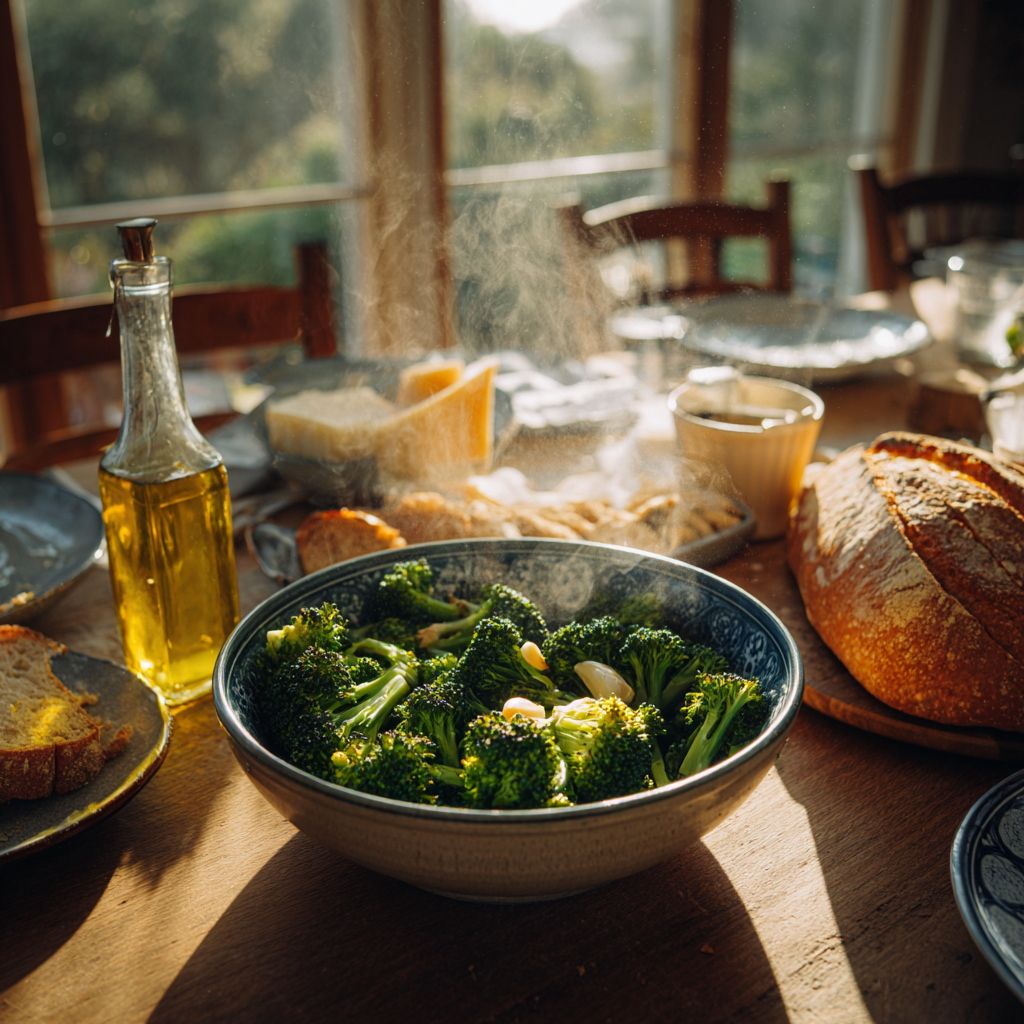
A humble pan and a little olive oil turn fresh stalks into a dish that feels like a warm visit. I cook this the way my Nonna taught me: honest ingredients and steady hands. The aroma gathers people, and the plate disappears fast.
Family-style italian broccoli leans on generous garlic and good olive. Some home cooks let the florets become soft and silky. Others prefer a quick sear to keep the color bright and the bite lively.
Either path honors the vegetables. We respect timing so every piece absorbs flavor. I’ll show when to stir, cover the pan, and remove from heat so you get the taste you expect.
- This side is simple to scale for weeknights or guests.
- The recipe teaches small cues: smell, color, and touch.
- Cook it your way and serve it proudly—Nonna would approve.
| Style | Texture | Time |
|---|---|---|
| Olive-green | Velvety | 15–20 min |
| Crisp-seared | Bright, firm | 5–7 min |
Ingredients that make the flavor shine
Good ingredients make this simple side sing; start at the market. Choose a fresh, large head that feels heavy for its size and shows tight, dark green florets. A 1–1.5 lb head yields about six cups of florets and tender stems.
Broccoli: choosing a fresh large head and using the stems
Look for weight and crisp stems — the heft means juicy, recent harvest. Don’t toss the stalk; peel the tough outer layer so the sweet core cooks through. Even the leaves add color and nutrients when sliced into similar-size pieces.
Extra virgin olive oil, garlic, and a pinch of chili
We use 1/4 cup extra virgin olive oil for richness and 3–4 cloves of garlic for aroma. Slice for a mellow note or mince for bolder flavor. Add 1/4–1/2 teaspoon crushed red pepper or a slit peperoncino for gentle heat.
Salt, water, and optional finishers like lemon and Parmesan
Salt matters: I prefer Diamond Crystal kosher salt for consistent seasoning. Add a 1/4 cup of water later to build a light pan sauce in a few minutes. Finishers are optional—lemon brightens, and freshly grated Parmesan or another cheese brings savory depth.
- Pieces should be similar in size: florets about the width of your index finger.
- A couple tablespoons more oil at the end makes a silkier finish if you like.
- Measure simple items in tablespoons and minutes so the result is repeatable.
| Ingredient | Amount | Purpose |
|---|---|---|
| Large head (fresh broccoli) | 1–1.5 lb | Yields ~6 cups florets & stems |
| Extra virgin olive oil / virgin olive oil | 1/4 cup (+ tbsp optional) | Richness and pan sauce |
| Cloves | 3–4 | Aroma: sliced or minced |
| Crushed red pepper / pepper | 1/4–1/2 tsp | Warmth without overpowering |
Prep that sets you up for success
Lay out a clean board and a sharp knife—good prep turns a large head into a simple, reliable meal. I like to work in stages: trim, peel, then cut. That order keeps the pieces tidy and cooks fast and even.
Trim, peel, and cut: spears vs. bite-size florets
Start by removing the dry base and any bruised leaves from the head. Split the crown if you plan spears; each spear holds florets and a stem that soaks up broccoli garlic oil and chili.
For pasta or quick tosses, cut bite-size florets about the width of your index finger. Slice tender inner stems thin so they finish with the florets.
Why peeling thicker stems changes the texture
Peeling removes the fibrous outer layer so stems cook tender instead of stringy. I peel thicker stalks with a vegetable peeler, then slice them into coins that match floret size.
- Keep pieces similar in size for even searing and steady timing.
- One large head yields roughly 6 cups of florets and stems—plan prep time accordingly.
- Save leaves; they sauté quickly and add color and gentle flavor to recipes.
| Cut Style | Best For | Cook Time Cue |
|---|---|---|
| Spears | Platter presentation, absorbs oil | Even browning on stems, tender florets |
| Bite-size florets | Pasta, bruschetta, quick tosses | Index-finger width; cooks fast |
| Stem coins | Even texture, quick pan finish | Thin slices match florets’ doneness |
Two delicious paths: tender olive-green or crisp-tender bright green
You can coax a mellow, olive-hued velvet from a head broccoli, or chase a bright green, toothsome bite. Each way uses simple moves—changes in time, heat, and a splash of water—to create very different results.
Italian-style “overcooked” for velvety, garlicky broccoli
Cook the florets past fork-tender, about 15 minutes, by steaming or gentle boiling. Drain, then finish in olive oil that was warmed with garlic and chili. The texture becomes silky and richly flavored.
Pros: comforting, forgiving to reheat, pairs well with roasts and braises. Cue: pieces should glide under a fork without snapping.
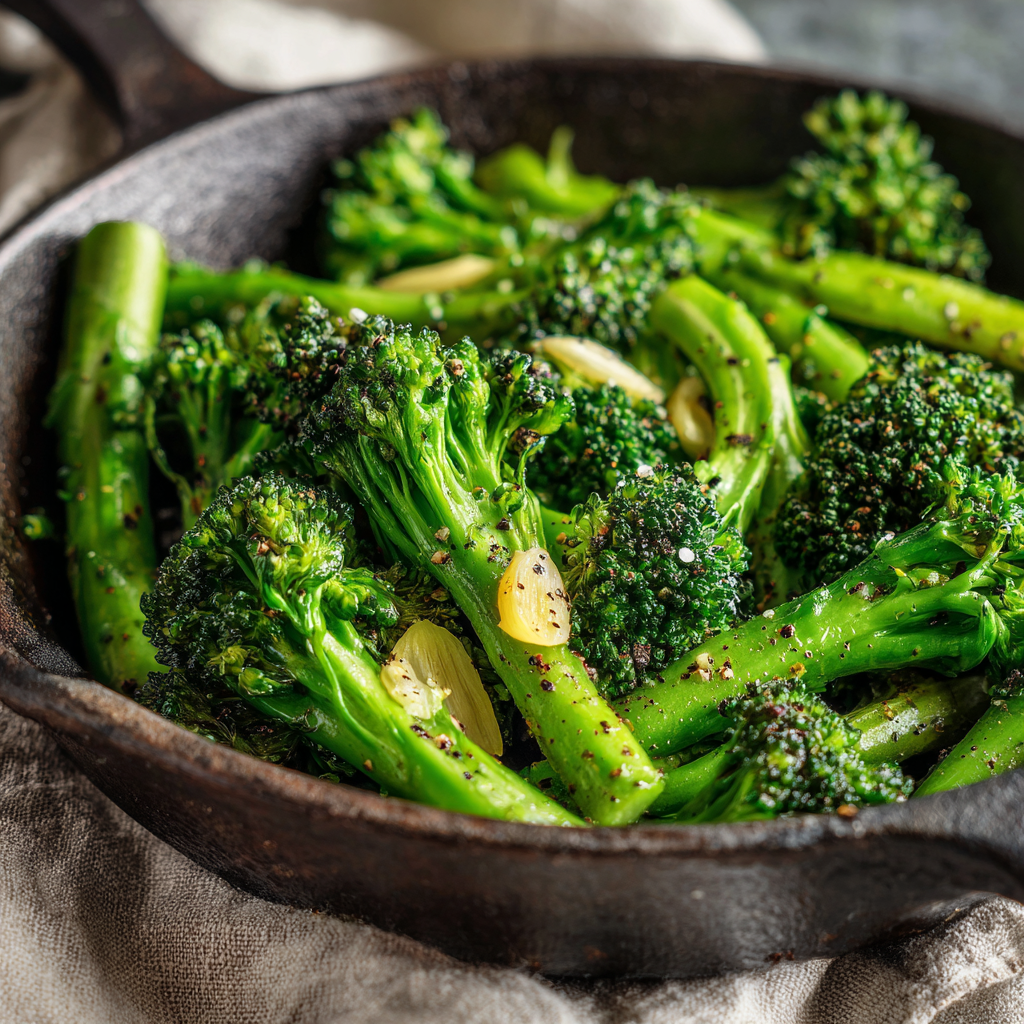
Crisp-seared, steam-finished for vibrant color and bite
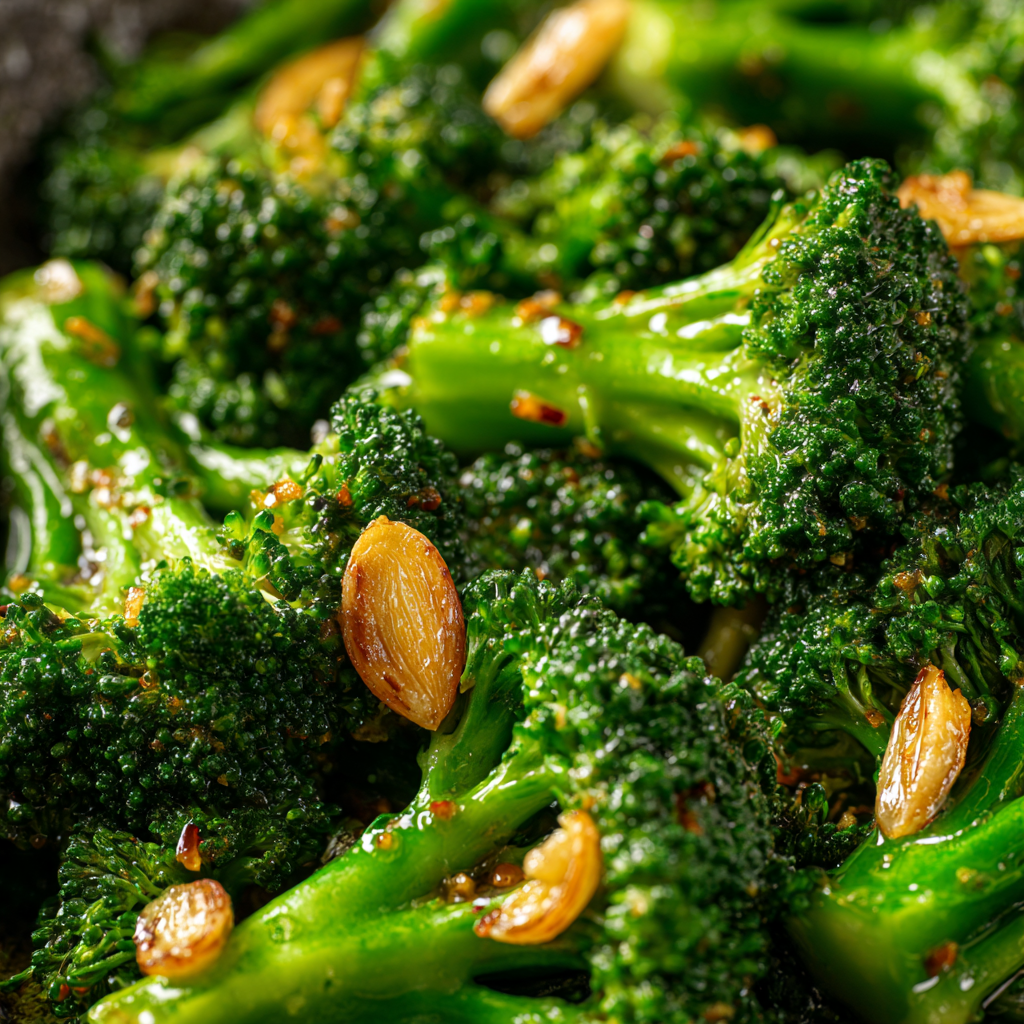
Heat a skillet until steady and sear florets 5–8 minutes so edges brown. Add a splash of water, cover for about 5 minutes, then uncover to evaporate excess. The result keeps a bright green hue and a gentle snap.
Pros: lively presentation, great with fish or pasta. Cue: browned tips and a fresh snap when bitten.
How to choose the method for your table
- Pick the velvety way for cozy mains; choose the crisp-tender path for lighter dishes.
- Salt thoughtfully in either method so the vegetable’s sweetness sings.
- If you must prep ahead, the silky approach holds up better; the bright style is best served the same day.
| Method | Time (minutes) | Best For |
|---|---|---|
| Velvety olive-green | ~15 | Roasts, braises, make-ahead |
| Crisp-seared bright green | 5–8 + 5 finish | Fish, pasta, quick weeknight side |
Sauteed broccoli with garlic Italian: step-by-step
Bring a 12-inch pan to medium-high so a water drop will dance and tell you the heat is right. Add a tablespoon or two of oil so the pieces sear instead of steam. For the bright method arrange in a single layer and don’t crowd the pan.
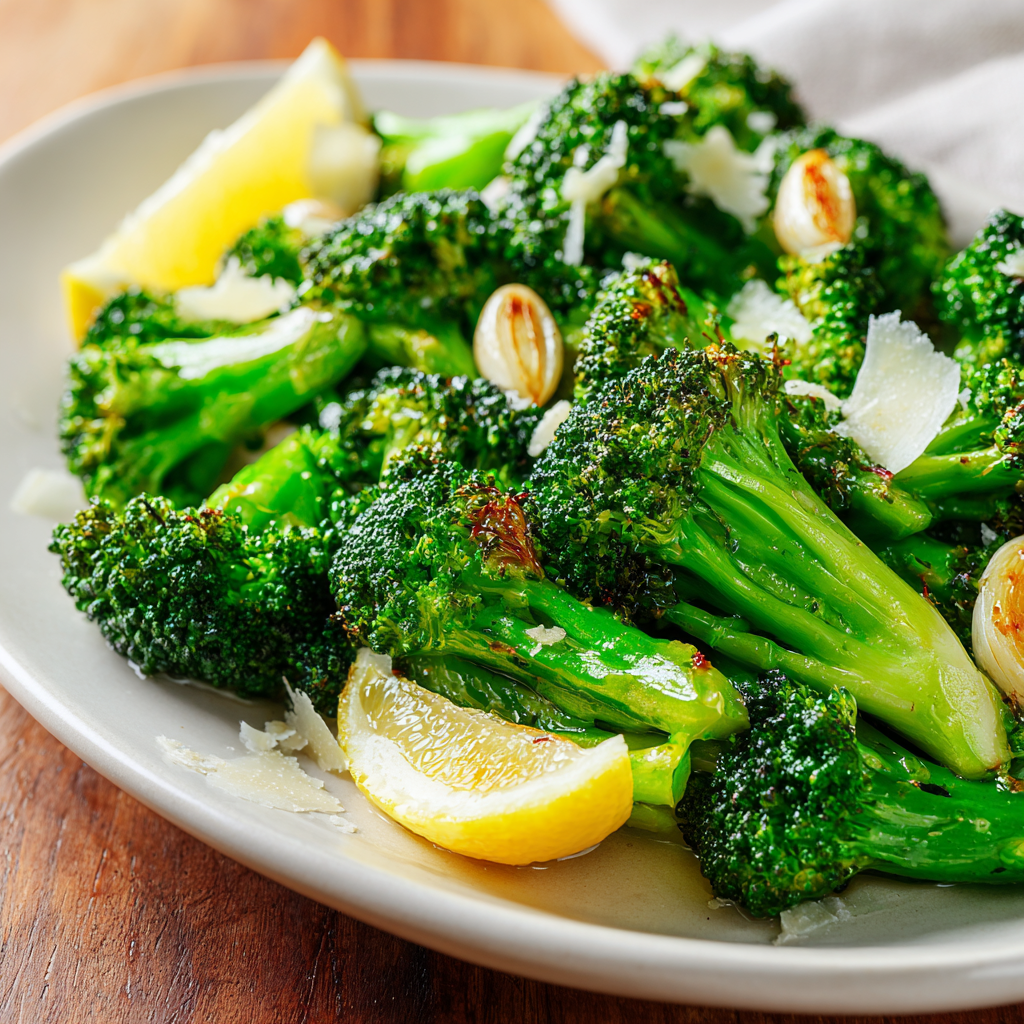
- Bright, crisp-tender: Heat the pan until a droplet sizzles, add oil, then add broccoli and salt. Let the florets brown undisturbed for 5–8 minutes. When the edges caramelize, add 1/4 cup water, 3–4 cloves sliced or minced garlic, and a pinch of pepper. Cover about 5 minutes until bright and tender. Finish with lemon and Parmesan.
- Velvety, olive-green: Warm oil over medium-low and bloom crushed red pepper and garlic briefly. Add broccoli, salt, and 1/2 cup water. Cover and cook 15–20 minutes until soft and silky. Uncover and let any light sauce reduce. Drizzle extra virgin olive oil if you like a richer sheen.
- Practical tips: Use 3–4 cloves total and adjust pepper to taste. Season in layers so salt penetrates stems. If serving with pasta, reserve some of the pan sauce and toss with starchy cooking water for a silkier finish.
Watch the minutes and trust your senses: listen for the sizzle, watch color change, and taste for salt. Prep time is short and these recipes reward simple care.
| Method | Key cue | Minutes |
|---|---|---|
| Crisp-tender | Caramelized edges, bright green | 5–8 sear + ~5 steam |
| Velvety | Olive-green, fork-tender | 15–20 covered |
| Finish options | Lemon, Parmesan, extra virgin olive oil | 1–2 to taste |
Timing, heat, and visual cues you can trust
Listen for the sizzle and watch the color—those cues tell you when the pan and produce are ready. I let a water drop dance; when it sizzles and the oil shimmers, the pan is hot enough to sear.
For a bright-green, crisp-tender finish, sear undisturbed for 5–8 minutes so one side browns. Add a splash of water, a few cloves of garlic, and cover for about 5 minutes. The steam wakes the interior while the edges stay caramelized.
For the silky, olive-hued style, lower the heat and cook covered for 15–20 minutes. The vegetable will soften and take on an olive-green tone; press a floret with a spoon—if it yields, it’s ready.
- If garlic browns too quickly, move pieces to a cooler spot or reduce the heat so flavor stays sweet, not bitter.
- Salt early but taste at the end; moisture reduces and seasoning concentrates.
- Use just enough olive oil to coat. Fresh broccoli browns predictably; frozen needs less color and less time.
| Cue | What to do | Time |
|---|---|---|
| Pan shimmer | Start sear | Immediate |
| Browned edges | Add water & cover | 5–8 minutes then 5 cover |
| Olive-green | Serve silky | 15–20 minutes covered |
Build more flavor without complicating the recipe
A few small tweaks lift this pan of greens from good to memorable in minutes. I favor moves that clarify taste rather than mask it, so the vegetable stays the hero.
Garlic strategies: sliced mild vs. minced bold
Sliced garlic softens as it warms and gives a sweet, gentle aroma. Minced garlic is assertive and clings to florets for a punchier profile.
If you want subtlety, warm oil with sliced cloves, then remove them before adding the produce. For a bolder finish, add minced cloves near the end so they brown and stick.
Chili heat, lemon brightness, and Parmesan savoriness
Bloom crushed pepper in oil to release its aroma. A slit fresh peperoncino gives quick, lively heat; flakes offer steady, even warmth.
A squeeze of lemon brightens the whole pan without covering the base flavor. Freshly grated Parmesan brings savory depth and melts on contact.
- Decide how loud you want the garlic to speak: sliced or minced.
- Infuse oil for gentle flavor, or keep solids in for texture.
- Taste before finishing; add lemon for lift or a drizzle of virgin olive oil for roundness.
| Tweak | How to do it | Effect on taste |
|---|---|---|
| Sliced garlic | Warm in oil, remove solids if desired | Mild, sweet, even flavor |
| Minced garlic | Add near end so it browns | Bold, clinging flavor |
| Chili (fresh or flakes) | Slit fresh chili or pinch flakes | Fresh chili = immediate heat; flakes = steady warmth |
| Lemon & Parmesan | Squeeze lemon; grate cheese fresh | Brightness from lemon, savory depth from cheese |
Serve it well: side dish, pasta toss, or bruschetta
Bring this dish to the table next to roasted chicken or grilled fish for an easy, classic pairing. I often set a platter warm and let people help themselves. The bright green finish looks lively beside richer mains.
Pairing ideas for weeknights and company
As a side dish it pairs well with roasted chicken, grilled steak, or seared salmon. Try it alongside simple antipasti like marinated chickpeas and roasted cauliflower to build a generous spread for guests.
Turning leftovers into a quick sauce
To make a fast sauce, warm leftovers in a skillet, add a splash of pasta water and olive oil, then purée briefly or mash for texture. Toss with hot pasta and finish with grated cheese for a 10-minute meal.
Finishing with a drizzle of extra virgin olive oil
Right before serving, finish each plate with a drizzle of very good olive oil and a squeeze of lemon. A light scatter of toasted breadcrumbs or almonds adds crunch without fuss.
- Save this post so weeknight plans are easier.
- Leftovers keep 3–5 days refrigerated; reheat gently to preserve color and texture.
- To add broccoli to grain bowls, combine with farro, beans, and herbs for a hearty lunch.
| Serving Idea | How to Serve | Best For |
|---|---|---|
| Classic side dish | Warm platter, lemon, olive oil drizzle | Roasts, grilled meats |
| Pasta toss | Toss with pasta water, olive oil, and cheese | Quick weeknight dinner |
| Bruschetta topping | Mash florets, pile on toasted bread, zest lemon | Appetizers, casual company |
| Sauce for polenta | Blend with oil and a splash of stock | Comforting vegetarian plates |
Make-ahead, storage, and reheating the right way
Treat leftovers kindly and they will reward you. I store cooked broccoli in shallow containers so moisture does not pool and dull the flavor. In the fridge, plan for 3–5 days; that is your safe window to enjoy the dish at its best.
Refrigeration, freezing, and what to expect with texture
You can freeze portions for up to one month. Expect a softer bite after thawing. That texture suits the velvety style more than the crisp-tender finish.
- Cooked vegetables keep 3–5 days refrigerated; shallow containers help preserve texture.
- Frozen portions last up to 1 month; color and snap will be reduced.
How to reheat to revive flavor and keep color
Reheat in a warm pan with a teaspoon of oil. Add a splash of water and cover briefly; steam will revive tenderness in a couple of minutes. If color matters, heat just until hot so it stays lively and avoids olive tones.
Taste and adjust salt at the end. A squeeze of lemon or a drizzle of good oil freshens the aroma. For pasta or sauces, add a quarter cup of reserved pasta water to loosen the sauce and help it cling.
| Storage | Time | Best use |
|---|---|---|
| Refrigerate | 3–5 days | Quick reheats, pasta tosses |
| Freeze | Up to 1 month | Velvety recipes, soups, casseroles |
| Reheat | 2–3 minutes | Pan-steam to revive color |
Bring this Italian broccoli recipe to your table tonight
Make this dish tonight and you’ll find how little time and honest ingredients create a memorable plate. Traditional and modern techniques both work; the choice is yours and the result is always welcoming.
Lay out your ingredients, warm a pan, and let oil gently bloom the garlic so the kitchen fills with scent. Add a splash of water when the pan needs it and watch a simple sauce form that ties the flavors together.
Finish what you love — lemon, a whisper of cheese, or a ribbon of extra virgin olive for warmth. Keep this broccoli recipe in rotation; it makes a reliable side and pairs with many mains.
Share it, pass the method on, and from my family to yours, buon appetito.
Sautéed Broccoli with Garlic (Italian Style)
Ingredients
Method
- Trim the broccoli: remove the dry base and tough leaves.
- Peel thick stems with a vegetable peeler to remove fibrous skin.
- Cut florets into bite-size pieces about the width of your index finger.
- Slice tender peeled stems into coins so they cook evenly.
- Heat a 12-inch skillet on medium-high until a drop of water sizzles.
- Add olive oil, then the broccoli and salt.
- Let it sear undisturbed for 5–8 minutes until edges brown.
- Add 1/4 cup water, garlic, and chili.
- Cover for 5 minutes to steam.
- Uncover, let excess water evaporate, then finish with lemon juice and Parmesan if desired.
- Warm olive oil in a skillet over medium-low heat.
- Add garlic and chili; let them sizzle gently until fragrant but not browned.
- Add broccoli, salt, and 1/2 cup water.
- Cover and cook 15–20 minutes until soft and silky.
- Uncover to reduce any liquid.
- Finish with a drizzle of olive oil or grated cheese before serving.
- Taste and adjust salt before serving.
- If garlic browns too fast, lower the heat.
- Lemon adds freshness; Parmesan adds depth.
- Serve warm as a side or toss with pasta for a quick meal.
Notes
- Use fresh broccoli for the best flavor and texture.
- The velvety version reheats and freezes better.
- The crisp-tender version should be eaten fresh for the brightest color.
- Leftovers can be mashed for bruschetta or tossed with pasta for a quick sauce.
- Always finish with good olive oil for that signature Italian aroma.