
Jump to Recipe
I bake with a simple aim: warm, honest loaves that smell like sunshine and the sea air of a Sicilian afternoon. My hands know the dough by feel — tacky, springy, and alive — and I look for that first steady rise before shaping coils that bake into a golden, crackling crust.
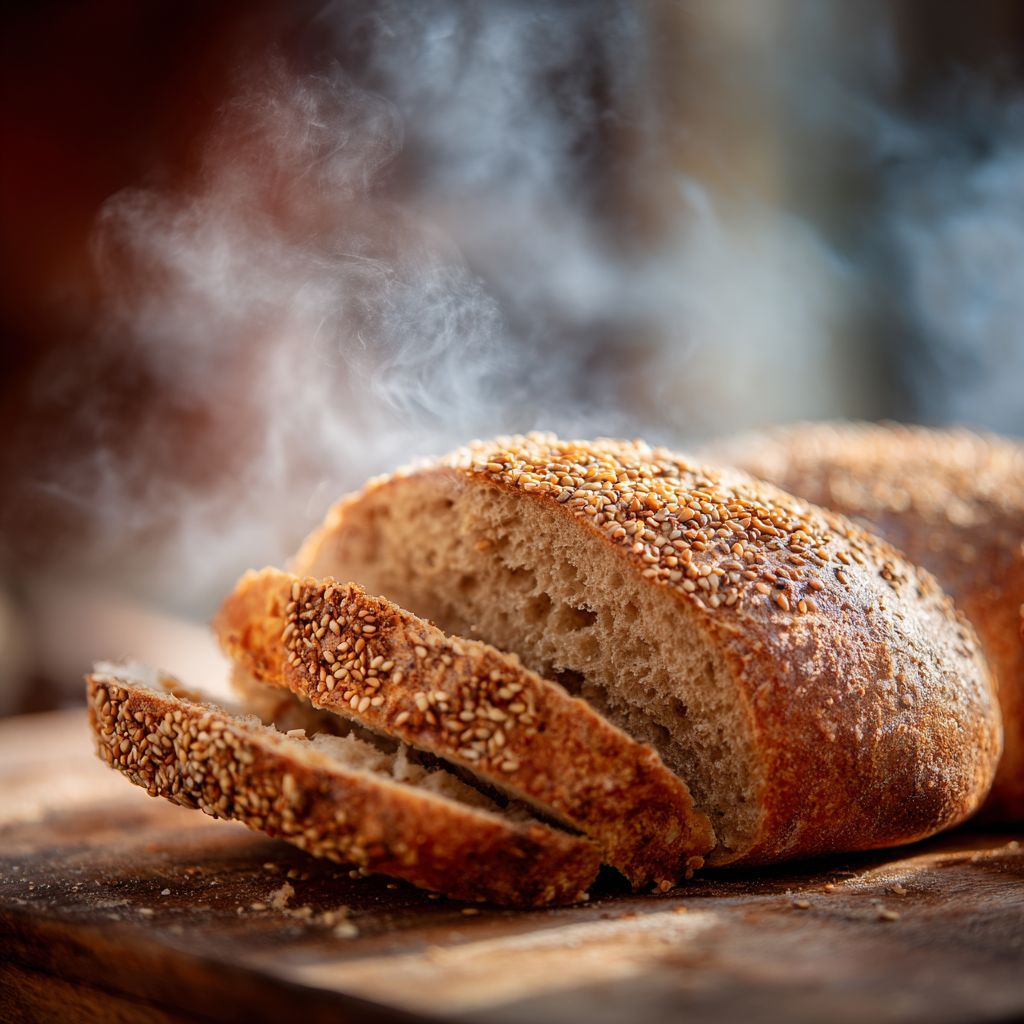
Fine semolina milled from durum wheat gives the crumb a glowing color and a slightly sweet, nutty note. I finish loaves with sesame for crunch, use a pan of hot water to coax oven steam at the start, and then let the oven dry out so the crust snaps just right.
Key Takeaways
- Use fine semolina flour from durum wheat for color and flavor.
- Touch and look for dough cues, not just clocks, to judge readiness.
- Introduce steam at bake start for spring, then finish in a dry oven for a crisp crust.
- Sesame seeds add a classic nutty finish often seen in Sicilian loaves.
- Three mixing paths exist: direct, poolish, or no-knead — choose what fits your time.
What makes this rustic loaf special for home bakers right now
You get bakery results at home when you focus on texture, steam, and gentle timing. I choose fine semolina for its golden hue and soft, creamy crumb; sesame seeds add a warm, nutty perfume that feels true to tradition.
The crust becomes crisp by introducing steam at the start, then finishing in a dry oven. That simple move boosts oven spring and gives a satisfying snap that invites slicing.
Flavor and texture you can’t fake: fine semolina, sesame, and a crisp crust
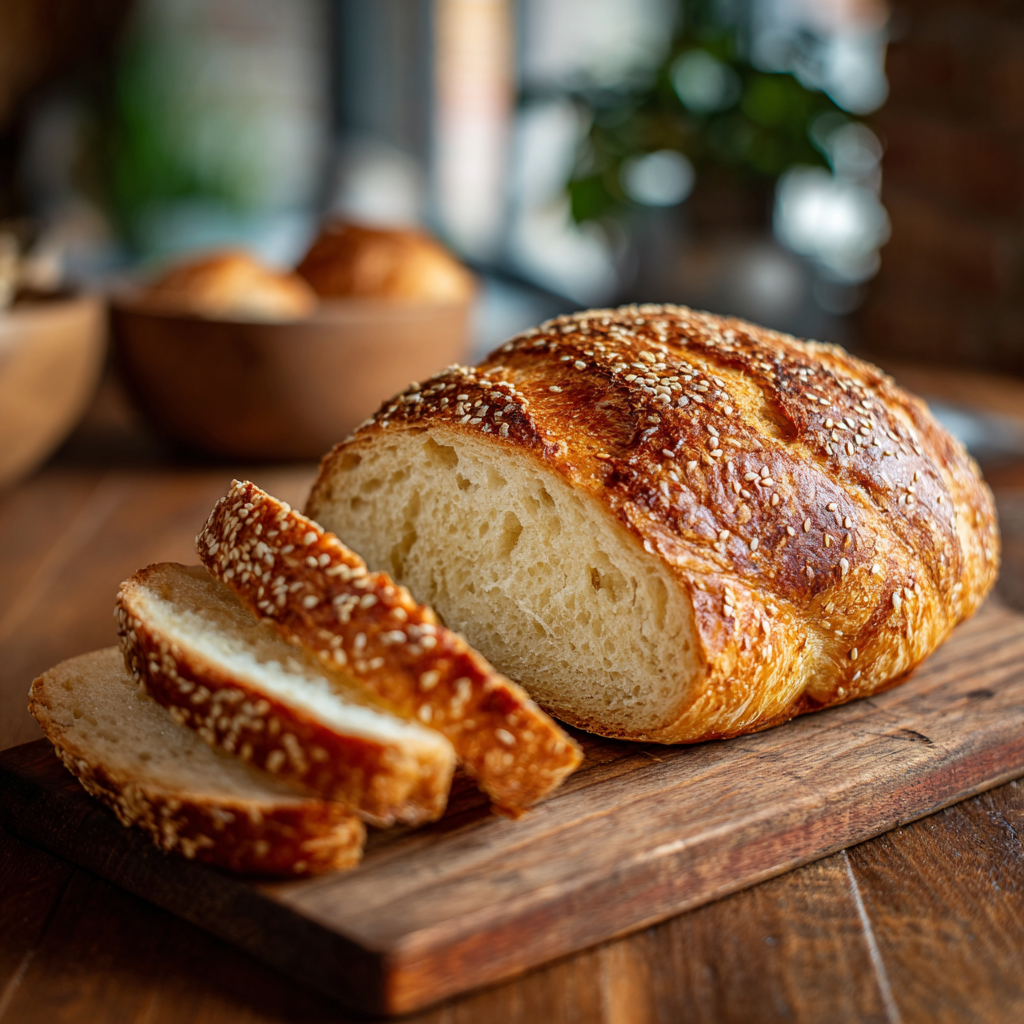
Fine semolina flour lends subtle sweetness and a tender interior that toasts beautifully. Sesame seeds are more than decoration—they perfume the loaf and signal authentic flavor.
Approachable technique with pro-level results
You don’t need a bakery setup. Use a stand mixer with a dough hook, a hand mixer, or your hands; the dough responds to touch and visual cues more than gadgetry. I keep active minutes short and let resting time build flavor while you go about your day.
- Easy swaps for dry yeast and active dry conversions.
- Adjust room temperature tips so dough behaves predictably.
- Clear cues for when to shape, rest, and bake—no guesswork.
| Ingredient / Method | What it does | Practical tip |
|---|---|---|
| Fine semolina | Golden color, creamy crumb | Use fine-milled, not coarse grits, for even texture |
| Sesame seeds | Nutty aroma and classic finish | Brush loaves with water or egg wash so seeds stick |
| Steam then dry bake | Higher oven spring, crisp crust | Start with a hot pan of water or spritz; remove after 10–12 minutes |
Key ingredients for authentic semolina bread flavor and structure
I focus on a few pantry heroes that shape taste and texture. Fine semolina from durum wheat gives a warm color and gentle, nutty note—avoid coarse grits or the crumb will feel rough.
For structure I blend flours. Bread flour adds chew and lift; if you use all-purpose flour expect a softer bite but still solid structure. I weigh ingredients for accuracy, but if you use cups, spoon and level flour before measuring.
Yeast, liquids, and small boosts
Yeast choices change timing. Active dry yeast is reliable; instant yeast works but use about 25% less by weight. Fresh yeast at ~20 g replaces about 2¼ teaspoons active dry for a typical home loaf.
Use lukewarm water (about 90–100°F) and add it slowly so the dough absorbs fully. A teaspoon or two of honey wakes the yeast, while a splash of olive oil keeps the crumb soft.
Salt, seeds, and final tips
Salt tightens gluten and balances flavor—don’t skip it. Brush loaves with water or egg wash so sesame seeds stick and toast evenly; poppy seed is a fine swap.
| Ingredient | Role | Practical tip |
|---|---|---|
| Fine semolina | Color and tender crumb | Use fine-milled durum wheat, not coarse grits |
| Bread flour | Structure and chew | Mix with semolina by weight for best loft |
| Yeast (active/instant/fresh) | Leavening and timing | Instant = ~25% less; fresh ~20 g ≈ 2¼ tsp active dry |
| Water, oil, sweetener | Hydration, tenderness, fermentation | Lukewarm water (90–100°F), 1–2 tsp honey, 1–2 tbsp olive oil |
If you want deeper notes and guidance on technique, see my Mediterranean loaf guidance at this page.
Essential tools: from stand mixer to dutch oven or baking stone
When your bench is set up right, the dough behaves and the oven rewards you. A few solid tools make shaping and baking predictable and joyful.
Stand mixer with dough hook vs hand mixing
A stand mixer keeps mixing steady and frees your hands for other tasks. I use the dough hook for even gluten development and shorter active time.
If you prefer touch, mix and fold by hand in a sturdy bowl. Hand mixing gives you feel for hydration and texture—perfect if you want to learn the dough.
Baking setups: pizza stone, overturned baking sheet, or dutch oven
For top crust and oven spring, I preheat a pizza stone. An overturned baking sheet works great if you don’t have one.
A well-heated Dutch oven traps heat and moisture; bake with the lid on then remove it to brown the shell. Use parchment to lift loaves onto hot surfaces smoothly.
Steam methods for a shatteringly crisp crust
Place a preheated metal pan beneath the stone and pour in 1 cup hot water at load. Never use glass—thermal shock can shatter it.
Line transfers with parchment paper so the loaf slides easily. Cool on a wire rack so steam escapes and the crust stays crisp. Watch minutes only as a guide; visual and tactile cues tell you when the loaf is done.
| Tool | Purpose | Pro tip |
|---|---|---|
| Stand mixer / mixer | Consistent mixing, less hands-on time | Use dough hook on low-medium until smooth; avoid overmixing |
| Pizza stone / baking sheet | Even bottom heat and oven spring | Preheat 30–45 minutes; slide loaf on parchment for clean transfer |
| Dutch oven | Retains heat and moisture for strong rise | Start covered, remove lid mid-bake to crisp the crust |
| Metal pan + water | Creates oven steam for crisp crust | Preheat pan, add hot water at load; avoid glass |
Rustic semolina bread italian recipe
Choose a direct mix, a poolish, or a gentle no-knead path—each gives distinct flavor and texture. Below I give a quick overview of time, yield, and the internal temperature that signals doneness. Then you’ll find three clear methods with timing and oven cues so you can pick what fits your day.
Quick overview: time, yield, and target internal temperature
Yields: 1–2 loaves depending on shape. Plan about 20–25 active minutes plus 2–3 hours total time for the direct method. Target internal temperature is roughly 200°F for a fully baked center.
Direct-mix method (stand mixer)
In the bowl combine lukewarm water, a teaspoon of honey, and active dry yeast; let the yeast mixture foam for 5–10 minutes. Add semolina flour, supporting flour, a teaspoon or two of olive oil, and salt.
Mix low, then medium in your stand mixer until the dough turns smooth and elastic and clings lightly to the bowl bottom. Proof in an oiled bowl, covered, for 60–90 minutes until doubled. Shape, preheat oven with your stone, load on parchment, add 1 cup hot water to a preheated metal pan for steam, and bake to 200°F.
Poolish variation for deeper flavor
Make a small mixture of flour, yeast, and water to a thick batter. Rest 1 hour to overnight—2–12 hours—until bubbly and jiggly. Incorporate this mixture into the main dough for extra aroma and loft. Follow the same proof and bake steps as the direct path.
No-knead Dutch oven path for beginners
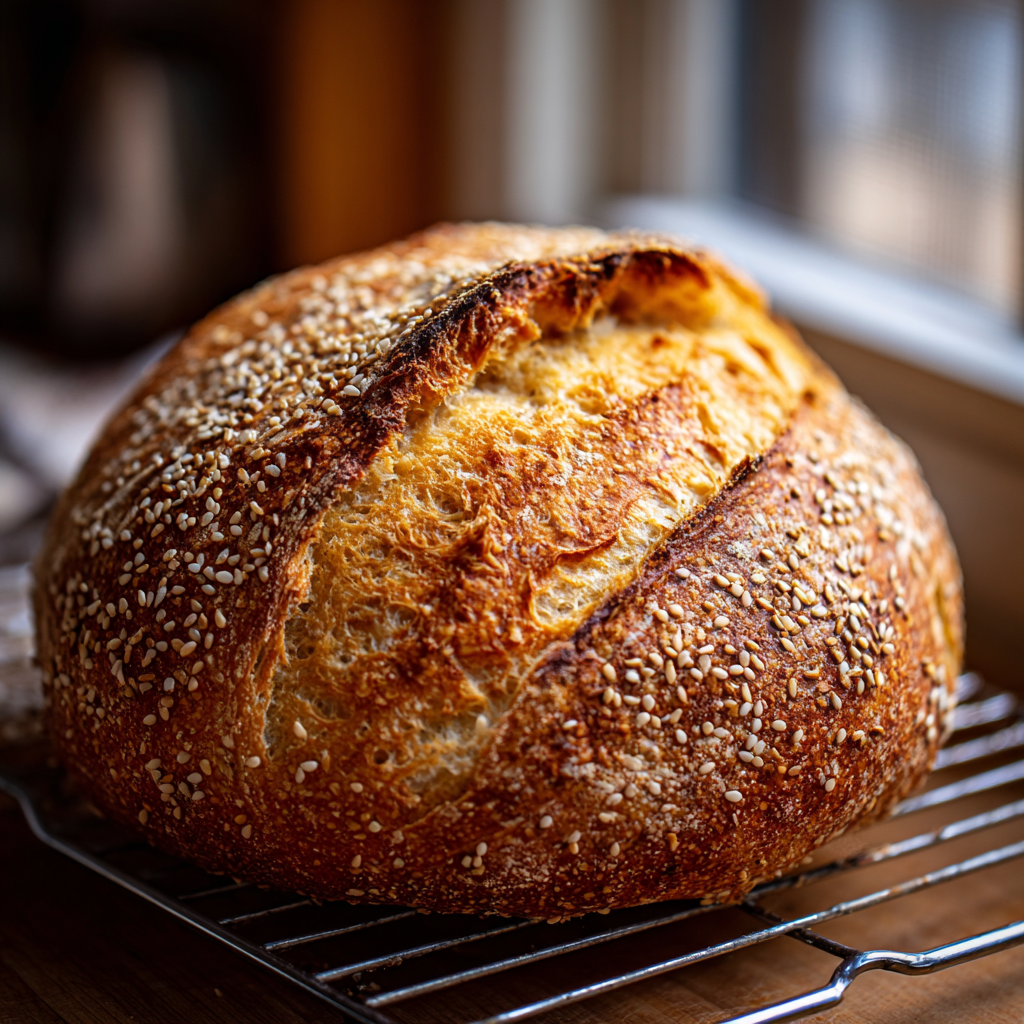
Mix flour, water, yeast, and salt to a shaggy dough in a large bowl. Let it sit until puffy (about 8–12 hours at room temp or fewer minutes if warm). Shape gently, score, and bake covered in a preheated Dutch oven for 30 minutes, then uncover and bake about 10 more minutes to brown the crust.
- Finish: remove the steam pan early so the crust sets, bake until deeply golden, and cool on a rack before slicing.
- Seasoning: salt balances the semolina flour; a teaspoon or two of olive oil keeps the crumb tender. Weigh ingredients when possible for consistent results.
| Method | Active minutes | Key oven cue |
|---|---|---|
| Direct-mix (stand mixer) | 20–25 minutes | Preheat oven, steam 1 cup water, bake to 200°F |
| Poolish | 20 minutes + poolish rest (1–12 hours) | Preheat oven, same steam method, deeper flavor |
| No-knead (Dutch oven) | 10–15 minutes prep; long rest | Bake covered 30 min, uncover 10 min for crust |
Shaping, topping, and baking for that Italian bakery look
How you shape the dough decides whether you get a tidy batard or an eye-catching S-coil on the table. I walk you through hands-on cues so your loaf holds form and bakes with a confident oven spring.
Forming loaves: tight logs, batards, and the occhi S-coil
Pre-shape into a loose log, rest briefly, then roll into a tight batard so surface tension builds. A taut surface helps the loaf rise straight and keeps seams from opening messily in the oven.
For the Sicilian occhi, stretch a 24-inch rope and coil each end in opposite directions to form an elegant S. That shape bakes up eye-catching and holds a gentle crumb.
Getting seeds and topping to stick
Work on a lightly oiled surface to prevent sticking and avoid adding extra flour. Brush the shaped loaf with water or a light egg wash so sesame seeds adhere in a generous blanket and toast deeply.
Scoring, oven cues, and timing
Score batards with 2–3 confident slashes to guide expansion; give the S-coil shallow snips where tension is highest. Load loaves on a preheated stone or baking sheet lined with parchment.
Bake at 400–475°F depending on your setup. Add 1 cup hot water to a preheated metal pan for steam, remove the pan after 15 minutes, then finish in a dry oven until the crust is richly golden and the loaf feels light for its size.
- Stagger two loaves by a few minutes to keep oven temperature steady.
- Transfer to a rack promptly so trapped steam escapes and the crust stays crisp.
| Step | Quick cue | Minutes |
|---|---|---|
| Pre-shape | Tighten surface tension | 5–10 |
| Seed finish | Brush with water/egg, press seeds | 1–2 |
| Bake with steam | Remove water pan after start | 15 |
Pro tips, timing cues, and troubleshooting common dough issues
When dough misbehaves, a few quick checks on yeast activity and hydration usually fix it fast. Start with your water: lukewarm, around 90–100°F, wakes active dry yeast in 5–10 minutes. If the yeast doesn’t foam, swap it and try again—no point wasting flour and time.
Weather matters. In humid rooms the dough can feel slack; add flour a teaspoon at a time until it feels supple. In dry climates add water by tablespoons until the dough regains a soft, elastic texture.
How to read the dough
Proper dough is smooth and elastic. It stretches without tearing and springs back slowly when poked. For proofing, press a fingertip gently: if the indent fills slowly, it is ready; if it snaps back, give it more time under lightly oiled plastic wrap.
Fixing crust problems
A soft crust usually means insufficient dry bake or poor ventilation after baking. Extend the final minutes and cool the loaf fully on a rack. A too-hard crust often points to too little initial steam or slight overbaking. Add robust steam at load, then remove it early and finish in a dry oven.
| Issue | Likely cause | Quick fix | Check |
|---|---|---|---|
| No yeast foam | Water too hot/cold or old yeast | Use 90–100°F water, proof fresh yeast 5–10 minutes | Yeast should form creamy foam |
| Slack dough | High humidity, over-hydration | Add flour by teaspoons until supple | Surface becomes less sticky |
| Tough dough | Too much flour or low water | Add water by tablespoons, mix gently | Dough stretches without tearing |
| Soft crust | Insufficient dry bake/venting | Extend bake, cool on rack | Crust firms as it cools |
I trust these cues over the clock. For a related family method and a different flat loaf, see my family torta al testo post for more hands-on tips.
Serving ideas, swaps, and ways to customize the flavor
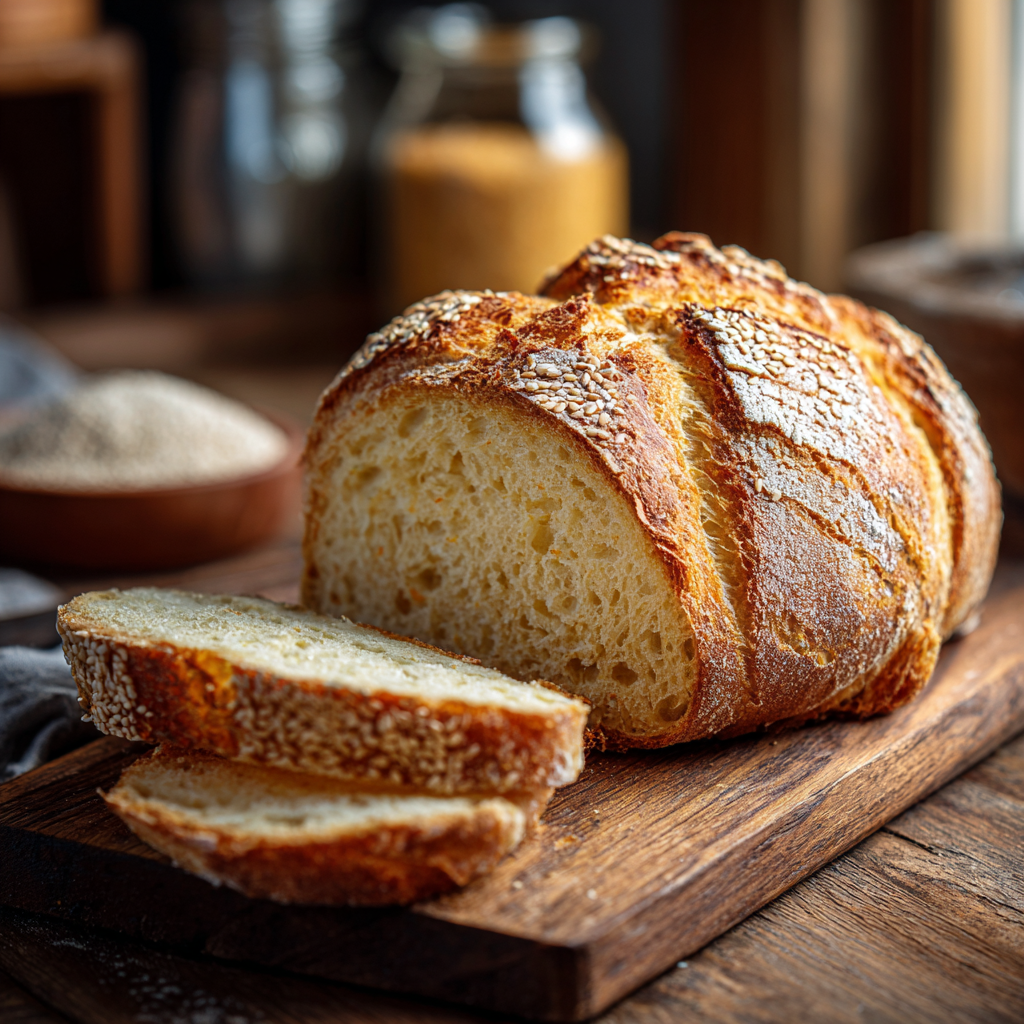
A warm loaf on the table invites simple, perfect pairings that show off its crumb. I aim for bright, salty, and herbal notes that balance the grainy charm of semolina.
Classic pairings
My favorite: warm slices, extra-virgin olive oil, a pinch of oregano, and a strip of anchovy. Add salumi and aged cheeses for a shared platter that feels like Sunday lunch.
Flavor twists and measured swaps
Add heat by folding 1/2–1 teaspoon chili flakes into the dough so the spice blooms while baking. For savory depth, grate 1/3 cup Parmigiano Reggiano into the flour mix.
- Seed swap: try poppy or a mixed-seed finish; sesame seeds keep the classic aroma.
- If you only have all-purpose flour, use it—expect a softer chew but still delicious.
Use it well
This semolina bread shines toasted for bruschetta, dressed as garlic bread, or served alongside soups and stews. I often slice one loaf, toast half, and freeze the rest in labeled cups so nothing goes to waste.
| Add-in | Measure | Effect |
|---|---|---|
| Chili flakes | 1/2–1 tsp | Warmth that perfumes the crumb |
| Parmigiano Reggiano | 1/3 cup | Umami and richer crust color |
| Seed mix | 2 tbsp | Crunch and nutty aroma |
Storing, freezing, and reheating so every slice tastes freshly baked
Treat storage like the final step of baking—small choices protect texture and flavor. For same-day use, cool the loaf fully, then tuck it into a breathable bread bag or a paper bag at room temperature. The crust will soften overnight but toasts back beautifully.
For longer keeping, wrap snugly in plastic wrap, then add a layer of parchment paper or place the wrapped loaf in a freezer-safe bag. Freeze whole, halved, or in slices on a baking sheet; transfer frozen slices to a bag for quick access.
Thaw whole loaves at room temperature for a few hours until the core loses its chill. For slices, toast straight from frozen. To refresh the crust, place the loaf on a rack in a 325–350°F oven for 8–12 minutes until crisp.
If your oven runs dry, preheat a small metal pan and add 1/2 cup hot water as you load the loaf; remove the pan after a few minutes to finish baking dry. Label loaves with dates—most freeze well for 1–3 months with minimal loss of flavor.
I avoid refrigeration; it dries the crumb. When in doubt, re-crisp a minute or two longer—the crumb will warm and the shell will snap back to life.
Rustic Semolina Bread
Ingredients
Method
Notes
- For a deeper flavor, you can use the poolish method by allowing a mixture of flour, yeast, and water to ferment for 1–12 hours before incorporating it into the dough.
- The bread can be frozen. Slice and store in a freezer-safe bag for up to 1–3 months. Toast slices straight from frozen for a quick snack.
- For extra flavor, feel free to fold in chili flakes or Parmigiano Reggiano into the dough before baking.